Page 15 of 785
Your vehicle at a glance
2 2
EXTERIOR OVERVIEW
1. Panoramic sunroof..................................4-50
2. Front windshield wiper blades ................7-48
3. Outside rearview mirror ..........................4-81
4. Door locks...............................................4-23
5. Headlight ................................................7-81
6. Front fog light ........................................4-129
7. Hood .......................................................4-44
8. Tires and wheels ............................7-53 / 8-4
OANNIN2901❈The actual shape may differ from the illustration.
■ Front view
Page 155 of 785
Features of your vehicle
62 4
MIRRORS
Inside rearview mirror
Adjust the rearview mirror so that the
center view through the rear window
is seen. Make this adjustment before
you start driving.
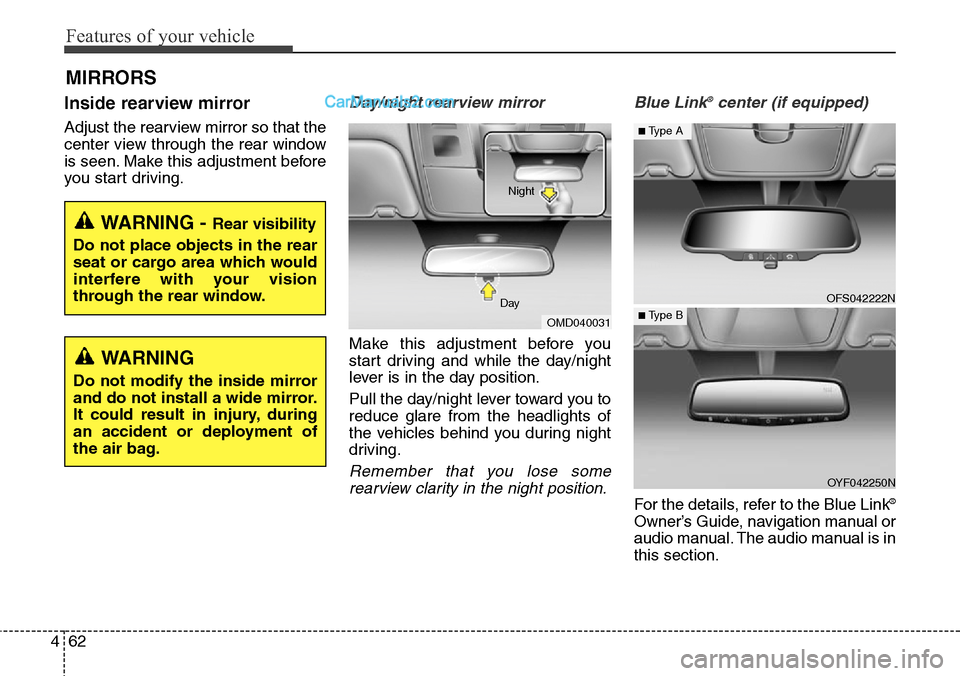
Day/night rearview mirror
Make this adjustment before you
start driving and while the day/night
lever is in the day position.
Pull the day/night lever toward you to
reduce glare from the headlights of
the vehicles behind you during night
driving.
Remember that you lose some
rearview clarity in the night position.Blue Link
®center (if equipped)
For the details, refer to the Blue Link®
Owner’s Guide, navigation manual or
audio manual. The audio manual is in
this section.
WARNING - Rear visibility
Do not place objects in the rear
seat or cargo area which would
interfere with your vision
through the rear window.
OMD040031 DayNight
WARNING
Do not modify the inside mirror
and do not install a wide mirror.
It could result in injury, during
an accident or deployment of
the air bag.
OFS042222N
OYF042250N
■Type A
■ Type B
Page 156 of 785
463
Features of your vehicle
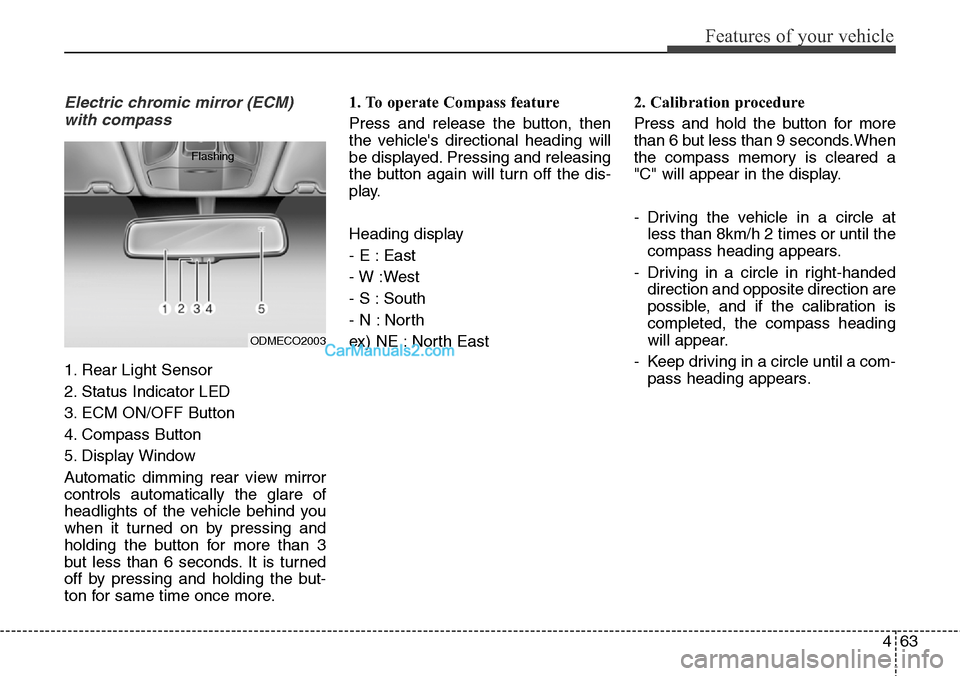
Electric chromic mirror (ECM)
with compass
1. Rear Light Sensor
2. Status Indicator LED
3. ECM ON/OFF Button
4. Compass Button
5. Display Window
Automatic dimming rear view mirror
controls automatically the glare of
headlights of the vehicle behind you
when it turned on by pressing and
holding the button for more than 3
but less than 6 seconds. It is turned
off by pressing and holding the but-
ton for same time once more.1. To operate Compass feature
Press and release the button, then
the vehicle's directional heading will
be displayed. Pressing and releasing
the button again will turn off the dis-
play.
Heading display
- E : East
- W :West
- S : South
- N : North
ex) NE : North East2. Calibration procedure
Press and hold the button for more
than 6 but less than 9 seconds.When
the compass memory is cleared a
"C" will appear in the display.
- Driving the vehicle in a circle at
less than 8km/h 2 times or until the
compass heading appears.
- Driving in a circle in right-handed
direction and opposite direction are
possible, and if the calibration is
completed, the compass heading
will appear.
- Keep driving in a circle until a com-
pass heading appears.
ODMECO2003 Flashing
Page 209 of 785
Features of your vehicle
116 4
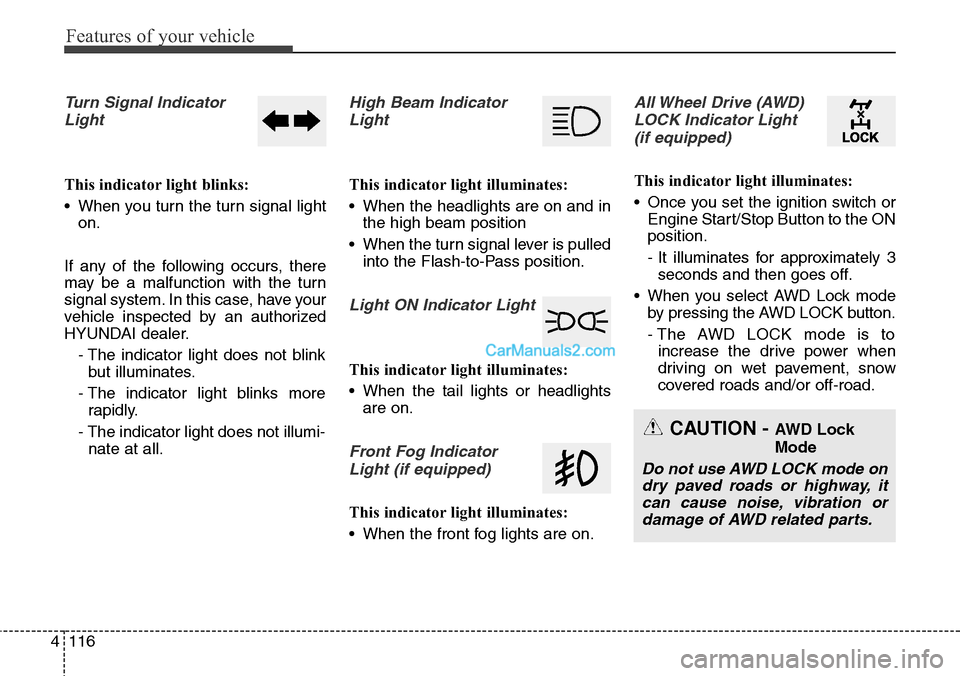
Turn Signal Indicator
Light
This indicator light blinks:
• When you turn the turn signal light
on.
If any of the following occurs, there
may be a malfunction with the turn
signal system. In this case, have your
vehicle inspected by an authorized
HYUNDAI dealer.
- The indicator light does not blink
but illuminates.
- The indicator light blinks more
rapidly.
- The indicator light does not illumi-
nate at all.
High Beam Indicator
Light
This indicator light illuminates:
• When the headlights are on and in
the high beam position
• When the turn signal lever is pulled
into the Flash-to-Pass position.
Light ON Indicator Light
This indicator light illuminates:
• When the tail lights or headlights
are on.
Front Fog Indicator
Light (if equipped)
This indicator light illuminates:
• When the front fog lights are on.
All Wheel Drive (AWD)
LOCK Indicator Light
(if equipped)
This indicator light illuminates:
• Once you set the ignition switch or
Engine Start/Stop Button to the ON
position.
- It illuminates for approximately 3
seconds and then goes off.
• When you select AWD Lock mode
by pressing the AWD LOCK button.
- The AWD LOCK mode is to
increase the drive power when
driving on wet pavement, snow
covered roads and/or off-road.
CAUTION - AWD Lock
Mode
Do not use AWD LOCK mode on
dry paved roads or highway, it
can cause noise, vibration or
damage of AWD related parts.
Page 217 of 785
Features of your vehicle
124 4
Battery saver function
• The purpose of this feature is to
prevent the battery from being dis-
charged. The system automatically
turns off the parking lights when
the driver removes the ignition key
(smart key : turns off the engine)
and opens the driver-side door.
• With this feature, the parking lights
will be turned off automatically if
the driver parks on the side of road
at night.
If necessary, to keep the lights on
when the ignition key is removed
(smart key : turns off the engine),
perform the following:
1) Open the driver-side door.
2) Turn the parking lights OFF and
ON again using the light switch
on the steering column.
Headlamp delay (if equipped)
If you turn the ignition switch to the
ACC or OFF position with the head-
lights ON, the headlights remain on
for about 5 minutes. However, if the
driver’s door is opened and closed,
the headlights are turned off after 15
seconds.
The headlights can be turned off by
pressing the lock button on the trans-
mitter (or smart key) twice or turning
the light switch to the OFF or Auto
position.
However, if you turn the light switch
to the Auto position when it is dark
outside, the headlights will not be
turned off.
You can activate or deactivate this
feature. Refer to “User Settings” in
this section.
LIGHTING
CAUTION
If the driver gets out of the vehi-
cle through other doors (other
than the driver's door), the bat-
tery saver function does not
operate and the headlamp delay
does not turn off automatically.
This will cause the battery to be
discharged. In this case, make
sure to turn off the lamp before
getting out of the vehicle.
Page 218 of 785
4125
Features of your vehicle
Daytime running light
(if equipped)
Daytime Running Lights (DRL) can
make it easier for others to see the
front of your vehicle during the day.
DRL can be helpful in many different
driving conditions, and it is especially
helpful after dawn and before sunset.
The DRL system will turn OFF when:
• The headlights are ON.
• Engine stops.
• The parking brake is applied.
Lighting control
The light switch has a Headlight and
a Parking light position.
To operate the lights, turn the knob at
the end of the control lever to one of
the following positions:(1) OFF position
(2) Auto light position (if equipped)
(3) Parking light position
(4) Headlight position
ODMECO2004
ODMECO2005 ■Type A
■Type B
Page 219 of 785
Features of your vehicle
126 4
Parking light position ( )
When the light switch is in the park-
ing light position, the tail, position,
license plate lights and the tail light
indicator will turn on.
Headlight position ( )
When the light switch is in the head-
light position, the head, tail, license
and instrument panel lights will turn
on.
✽NOTICE
The ignition switch must be in the
ON position to turn on the head-
lights.
ODMECO2008
ODMECO2009 ■Type A
■Type B
ODMECO2010
ODMECO2011 ■Type A
■Type B
Page 220 of 785
4127
Features of your vehicle
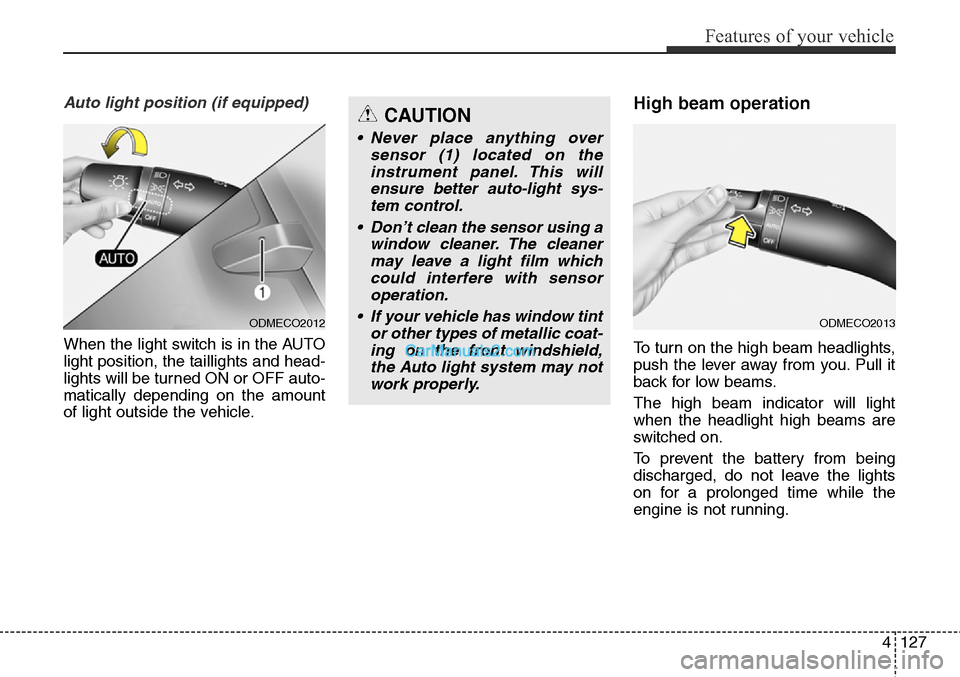
Auto light position (if equipped)
When the light switch is in the AUTO
light position, the taillights and head-
lights will be turned ON or OFF auto-
matically depending on the amount
of light outside the vehicle.
High beam operation
To turn on the high beam headlights,
push the lever away from you. Pull it
back for low beams.
The high beam indicator will light
when the headlight high beams are
switched on.
To prevent the battery from being
discharged, do not leave the lights
on for a prolonged time while the
engine is not running.
ODMECO2012
CAUTION
• Never place anything over
sensor (1) located on the
instrument panel. This will
ensure better auto-light sys-
tem control.
• Don’t clean the sensor using a
window cleaner. The cleaner
may leave a light film which
could interfere with sensor
operation.
• If your vehicle has window tint
or other types of metallic coat-
ing on the front windshield,
the Auto light system may not
work properly.
ODMECO2013