Page 434 of 473

7-71
7
Maintenance
2.The vehicle should be placed on aflat floor.
3.Draw vertical lines (Vertical lines passing through respective head
lamp centers) and a horizontal line
(Horizontal line passing throughcenter of head lamps) on thescreen.
4.With the head lamp and battery in normal condition, aim the head
lamps so the brightest portion falls
on the horizontal and vertical lines.
5-1. MFR type To aim the low/high beam left or
right, turn the screw (1) clockwise
or counterclockwise. To aim the
low/high beam up or down, turn the
screw (2) clockwise or counter-
clockwise. 5-2. Projection type
1) Low beam aiming
To aim the low beam left orright, turn the screw (3) clock-
wise or counterclockwise.
To aim the low beam up or
down, turn the screw (4) clock-
wise or counterclockwise.
2) High beam aiming High beam aiming is available
up direction or down.
To aim the high beam up or
down, turn the screw (5) clock-
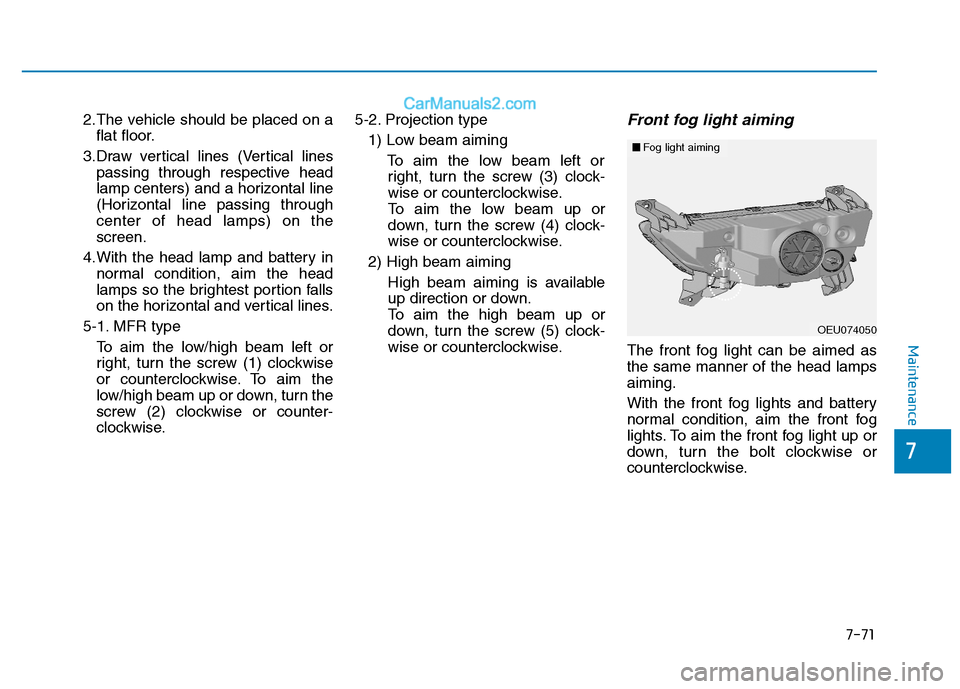
wise or counterclockwise.Front fog light aiming
The front fog light can be aimed asthe same manner of the head lampsaiming.
With the front fog lights and battery
normal condition, aim the front fog
lights. To aim the front fog light up or
down, turn the bolt clockwise or
counterclockwise.
OEU074050
■■Fog light aiming
Page 438 of 473
7-75
7
Maintenance
Side marker lamp
1.To remove the lamp, pry the lampwith a flat-tip screwdriver and push
it rearward.
2.Disconnect the wiring connector, and remove the bulb by turning the
bulb socket counterclockwise.
3.To install the bulb, reverse the removal procedure.
Rear combination light bulbs replacement
BUS, VAN
1. Tail/stop light
2. Tail/stop light
3. Turn signal light
4. Back up light
5. Rear fog light
OEU074046
OEU074073
When prying with a flat-tip
screwdriver, wrap it with pro-
tective tape to prevent dam-
age.
Put on gloves to protect your hands.
CAUTION
Page 439 of 473
1.Open the rear door.
2.Loosen the light assembly retain-ing screws with a cross-tip screw-
driver.
3.Remove the rear combination light assembly from the body of the
vehicle. 4.Remove the socket from the
assembly by turning the socket
counter clockwise until the tabs on
the socket align with the slots on
the assembly.
5.Remove the bulb from the socket by pressing it in and rotating it
counter clockwise until the tabs on
the bulb align with the slots in the
socket. Pull the bulb out of the
socket.
6.Insert a new bulb by inserting it into the socket and rotating it until it
locks into place. 7.Install the socket in the assembly
by aligning the tabs on the socket
with the slots in the assembly.
Push the socket into the assembly
and turn the socket clockwise.
8.Reinstall the light assembly to the body of the vehicle.
7-76
Maintenance
OEU074053OEU074051
Page 440 of 473
7-77
7
Maintenance
VA N
1.Disconnect the power cord fromthe bulb. 2.Remove the cover by pressing the
both sides of the cover. 3.To replace the rear combination
light (stop/tail light, turn signal light
or back-up light), take it out from
the bulb holder by turning it coun-
terclockwise.
(1) Turn Signal Light
(2) Stop/Tail Light
(3) Back-up Light
4.Install the new bulb.
OEU054020
OEU054021OEU054022