2015 Hyundai Genesis Rear seat
[x] Cancel search: Rear seatPage 63 of 501
2-37
Safety system of your vehicle
2
Child restraint system types
There are three main types of child
restraint systems: rear-facing seats,
forward-facing seats, and booster
seats. They are classified according
to the child’s age, height and weight.
Rear-facing child seats
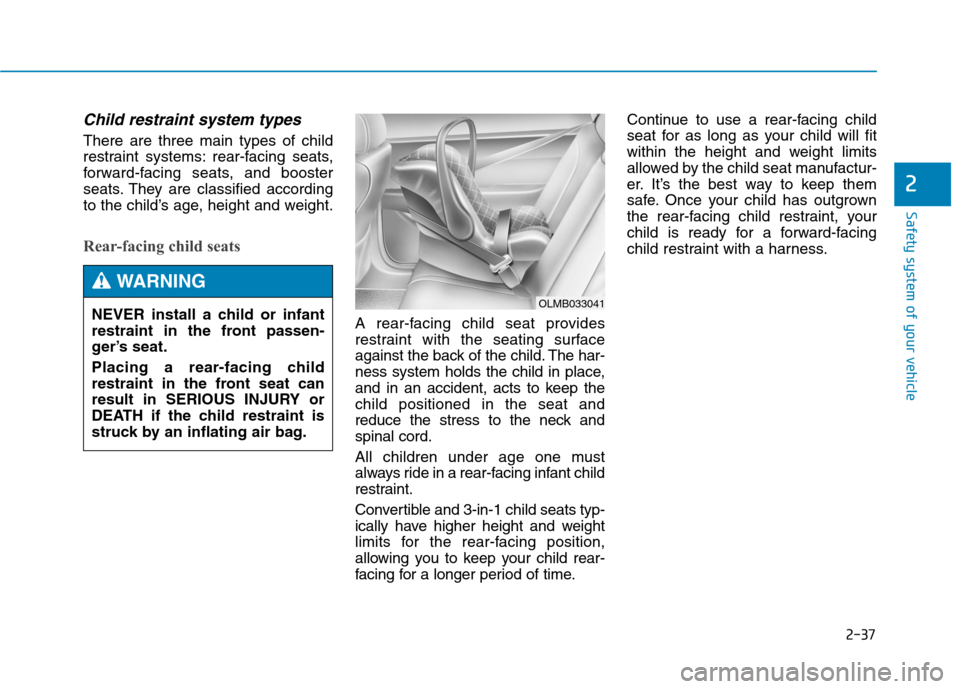
A rear-facing child seat provides
restraint with the seating surface
against the back of the child. The har-
ness system holds the child in place,
and in an accident, acts to keep the
child positioned in the seat and
reduce the stress to the neck and
spinal cord.
All children under age one must
always ride in a rear-facing infant child
restraint.
Convertible and 3-in-1 child seats typ-
ically have higher height and weight
limits for the rear-facing position,
allowing you to keep your child rear-
facing for a longer period of time.Continue to use a rear-facing child
seat for as long as your child will fit
within the height and weight limits
allowed by the child seat manufactur-
er. It’s the best way to keep them
safe. Once your child has outgrown
the rear-facing child restraint, your
child is ready for a forward-facing
child restraint with a harness.
OLMB033041NEVER install a child or infant
restraint in the front passen-
ger’s seat.
Placing a rear-facing child
restraint in the front seat can
result in SERIOUS INJURY or
DEATH if the child restraint is
struck by an inflating air bag.
WARNING
Page 64 of 501
2-38
Safety system of your vehicle
Forward-facing child restraints
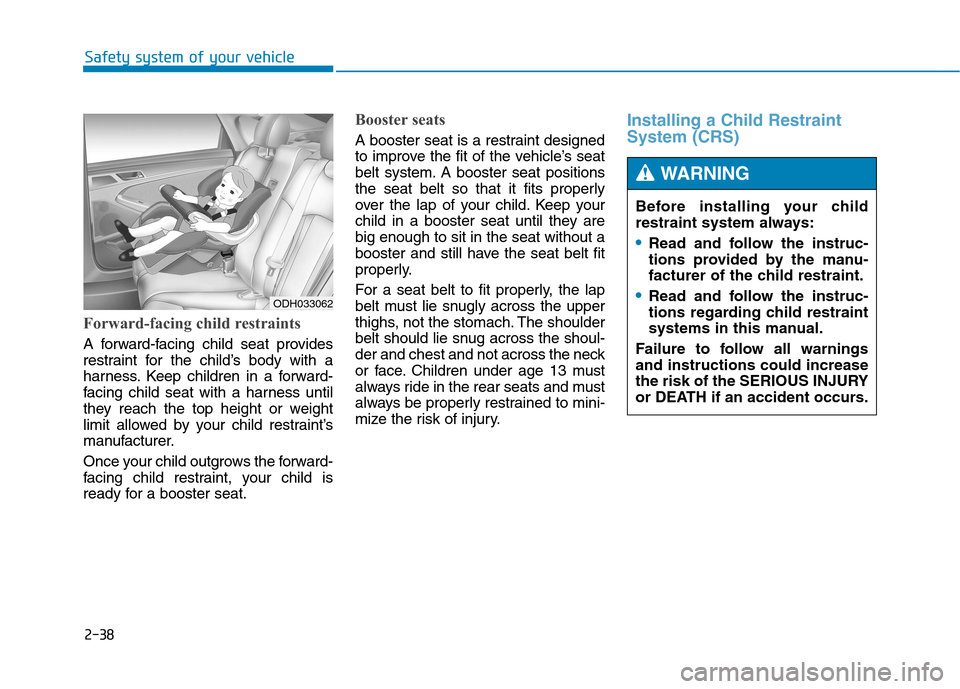
A forward-facing child seat provides
restraint for the child’s body with a
harness. Keep children in a forward-
facing child seat with a harness until
they reach the top height or weight
limit allowed by your child restraint’s
manufacturer.
Once your child outgrows the forward-
facing child restraint, your child is
ready for a booster seat.
Booster seats
A booster seat is a restraint designed
to improve the fit of the vehicle’s seat
belt system. A booster seat positions
the seat belt so that it fits properly
over the lap of your child. Keep your
child in a booster seat until they are
big enough to sit in the seat without a
booster and still have the seat belt fit
properly.
For a seat belt to fit properly, the lap
belt must lie snugly across the upper
thighs, not the stomach. The shoulder
belt should lie snug across the shoul-
der and chest and not across the neck
or face. Children under age 13 must
always ride in the rear seats and must
always be properly restrained to mini-
mize the risk of injury.
Installing a Child Restraint
System (CRS)
Before installing your child
restraint system always:
Read and follow the instruc-
tions provided by the manu-
facturer of the child restraint.
Read and follow the instruc-
tions regarding child restraint
systems in this manual.
Failure to follow all warnings
and instructions could increase
the risk of the SERIOUS INJURY
or DEATH if an accident occurs.
WARNING
ODH033062
Page 65 of 501
2-39
Safety system of your vehicle
2
After selecting a proper child seat for
your child, check to make sure it fits
properly in your vehicle. Follow the
instructions provided by the manu-
facturer when installing the child
seat. Note these general steps when
installing the seat to your vehicle:
Properly secure the child restraint
to the vehicle.
All child restraints
must be secured to the vehicle with
the lap part of a lap/shoulder belt or
with the LATCH system.
Make sure the child restraint is
firmly secured.After installing a
child restraint to the vehicle, push
and pull the seat forward and from
side-to-side to verify that it is
securely attached to the seat. A
child restraint secured with a seat
belt should be installed as firmly as
possible. However, some side-to-
side movement can be expected.
Secure the child in the child
restraint.Make sure the child is
properly strapped in the child
restraint according to the manufac-
turer instructions.
Lower Anchors and Tether for
Children (LATCH) System
The LATCH system holds a child
restraint during driving and in an acci-
dent. This system is designed to
make installation of the child restraint
easier and reduce the possibility of
improperly installing your child
restraint. The LATCH system uses
anchors in the vehicle and attach-
ments on the child restraint. The
LATCH system eliminates the need
to use seat belts to secure the child
restraint to the rear seats.
Lower anchors are metal bars built
into the vehicle. There are two lower
anchors for each LATCH seating
position that will accommodate a
child restraint with lower attachments.
To use the LATCH system in your
vehicle, you must have a child
restraint with LATCH attachments.
The child seat manufacturer will pro-
vide you with instructions on how to
use the child seat with its attachments
for the LATCH lower anchors. A child restraint in a closed
vehicle can become very hot. To
prevent burns, check the seat-
ing surface and buckles before
placing your child in the child
restraint.
WARNING
Page 66 of 501
2-40
Safety system of your vehicle
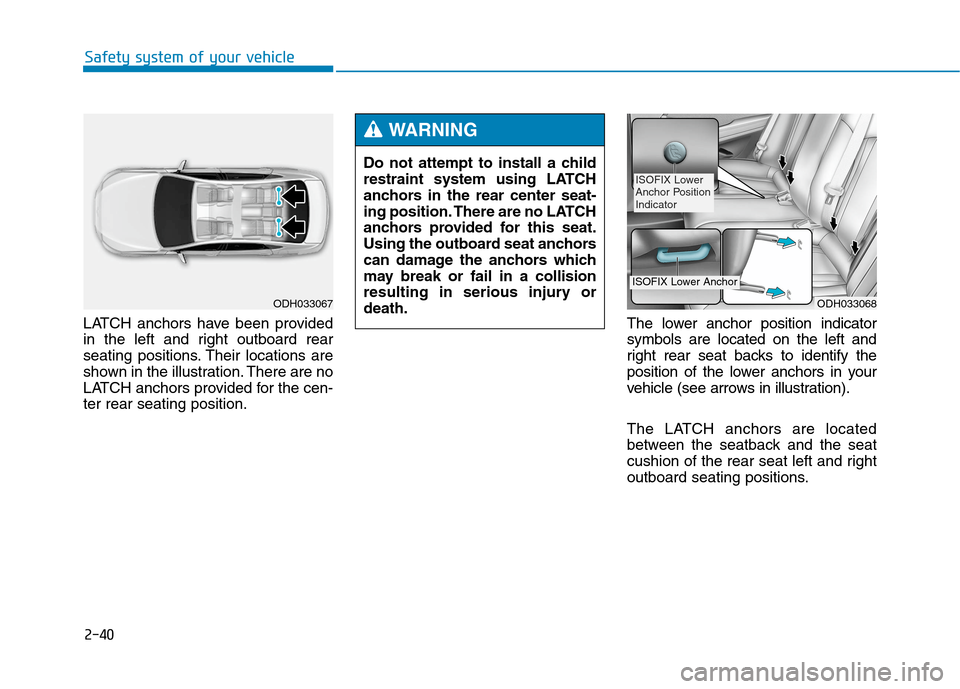
LATCH anchors have been provided
in the left and right outboard rear
seating positions. Their locations are
shown in the illustration. There are no
LATCH anchors provided for the cen-
ter rear seating position.The lower anchor position indicator
symbols are located on the left and
right rear seat backs to identify the
position of the lower anchors in your
vehicle (see arrows in illustration).
The LATCH anchors are located
between the seatback and the seat
cushion of the rear seat left and right
outboard seating positions. Do not attempt to install a child
restraint system using LATCH
anchors in the rear center seat-
ing position. There are no LATCH
anchors provided for this seat.
Using the outboard seat anchors
can damage the anchors which
may break or fail in a collision
resulting in serious injury or
death.
WARNING
ODH033067ODH033068
ISOFIX Lower
Anchor Position
Indicator
ISOFIX Lower Anchor
Page 67 of 501
2-41
Safety system of your vehicle
2
Securing a child restraint with
the LATCH anchors system
To install a LATCH-compatible child
restraint in either of the rear outboard
seating positions:
1. Move the seat belt buckle away from
the lower anchors.
2. Move any other objects away from
the anchors that could prevent a
secure connection between the child
restraint and the lower anchors.
3. Place the child restraint on the vehi-
cle seat, then attach the seat to the
lower anchors according to the
instructions provided by the child
restraint manufacturer.
4. Follow the child restraint instructions
for properly adjusting and tightening
the lower attachments on the child
restraint to the lower anchors.Take the following precautions
when using the LATCH system:
Read and follow all installation
instructions provided with
your child restraint system.
To prevent the child from
reaching and taking hold of
unretracted seat belts, buckle
all unused rear seat belts and
retract the seat belt webbing
behind the child. Children can
be strangled if a shoulder belt
becomes wrapped around
their neck and the seat belt
tightens.
NEVER attach more than one
child restraint to a single
anchor. This could cause the
anchor or attachment to come
loose or break.
Always have the LATCH sys-
tem inspected by your author-
ized HYUNDAI dealer after an
accident. An accident can
damage the LATCH system
and may not properly secure
the child restraint.
WARNING
Weight for LATCH system
The recommended weight for
the LATCH system is under 65
lb (29.48 kg).
How to calculate the child
restraint weight :
Child restraint weight =
65 lb (29.48 kg) - Child weight.
WARNING
Page 69 of 501
2-43
Safety system of your vehicle
2
3. Check that the child restraint is
securely attached to the seat by
pushing and pulling the seat for-
ward and from side-to-side.
Securing a child restraint with
a lap belt or lap/shoulder belt
When not using the LATCH system,
all child restraints must be secured to
a vehicle rear seat with the lap part
of a lap/shoulder belt.
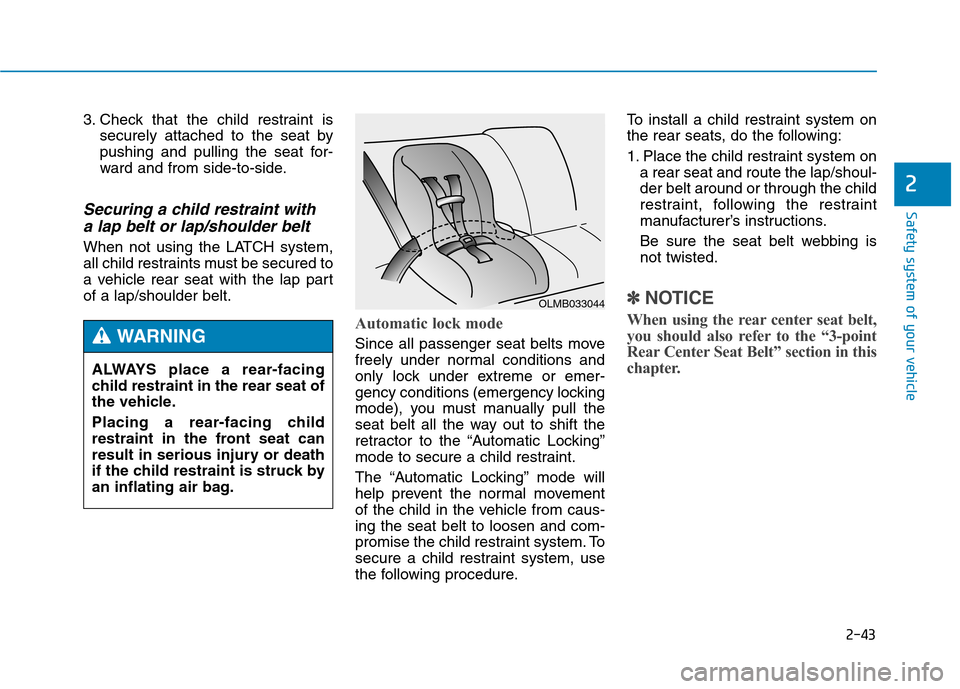
Automatic lock mode
Since all passenger seat belts move
freely under normal conditions and
only lock under extreme or emer-
gency conditions (emergency locking
mode), you must manually pull the
seat belt all the way out to shift the
retractor to the “Automatic Locking”
mode to secure a child restraint.
The “Automatic Locking” mode will
help prevent the normal movement
of the child in the vehicle from caus-
ing the seat belt to loosen and com-
promise the child restraint system. To
secure a child restraint system, use
the following procedure.To install a child restraint system on
the rear seats, do the following:
1. Place the child restraint system on
a rear seat and route the lap/shoul-
der belt around or through the child
restraint, following the restraint
manufacturer’s instructions.
Be sure the seat belt webbing is
not twisted.
✽ ✽
NOTICE
When using the rear center seat belt,
you should also refer to the “3-point
Rear Center Seat Belt” section in this
chapter.
ALWAYS place a rear-facing
child restraint in the rear seat of
the vehicle.
Placing a rear-facing child
restraint in the front seat can
result in serious injury or death
if the child restraint is struck by
an inflating air bag.
WARNING
OLMB033044
Page 75 of 501

2-49
Safety system of your vehicle
2
(Continued)
Do not allow the front passen-
ger to place their feet or legs on
the dashboard.
No objects should be placed
over or near the air bag mod-
ules on the steering wheel,
instrument panel, and the front
passenger's panel above the
glove box. Such objects could
cause harm if the vehicle is in a
crash severe enough to cause
the air bags to deploy.
Side air bags
Your vehicle is equipped with a side air
bag in each front and outboard rear
seat. The purpose of the air bag is to
provide the vehicle's driver and/or the
front and outboard rear passenger with
additional protection than that offered
by the seat belt alone.The side air bags are designed to
deploy only during certain side impact
collisions, depending on the crash
severity, angle, speed and point of
impact.
The side air bags do not only deploy
on the side of the impact but also on
the opposite side.
For vehicles equipped with a rollover
sensor the side and curtain air bags
on both sides of the vehicle may
deploy if a rollover or possible
rollover is detected.
The side air bags are not designed to
deploy in all side impact or rollover
situations.
ODH033033
ODH033088
Page 76 of 501

2-50
Safety system of your vehicle
Curtain air bags
Curtain air bags are located along
both sides of the roof rails above the
front and rear doors. To reduce the risk of serious
injury or death from an inflating
side air bag, take the following
precautions:
Seat belts must be worn at all
times to help keep occupants
positioned properly.
Do not allow passengers to
lean their heads or bodies onto
doors, put their arms on the
doors, stretch their arms out of
the window, or place objects
between the doors and seats.
Hold the steering wheel at the 9
o’clock and 3 o’clock positions,
to minimize the risk of injuries
to your hands and arms.
Do not use any accessory
seat covers. This could reduce
or prevent the effectiveness
of the system.
Do not place any objects over
the air bag or between the air
bag and yourself.
(Continued)
WARNING (Continued)
Do not place any objects
between the door and the
seat. They may become dan-
gerous projectiles if the side
air bag inflates.
Do not install any accessories
on the side or near the side air
bags.
Do not cause impact to the
doors when the Engine
Start/Stop button is in the ON
position or this may cause the
side air bags to inflate.
If the seat or seat cover is
damaged, have the vehicle
checked and repaired by an
authorized HYUNDAI dealer.
ODH033087
ODH033089