Page 173 of 473
Features of your vehicle
96 4
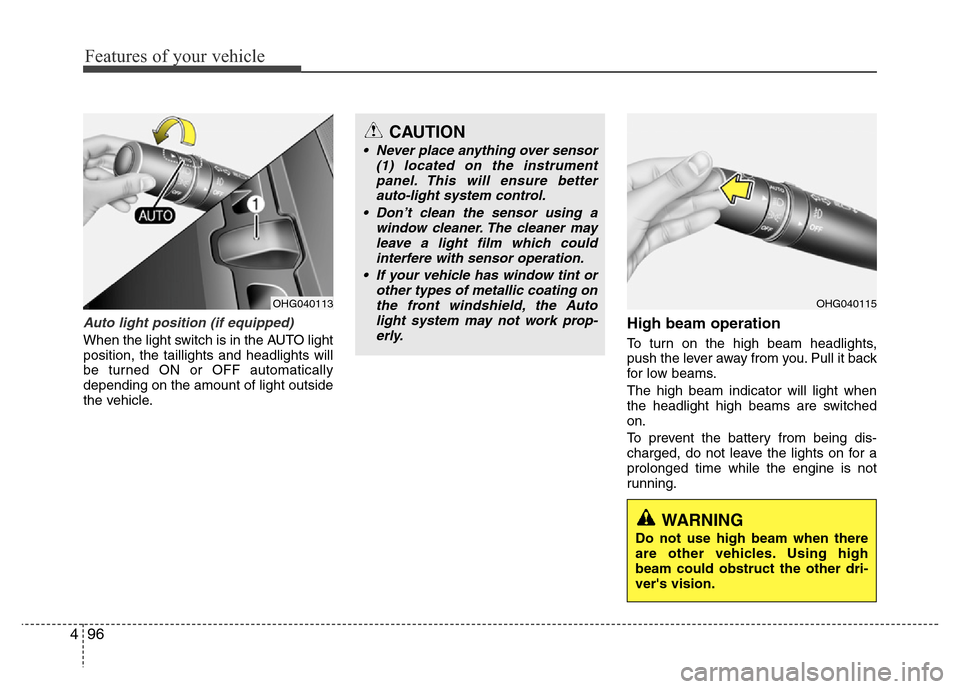
Auto light position (if equipped)
When the light switch is in the AUTO light
position, the taillights and headlights will
be turned ON or OFF automatically
depending on the amount of light outside
the vehicle.
High beam operation
To turn on the high beam headlights,
push the lever away from you. Pull it back
for low beams.
The high beam indicator will light when
the headlight high beams are switched
on.
To prevent the battery from being dis-
charged, do not leave the lights on for a
prolonged time while the engine is not
running.
OHG040113OHG040115
CAUTION
• Never place anything over sensor
(1) located on the instrument
panel. This will ensure better
auto-light system control.
• Don’t clean the sensor using a
window cleaner. The cleaner may
leave a light film which could
interfere with sensor operation.
• If your vehicle has window tint or
other types of metallic coating on
the front windshield, the Auto
light system may not work prop-
erly.
WARNING
Do not use high beam when there
are other vehicles. Using high
beam could obstruct the other dri-
ver's vision.
Page 175 of 473
Features of your vehicle
98 4
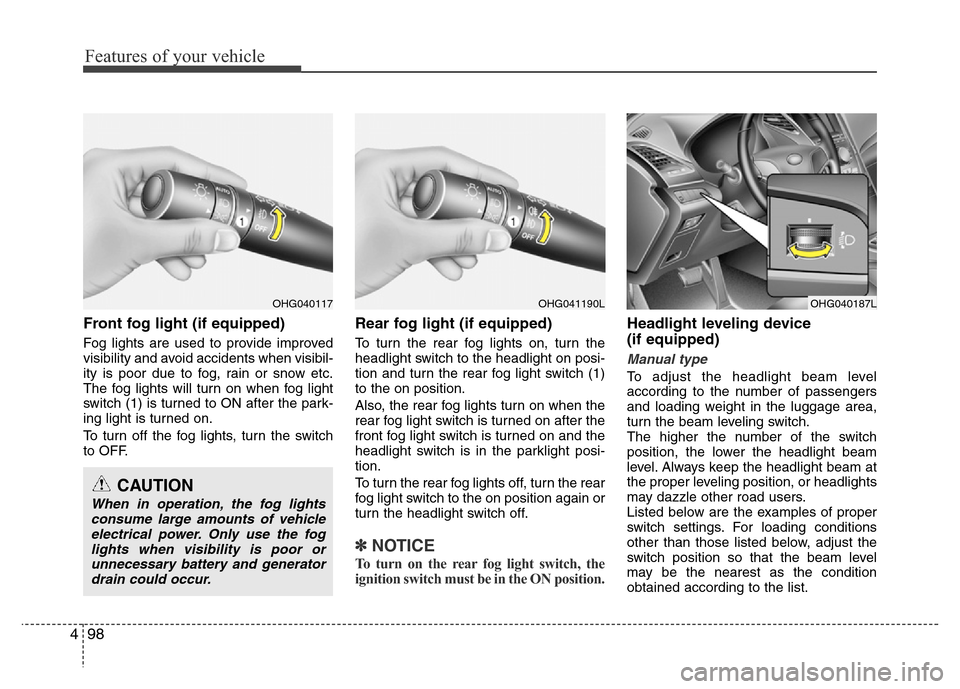
Front fog light (if equipped)
Fog lights are used to provide improved
visibility and avoid accidents when visibil-
ity is poor due to fog, rain or snow etc.
The fog lights will turn on when fog light
switch (1) is turned to ON after the park-
ing light is turned on.
To turn off the fog lights, turn the switch
to OFF.
Rear fog light (if equipped)
To turn the rear fog lights on, turn the
headlight switch to the headlight on posi-
tion and turn the rear fog light switch (1)
to the on position.
Also, the rear fog lights turn on when the
rear fog light switch is turned on after the
front fog light switch is turned on and the
headlight switch is in the parklight posi-
tion.
To turn the rear fog lights off, turn the rear
fog light switch to the on position again or
turn the headlight switch off.
✽NOTICE
To turn on the rear fog light switch, the
ignition switch must be in the ON position.
Headlight leveling device
(if equipped)
Manual type
To adjust the headlight beam level
according to the number of passengers
and loading weight in the luggage area,
turn the beam leveling switch.
The higher the number of the switch
position, the lower the headlight beam
level. Always keep the headlight beam at
the proper leveling position, or headlights
may dazzle other road users.
Listed below are the examples of proper
switch settings. For loading conditions
other than those listed below, adjust the
switch position so that the beam level
may be the nearest as the condition
obtained according to the list.
OHG040117
CAUTION
When in operation, the fog lights
consume large amounts of vehicle
electrical power. Only use the fog
lights when visibility is poor or
unnecessary battery and generator
drain could occur.
OHG040187LOHG041190L
Page 180 of 473
4103
Features of your vehicle
INTERIOR LIGHT
Automatic turn off function
(if equipped)
The interior lights automatically turn off
approximately 20 minutes after the igni-
tion switch is turned off.
If your vehicle is equipped with the theft
alarm system, the interior lights automat-
ically turns off approximately 5 seconds
after the system is in the armed stage.
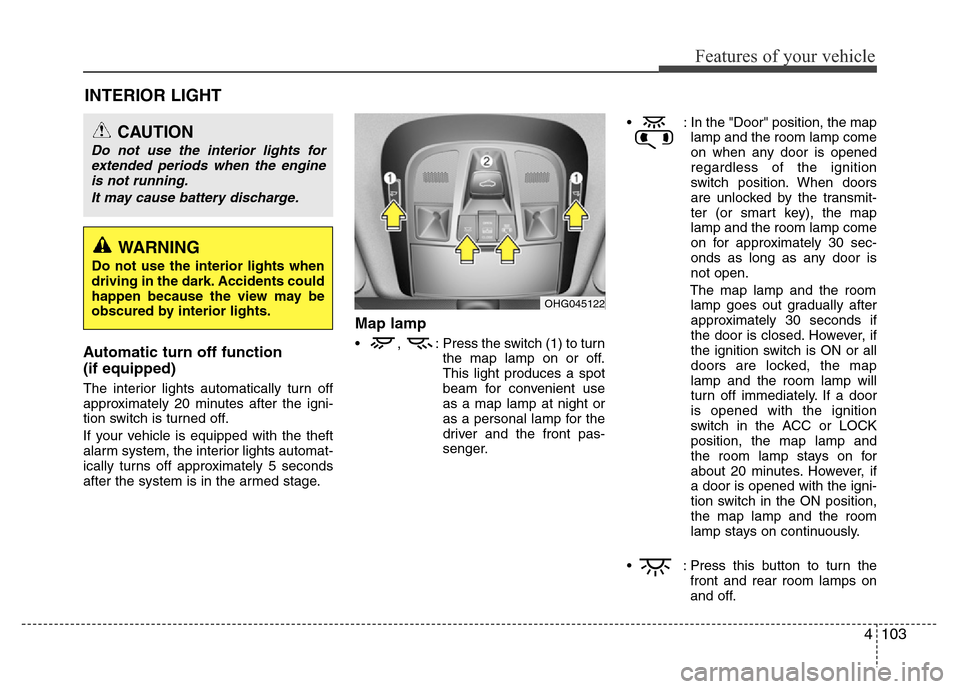
Map lamp
• , : Press the switch (1) to turn
the map lamp on or off.
This light produces a spot
beam for convenient use
as a map lamp at night or
as a personal lamp for the
driver and the front pas-
senger.• : In the "Door" position, the map
lamp and the room lamp come
on when any door is opened
regardless of the ignition
switch position. When doors
are unlocked by the transmit-
ter (or smart key), the map
lamp and the room lamp come
on for approximately 30 sec-
onds as long as any door is
not open.
The map lamp and the room
lamp goes out gradually after
approximately 30 seconds if
the door is closed. However, if
the ignition switch is ON or all
doors are locked, the map
lamp and the room lamp will
turn off immediately. If a door
is opened with the ignition
switch in the ACC or LOCK
position, the map lamp and
the room lamp stays on for
about 20 minutes. However, if
a door is opened with the igni-
tion switch in the ON position,
the map lamp and the room
lamp stays on continuously.
• : Press this button to turn the
front and rear room lamps on
and off.
CAUTION
Do not use the interior lights for
extended periods when the engine
is not running.
It may cause battery discharge.
OHG045122
WARNING
Do not use the interior lights when
driving in the dark. Accidents could
happen because the view may be
obscured by interior lights.
Page 185 of 473
Features of your vehicle
108 4
MANUAL CLIMATE CONTROL SYSTEM
1. Temperature control knob
2. Fan speed control switch
3. Air conditioning button
4. OFF button
5. Front windshield defroster button
6. Rear window defroster button
7. Air intake control button
8. Mode selection switch
OHG045131
CAUTION
Operating the blower when the
ignition switch is in the ON posi-
tion could cause the battery to
discharge. Operate the blower
when the engine is running.
Page 189 of 473
Features of your vehicle
112 4
Temperature conversion
You can switch the temperature mode
between Centigrade to Fahrenheit as fol-
lows:
1. Select mode.
2. Press the OFF button.
3. Press the air intake control button
( ) 5 times within 3 seconds.
The display will change from Centigrade
to Fahrenheit, or from Fahrenheit to
Centigrade.
If the battery has been discharged or dis-
connected, the temperature mode dis-
play will reset to Centigrade.
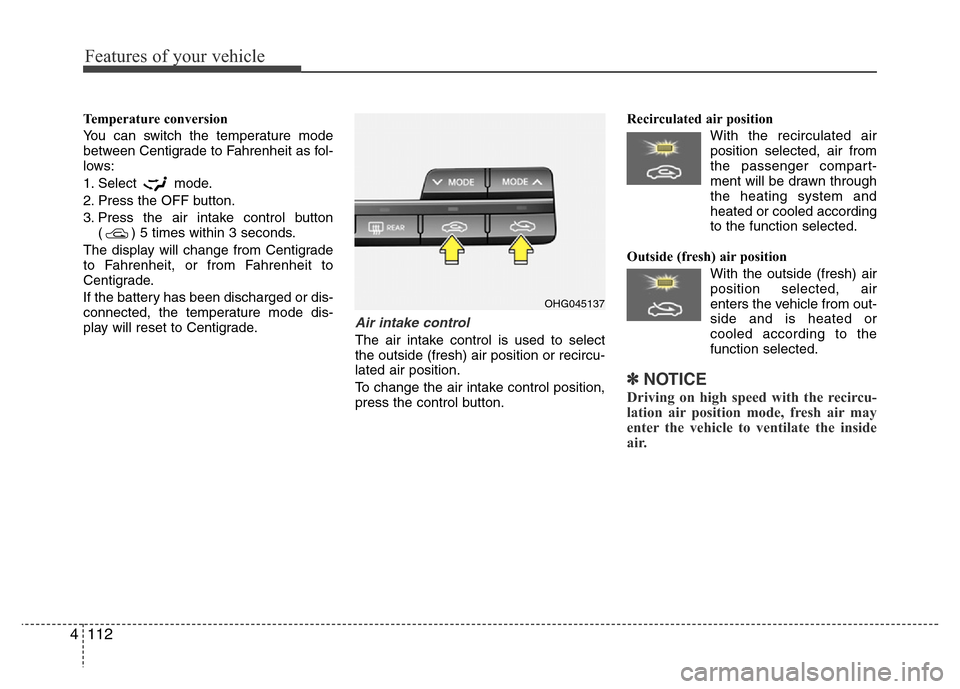
Air intake control
The air intake control is used to select
the outside (fresh) air position or recircu-
lated air position.
To change the air intake control position,
press the control button.Recirculated air position
With the recirculated air
position selected, air from
the passenger compart-
ment will be drawn through
the heating system and
heated or cooled according
to the function selected.
Outside (fresh) air position
With the outside (fresh) air
position selected, air
enters the vehicle from out-
side and is heated or
cooled according to the
function selected.
✽NOTICE
Driving on high speed with the recircu-
lation air position mode, fresh air may
enter the vehicle to ventilate the inside
air.
OHG045137
Page 195 of 473
Features of your vehicle
118 4
AUTOMATIC CLIMATE CONTROL SYSTEM (IF EQUIPPED)
1. Fan speed control knob
2. AUTO (automatic control) button
3. OFF button
4. Driver’s temperature control switch
5. Passenger's temperature control
switch
6. Front windshield defroster button
7. Rear window defroster button
8. Air conditioning button
9. Mode selection button
10. Air intake control button
11. Climate information screen selection
button
12. SYNC button
■■Type A
■Type B
OHG045516L/OHG045514L
CAUTION
Operating the blower when the
ignition switch is in the ON posi-
tion could cause the battery to dis-
charge. Operate the blower when
the engine is running.
Page 200 of 473
4 123
Features of your vehicle
Adjusting the driver and passenger side
temperature individually
• Press the “SYNC” button again to
adjust the driver and passenger side
temperature individually. The illumina-
tion of button turns off.
• Operate the driver side temperature
control to adjust the driver side tem-
perature.
• Operate the passenger side tempera-
ture control to adjust the passenger
side temperature.Temperature conversion
If the battery has been discharged or dis-
connected, the temperature mode dis-
play will reset to Centigrade.
This is a normal condition. You can switch
the temperature mode between
Centigrade to Fahrenheit as follows;
- Automatic climate control system
While pressing the OFF button, press the
AUTO button for 3 seconds or more. The
display will change from Centigrade to
Fahrenheit, or from Fahrenheit to
Centigrade.
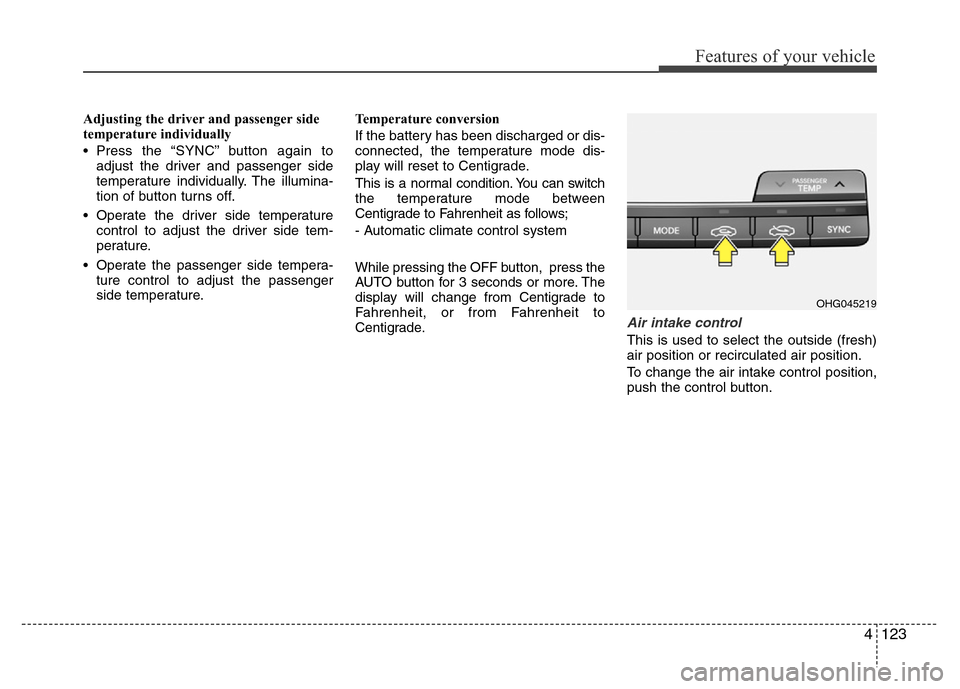
Air intake control
This is used to select the outside (fresh)
air position or recirculated air position.
To change the air intake control position,
push the control button.
OHG045219
Page 209 of 473
Features of your vehicle
132 4
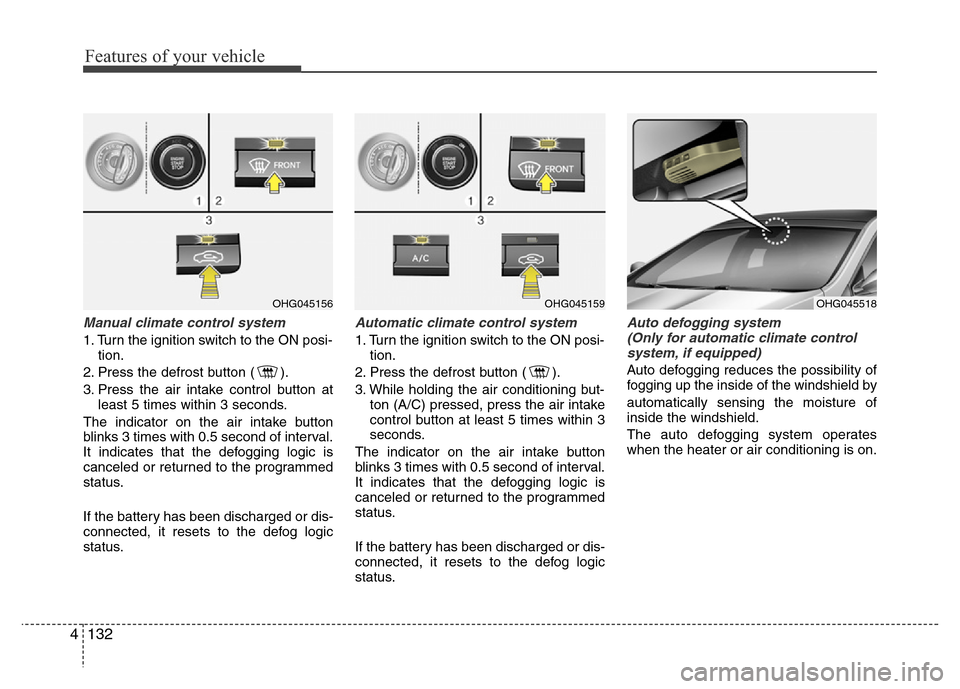
Manual climate control system
1. Turn the ignition switch to the ON posi-
tion.
2. Press the defrost button ( ).
3. Press the air intake control button at
least 5 times within 3 seconds.
The indicator on the air intake button
blinks 3 times with 0.5 second of interval.
It indicates that the defogging logic is
canceled or returned to the programmed
status.
If the battery has been discharged or dis-
connected, it resets to the defog logic
status.
Automatic climate control system
1. Turn the ignition switch to the ON posi-
tion.
2. Press the defrost button ( ).
3. While holding the air conditioning but-
ton (A/C) pressed, press the air intake
control button at least 5 times within 3
seconds.
The indicator on the air intake button
blinks 3 times with 0.5 second of interval.
It indicates that the defogging logic is
canceled or returned to the programmed
status.
If the battery has been discharged or dis-
connected, it resets to the defog logic
status.
Auto defogging system
(Only for automatic climate control
system, if equipped)
Auto defogging reduces the possibility of
fogging up the inside of the windshield by
automatically sensing the moisture of
inside the windshield.
The auto defogging system operates
when the heater or air conditioning is on.
OHG045156OHG045159OHG045518