2015 Hyundai Accent brake
[x] Cancel search: brakePage 140 of 425
Features of your vehicle
70 4
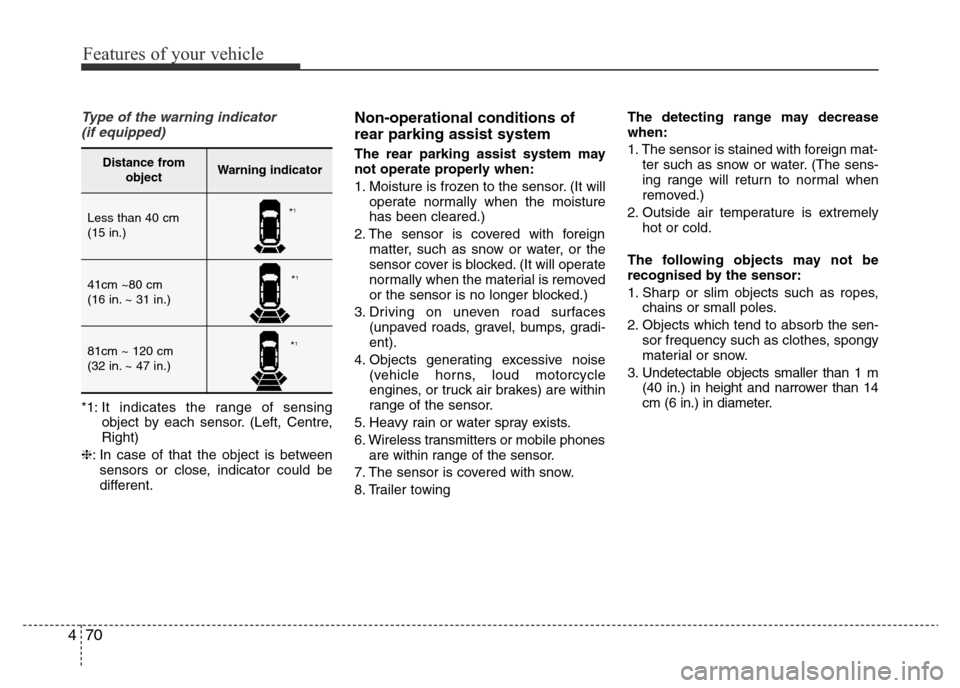
Type of the warning indicator
(if equipped)
*1: It indicates the range of sensing
object by each sensor. (Left, Centre,
Right)
❈: In case of that the object is between
sensors or close, indicator could be
different.
Non-operational conditions of
rear parking assist system
The rear parking assist system may
not operate properly when:
1. Moisture is frozen to the sensor. (It will
operate normally when the moisture
has been cleared.)
2. The sensor is covered with foreign
matter, such as snow or water, or the
sensor cover is blocked. (It will operate
normally when the material is removed
or the sensor is no longer blocked.)
3. Driving on uneven road surfaces
(unpaved roads, gravel, bumps, gradi-
ent).
4. Objects generating excessive noise
(vehicle horns, loud motorcycle
engines, or truck air brakes) are within
range of the sensor.
5. Heavy rain or water spray exists.
6. Wireless transmitters or mobile phones
are within range of the sensor.
7. The sensor is covered with snow.
8. Trailer towingThe detecting range may decrease
when:
1. The sensor is stained with foreign mat-
ter such as snow or water. (The sens-
ing range will return to normal when
removed.)
2. Outside air temperature is extremely
hot or cold.
The following objects may not be
recognised by the sensor:
1. Sharp or slim objects such as ropes,
chains or small poles.
2. Objects which tend to absorb the sen-
sor frequency such as clothes, spongy
material or snow.
3. Undetectable objects smaller than 1 m
(40 in.) in height and narrower than 14
cm (6 in.) in diameter.Distance from
objectWarning indicator
Less than 40 cm
(15 in.)
41cm ~80 cm
(16 in. ~ 31 in.)
81cm ~ 120 cm
(32 in. ~ 47 in.)
*1
*1
*1
Page 149 of 425
479
Features of your vehicle
Daytime running light
(if equipped)
The Daytime Running Lights (DRL) can
make it easier for others to see the front
of your vehicle during the day. DRL can
be helpful in many different driving condi-
tions, and it is especially helpful after
dawn and before sunset.
The daytime running lights turn off when:
Type A
1. The parking light switch is ON.
2. The engine stops.
3. The parking brake is engaged.
Type B
1. The headlight switch is ON.
2. The front fog light switch is ON.
3. The engine stops.
Headlight levelling device
(if equipped)
Manual type
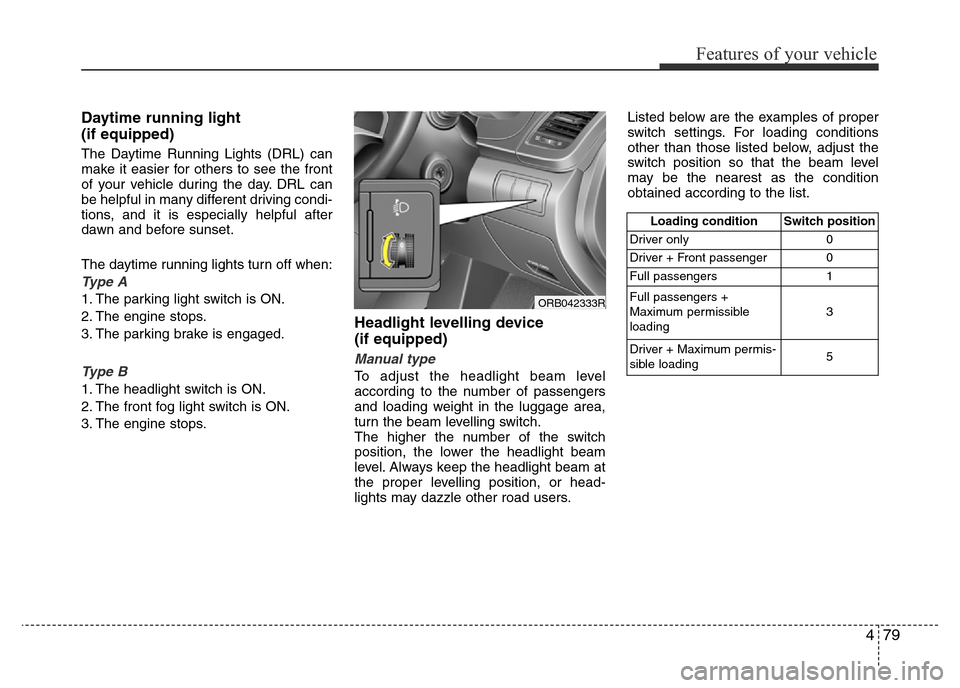
To adjust the headlight beam level
according to the number of passengers
and loading weight in the luggage area,
turn the beam levelling switch.
The higher the number of the switch
position, the lower the headlight beam
level. Always keep the headlight beam at
the proper levelling position, or head-
lights may dazzle other road users.Listed below are the examples of proper
switch settings. For loading conditions
other than those listed below, adjust the
switch position so that the beam level
may be the nearest as the condition
obtained according to the list.
Loading condition Switch position
Driver only 0
Driver + Front passenger 0
Full passengers 1
Full passengers +
Maximum permissible
loading3
Driver + Maximum permis-
sible loading 5
ORB042333R
Page 238 of 425
5
Before driving / 5-3
Key / 5-5
Engine Start/Stop button / 5-9
Manual transaxle / 5-15
Automatic transaxle / 5-18
Continuously variable transaxle (CVT) / 5-24
Dual Clutch Transmission (DCT) / 5-30
Brake system / 5-38
Cruise control system / 5-50
Economical operation / 5-54
Special driving conditions / 5-56
Winter driving / 5-60
Trailer towing / 5-64
Vehicle weight / 5-73
Driving your vehicle
Page 240 of 425
53
Driving your vehicle
Before entering the vehicle
• Be sure that all windows, outside mir-
ror(s), and outside lights are clean.
• Check the condition of the tyres.
• Check under the vehicle for any sign of
leaks.
• Be sure there are no obstacles behind
you if you intend to back up.
Necessary inspections
Fluid levels, such as engine oil, engine
coolant, brake fluid, and washer fluid
should be checked on a regular basis,
with the exact interval depending on the
fluid. Further details are provided in sec-
tion 7, “Maintenance”.
Before starting
• Close and lock all doors.
• Position the seat so that all controls are
easily reached.
• Check the operation of warning lights
when the ignition switch is turned to
the ON position.
• Check all gauges.
• Adjust the inside and outside rear-view
mirrors.
• Be sure that all lights work.
• Release the parking brake and make
sure the brake warning light goes out.
For safe operation, be sure you are famil-
iar with your vehicle and its equipment.
BEFORE DRIVING
WARNING
All passengers must be properly
belted whenever the vehicle is mov-
ing. Refer to “Seat belts” in section
3 for more information on their
proper use.
WARNING
Always check the surrounding
areas near your vehicle for people,
especially children, before putting a
car into gear.
WARNING
Driving whilst distracted can result
in a loss of vehicle control, that
may lead to an accident, severe
personal injury, and death. The dri-
ver’s primary responsibility is in
the safe and legal operation of a
vehicle, and use of any handheld
devices, other equipment, or vehi-
cle systems which take the driver’s
eyes, attention and focus away
from the safe operation of a vehicle
or which are not permissible by law
should never be used during oper-
ation of the vehicle.
Page 242 of 425
55
Driving your vehicle
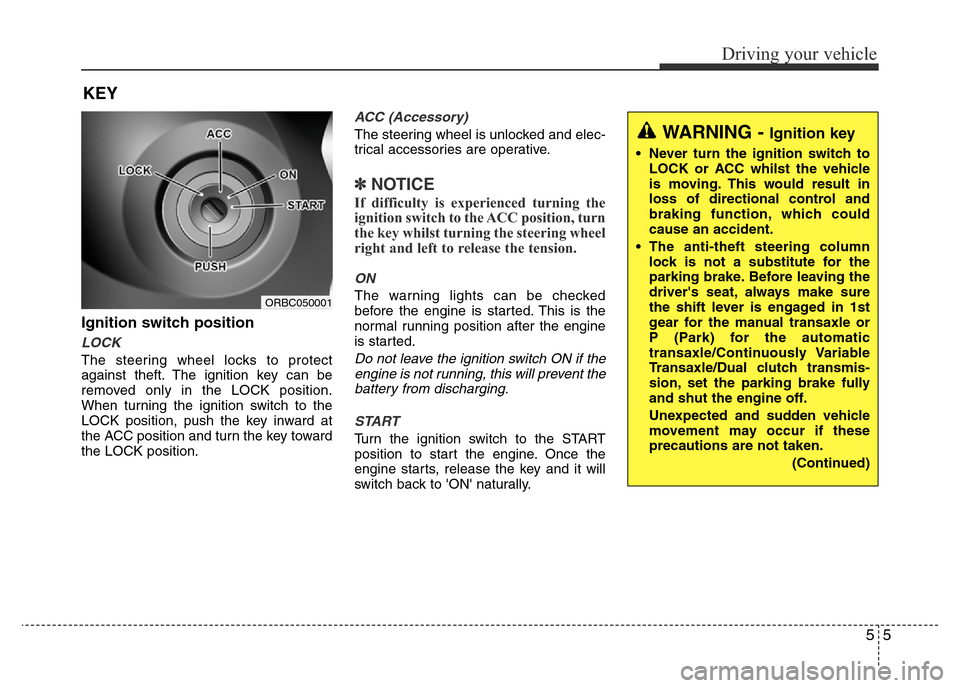
Ignition switch position
LOCK
The steering wheel locks to protect
against theft. The ignition key can be
removed only in the LOCK position.
When turning the ignition switch to the
LOCK position, push the key inward at
the ACC position and turn the key toward
the LOCK position.
ACC (Accessory)
The steering wheel is unlocked and elec-
trical accessories are operative.
✽NOTICE
If difficulty is experienced turning the
ignition switch to the ACC position, turn
the key whilst turning the steering wheel
right and left to release the tension.
ON
The warning lights can be checked
before the engine is started. This is the
normal running position after the engine
is started.
Do not leave the ignition switch ON if the
engine is not running, this will prevent the
battery from discharging.
START
Turn the ignition switch to the START
position to start the engine. Once the
engine starts, release the key and it will
switch back to 'ON' naturally.
KEY
ORBC050001
WARNING - Ignition key
• Never turn the ignition switch to
LOCK or ACC whilst the vehicle
is moving. This would result in
loss of directional control and
braking function, which could
cause an accident.
• The anti-theft steering column
lock is not a substitute for the
parking brake. Before leaving the
driver's seat, always make sure
the shift lever is engaged in 1st
gear for the manual transaxle or
P (Park) for the automatic
transaxle/Continuously Variable
Transaxle/Dual clutch transmis-
sion, set the parking brake fully
and shut the engine off.
Unexpected and sudden vehicle
movement may occur if these
precautions are not taken.
(Continued)
Page 243 of 425
Driving your vehicle
6 5
Starting the engineStarting the petrol engine
(if equipped)
1. Make sure the parking brake is
applied.
2.Manual Transaxle- Depress the
clutch pedal fully and shift the
transaxle into Neutral. Keep the clutch
pedal and brake pedal depressed
whilst turning the ignition switch to the
start position.
Automatic Transaxle/Continuously
Variable Transaxle- Place the shift
lever in P (Park). Depress the brake
pedal fully.
You can also start the engine when
the shift lever is in the N (Neutral)
position.
3. Turn the ignition switch to START and
hold it there until the engine starts (a
maximum of 10 seconds), then
release the key.
It should be started without depressing
the accelerator.
4. Do not wait for the engine to warm up
whilst the vehicle remains stationary.
Start driving at moderate engine
speeds. (Steep accelerating and decel-
erating should be avoided.)
(Continued)
• Never reach for the ignition
switch, or any other controls
through the steering wheel whilst
the vehicle is in motion. The pres-
ence of your hand or arm in this
area could cause a loss of vehicle
control, an accident and serious
bodily injury or death.
• Do not place any movable objects
around the driver’s seat as they
may move whilst driving, inter-
fere with the driver and lead to an
accident.
WARNING
• Always wear appropriate shoes
when operating your vehicle.
Unsuitable shoes (high heels, ski
boots, sandals, etc.) may inter-
fere with your ability to use the
brake and accelerator pedals,
and the clutch pedal (if
equipped).
• Do not start the vehicle with the
accelerator pedal depressed. The
vehicle can move and lead to an
accident.
• Wait until the engine rpm is nor-
mal. The vehicle may suddenly
move if the brake pedal is
released when the rpm is high.
Page 244 of 425
57
Driving your vehicle
Starting the diesel engine
(if equipped)
To start the diesel engine when the
engine is cold, it has to be pre-heated
before starting the engine and then also
has to be warmed up before starting to
drive.
1. Make sure the parking brake is
applied.
2.Manual Transaxle- Depress the
clutch pedal fully and shift the into
Neutral. Keep the clutch pedal and
brake pedal depressed whilst turning
the ignition switch to the start position.
Automatic transaxle / Dual clutch
transmission- Place the shift lever in
P (park). Depress the brake pedal fully.
You can also start the engine when the
shift lever is in the N (neutral) position.
3. Turn the ignition switch to the ON posi-
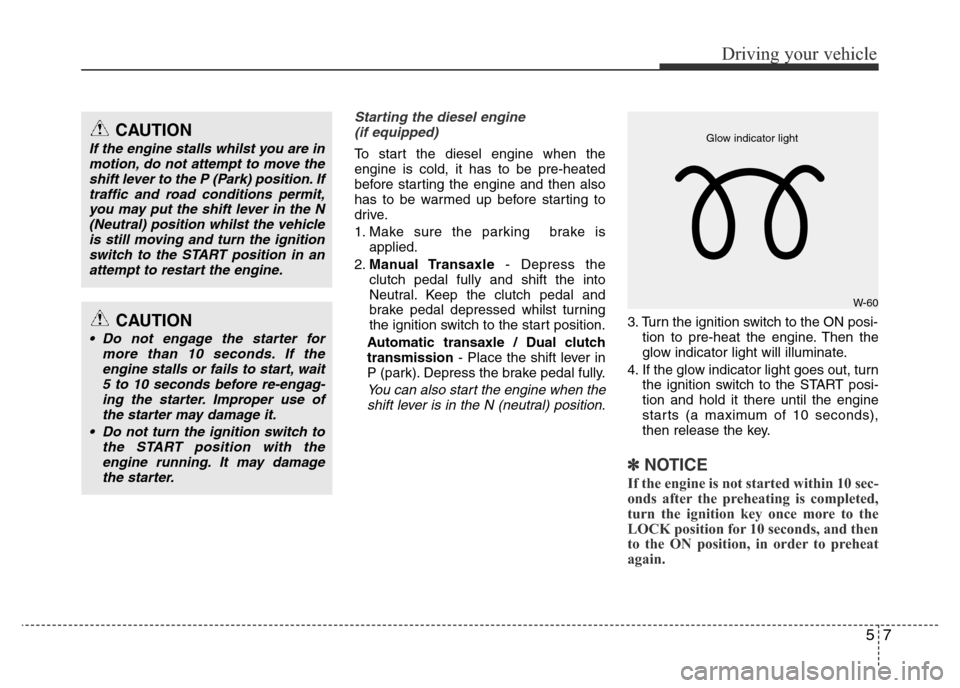
tion to pre-heat the engine. Then the
glow indicator light will illuminate.
4. If the glow indicator light goes out, turn
the ignition switch to the START posi-
tion and hold it there until the engine
starts (a maximum of 10 seconds),
then release the key.
✽ NOTICE
If the engine is not started within 10 sec-
onds after the preheating is completed,
turn the ignition key once more to the
LOCK position for 10 seconds, and then
to the ON position, in order to preheat
again.
CAUTION
If the engine stalls whilst you are in
motion, do not attempt to move the
shift lever to the P (Park) position. If
traffic and road conditions permit,
you may put the shift lever in the N
(Neutral) position whilst the vehicle
is still moving and turn the ignition
switch to the START position in an
attempt to restart the engine.
CAUTION
• Do not engage the starter for
more than 10 seconds. If the
engine stalls or fails to start, wait
5 to 10 seconds before re-engag-
ing the starter. Improper use of
the starter may damage it.
• Do not turn the ignition switch to
the START position with the
engine running. It may damage
the starter.
W-60 Glow indicator light
Page 247 of 425
Driving your vehicle
10 5
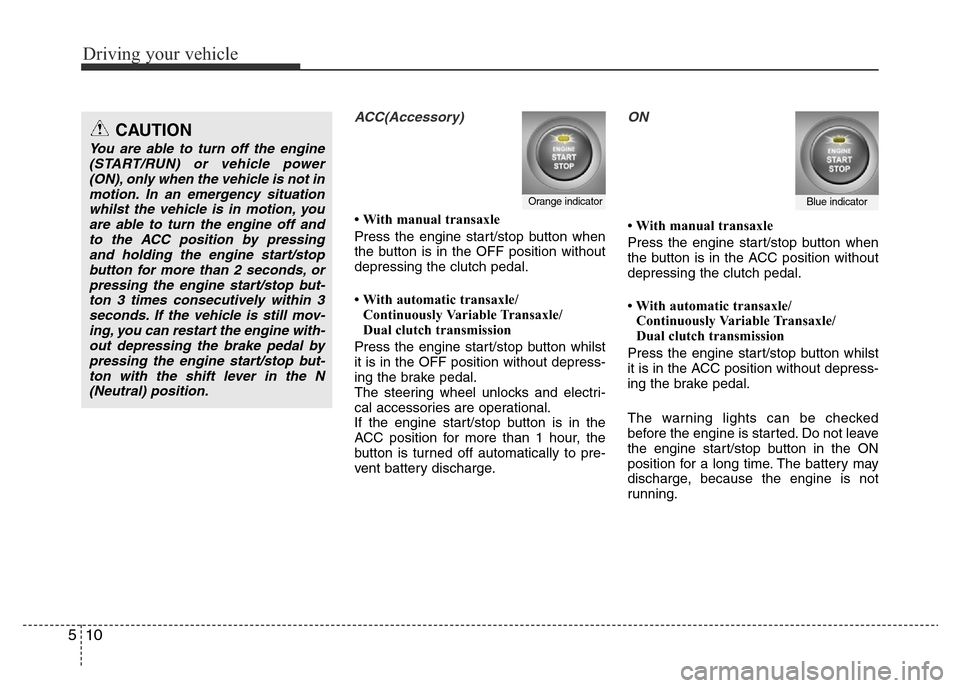
ACC(Accessory)
• With manual transaxle
Press the engine start/stop button when
the button is in the OFF position without
depressing the clutch pedal.
• With automatic transaxle/
Continuously Variable Transaxle/
Dual clutch transmission
Press the engine start/stop button whilst
it is in the OFF position without depress-
ing the brake pedal.
The steering wheel unlocks and electri-
cal accessories are operational.
If the engine start/stop button is in the
ACC position for more than 1 hour, the
button is turned off automatically to pre-
vent battery discharge.
ON
• With manual transaxle
Press the engine start/stop button when
the button is in the ACC position without
depressing the clutch pedal.
• With automatic transaxle/
Continuously Variable Transaxle/
Dual clutch transmission
Press the engine start/stop button whilst
it is in the ACC position without depress-
ing the brake pedal.
The warning lights can be checked
before the engine is started. Do not leave
the engine start/stop button in the ON
position for a long time. The battery may
discharge, because the engine is not
running.
Orange indicatorBlue indicator
CAUTION
You are able to turn off the engine
(START/RUN) or vehicle power
(ON), only when the vehicle is not in
motion. In an emergency situation
whilst the vehicle is in motion, you
are able to turn the engine off and
to the ACC position by pressing
and holding the engine start/stop
button for more than 2 seconds, or
pressing the engine start/stop but-
ton 3 times consecutively within 3
seconds. If the vehicle is still mov-
ing, you can restart the engine with-
out depressing the brake pedal by
pressing the engine start/stop but-
ton with the shift lever in the N
(Neutral) position.