2015 Hyundai Accent ABS
[x] Cancel search: ABSPage 293 of 425
Driving your vehicle
56 5
Hazardous driving conditions
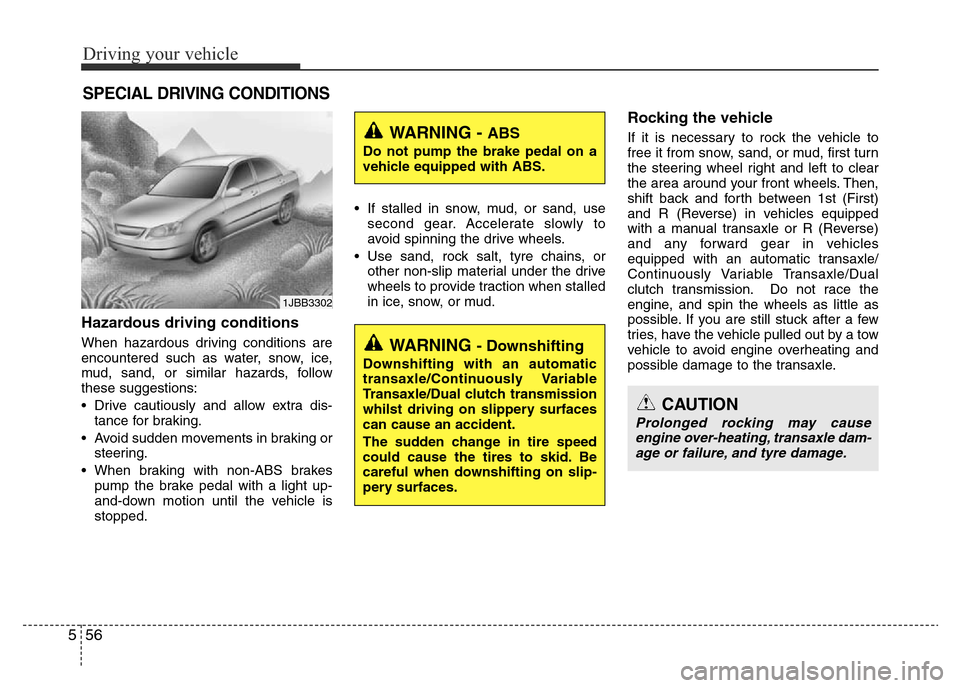
When hazardous driving conditions are
encountered such as water, snow, ice,
mud, sand, or similar hazards, follow
these suggestions:
• Drive cautiously and allow extra dis-
tance for braking.
• Avoid sudden movements in braking or
steering.
• When braking with non-ABS brakes
pump the brake pedal with a light up-
and-down motion until the vehicle is
stopped.• If stalled in snow, mud, or sand, use
second gear. Accelerate slowly to
avoid spinning the drive wheels.
• Use sand, rock salt, tyre chains, or
other non-slip material under the drive
wheels to provide traction when stalled
in ice, snow, or mud.
Rocking the vehicle
If it is necessary to rock the vehicle to
free it from snow, sand, or mud, first turn
the steering wheel right and left to clear
the area around your front wheels. Then,
shift back and forth between 1st (First)
and R (Reverse) in vehicles equipped
with a manual transaxle or R (Reverse)
and any forward gear in vehicles
equipped with an automatic transaxle/
Continuously Variable Transaxle/Dual
clutch transmission. Do not race the
engine, and spin the wheels as little as
possible. If you are still stuck after a few
tries, have the vehicle pulled out by a tow
vehicle to avoid engine overheating and
possible damage to the transaxle.
SPECIAL DRIVING CONDITIONS
1JBB3302
WARNING - ABS
Do not pump the brake pedal on a
vehicle equipped with ABS.
CAUTION
Prolonged rocking may cause
engine over-heating, transaxle dam-
age or failure, and tyre damage.
WARNING - Downshifting
Downshifting with an automatic
transaxle/Continuously Variable
Transaxle/Dual clutch transmission
whilst driving on slippery surfaces
can cause an accident.
The sudden change in tire speed
could cause the tires to skid. Be
careful when downshifting on slip-
pery surfaces.
Page 303 of 425
Driving your vehicle
66 5
Trailer brakes
If your trailer is equipped with a braking
system, make sure it conforms to your
country’s regulations and that it is prop-
erly installed and operating correctly.
If your trailer weighs more than the max-
imum trailer weight without trailer brakes
loaded, then it needs its own brakes and
they must be adequate. Be sure to read
and follow the instructions for the trailer
brakes so you’ll be able to install, adjust
and maintain them properly.
• Don’t tap into your vehicle's brake sys-
tem.
Driving with a trailer
Towing a trailer requires a certain
amount of experience. Before setting out
for the open road, you must get to know
your trailer. Acquaint yourself with the
feel of handling and braking with the
added weight of the trailer. And always
keep in mind that the vehicle you are
driving is now a good deal longer and not
nearly so responsive as your vehicle is
by itself.
Before you start, check the trailer towbar
and platform, safety chains, electrical
connector(s), lights, tyres and mirror
adjustment. If the trailer has electric
brakes, start moving your vehicle and
trailer and then apply the trailer brake
controller by hand to be sure the brakes
are working. This lets you check your
electrical connection(s) at the same time.
During your trip, occasionally check to be
sure that the load is secure, and that the
lights and trailer brakes are still working.
Following distance
Stay at least twice as far behind the vehi-
cle ahead as you would when driving
your vehicle without a trailer. This can
help you avoid situations that require
heavy braking and sudden turns.
Passing
You’ll need more passing distance up
ahead when you’re towing a trailer. And,
because of the increased vehicle length,
you’ll need to go much farther beyond the
passed vehicle before you can return to
your lane.
Backing up
Hold the bottom of the steering wheel
with one hand. Then, to move the trailer
to the left, just move your hand to the left.
To move the trailer to the right, move your
hand to the right. Always back up slowly
and, if possible, have someone guide
you.
Making turns
When you're turning with a trailer, make
wider turns than normal. Do this so your
trailer won't strike kerbs, road signs,
trees, or other objects. Avoid jerky or
sudden manoeuvres. Signal well in
advance.
WARNING- Trailer brakes
Do not use a trailer with its own
brakes unless you are absolutely
certain that you have properly set
up the brake system. This should
be performed by professionals who
are experienced in this field.
Page 305 of 425
Driving your vehicle
68 5
Parking on hills
Generally, if you have a trailer attached to
your vehicle, you should not park your
vehicle on a hill. People can be seriously
or fatally injured, and both your vehicle
and the trailer can be damaged if they
unexpectedly roll down the hill.However, if you ever have to park your
trailer on a hill, here's how to do it:
1. Pull the vehicle into the parking space.
Turn the steering wheel in the direction
of the kerb (left if headed down hill,
right if headed up hill).
2. If the vehicle has a manual transaxle,
place the shift lever in neutral. If the
vehicle has an automatic transaxle/
Continuously Variable Transaxle/Dual
clutch transmission, place the shift
lever in P (Park).
3. Set the parking brake and shut off the
vehicle.
4. Place chocks under the trailer wheels
on the down hill side of the wheels.
5. Start the vehicle, hold the brakes, shift
to neutral, release the parking brake
and slowly release the brakes until the
trailer chocks absorb the load.
6. Re-apply the brakes, re-apply the
parking brake and shift the vehicle to R
(Reverse) for manual transaxle or P
(Park) for automatic transaxle/
Continuously Variable Transaxle/Dual
clutch transmission.
7. Shut off the vehicle and release the
vehicle brakes but leave the parking
brake set.
WARNING- Parking on a
hill
Parking your vehicle on a hill with a
trailer attached could cause seri-
ous injury or death, should the trail-
er break loose.
WARNING- Parking brake
It can be dangerous to get out of
your vehicle if the parking brake is
not firmly set.
If you have left the engine running,
the vehicle can move suddenly. You
or others could be seriously or
fatally injured.
Page 320 of 425
What to do in an emergency
10 6
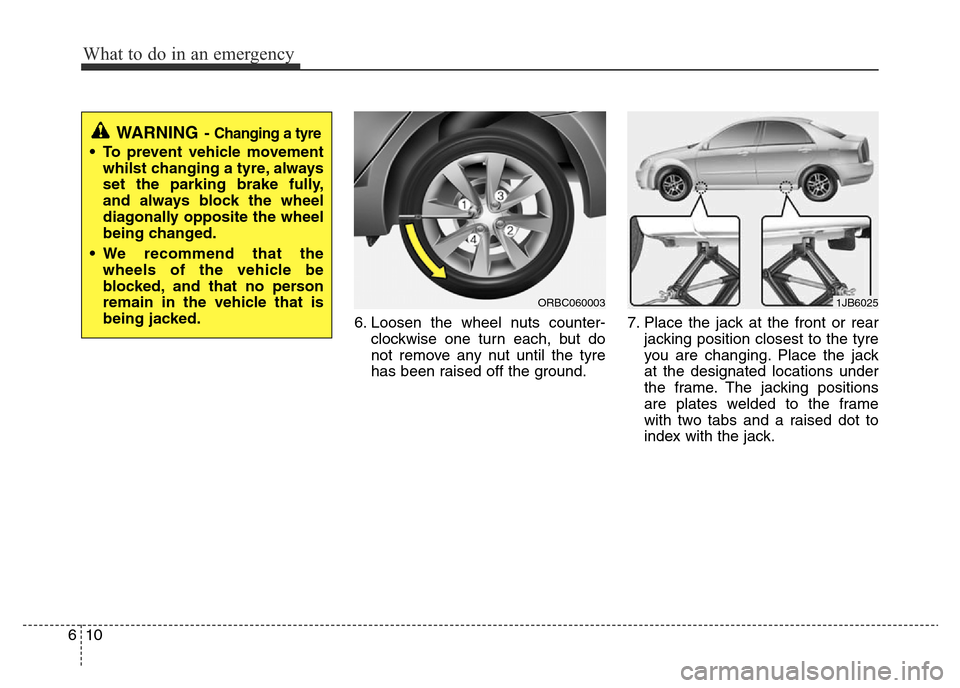
6. Loosen the wheel nuts counter-
clockwise one turn each, but do
not remove any nut until the tyre
has been raised off the ground.7. Place the jack at the front or rear
jacking position closest to the tyre
you are changing. Place the jack
at the designated locations under
the frame. The jacking positions
are plates welded to the frame
with two tabs and a raised dot to
index with the jack.
WARNING- Changing a tyre
• To prevent vehicle movement
whilst changing a tyre, always
set the parking brake fully,
and always block the wheel
diagonally opposite the wheel
being changed.
• We recommend that the
wheels of the vehicle be
blocked, and that no person
remain in the vehicle that is
being jacked.
ORBC0600031JB6025
Page 377 of 425
749
Maintenance
Wheel replacement
When replacing the metal wheels for
any reason, make sure the new
wheels are equivalent to the original
factory units in diameter, rim width
and offset.Tyre traction
Tyre traction can be reduced if you
drive on worn tyres, tyres that are
improperly inflated or on slippery
road surfaces. Tyres should be
replaced when tread wear indicators
appear. To reduce the possibility of
losing control, slow down whenever
there is rain, snow or ice on the road.
Tyre maintenance
In addition to proper inflation, correct
wheel alignment helps to decrease
tyre wear. If you find a tyre is worn
unevenly, have your dealer check the
wheel alignment.
When you have new tyres installed,
make sure they are balanced. This
will increase vehicle ride comfort and
tyre life. Additionally, a tyre should
always be rebalanced if it is removed
from the wheel.
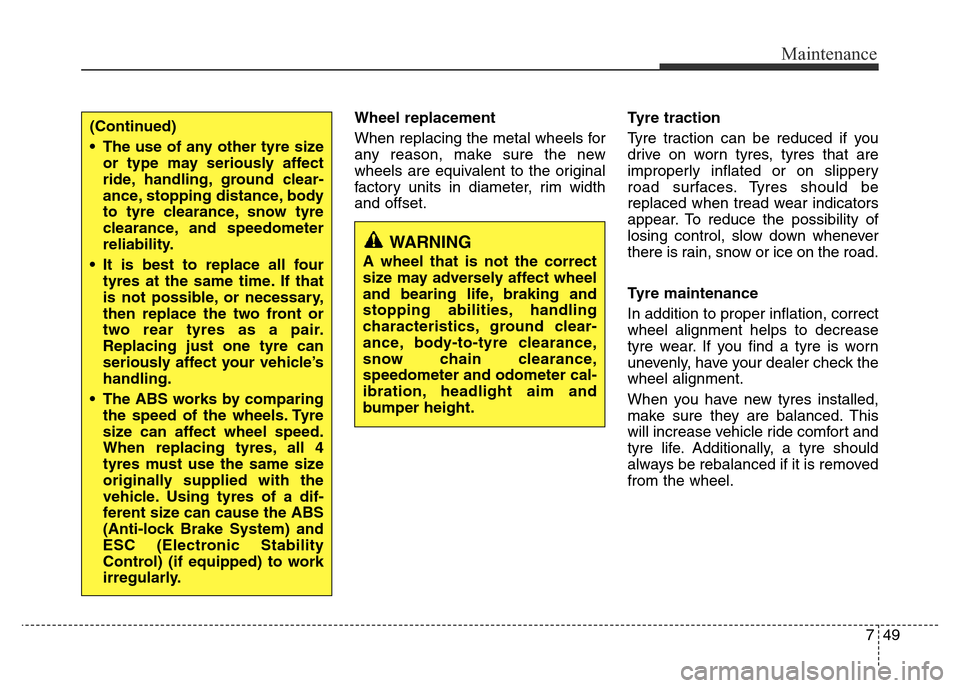
WARNING
A wheel that is not the correct
size may adversely affect wheel
and bearing life, braking and
stopping abilities, handling
characteristics, ground clear-
ance, body-to-tyre clearance,
snow chain clearance,
speedometer and odometer cal-
ibration, headlight aim and
bumper height.
(Continued)
• The use of any other tyre size
or type may seriously affect
ride, handling, ground clear-
ance, stopping distance, body
to tyre clearance, snow tyre
clearance, and speedometer
reliability.
• It is best to replace all four
tyres at the same time. If that
is not possible, or necessary,
then replace the two front or
two rear tyres as a pair.
Replacing just one tyre can
seriously affect your vehicle’s
handling.
• The ABS works by comparing
the speed of the wheels. Tyre
size can affect wheel speed.
When replacing tyres, all 4
tyres must use the same size
originally supplied with the
vehicle. Using tyres of a dif-
ferent size can cause the ABS
(Anti-lock Brake System) and
ESC (Electronic Stability
Control) (if equipped) to work
irregularly.
Page 390 of 425

Maintenance
62 7
DescriptionSymbolFuse ratingProtected component
IG11IG110A
ATM Shift Lock Control Module, EPS Control Module, Tire Pressure Monitoring Module,
Electro Chromic Mirror, SBR Control Module, Seat Belt Reminder Indicator, Rear Parking
Assist Buzzer, Stop Lamp Switch(Gasoline), Rheostat, Fuel Filter Warning Sensor (Diesel),
Rear Parking Assist Sensor Side LH/RH, Rear Parking Assist Sensor Center LH/RH
ABS10AABS Control Module, ESC Module, ESC Off Switch,
E/R Fuse & Relay Box (Multipurpose Check Connector)
B/UP LAMPB/UP
LAMP10ABack-Up Lamp Switch
ECU10AECM, Mass Air Flow Sensor (Diesel), Smart Key Control Module
IG21IG210APower Window Relay, Instrument Cluster, Sunroof Motor, Head Lamp Leveling Device
Switch, Head Lamp LH/RH
IG22IG210AA/C Control Module, BCM, Smart Key Control Module, Wiper Control Unit
HAZARD15AHazard Relay, Hazard Switch
1PDM25ASmart Key Control Module
SUNROOF15ASunroof Motor
2PDM10ASmart Key Control Module, Start/Stop Button Switch
TCU15ATCM (Diesel), Pulse Generator 'A'/'B', Vehicle Speed Sensor, Transaxle Range Switch
IG12IG110AParticle Material Sensor5SPARE5SPARE10A-
WIPER FRT25AMultifunction Switch, Front Wiper Motor
DR LOCK20ADoor Lock/Unlock Relay, Tail Gate Unlock Relay, Driver Door Lock Actuator
Page 392 of 425
Maintenance
64 7
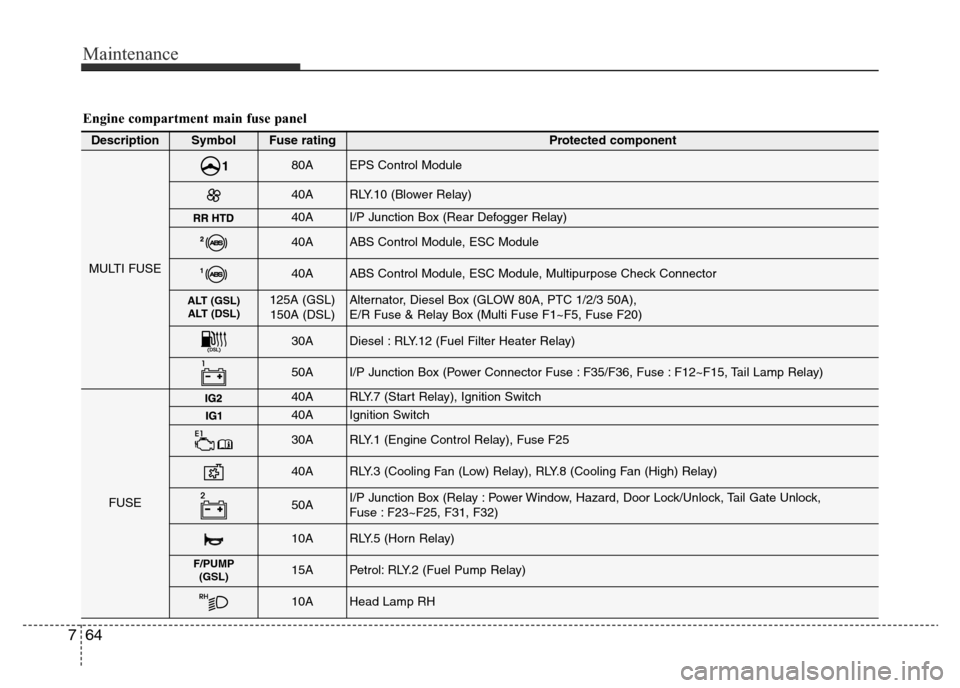
DescriptionSymbolFuse ratingProtected component
MULTI FUSE
80AEPS Control Module
40ARLY.10 (Blower Relay)
40AI/P Junction Box (Rear Defogger Relay)
40AABS Control Module, ESC Module
40AABS Control Module, ESC Module, Multipurpose Check Connector
ALT (GSL)
ALT (DSL)125A (GSL)
150A (DSL)Alternator, Diesel Box (GLOW 80A, PTC 1/2/3 50A),
E/R Fuse & Relay Box (Multi Fuse F1~F5, Fuse F20)
30ADiesel : RLY.12 (Fuel Filter Heater Relay)
50AI/P Junction Box (Power Connector Fuse : F35/F36, Fuse : F12~F15, Tail Lamp Relay)
FUSE
40ARLY.7 (Start Relay), Ignition Switch
40AIgnition Switch
30ARLY.1 (Engine Control Relay), Fuse F25
40ARLY.3 (Cooling Fan (Low) Relay), RLY.8 (Cooling Fan (High) Relay)
50AI/P Junction Box (Relay : Power Window, Hazard, Door Lock/Unlock, Tail Gate Unlock,
Fuse : F23~F25, F31, F32)
10ARLY.5 (Horn Relay)
F/PUMP
(GSL)15APetrol: RLY.2 (Fuel Pump Relay)
10AHead Lamp RH
Engine compartment main fuse panel
Page 398 of 425
Maintenance
70 7
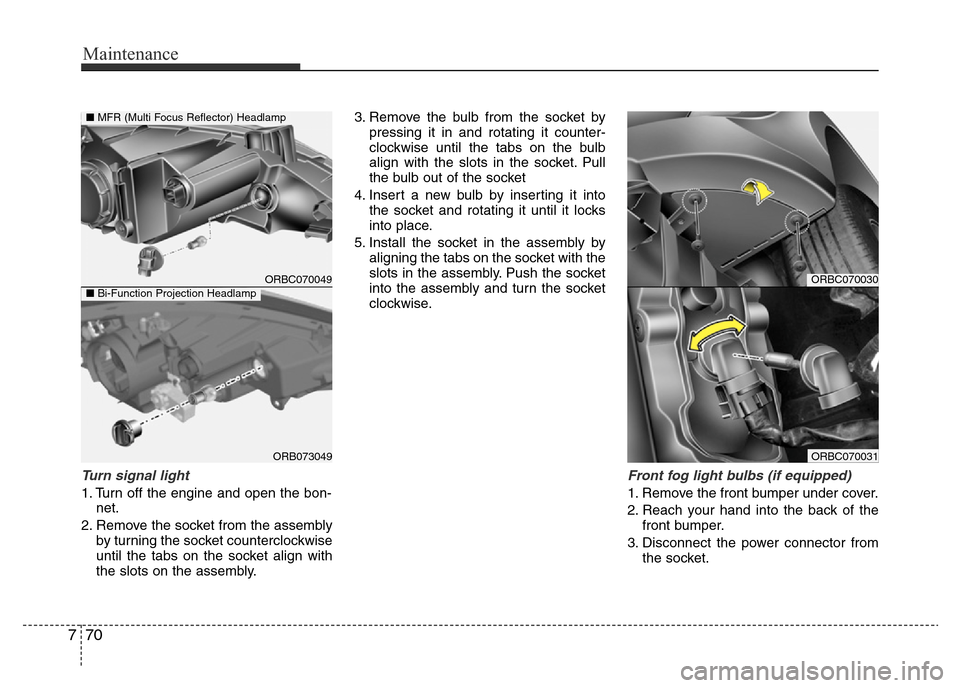
Turn signal light
1. Turn off the engine and open the bon-
net.
2. Remove the socket from the assembly
by turning the socket counterclockwise
until the tabs on the socket align with
the slots on the assembly.3. Remove the bulb from the socket by
pressing it in and rotating it counter-
clockwise until the tabs on the bulb
align with the slots in the socket. Pull
the bulb out of the socket
4. Insert a new bulb by inserting it into
the socket and rotating it until it locks
into place.
5. Install the socket in the assembly by
aligning the tabs on the socket with the
slots in the assembly. Push the socket
into the assembly and turn the socket
clockwise.
Front fog light bulbs (if equipped)
1. Remove the front bumper under cover.
2. Reach your hand into the back of the
front bumper.
3. Disconnect the power connector from
the socket.
ORBC070030
ORBC070031
ORBC070049
ORB073049
■MFR (Multi Focus Reflector) Headlamp
■Bi-Function Projection Headlamp