Page 321 of 453

uuWhen Driving uShifting
320
Driving
■Shift Lever Operation1Shift Lever Operation
NOTICE
When you change the shift lever from (D to (R and
vice versa, come to a complete stop and keep the
brake pedal depressed.
Operating the shift lever be fore the vehicle has come
to a complete standstill can damage the transmission.
Use the shift lever positi on indicator to check the
lever position befo re pulling away.
If the transmission indicator blinks when driving, in
any shift position, there is a problem with the
transmission.
Avoid sudden acceleration and have the transmission
checked by a dealer as soon as possible.
The fuel supply may be cut of f if you drive at engine
speeds in or over the ta chometer red zone (engine
speed limit). If this happe ns, you may experience a
slight jolt.
It may not be possible to operate the shift lever if the
brake pedal is applied while the shift lever release
button is pressed.
Depress the brake pedal first.
Shift Lever Position Indicator Tachometer’s red zone
Depress the brake pedal and press
the shift lever release button to shift.
Shift without pressing the shift lever
release button.
Press the shift lever release button
and shift.
15 US FIT-31T5A6000.book 320 ページ 2014年3月6日 木曜日 午後7時5分
Page 322 of 453

321
uuWhen Driving uShifting
Continued
Driving
Shifting
Change the shift position in accordance with your driving needs.
■Shift lever positions
*1 : Models with the smart entry system have an ENGINE START/STOP button instead of an ignition switch.
Automatic transmission (CVT) models with paddle shifters
1Shifting
You cannot turn the ignition switch to LOCK
(0*1
and remove the key unless the shift lever is in ( P.
The vehicle may move forward very slightly even in
(N while the engine is cold.
Depress the brake pe dal firmly and, when necessary,
apply the parking brake.
When shifting positions in extremely low
temperatures (-22°F/-30°C), there may be a short
delay before the shift posit ion is displayed. Always
confirm you are in the corr ect shift position before
driving.Park
Used when parking or starting the engine
Reverse
Used when reversing
Neutral
Used when idling
Drive
Used:
●For normal driving●When temporarily driving in the
7-speed manual shift mode
Release Button Drive (S)
Used for:
●For better acceleration●To increase engine braking●When going up or down hills●When driving in the 7-speed manual
shift mode
15 US FIT-31T5A6000.book 321 ページ 2014年3月6日 木曜日 午後7時5分
Page 323 of 453

uuWhen Driving uShifting
322
Driving
■Shift Lever Operation1Shift Lever Operation
NOTICE
When you change the shift lever from (D to (R and
vice versa, come to a complete stop and keep the
brake pedal depressed.
Operating the shift lever be fore the vehicle has come
to a complete standstill can damage the transmission.
Use the shift lever positi on indicator to check the
lever position befo re pulling away.
If the transmission indicator blinks when driving, in
any shift position, there is a problem with the
transmission.
Avoid sudden acceleration and have the transmission
checked by a dealer as soon as possible.
The fuel supply may be cut of f if you drive at engine
speeds in or over the ta chometer red zone (engine
speed limit). If this happe ns, you may experience a
slight jolt.
It may not be possible to operate the shift lever if the
brake pedal is applied while the shift lever release
button is pressed.
Depress the brake pedal first.
M (7-Speed Manual Shift Mode)
Indicator/Shift Indicator Tachometer’s red zone
Depress the brake pedal and press
the shift lever rele ase button to shift.
Shift without pressing the shift lever
release button.
Press the shift lever release button
and shift. Shift Lever Position Indicator
15 US FIT-31T5A6000.book 322 ページ 2014年3月6日 木曜日 午後7時5分
Page 328 of 453
327
uuWhen Driving uShifting
Driving
The manual transmission has a lockout mechanism that stops you from accidentally
shifting into
(R from a forward gear while the ve hicle is moving above a certain
speed.
If you cannot shift to
(R when the vehicle is stopped, do the following: 1.Depress the clutch pedal, move the shift
lever all the way to the left, and shift to
(R.
2. If you still cannot shift into
(R, apply the
parking brake, and turn the ignition switch
to ACCESSORY
(q or LOCK (0*1.
3. Depress the clutch pedal and shift into
(R.
4. Keep depressing the clutch pedal and start
the engine.
Have your vehicle checked by a dealer if you
have to go through this procedure repeatedly.
*1 : Models with the smart entry system have an ENGINE START/STOP button instead of an ignition switch.
■Reverse Lockout
15 US FIT-31T5A6000.book 327 ページ 2014年3月6日 木曜日 午後7時5分
Page 332 of 453

331
uuWhen Driving uCruise Control*
Driving
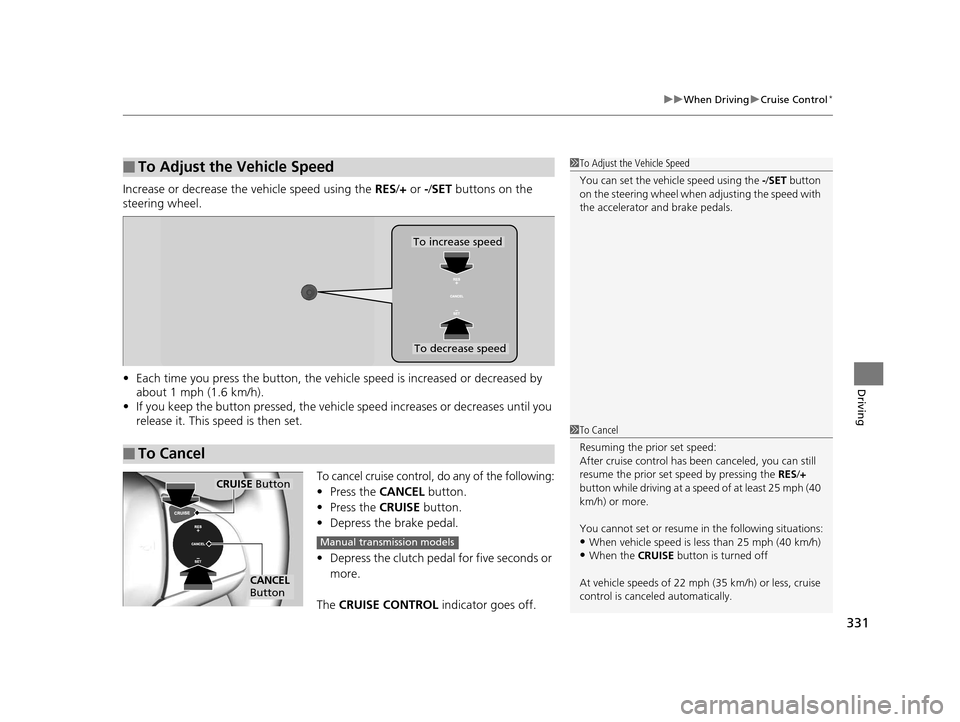
Increase or decrease the vehicle speed using the RES/+ or -/ SET buttons on the
steering wheel.
• Each time you press the button, the vehicl e speed is increased or decreased by
about 1 mph (1.6 km/h).
• If you keep the button pressed, the vehicl e speed increases or decreases until you
release it. This speed is then set.
To cancel cruise control, do any of the following:
• Press the CANCEL button.
• Press the CRUISE button.
• Depress the brake pedal.
• Depress the clutch pedal for five seconds or
more.
The CRUISE CONTROL indicator goes off.
■To Adjust the Vehicle Speed1To Adjust the Vehicle Speed
You can set the vehicle speed using the -/SET button
on the steering wheel when adjusting the speed with
the accelerator and brake pedals.
■To Cancel
To decrease speed
To increase speed
1 To Cancel
Resuming the prior set speed:
After cruise control has be en canceled, you can still
resume the prior set speed by pressing the RES/+
button while driving at a speed of at least 25 mph (40
km/h) or more.
You cannot set or resume in the following situations:
•When vehicle speed is less than 25 mph (40 km/h)•When the CRUISE button is turned off
At vehicle speeds of 22 m ph (35 km/h) or less, cruise
control is canceled automatically.
CRUISE Button
CANCEL
Button
Manual transmission models
15 US FIT-31T5A6000.book 331 ページ 2014年3月6日 木曜日 午後7時5分
Page 333 of 453

332
uuWhen Driving uVehicle Stability Assist (VSA® ), aka Electronic Stability Control (ESC), System
Driving
Vehicle Stability Assist (VSA®), aka Electronic
Stability Control (ESC), System
VSA ® helps to stabilize the vehicle during cornering if the vehicle turns more or less
than what was intended. It also assists in maintaining traction on slippery surfaces.
It does so by regulating engine output and selectively applying the brakes.
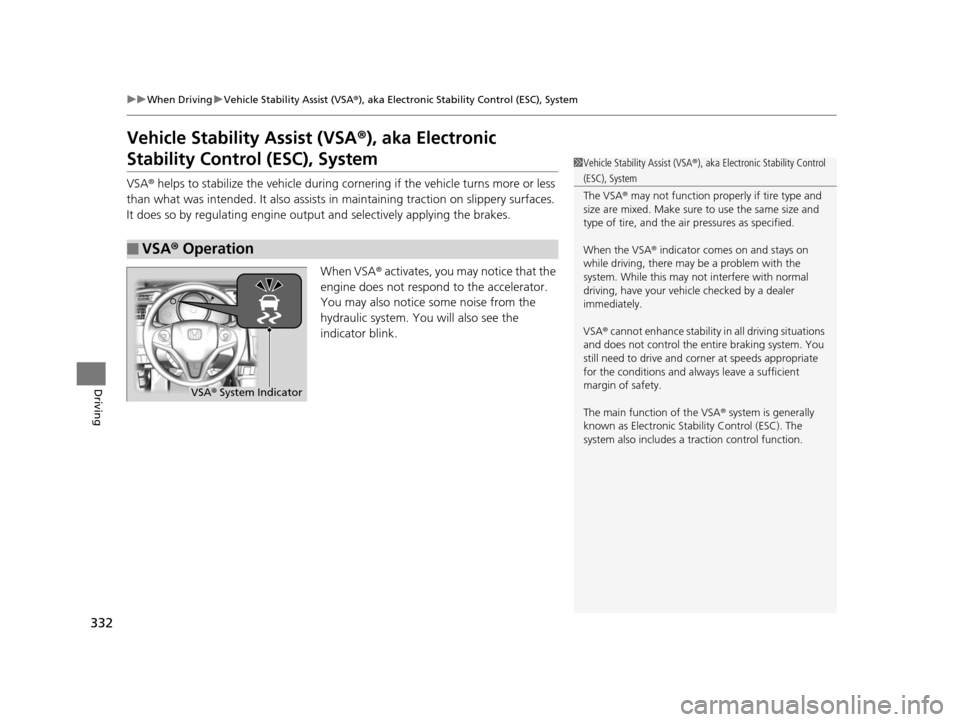
When VSA® activates, you may notice that the
engine does not respond to the accelerator.
You may also notice some noise from the
hydraulic system. You will also see the
indicator blink.
■VSA ® Operation
1 Vehicle Stability Assist (VSA ®), aka Electronic Stability Control
(ESC), System
The VSA ® may not function properl y if tire type and
size are mixed. Make sure to use the same size and
type of tire, and the air pressures as specified.
When the VSA ® indicator comes on and stays on
while driving, there may be a problem with the
system. While this may not interfere with normal
driving, have your vehi cle checked by a dealer
immediately.
VSA ® cannot enhance stability in all driving situations
and does not control the entire braking system. You
still need to drive and corner at speeds appropriate
for the conditions and always leave a sufficient
margin of safety.
The main function of the VSA ® system is generally
known as Electronic Stab ility Control (ESC). The
system also includes a traction control function.
VSA® System Indicator
15 US FIT-31T5A6000.book 332 ページ 2014年3月6日 木曜日 午後7時5分
Page 341 of 453
340
Driving
Braking
Brake System
Use the parking brake to keep the vehicle stationary when parking.To apply:
Pull the lever fully up without pressing the
release button.
To release:
1. Pull the lever slightly, and press and hold
the release button.
2. Lower the lever down all the way, then
release the button.
■Parking Brake1Parking Brake
NOTICE
Release the parking brake fu lly before driving. The
rear brakes and axle can be damaged if you drive
with the parki ng brake applied.
If you start driving without fully releasing the parking
brake, a buzzer sounds as a warning.
Always apply the parking brake when parking.
15 US FIT-31T5A6000.book 340 ページ 2014年3月6日 木曜日 午後7時5分
Page 342 of 453

341
uuBraking uBrake System
Driving
Your vehicle is equipped with disc brakes at the front, and drum brakes in the rear
wheels. A vacuum power assist helps reduce the effort needed on the brake pedal.
The brake assist system increases the st opping force when you depress the brake
pedal hard in an emergency situation. The anti-lock brake system (ABS) helps you
retain steering control wh en braking very hard.
2Brake Assist System P. 343
2 Anti-lock Brake System (ABS) P. 342
■Foot Brake1Foot Brake
Check the brakes after driving through deep water,
or if there is a buildup of road surface water. If
necessary, dry the brakes by lightly depressing the
pedal several times.
If you hear a continuous me tallic friction sound when
applying the brakes, the brake pads need to be
replaced. Have your vehi cle checked by a dealer.
Constantly using the brak e pedal while going down a
long hill builds up heat, which reduces the brake
effectiveness. Apply engine braking by taking your
foot off the accelerator pe dal and downshifting to a
lower gear/speed position. With manual transmission
use a lower gear for gr eater engine braking.
Do not rest your foot on the brake pedal while
driving, as it will lightly apply the brakes and cause
them to lose effectiveness over time and reduce pad
life. It will also conf use drivers behind you.
15 US FIT-31T5A6000.book 341 ページ 2014年3月6日 木曜日 午後7時5分