Page 326 of 453
325
uuWhen Driving uShifting
Continued
Driving
Shifting
Fully depress the clutch pedal to operate the shift lever and change gears, then
slowly release the pedal.
Depress the clutch pedal, and pause fo r a few seconds before shifting into
(R, or
shift into one of the forward gears for a mo ment. This stops the gears so they do not
“grind.”
■Shift Lever Operation
Manual transmission models
1 Shifting
NOTICE
Do not shift to (R before the vehicle comes to a
complete stop.
Shifting to
( R before stopping can damage the
transmission.
NOTICE
Before downshifting, make su re the engine will not
go into the tachometer’s red zone. Should this occur,
it can severely da mage your engine.
15 US FIT-31T5A6000.book 325 ページ 2014年3月6日 木曜日 午後7時5分
Page 327 of 453
uuWhen Driving uShifting
326
Driving
When you are not shifting, do not rest your
foot on the clutch pedal. This can cause your
clutch to wear out faster. 1Shifting
Recommended Shift Points
Driving in the highest gear that allows the engine to
run and accelerate smoothly helps to optimize fuel
economy and effective emissions control. The
following shift points are recommended:
If you exceed the maximum speed for the gear you
are in, the engine speed will enter into the
tachometer’s red zone. When this happens, you may
experience a slight jolt. Shift Up Normal Acceleration
1st to 2nd16 mph (26 km/h)
2nd to 3rd 26 mph (42 km/h)
3rd to 4th35 mph (56 km/h)
4th to 5th 41 mph (66 km/h)
5th to 6th43 mph (69 km/h)
15 US FIT-31T5A6000.book 326 ページ 2014年3月6日 木曜日 午後7時5分
Page 328 of 453
327
uuWhen Driving uShifting
Driving
The manual transmission has a lockout mechanism that stops you from accidentally
shifting into
(R from a forward gear while the ve hicle is moving above a certain
speed.
If you cannot shift to
(R when the vehicle is stopped, do the following: 1.Depress the clutch pedal, move the shift
lever all the way to the left, and shift to
(R.
2. If you still cannot shift into
(R, apply the
parking brake, and turn the ignition switch
to ACCESSORY
(q or LOCK (0*1.
3. Depress the clutch pedal and shift into
(R.
4. Keep depressing the clutch pedal and start
the engine.
Have your vehicle checked by a dealer if you
have to go through this procedure repeatedly.
*1 : Models with the smart entry system have an ENGINE START/STOP button instead of an ignition switch.
■Reverse Lockout
15 US FIT-31T5A6000.book 327 ページ 2014年3月6日 木曜日 午後7時5分
Page 332 of 453

331
uuWhen Driving uCruise Control*
Driving
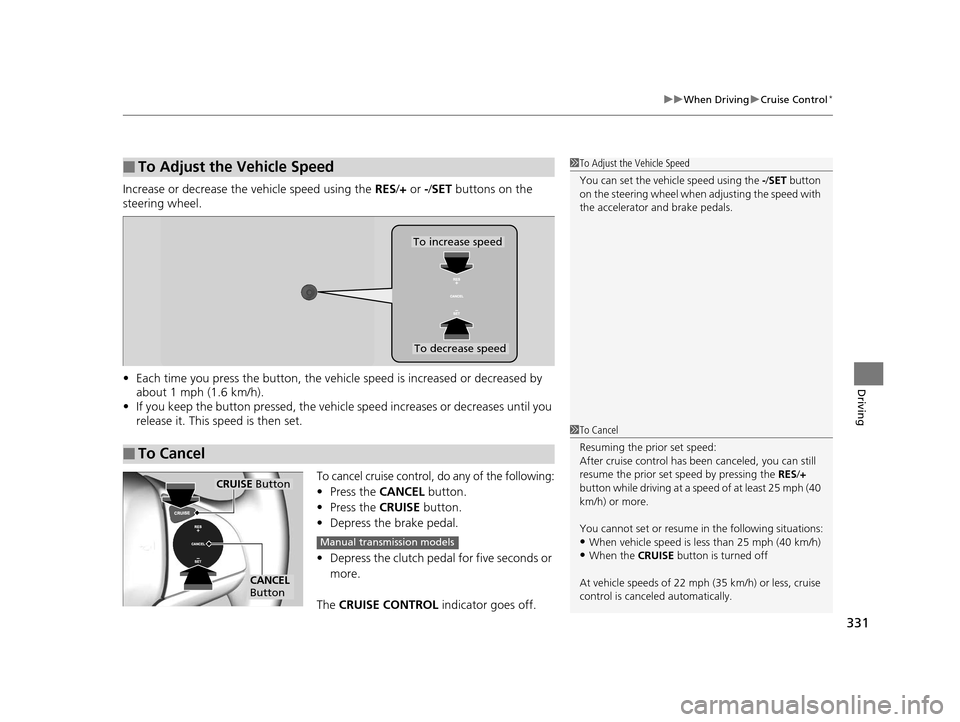
Increase or decrease the vehicle speed using the RES/+ or -/ SET buttons on the
steering wheel.
• Each time you press the button, the vehicl e speed is increased or decreased by
about 1 mph (1.6 km/h).
• If you keep the button pressed, the vehicl e speed increases or decreases until you
release it. This speed is then set.
To cancel cruise control, do any of the following:
• Press the CANCEL button.
• Press the CRUISE button.
• Depress the brake pedal.
• Depress the clutch pedal for five seconds or
more.
The CRUISE CONTROL indicator goes off.
■To Adjust the Vehicle Speed1To Adjust the Vehicle Speed
You can set the vehicle speed using the -/SET button
on the steering wheel when adjusting the speed with
the accelerator and brake pedals.
■To Cancel
To decrease speed
To increase speed
1 To Cancel
Resuming the prior set speed:
After cruise control has be en canceled, you can still
resume the prior set speed by pressing the RES/+
button while driving at a speed of at least 25 mph (40
km/h) or more.
You cannot set or resume in the following situations:
•When vehicle speed is less than 25 mph (40 km/h)•When the CRUISE button is turned off
At vehicle speeds of 22 m ph (35 km/h) or less, cruise
control is canceled automatically.
CRUISE Button
CANCEL
Button
Manual transmission models
15 US FIT-31T5A6000.book 331 ページ 2014年3月6日 木曜日 午後7時5分
Page 372 of 453

371
uuMaintenance Under the Hood uBrake Fluid
Maintenance
Brake Fluid
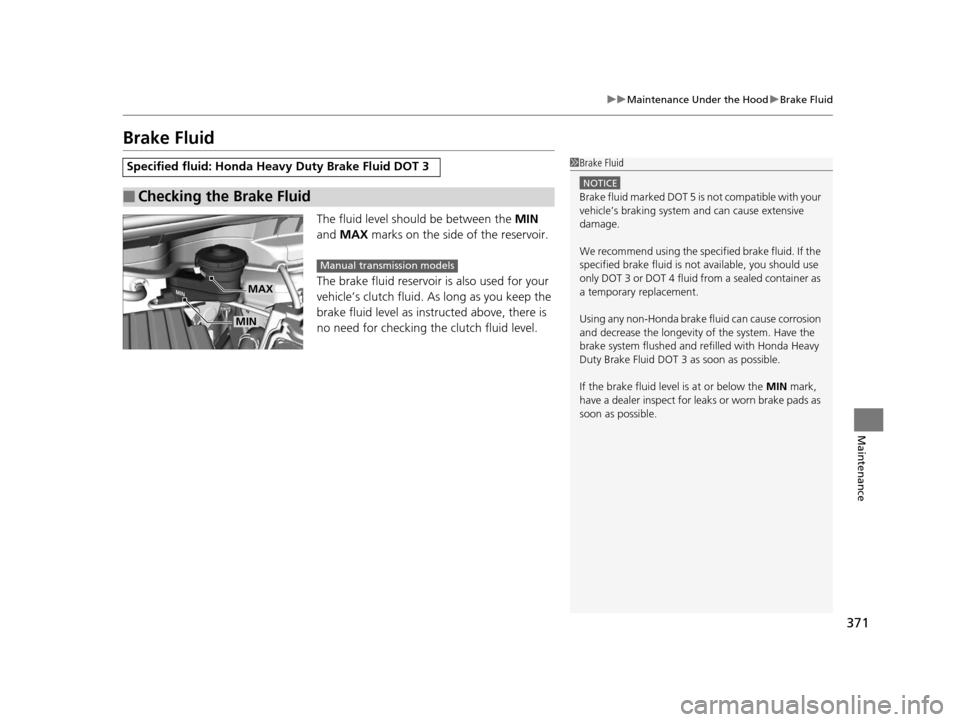
The fluid level should be between the MIN
and MAX marks on the side of the reservoir.
The brake fluid reservoir is also used for your
vehicle’s clutch fluid. As long as you keep the
brake fluid level as ins tructed above, there is
no need for checking the clutch fluid level.
Specified fluid: Honda Heav y Duty Brake Fluid DOT 3
■Checking the Brake Fluid
1Brake Fluid
NOTICE
Brake fluid marked DOT 5 is not compatible with your
vehicle’s braking system and can cause extensive
damage.
We recommend using the specif ied brake fluid. If the
specified brake fluid is not available, you should use
only DOT 3 or DOT 4 fluid fr om a sealed container as
a temporary replacement.
Using any non-Honda brake fluid can cause corrosion
and decrease the longevity of the system. Have the
brake system flushed and re filled with Honda Heavy
Duty Brake Fluid DOT 3 as soon as possible.
If the brake fluid level is at or below the MIN mark,
have a dealer inspect for l eaks or worn brake pads as
soon as possible.
MIN
MAX
Manual transmission models
15 US FIT-31T5A6000.book 371 ページ 2014年3月6日 木曜日 午後7時5分
Page 413 of 453
412
uuEngine Does Not Start uIf the Smart Entry Remote Battery is Weak
Handling the Unexpected
If the Smart Entry Remote Battery is Weak
If the beeper sounds, the indicator on the ENGINE START/STOP button flashes,
and the engine won’t start.
Start the engine as follows. 1.Touch the center of the ENGINE START/
STOP button with the H logo on the smart
entry remote while the indicator on the
ENGINE START/STOP button is flashing.
The buttons on the smart entry remote
should be facing you.
u The indicator flashes for about 30
seconds.
2. Depress the brake pedal (automatic
transmission) or clutch pedal (manual
transmission) and press the ENGINE
START/STOP button within 10 seconds
after the beeper sounds and the indicator
stays on.
u If you don’t depress the pedal, the mode
will change to ACCESSORY.
Models with smart entry system
ENGINE
START
STOP
15 US FIT-31T5A6000.book 412 ページ 2014年3月6日 木曜日 午後7時5分
Page 424 of 453

423Continued
Handling the Unexpected
Fuses
Fuse Locations
If any electrical devices are not working,
turn the ignition switch to LOCK
(0*1 and
check to see if any appl icable fuse is blown.
■Fuse box A
Located near the brake fluid reservoir. Push
the tabs to open the box.
Fuse locations are shown on the fuse box
cover. Locate the fuse in question by the
fuse number and box cover number.
■Engine Compartment Fuse Box
Tab
■Circuit protected and fuse rating
Circuit ProtectedAmps
1Headlight Low Beam Main20 A
2CDC*(30 A)
3Hazard10 A
4DBW15 A
5Wiper(30 A)
6Stop10 A
7IGP15 A
8IG Coil15 A
9ECP*(10 A)
10INJ(20 A)
11––
12Main Fan30 A
13Starter SW(30 A)
14MG Clutch7.5 A
15Battery Sensor(7.5 A)
16––
17Daytime Running Lights(7.5 A)
18Horn10 A
19Fog Light*(15 A)
20––
*1 : Models with the smart entry system have an ENGINE START/STOP button instead of an ignition
switch.
Circuit ProtectedAmps
21Back Up Main15 A
22Interior Lights7.5 A
23Sub Fan(30 A)
24––
25Smart Entry Auto Start*(7.5 A)
26ST MG(7.5 A)
27––
28––
29Back Up(10 A)
30IGP LAF(10 A)
31IGPS(7.5 A)
32Right Headlight Low Beam10 A
33Left Headlight Low Beam10 A
* Not available on all models
15 US FIT-31T5A6000.book 423 ページ 2014年3月6日 木曜日 午後7時5分