2015 HONDA CIVIC COUPE audio
[x] Cancel search: audioPage 280 of 441

Continued
279
uuBluetooth ® HandsFreeLink ®u HFL Menus
Features
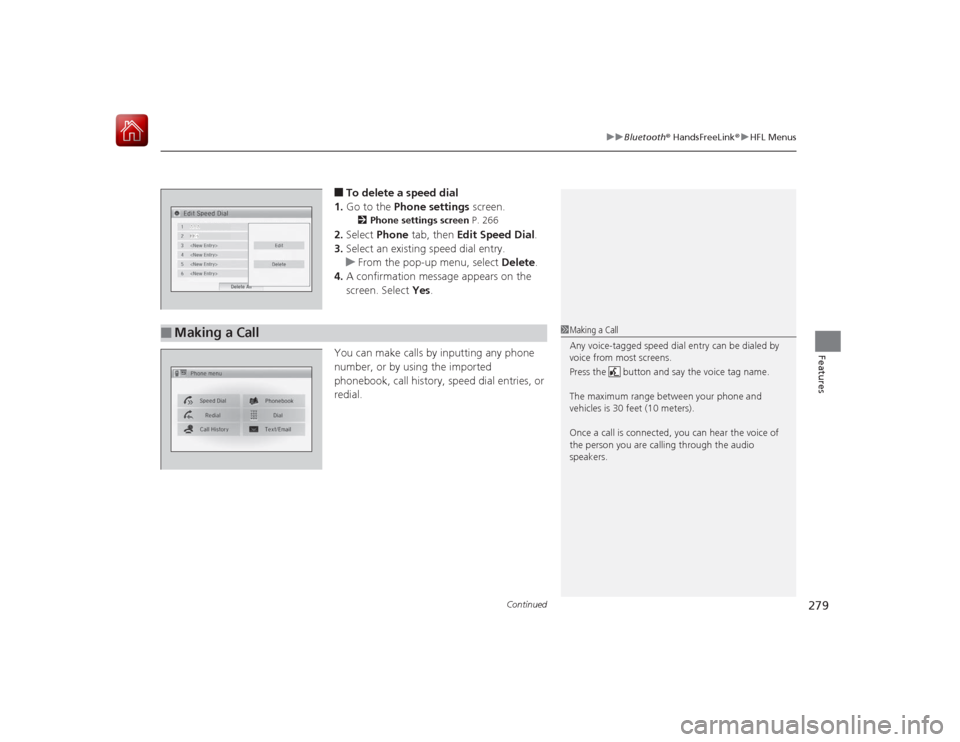
■To delete a speed dial
1. Go to the Phone settings screen.2Phone settings screen P. 266
2.Select Phone tab, then Edit Speed Dial .
3. Select an existing speed dial entry.
u From the pop-up menu, select Delete.
4. A confirmation message appears on the
screen. Select Yes.
You can make calls by inputting any phone
number, or by using the imported
phonebook, call history, speed dial entries, or
redial.
■
Making a Call
1 Making a Call
Any voice-tagged speed dial entry can be dialed by
voice from most screens.
Press the button and say the voice tag name.
The maximum range between your phone and
vehicles is 30 feet (10 meters).
Once a call is connected, you can hear the voice of
the person you are calling through the audio
speakers.
Page 321 of 441

320
uuWhen Driving uLaneWatch
TM*
Driving
LaneWatch
TM
*
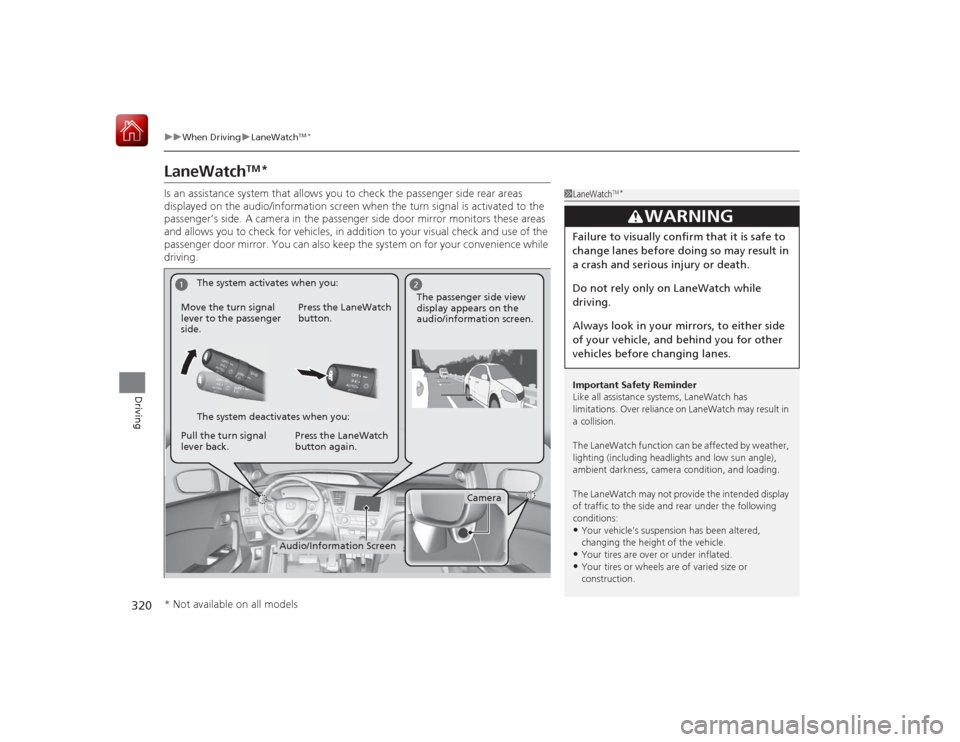
Is an assistance system that allows you to check the passenger side rear areas
displayed on the audio/information screen when the turn signal is activated to the
passenger’s side. A camera in the passenger side door mirror monitors these areas
and allows you to check for vehicles, in addition to your visual check and use of the
passenger door mirror. You can also keep the system on for your convenience while
driving.
1LaneWatch
TM*
Important Safety Reminder
Like all assistance systems, LaneWatch has
limitations. Over reliance on LaneWatch may result in
a collision.
The LaneWatch function can be affected by weather, lighting (including headlights and low sun angle),
ambient darkness, camera condition, and loading.
The LaneWatch may not provide the intended display
of traffic to the side and rear under the following
conditions:•Your vehicle’s suspension has been altered,
changing the height of the vehicle.•Your tires are over or under inflated.•Your tires or wheels ar e of varied size or
construction.
3
WARNING
Failure to visually confirm that it is safe to
change lanes before doing so may result in
a crash and serious in jury or death.
Do not rely only on LaneWatch while
driving.
Always look in your mirrors, to either side
of your vehicle, and behind you for other
vehicles before changing lanes.
1
2
Camera
Audio/Information Screen
Move the turn signal
lever to the passenger
side.
Press the LaneWatch
button.
Pull the turn signal
lever back. Press the LaneWatch
button again. The passenger side view
display appears on the
audio/information screen.
The system activates when you:
The system deactivates when you:
* Not available on all models
Page 322 of 441

321
uuWhen Driving uLaneWatch
TM*
Driving
■Customizing the LaneWatch settings
You can customize the following items using the audio/information screen.
• Show with Turn Signal : Selects whether LaneWatch monitor comes on when
you operate the turn signal light lever.
• Display Time after Turn Signal Off : Changes the length of time the LaneWatch
display stays on after you pull the turn signal lever back.
• Reference Lines : Selects whether the reference lines appear on the LaneWatch
monitor.
• Next Maneuver Pop up
*: Selects whether a turn direction screen of the
navigation system interrupts the LaneWatch display.
• Display : Allows for display adjustments of items, such as brightness, and tint.
This setting is part of the Audio setup group.
2Customized Features
* P. 220
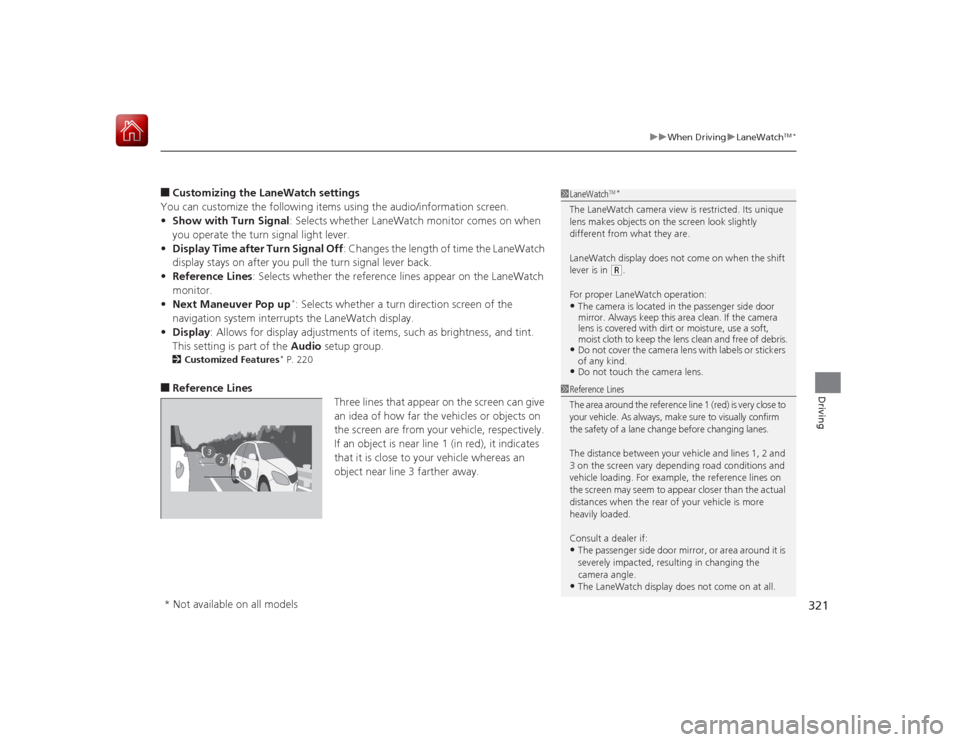
■Reference Lines
Three lines that appear on the screen can give
an idea of how far the vehicles or objects on
the screen are from your vehicle, respectively.
If an object is near line 1 (in red), it indicates
that it is close to your vehicle whereas an
object near line 3 farther away.
1 LaneWatch
TM*
The LaneWatch camera view is restricted. Its unique
lens makes objects on the screen look slightly
different from what they are.
LaneWatch display does not come on when the shift
lever is in
(R.
For proper LaneWatch operation:
•The camera is located in the passenger side door
mirror. Always keep this area clean. If the camera
lens is covered with dirt or moisture, use a soft,
moist cloth to keep the lens clean and free of debris.•Do not cover the camera lens with labels or stickers
of any kind.•Do not touch the camera lens.
2
3
1
1 Reference Lines
The area around the reference line 1 (red) is very close to
your vehicle. As always, make sure to visually confirm
the safety of a lane change before changing lanes.
The distance between your vehicle and lines 1, 2 and
3 on the screen vary depending road conditions and
vehicle loading. For example, the reference lines on
the screen may seem to appear closer than the actual
distances when the rear of your vehicle is more
heavily loaded.
Consult a dealer if:•The passenger side door mirror, or area around it is
severely impacted, resulting in changing the
camera angle.•The LaneWatch display does not come on at all.
* Not available on all models
Page 332 of 441

331Driving
Rearview Camera
*
About Your Rearview CameraFor models with the navigation system, see the Navigation System Manual for the
rearview camera.
The i-MID can display your vehicle’s rear view.
The display automatically changes to a rear view when the shift lever is moved to (R
.
The audio/information screen can display your vehicle’s rear view. The display
automatically changes to the rear view when the shift lever is moved to
(R
.
The rearview camera has a unique lens that makes objects appear closer or further
than they actually are.
■
Rearview Camera Display Area
1 About Your Rearview Camera
The rear camera view is restricted. You cannot see
the corner ends of the bumper or what is underneath
the bumper. Its unique lens also makes objects
appear closer or farther than they actually are.
Visually confirm that it is safe to drive before backing
up. Certain conditions, such as weather, lighting, and
high temperatures, may also restrict the rear view. Do
not rely on the rearview display which does not give
you all information about conditions at the back of
your vehicle.
If the camera lens is covered with dirt or moisture,
use a soft, moist cloth to keep the lens clean and free
of debris.
You can change the Fixed Guideline and Dynamic
Guideline settings.
2 Customized Features
* P. 220
Fixed Guideline
On : Guidelines appear when you shift into
(R.
Off : Guidelines do not appear when the dynamic
guideline is off.
Dynamic Guideline
On : Guidelines move according to the steering wheel
direction.
Off : Guidelines do not move.
Models with display audio system
Models with navigation systemModels without navigation systemModels with one displayModels without navigation systemModels with display audio system
Bumper
Guidelines
Approx. 118 in (3 m)
Approx. 79 in (2 m) Approx. 39 in (1 m)
Approx. 20 in (0.5 m)
Approx. 118 in (3 m) Approx. 79 in (2 m) Approx. 39 in (1 m) Camera
* Not available on all models
Page 382 of 441

381Maintenance
BatteryChecking the Battery
Check the battery terminals for corrosion
monthly.
If your vehicle's battery is disconnected or goes dead:
• The audio system is disabled.
2 Reactivating the audio system P. 163
•The clock resets.
2 Adjusting the Clock P. 100
•The navigation system
* is disabled.
2 Refer to the Navigation System Manual
Charging the BatteryDisconnect both battery cables to prevent damaging your vehicle's electrical system.
Always disconnect the negative (–) cab le first, and reconnect it last.
1BatteryWARNING: Battery post, terminals,
and related accessori es contain lead
and lead compounds.
Wash your hands after handling.When you find corrosion, clean the battery terminals
by applying a baking powder and water solution.
Clean the terminal with a damp towel. Cloth/towel
dry the battery. Coat the terminals with grease to
help prevent future corrosion.
When replacing the battery, the replacement must be
of the same specifications.
Please consult a dealer for more information.
3
WARNING
The battery gives off explosive hydrogen
gas during normal operation.
A spark or flame can cause the battery to
explode with enough force to kill or
seriously hurt you.
When conducting any battery
maintenance, wear protective clothing and
a face shield, or have a skilled technician do
it.
* Not available on all models
Page 386 of 441

385
Continued
Maintenance
CleaningInterior CareUse a damp cloth with a mixture of mild detergent and warm water to remove dirt.
Use a clean cloth to remove detergent residue.
Use a soft brush with a mixture of mild soap and warm water to clean the seat belts.
Let the belts air dry. Wipe the openings of the seat belt anchors using a clean cloth.■
Cleaning Seat Belts
1Interior Care
Do not spill liquids inside the vehicle.
Electrical devices and systems may malfunction if
liquids are splashed on them.
Do not use silicone based sprays on electrical devices
such as audio devices and switches.
Doing so may cause the items to malfunction or a fire
inside the vehicle.
If a silicone based spray is inadvertently used on
electrical devices, consult a dealer.
Depending on their composition, chemicals and
liquid aromatics may cause discoloration, wrinkles,
and cracking to resin-based parts and textiles.
Do not use alkali solvents or organic solvents such as
benzene or gasoline.
After using chemicals, make sure to gently wipe them
away using a dry cloth.
Do not place used cloths on top of resin based parts
or textiles for long periods of time without washing.
Opening
Page 404 of 441

403
Continued
Handling the Unexpected
Jump StartingTurn off the power to electric devices, such as audio and lights. Turn off the engine,
then open the hood. 1.Connect the first jumper cable to your
vehicle's battery + terminal.
2. Connect the other end of the first jumper
cable to the booster battery + terminal.
u Use a 12-volt booster battery only.
u When using an automotive battery
charger to boost your 12-volt battery,
select a lower charging voltage than 15-
volt. Check the charger manual for the
proper setting.
3. Connect the second jumper cable to the
booster battery - terminal.■
Jump Starting Procedure
1Jump Starting
Securely attach the jumper cables clips so that they
do not come off when the engine vibrates. Also be
careful not to tangle the jumper cables or allow the
cable ends to touch each other while attaching or
detaching the jumper cables.
3
WARNING
A battery can explode if you do not follow
the correct procedure, seriously injuring
anyone nearby.
Keep all sparks, open flames, and smoking
materials away from the battery.
Booster Battery1.8 ℓ engine models2.4 ℓ engine modelsBooster Battery
Page 426 of 441

425Information
Devices that Emit Radio WavesThe following products and systems on your vehicle emit radio waves when in
operation.
Each of the above complies with the appropriate requirements or the required
standards of FCC (Federal Communications Commission) and Industry Canada
Standard, described below:As required by the FCC:
This device complies with Part 15 of the FCC rules. Operation is
subject to the following two conditions: (1) This device may not
cause harmful interference, and (2) this device must accept any
interference received, including interference that may cause
undesired operation.
Changes or mo difications not expressly approved by the party
responsible for compliance could void the user's authority to
operate the equipment.This device complies with Industry Canada Standard RSS-Gen/210/310. Operation is
subject to the following two conditions: (1) this de vice may not cause interference,
and (2) this device must accept any interference, including interference that may
cause undesired operation of the device.Audio SystemBluetooth ® AudioBluetooth® HandsFreeLink ®Immobilizer SystemRemote Transmitter