2015 GMC SIERRA 1500 warning light
[x] Cancel search: warning lightPage 324 of 539
Black plate (59,1)GMC Sierra Owner Manual (GMNA Localizing-U.S/Canada/Mexico-
7299746) - 2015 - crc - 11/11/13
Driving and Operating 9-59
assist on again, select On in the
vehicle personalization menu. The
On with Towbar setting allows for
the parking assist to work properly
with a small item attached to the
trailer hitch. Turn off parking assist
when towing a trailer.
To turn the Rear Vision Camera
(RVC) system rear parking assist
symbols or guidance lines on or off:
1. On the infotainment systemHome screen, press the Settings
screen button, or turn the MENU
knob to highlight Settings and
press MENU.
2. Select Rear Camera.
3. Press Rear Park Assist Symbols or Guidance Lines and then
select Off or On.
Disconnecting the Rear Vision
Camera (RVC)
The RVC must be disconnected if
the tailgate needs to be removed. The RVC is disconnected by
removing the connector from the
electrical junction block mounted on
the left side of the cross member of
the vehicle frame. After
disconnecting, the cap mounted
next to the camera connector must
be relocated so that the open
terminals on the junction block are
covered.
Assistance Systems for
Driving
If equipped, when driving the
vehicle, Forward Collision Alert
(FCA) and Lane Departure Warning
(LDW) can help to avoid a crash or
reduce crash damage.
Forward Collision Alert
(FCA) System
If equipped, the FCA system may
help to avoid or reduce the harm
caused by front-end crashes. When
approaching a vehicle ahead too
quickly, FCA provides a red flashing
alert on the windshield and rapidlybeeps or pulses the driver seat.
FCA also lights an amber visual
alert if following another vehicle
much too closely.
FCA detects vehicles within a
distance of approximately 60 m
(197 ft) and operates at speeds
above 40 km/h (25 mph).
{Warning
FCA is a warning system and
does not apply the brakes. When
approaching a slower-moving or
stopped vehicle ahead too rapidly,
or when following a vehicle too
closely, FCA may not provide a
warning with enough time to help
avoid a crash. FCA does not warn
of pedestrians, animals, signs,
guardrails, bridges, construction
barrels, or other objects. Be ready
to take action and apply the
brakes. For more information, see
Defensive Driving on page 9-3.
Page 327 of 539
Black plate (62,1)GMC Sierra Owner Manual (GMNA Localizing-U.S/Canada/Mexico-
7299746) - 2015 - crc - 11/11/13
9-62 Driving and Operating
Lane Departure
Warning (LDW)
If equipped, LDW may help avoid
crashes due to unintentional lane
departures. It may provide a
warning if the vehicle is crossing a
detected lane marking without using
a turn signal in the lane departure
direction. LDW uses a camera
sensor to detect the lane markings.
It only operates at speeds of
56 km/h (35 mph) or greater.
When the vehicle crosses a
detected lane marking, the LDW
indicator will flash and either three
beeps will be sounded from the left
or right side, or three Safety Alert
Seat pulses will occur on the left or
right side of the seat, depending on
the lane departure direction. LDW
will not warn if the turn signal is on
in the departure direction, or if a
sharp maneuver is made.
{Warning
The LDW system is an aid to help
the vehicle stay in the driving
lane. It does not steer the vehicle.
The LDW system may not:
.Provide enough time to avoid
a crash.
.Detect lane markings under
bad weather conditions or if
the windshield is dirty.
.Detect lane markings and will
not detect road edges.
.Warn that the vehicle is
crossing a lane marking if the
system does not detect the
lane marking.
If LDW only detects lane
markings on one side of the road,
it will only warn you when
departing the lane on the side
where it has detected a lane
marker. Even with LDW, always
keep your attention on the road (Continued)
Warning (Continued)
and maintain proper vehicle
position within the lane, or vehicle
damage, injury, or death could
occur. Always keep the
windshield clean and do not use
LDW in bad weather conditions.
How the System Works
The LDW camera sensor is on the
windshield ahead of the rearview
mirror.
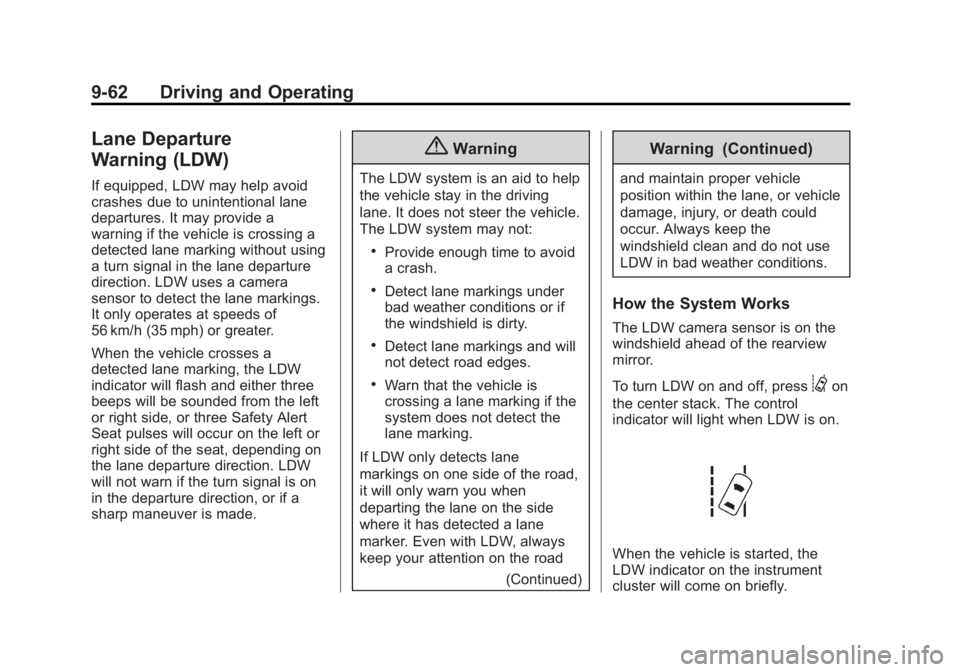
To turn LDW on and off, press
@on
the center stack. The control
indicator will light when LDW is on.
When the vehicle is started, the
LDW indicator on the instrument
cluster will come on briefly.
Page 333 of 539
Black plate (68,1)GMC Sierra Owner Manual (GMNA Localizing-U.S/Canada/Mexico-
7299746) - 2015 - crc - 11/11/13
9-68 Driving and Operating
Be careful not to spill fuel. Do not
top off or overfill the tank and wait a
few seconds after you have finished
pumping before removing the
nozzle. Clean fuel from painted
surfaces as soon as possible. See
Exterior Care on page 10-98.
When replacing the fuel cap, turn it
clockwise until it clicks. It will require
more effort to turn the fuel cap on
the last turn as you tighten it. Make
sure the cap is fully installed. The
diagnostic system can determine if
the fuel cap has been left off or
improperly installed. This would
allow fuel to evaporate into the
atmosphere. SeeMalfunction
Indicator Lamp on page 5-22.
The TIGHTEN GAS CAP message
displays on the Driver Information
Center (DIC) if the fuel cap is not
properly installed. See Fuel System
Messages on page 5-38 for more
information.{Warning
If a fire starts while you are
refueling, do not remove the
nozzle. Shut off the flow of fuel by
shutting off the pump or by
notifying the station attendant.
Leave the area immediately.
{Caution
If a new fuel cap is needed, be
sure to get the right type of cap
from your dealer. The wrong type
of fuel cap might not fit properly,
might cause the malfunction
indicator lamp to light, and could
damage the fuel tank and
emissions system. See
Malfunction Indicator Lamp on
page 5-22.
Filling a Portable Fuel
Container
{Warning
Filling a portable fuel container
while it is in the vehicle can cause
fuel vapors that can ignite either
by static electricity or other
means. You or others could be
badly burned and the vehicle
could be damaged. Always:
.Use approved fuel
containers.
.Remove the container from
the vehicle, trunk, or pickup
bed before filling.
.Place the container on the
ground.
.Place the nozzle inside the fill
opening of the container
before dispensing fuel, and
(Continued)
Page 334 of 539
Black plate (69,1)GMC Sierra Owner Manual (GMNA Localizing-U.S/Canada/Mexico-
7299746) - 2015 - crc - 11/11/13
Driving and Operating 9-69
Warning (Continued)
keep it in contact with the fill
opening until filling is
complete.
.Fill the container no more
than 95% full to allow for
expansion.
.Do not smoke, light matches,
or use lighters while
pumping fuel.
.Avoid using cell phones or
other electronic devices.
Trailer Towing
General Towing
Information
Only use towing equipment that has
been designed for the vehicle.
Contact your dealer or trailering
dealer for assistance with preparing
the vehicle for towing a trailer. Read
the entire section before towing a
trailer.
For towing a disabled vehicle, see
Towing the Vehicle on page 10-93.
For towing the vehicle behind
another vehicle such as a motor
home, seeRecreational Vehicle
Towing on page 10-93.
Driving Characteristics
and Towing Tips
Driving with a Trailer
When towing a trailer:
.Become familiar with the state
and local laws that apply to
trailer towing.
.Do not tow a trailer during the
first 800 km (500 mi) to prevent
damage to the engine, axle,
or other parts.
.Then during the first 800 km
(500 mi) of trailer towing, do not
drive over 80 km/h (50 mph) and
do not make starts at full throttle.
.Vehicles can tow in D (Drive).
Shift the transmission to a lower
gear if the transmission shifts
too often under heavy loads and/
or hilly conditions.
.Turn off Park Assist when
towing.
Page 357 of 539
Black plate (92,1)GMC Sierra Owner Manual (GMNA Localizing-U.S/Canada/Mexico-
7299746) - 2015 - crc - 11/11/13
9-92 Driving and Operating
Operating the vehicle in Tow/Haul
when lightly loaded or with no trailer
at all will not cause damage.
However, there is no benefit to the
selection of Tow/Haul when the
vehicle is unloaded. Such a
selection when unloaded may result
in unpleasant engine and
transmission driving characteristics
and reduced fuel economy. Tow/
Haul is recommended only when
pulling a heavy trailer or a large or
heavy load.
Integrated Trailer Brake
Control System
The vehicle may have an Integrated
Trailer Brake Control (ITBC) system
for use with electric trailer brakes or
most electric over hydraulic trailer
brakes.
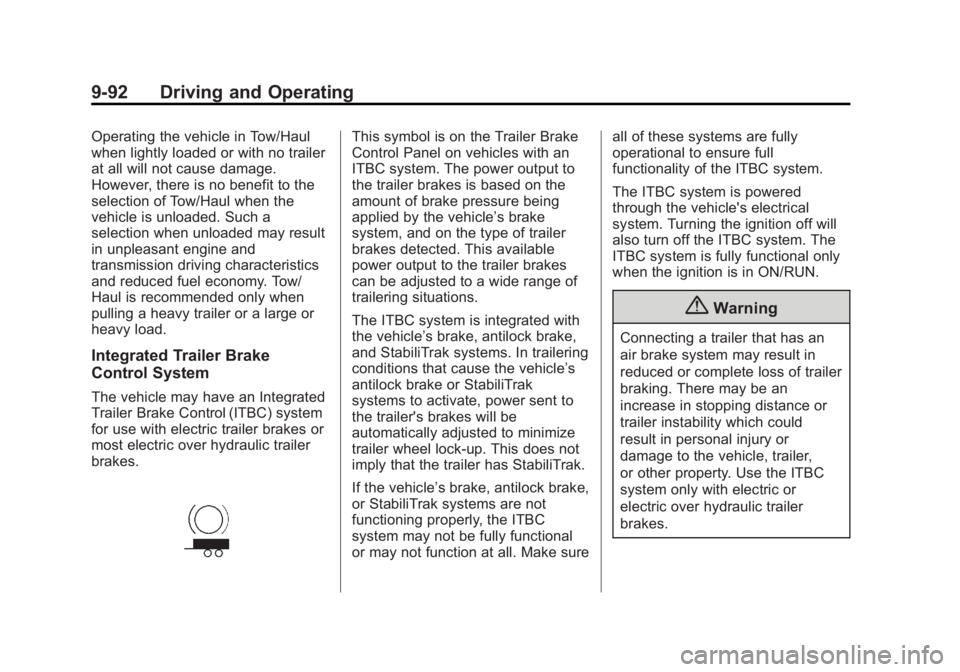
This symbol is on the Trailer Brake
Control Panel on vehicles with an
ITBC system. The power output to
the trailer brakes is based on the
amount of brake pressure being
applied by the vehicle’s brake
system, and on the type of trailer
brakes detected. This available
power output to the trailer brakes
can be adjusted to a wide range of
trailering situations.
The ITBC system is integrated with
the vehicle’s brake, antilock brake,
and StabiliTrak systems. In trailering
conditions that cause the vehicle’s
antilock brake or StabiliTrak
systems to activate, power sent to
the trailer's brakes will be
automatically adjusted to minimize
trailer wheel lock-up. This does not
imply that the trailer has StabiliTrak.
If the vehicle’s brake, antilock brake,
or StabiliTrak systems are not
functioning properly, the ITBC
system may not be fully functional
or may not function at all. Make sure all of these systems are fully
operational to ensure full
functionality of the ITBC system.
The ITBC system is powered
through the vehicle's electrical
system. Turning the ignition off will
also turn off the ITBC system. The
ITBC system is fully functional only
when the ignition is in ON/RUN.
{Warning
Connecting a trailer that has an
air brake system may result in
reduced or complete loss of trailer
braking. There may be an
increase in stopping distance or
trailer instability which could
result in personal injury or
damage to the vehicle, trailer,
or other property. Use the ITBC
system only with electric or
electric over hydraulic trailer
brakes.
Page 361 of 539
Black plate (96,1)GMC Sierra Owner Manual (GMNA Localizing-U.S/Canada/Mexico-
7299746) - 2015 - crc - 11/11/13
9-96 Driving and Operating
continues over multiple ignition
cycles, there is a problem with the
ITBC system. Have the vehicle
serviced.
If either the CHECK TRAILER
WIRING or SERVICE TRAILER
BRAKE SYSTEM message displays
while driving, the ITBC system may
not be fully functional or may not
function at all. When traffic
conditions allow, carefully pull the
vehicle over to the side of the road
and turn the ignition off. Check the
wiring connection to the trailer and
turn the ignition back on. If either of
these messages continues, either
the vehicle or trailer needs service.
A GM dealer may be able to
diagnose and repair problems with
the trailer. However, any diagnosis
and repair of the trailer is not
covered under the vehicle warranty.
Contact your trailer dealer for
assistance with trailer repairs and
trailer warranty information.Trailer Sway
Control (TSC)
Vehicles with StabiliTrak have a
TSC feature. Trailer sway is
unintended side-to-side motion of a
trailer while being towed. If the
vehicle is towing a trailer and the
TSC detects that sway is increasing,
the vehicle brakes are selectively
applied at each wheel, to help
reduce excessive trailer sway. If the
vehicle is equipped with the
Integrated Trailer Brake Control
(ITBC) system, and the trailer has
the electric actuated brake system,
StabiliTrak may also apply the trailer
brakes.
If TSC is enabled, the Traction
Control System (TCS)/StabiliTrak
warning light will flash on the
instrument cluster. Vehicle speed
must be reduced. If trailer sway
continues, StabiliTrak can reduce
engine torque to help slow the
vehicle. SeeTraction Control/
Electronic Stability Control on
page 9-50.
{Warning
Even if the vehicle is equipped
with TSC, trailer sway could result
in loss of control and the vehicle
could crash. If excessive trailer
sway is detected, slow down to a
safe speed. Check the trailer and
vehicle to help correct possible
causes. These could include an
improperly or overloaded trailer,
unrestrained cargo, improper
trailer hitch configuration,
excessive vehicle-trailer speed,
or improperly inflated or incorrect
vehicle or trailer tires. See Towing
Equipment on page 9-87 for
trailer ratings and hitch setup
recommendations.
Adding non-dealer accessories can
affect the vehicle performance. See
Accessories and Modifications on
page 10-3.
Page 368 of 539
Black plate (1,1)GMC Sierra Owner Manual (GMNA Localizing-U.S/Canada/Mexico-
7299746) - 2015 - crc - 11/11/13
Vehicle Care 10-1
Vehicle Care
General Information
General Information . . . . . . . . . . 10-2
California Proposition65 Warning . . . . . . . . . . . . . . . . . 10-2
California Perchlorate Materials Requirements . . . . 10-3
Accessories and Modifications . . . . . . . . . . . . . . . 10-3
Vehicle Checks
Doing Your OwnService Work . . . . . . . . . . . . . . . 10-3
Hood . . . . . . . . . . . . . . . . . . . . . . . . 10-4
Engine Compartment Overview . . . . . . . . . . . . . . . . . . . 10-5
Engine Oil . . . . . . . . . . . . . . . . . . 10-10
Engine Oil Life System . . . . . 10-13
Automatic Transmission Fluid . . . . . . . . . . . . . . . . . . . . . . 10-14
Engine Air Cleaner/Filter . . . . 10-17
Cooling System . . . . . . . . . . . . 10-19
Engine Coolant . . . . . . . . . . . . . 10-20
Engine Overheating . . . . . . . . 10-23
Overheated Engine Protection
Operating Mode . . . . . . . . . . . 10-25 Engine Fan . . . . . . . . . . . . . . . . . 10-25
Power Steering Fluid (1500
Series) . . . . . . . . . . . . . . . . . . . . 10-26
Power Steering Fluid (2500/ 3500 Series) . . . . . . . . . . . . . . 10-26
Washer Fluid . . . . . . . . . . . . . . . 10-27
Brakes . . . . . . . . . . . . . . . . . . . . . 10-28
Brake Fluid . . . . . . . . . . . . . . . . . 10-29
Battery . . . . . . . . . . . . . . . . . . . . . 10-30
Four-Wheel Drive . . . . . . . . . . . 10-31
Front Axle . . . . . . . . . . . . . . . . . . 10-32
Rear Axle . . . . . . . . . . . . . . . . . . 10-33
Noise Control System . . . . . . 10-34
Starter Switch Check . . . . . . . 10-35
Automatic Transmission Shift Lock Control Function
Check . . . . . . . . . . . . . . . . . . . . . 10-35
Ignition Transmission Lock Check . . . . . . . . . . . . . . . . . . . . . 10-35
Park Brake and P (Park) Mechanism Check . . . . . . . . 10-36
Wiper Blade Replacement . . . . . . . . . . . . . . 10-36
Glass Replacement . . . . . . . . 10-37
Headlamp Aiming
Headlamp Aiming . . . . . . . . . . 10-37
Bulb Replacement
Bulb Replacement . . . . . . . . . . 10-37
Halogen Bulbs . . . . . . . . . . . . . . 10-37
LED Lighting . . . . . . . . . . . . . . . 10-37
Headlamps, Front Turn Signal, Sidemarker, and
Parking Lamps . . . . . . . . . . . . 10-38
Fog Lamps . . . . . . . . . . . . . . . . . 10-38
Taillamps (Chassis Cab Models) . . . . . . . . . . . . . . . . . . . 10-39
Taillamps, Turn Signal, Stoplamps, and Back-Up
Lamps . . . . . . . . . . . . . . . . . . . . 10-39
Center High-Mounted Stoplamp (CHMSL) and
Cargo Lamp . . . . . . . . . . . . . . 10-40
License Plate Lamp . . . . . . . . 10-40
Replacement Bulbs . . . . . . . . . 10-40
Electrical System
Electrical System Overload . . . . . . . . . . . . . . . . . . 10-41
Fuses . . . . . . . . . . . . . . . . . . . . . . 10-41
Engine Compartment Fuse Block . . . . . . . . . . . . . . . . . . . . . 10-42
Instrument Panel Fuse Block (Left) . . . . . . . . . . . . . . . 10-46
Instrument Panel Fuse Block (Right) . . . . . . . . . . . . . . . . . . . . 10-48
Page 385 of 539
Black plate (18,1)GMC Sierra Owner Manual (GMNA Localizing-U.S/Canada/Mexico-
7299746) - 2015 - crc - 11/11/13
10-18 Vehicle Care
When to Inspect the Engine Air
Cleaner/Filter
Inspect the air cleaner/filter at the
scheduled maintenance intervals
and replace it at the first oil change
after each 80 000 km (50,000 mi)
interval. SeeMaintenance Schedule
on page 11-3. If driving in dusty/dirty
conditions, inspect the filter at each
engine oil change.
How to Inspect the Engine Air
Cleaner/Filter
To inspect the air cleaner/filter,
remove the engine air cleaner/filter
from the vehicle by following
Steps 1−8. When the engine air
cleaner/filter is removed, lightly
shake it to release loose dust and
dirt. If the engine air cleaner/filter
remains covered with dirt, a new
filter is required. Never use
compressed air to clean the filter. Replacing the Engine Air Cleaner/
Filter
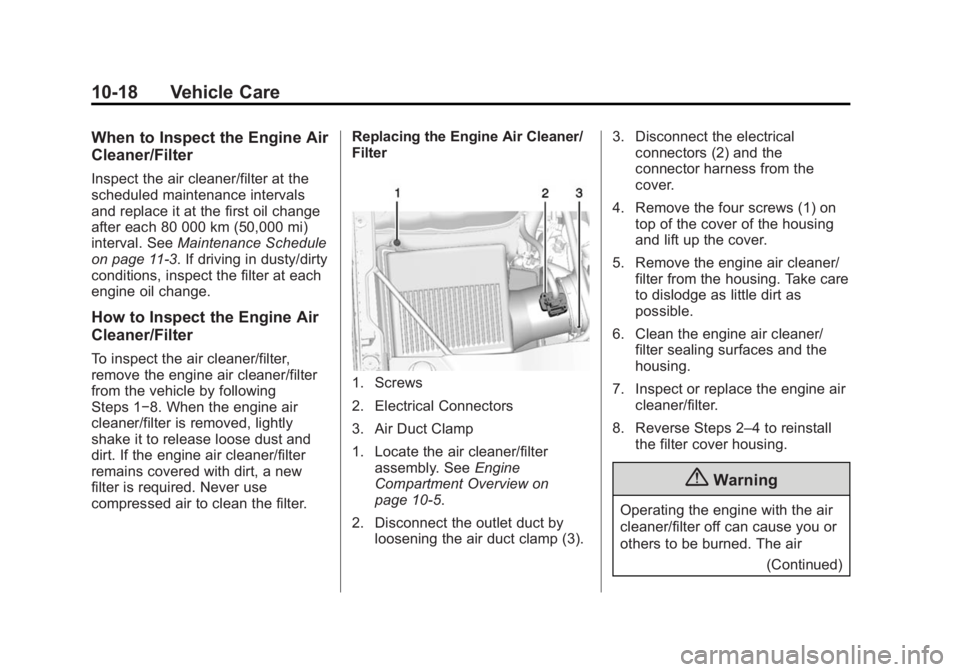
1. Screws
2. Electrical Connectors
3. Air Duct Clamp
1. Locate the air cleaner/filter
assembly. See Engine
Compartment Overview on
page 10-5.
2. Disconnect the outlet duct by loosening the air duct clamp (3). 3. Disconnect the electrical
connectors (2) and the
connector harness from the
cover.
4. Remove the four screws (1) on top of the cover of the housing
and lift up the cover.
5. Remove the engine air cleaner/ filter from the housing. Take care
to dislodge as little dirt as
possible.
6. Clean the engine air cleaner/ filter sealing surfaces and the
housing.
7. Inspect or replace the engine air cleaner/filter.
8. Reverse Steps 2–4 to reinstall the filter cover housing.
{Warning
Operating the engine with the air
cleaner/filter off can cause you or
others to be burned. The air
(Continued)