2015 GMC SIERRA 1500 check engine
[x] Cancel search: check enginePage 393 of 539
Black plate (26,1)GMC Sierra Owner Manual (GMNA Localizing-U.S/Canada/Mexico-
7299746) - 2015 - crc - 11/11/13
10-26 Vehicle Care
increases as the clutch more fully
engages, so an increase in fan
noise may be heard. This is normal
and should not be mistaken as the
transmission slipping or making
extra shifts. It is merely the cooling
system functioning properly. The fan
will slow down when additional
cooling is not required and the
clutch disengages.
This fan noise may also be heard
when starting the engine. It will go
away as the fan clutch partially
disengages.
If the vehicle has electric cooling
fans, the fans may be heard
spinning at low speed during most
everyday driving. The fans may turn
off if no cooling is required. Under
heavy vehicle loading, trailer towing,
high outside temperatures,
or operation of the air conditioning
system, the fans may change to
high speed and an increase in fan
noise may be heard. This is normal
and indicates that the cooling
system is functioning properly. Thefans will change to low speed when
additional cooling is no longer
required.
The electric engine cooling fans
may run after the engine has been
turned. off. This is normal and no
service is required.
Power Steering Fluid
(1500 Series)
The vehicle has electric power
steering and does not use power
steering fluid.
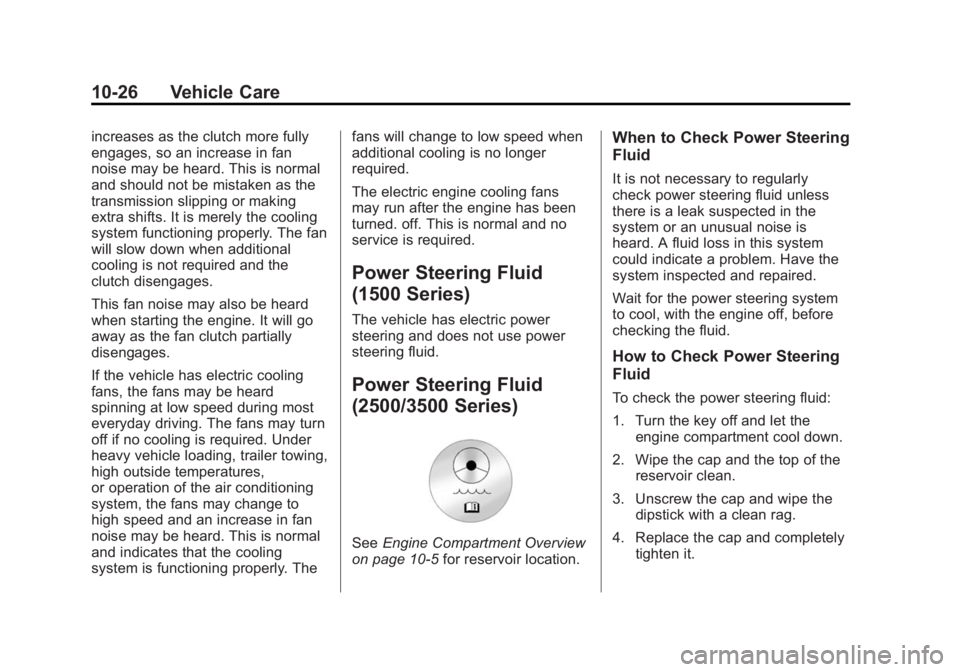
Power Steering Fluid
(2500/3500 Series)
See
Engine Compartment Overview
on page 10-5 for reservoir location.
When to Check Power Steering
Fluid
It is not necessary to regularly
check power steering fluid unless
there is a leak suspected in the
system or an unusual noise is
heard. A fluid loss in this system
could indicate a problem. Have the
system inspected and repaired.
Wait for the power steering system
to cool, with the engine off, before
checking the fluid.
How to Check Power Steering
Fluid
To check the power steering fluid:
1. Turn the key off and let the
engine compartment cool down.
2. Wipe the cap and the top of the reservoir clean.
3. Unscrew the cap and wipe the dipstick with a clean rag.
4. Replace the cap and completely tighten it.
Page 396 of 539
Black plate (29,1)GMC Sierra Owner Manual (GMNA Localizing-U.S/Canada/Mexico-
7299746) - 2015 - crc - 11/11/13
Vehicle Care 10-29
new, approved replacement parts.
If this is not done, the brakes might
not work properly. For example,
installing disc brake pads that are
wrong for the vehicle, can change
the balance between the front and
rear brakes—for the worse. The
braking performance expected can
change in many other ways if the
wrong replacement brake parts are
installed.
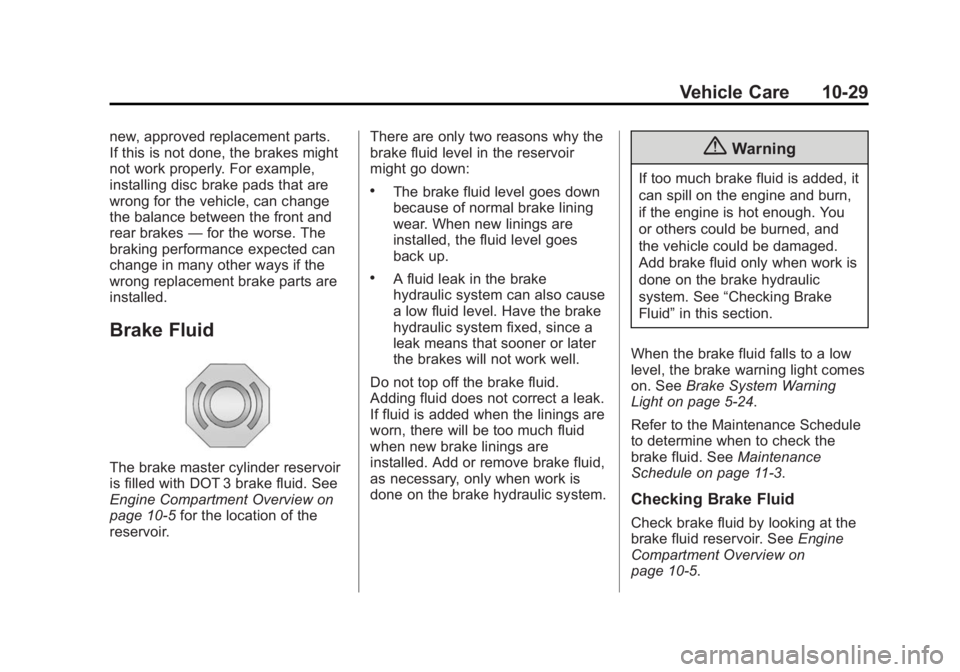
Brake Fluid
The brake master cylinder reservoir
is filled with DOT 3 brake fluid. See
Engine Compartment Overview on
page 10-5 for the location of the
reservoir. There are only two reasons why the
brake fluid level in the reservoir
might go down:
.The brake fluid level goes down
because of normal brake lining
wear. When new linings are
installed, the fluid level goes
back up.
.A fluid leak in the brake
hydraulic system can also cause
a low fluid level. Have the brake
hydraulic system fixed, since a
leak means that sooner or later
the brakes will not work well.
Do not top off the brake fluid.
Adding fluid does not correct a leak.
If fluid is added when the linings are
worn, there will be too much fluid
when new brake linings are
installed. Add or remove brake fluid,
as necessary, only when work is
done on the brake hydraulic system.
{Warning
If too much brake fluid is added, it
can spill on the engine and burn,
if the engine is hot enough. You
or others could be burned, and
the vehicle could be damaged.
Add brake fluid only when work is
done on the brake hydraulic
system. See “Checking Brake
Fluid” in this section.
When the brake fluid falls to a low
level, the brake warning light comes
on. See Brake System Warning
Light on page 5-24.
Refer to the Maintenance Schedule
to determine when to check the
brake fluid. See Maintenance
Schedule on page 11-3.
Checking Brake Fluid
Check brake fluid by looking at the
brake fluid reservoir. See Engine
Compartment Overview on
page 10-5.
Page 397 of 539
Black plate (30,1)GMC Sierra Owner Manual (GMNA Localizing-U.S/Canada/Mexico-
7299746) - 2015 - crc - 11/11/13
10-30 Vehicle Care
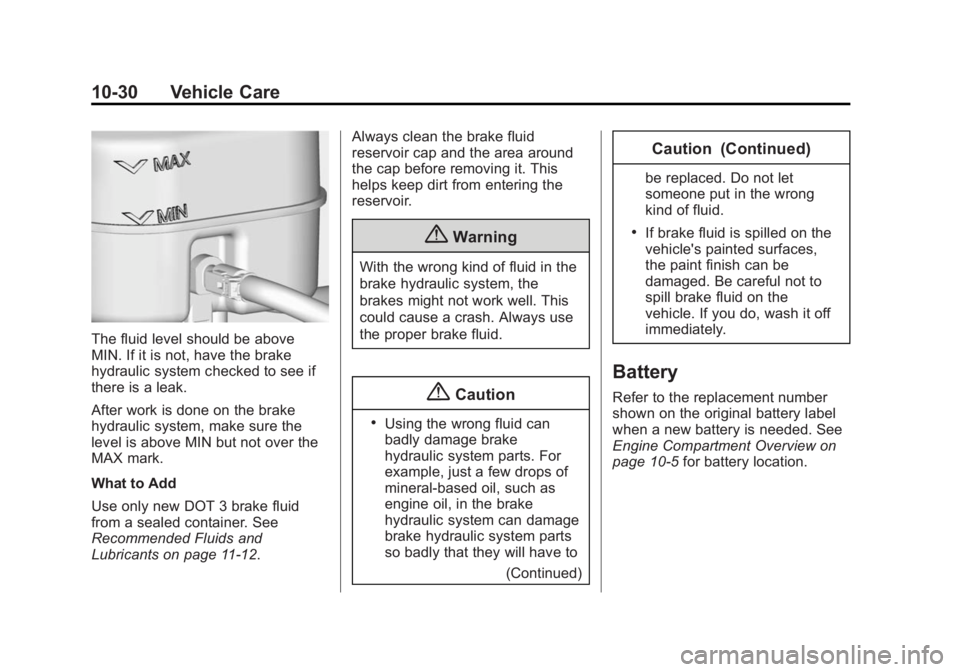
The fluid level should be above
MIN. If it is not, have the brake
hydraulic system checked to see if
there is a leak.
After work is done on the brake
hydraulic system, make sure the
level is above MIN but not over the
MAX mark.
What to Add
Use only new DOT 3 brake fluid
from a sealed container. See
Recommended Fluids and
Lubricants on page 11-12.Always clean the brake fluid
reservoir cap and the area around
the cap before removing it. This
helps keep dirt from entering the
reservoir.
{Warning
With the wrong kind of fluid in the
brake hydraulic system, the
brakes might not work well. This
could cause a crash. Always use
the proper brake fluid.
{Caution
.Using the wrong fluid can
badly damage brake
hydraulic system parts. For
example, just a few drops of
mineral-based oil, such as
engine oil, in the brake
hydraulic system can damage
brake hydraulic system parts
so badly that they will have to
(Continued)
Caution (Continued)
be replaced. Do not let
someone put in the wrong
kind of fluid.
.If brake fluid is spilled on the
vehicle's painted surfaces,
the paint finish can be
damaged. Be careful not to
spill brake fluid on the
vehicle. If you do, wash it off
immediately.
Battery
Refer to the replacement number
shown on the original battery label
when a new battery is needed. See
Engine Compartment Overview on
page 10-5for battery location.
Page 400 of 539
Black plate (33,1)GMC Sierra Owner Manual (GMNA Localizing-U.S/Canada/Mexico-
7299746) - 2015 - crc - 11/11/13
Vehicle Care 10-33
What to Use
Refer toRecommended Fluids and
Lubricants on page 11-12 to
determine what kind of lubricant
to use.
Rear Axle
When to Check Lubricant
It is not necessary to regularly
check rear axle fluid unless a leak is
suspected or an unusual noise is
heard. A fluid loss could indicate a
problem. Have it inspected and
repaired.
All axle assemblies are filled by
volume of fluid during production.
They are not filled to reach a certain
level. When checking the fluid level
on any axle, variations in the
readings can be caused by factory
fill differences between the minimum
and the maximum fluid volume.
Also, if a vehicle has just been
driven before checking the fluid
level, it may appear lower than
normal because fluid has traveled out along the axle tubes and has
not drained back to the sump area.
Therefore, a reading taken
five minutes after the vehicle has
been driven will appear to have a
lower fluid level than a vehicle that
has been stationary for an hour or
two. The rear axle assembly must
be supported on a flat, level surface
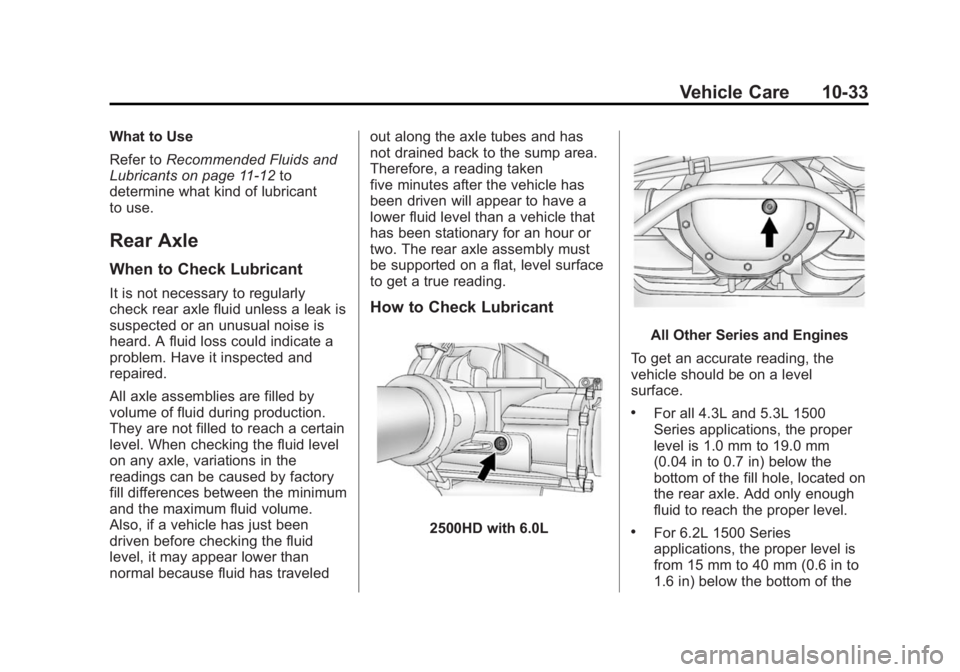
to get a true reading.How to Check Lubricant
2500HD with 6.0L
All Other Series and Engines
To get an accurate reading, the
vehicle should be on a level
surface.
.For all 4.3L and 5.3L 1500
Series applications, the proper
level is 1.0 mm to 19.0 mm
(0.04 in to 0.7 in) below the
bottom of the fill hole, located on
the rear axle. Add only enough
fluid to reach the proper level.
.For 6.2L 1500 Series
applications, the proper level is
from 15 mm to 40 mm (0.6 in to
1.6 in) below the bottom of the
Page 402 of 539
Black plate (35,1)GMC Sierra Owner Manual (GMNA Localizing-U.S/Canada/Mexico-
7299746) - 2015 - crc - 11/11/13
Vehicle Care 10-35
Air Intake:
.Removal of the air cleaner
silencer.
.Modification of the air cleaner.
Exhaust:
.Removal of the muffler and/or
resonator.
.Removal of the exhaust pipes
and exhaust pipe clamps.
Starter Switch Check
{Warning
When you are doing this
inspection, the vehicle could
move suddenly. If the vehicle
moves, you or others could be
injured.
1. Before starting this check, be sure there is enough room
around the vehicle. 2. Apply both the parking brake
and the regular brake.
Do not use the accelerator
pedal, and be ready to turn off
the engine immediately if it
starts.
3. Try to start the engine in each gear. The vehicle should start
only in P (Park) or N (Neutral).
If the vehicle starts in any other
position, contact your dealer for
service.
Automatic Transmission
Shift Lock Control
Function Check
{Warning
When you are doing this
inspection, the vehicle could
move suddenly. If the vehicle
moves, you or others could be
injured. 1. Before starting this check, be
sure there is enough room
around the vehicle. It should be
parked on a level surface.
2. Apply the parking brake. Be ready to apply the regular brake
immediately if the vehicle begins
to move.
3. With the engine off, turn the ignition on, but do not start the
engine. Without applying the
regular brake, try to move the
shift lever out of P (Park) with
normal effort. If the shift lever
moves out of P (Park), contact
your dealer for service.
Ignition Transmission
Lock Check
While parked and with the parking
brake set, try to turn the ignition to
LOCK/OFF in each shift lever
position.
.The ignition should turn to
LOCK/OFF only when the shift
lever is in P (Park).
Page 403 of 539
Black plate (36,1)GMC Sierra Owner Manual (GMNA Localizing-U.S/Canada/Mexico-
7299746) - 2015 - crc - 11/11/13
10-36 Vehicle Care
.The ignition key should come
out only in LOCK/OFF.
Contact your dealer if service is
required.
Park Brake and P (Park)
Mechanism Check
{Warning
When you are doing this check,
the vehicle could begin to move.
You or others could be injured
and property could be damaged.
Make sure there is room in front
of the vehicle in case it begins to
roll. Be ready to apply the regular
brake at once should the vehicle
begin to move. Park on a fairly steep hill, with the
vehicle facing downhill. Keeping
your foot on the regular brake, set
the parking brake.
.To check the parking brake's
holding ability: With the engine
running and the transmission in
N (Neutral), slowly remove foot
pressure from the regular brake
pedal. Do this until the vehicle is
held by the parking brake only.
.To check the P (Park)
mechanism's holding ability:
With the engine running, shift to
P (Park). Then release the
parking brake followed by the
regular brake.
Contact your dealer if service is
required.
Wiper Blade Replacement
Windshield wiper blades should be
inspected for wear or cracking. See
Maintenance Schedule on
page 11-3. Replacement blades come in
different types and are removed in
different ways. For proper
windshield wiper blade length and
type, see
Maintenance
Replacement Parts on page 11-14.
{Caution
Allowing the wiper arm to touch
the windshield when no wiper
blade is installed could damage
the windshield. Any damage that
occurs would not be covered by
your warranty. Do not allow the
wiper arm to touch the windshield.
To replace the windshield wiper
blade:
1. Pull the windshield wiper assembly away from the
windshield.
Page 456 of 539
Black plate (89,1)GMC Sierra Owner Manual (GMNA Localizing-U.S/Canada/Mexico-
7299746) - 2015 - crc - 11/11/13
Vehicle Care 10-89
{Caution
Ignoring these steps could result
in costly damage to the vehicle
that would not be covered by the
vehicle warranty. Trying to start
the vehicle by pushing or pulling it
will not work, and it could damage
the vehicle.
1. Check the other vehicle. It must have a 12-volt battery with a
negative ground system.
{Caution
If the other vehicle does not have
a 12-volt system with a negative
ground, both vehicles can be
damaged. Only use a vehicle that
has a 12-volt system with a
negative ground for jump starting. 2. If you have a vehicle with a
diesel engine with two batteries,
you should know before you
begin that, especially in cold
weather, you may not be able to
get enough power from a single
battery in another vehicle to start
your diesel engine. If your
vehicle has more than one
battery, using the battery that is
closer to the starter will reduce
electrical resistance. This is
located on the passenger side,
in the rear of the engine
compartment.
3. Get the vehicles close enough so the jumper cables can reach,
but be sure the vehicles are not
touching each other. If they are,
it could cause an unwanted
ground connection. You would
not be able to start your vehicle,
and the bad grounding could
damage the electrical systems.
To avoid the possibility of the
vehicles rolling, set the parking
brake firmly on both vehicles
involved in the jump start procedure. Put the automatic
transmission in P (Park) or a
manual transmission in Neutral
before setting the parking brake.
If you have a four-wheel-drive
vehicle, be sure the transfer
case is in a drive gear, not in
N (Neutral).
{Caution
If any accessories are left on or
plugged in during the jump
starting procedure, they could be
damaged. The repairs would not
be covered by the vehicle
warranty. Whenever possible, turn
off or unplug all accessories on
either vehicle when jump starting.
4. Turn off the ignition on both vehicles. Unplug unnecessary
accessories plugged into the
accessory power outlets. Turn
off the radio and all the lamps
that are not needed. This will
Page 458 of 539
Black plate (91,1)GMC Sierra Owner Manual (GMNA Localizing-U.S/Canada/Mexico-
7299746) - 2015 - crc - 11/11/13
Vehicle Care 10-91
6. Check that the jumper cables donot have loose or missing
insulation. If they do, you could
get a shock. The vehicles could
be damaged too.
Before you connect the cables,
here are some basic things you
should know. Positive (+) will go
to positive (+) or to a remote
positive (+) terminal if the
vehicle has one. Negative (−)
will go to a heavy, unpainted
metal engine part or to a remote
negative (−) terminal if the
vehicle has one.
Do not connect positive (+) to
negative (−) or you will get a
short that would damage the
battery and maybe other parts
too. And do not connect the
negative (−) cable to the
negative (−) terminal on the
dead battery because this can
cause sparks.
5.3L Shown, 4.3L, 6.0L, 6.2L and
6.6L Similar
7. Connect the red positive (+) cable to the positive (+) terminal
of the vehicle with the dead
battery.
8. Do not let the other end touch metal. Connect it to the
positive (+) terminal of the good
battery. Use a remote
positive (+) terminal if the
vehicle has one. 9. Connect the black negative (−)
cable to the negative (−) terminal
of the good battery. Use a
remote negative (−) terminal if
the vehicle has one.
Do not let the other end touch
anything until the next step.
10. Connect the other end of the negative (−) cable.
4.3L Shown, 5.3L and 6.2L Similar
‐To the metal bracket that is
bolted to the engine and
supports the resonator, on
the vehicle with the dead
battery.