2015 GMC CANYON instrument cluster
[x] Cancel search: instrument clusterPage 143 of 433

Black plate (30,1)GMC Canyon Owner Manual (GMNA-Localizing-U.S./Canada-7587000) -
2015 - CRC - 3/17/15
5-30 Instruments and Controls
worx:Press to move up or
down in a list.
oorp: Press to move between
the interactive display zones in the
cluster.
V(Set/Reset): Press to open a
menu or select a menu item. Press
and hold to reset values on certain
screens.
DIC Info Page Options
The info pages on the DIC can be
turned on or off through the
Settings menu.
1. Press
oto access the cluster
applications.
2. Press
worxto scroll to the
Settings application.
3. Press
Vto enter the
Settings menu.
4. Scroll to Info Pages and press
p.
5. Press
worxto move through
the list of possible information
displays.
6. Press
Vwhile an item is
highlighted to select or deselect
that item. When an item is
selected, a checkmark will
appear next to it.
DIC Info Pages
The following is the list of all
possible DIC info page displays.
Some may not be available for your
particular vehicle. Some items may
not be turned on by default but can
be turned on through the Settings
app. See “DIC Info Page Options”
earlier in this section.
Speed: Shows the vehicle speed in
either kilometers per hour (km/h) or
miles per hour (mph).
Trip A or Trip B: Shows the
current distance traveled, in either
kilometers (km) or miles (mi), since
the trip odometer was last reset.
This also shows the approximate
average liters per 100 kilometers
(L/100 km) or miles per
gallon (mpg). This number is
calculated based on the number of
L/100 km (mpg) recorded since the
last time this menu item was reset.
This number reflects only the
approximate average fuel economy
Page 146 of 433
Black plate (33,1)GMC Canyon Owner Manual (GMNA-Localizing-U.S./Canada-7587000) -
2015 - CRC - 3/17/15
Instruments and Controls 5-33
Vehicle Messages
Messages displayed on the DIC
indicate the status of the vehicle or
some action that may be needed to
correct a condition. Multiple
messages may display one after
the other.
The messages that do not require
immediate action can be
acknowledged and cleared by
pressing SET/CLR or
V. The
messages that require immediate
action cannot be cleared until that
action is performed. All messages
should be taken seriously and
clearing the messages does not
correct the problem.
The following are some of the
vehicle messages that may be
displayed depending on your
vehicle content.
Battery Voltage and
Charging Messages
BATTERY LOW START
VEHICLE
When the vehicle’ s battery is
severely discharged, this message
will display and four chimes will
sound. Start the vehicle
immediately. If the vehicle is not
started and the battery continues to
discharge, the climate controls,
heated seats, and audio systems
will shut off and the vehicle may
require a jump start. These systems
will function again after the vehicle
is started.
BATTERY SAVER ACTIVE
This message displays when the
battery voltage drops below
expected levels and features are
disabled. Turn off all unnecessary
accessory features.
SERVICE BATTERY
CHARGING SYSTEM
On some vehicles, this message
displays if there is a problem with
the battery charging system. Under
certain conditions, the charging
system light may also turn on in the
instrument cluster. See Charging
System Light on page 5-17. Driving
with this problem could drain the
battery. Turn off all unnecessary
accessories. Have the electrical
system checked as soon as
possible. See your dealer.
TRANSPORT MODE ON
This message is displayed when the
vehicle is in transport mode. Some
features can be disabled while in
this mode, including Remote
Keyless Entry (RKE), remote start,
and the vehicle alarm system. Take
the vehicle to your dealer for service
to turn transport mode off.
Page 149 of 433

Black plate (36,1)GMC Canyon Owner Manual (GMNA-Localizing-U.S./Canada-7587000) -
2015 - CRC - 3/17/15
5-36 Instruments and Controls
Engine Power Messages
ENGINE POWER IS REDUCED
This message displays and a chime
may sound when the cooling system
temperature gets too hot and the
engine further enters the engine
coolant protection mode. See
Engine Overheating on page 10-19
for more information.
This message also displays when
the vehicle's engine power is
reduced. Reduced engine power
can affect the vehicle's ability to
accelerate. If this message is on,
but there is no reduction in
performance, proceed to your
destination. The performance may
be reduced the next time the vehicle
is driven. The vehicle may be driven
at a reduced speed while this
message is on, but acceleration and
speed may be reduced. Anytime
this message stays on, the vehicle
should be taken to your dealer for
service as soon as possible.
Fuel System Messages
FUEL LEVEL LOW
This message displays and a chime
may sound if the fuel level is low.
Refuel as soon as possible. See
Fuel Gauge on page 5-14andFuel
on page 9-54.
TIGHTEN GAS CAP
This message may display along
with the malfunction indicator lamp
on the instrument cluster if the
vehicle's fuel cap is not tightened
properly. See Malfunction Indicator
Lamp on page 5-18. Reinstall the
fuel cap fully. See Filling the Tank
on page 9-55. The diagnostic
system can determine if the fuel cap
has been left off or improperly
installed. A loose or missing fuel
cap allows fuel to evaporate into the
atmosphere. A few driving trips with
the cap properly installed should
turn this light and message off.
Key and Lock Messages
REPLACE BATTERY IN
REMOTE KEY
This message displays if a Remote
Keyless Entry (RKE) transmitter
battery is low. The battery needs to
be replaced in the transmitter. See
“Battery Replacement” under
Remote Keyless Entry (RKE)
System Operation on page 2-4.
Lamp Messages
TURN SIGNAL ON
This message displays and a chime
sounds if a turn signal is left on for
1.2 km (0.75 mi). Move the turn
signal lever to the off position.
Page 162 of 433
Black plate (3,1)GMC Canyon Owner Manual (GMNA-Localizing-U.S./Canada-7587000) -
2015 - CRC - 3/17/15
Lighting 6-3
When the high-beam headlamps are
on, this indicator light on the
instrument cluster will also be on.
Flash-to-Pass
This feature lets you use the
high-beam headlamps to signal a
driver in front of you that you want
to pass. It works even if the
headlamps are in the automatic
position.
To use it, pull the turn signal lever
toward you, then release it.
If the headlamps are in the
automatic position or on low beam,
the high-beam headlamps will turn
on. They will stay on as long as you
hold the lever toward you. The
high-beam indicator on the
instrument cluster will come on.
Release the lever to return to
normal operation.
Daytime Running
Lamps (DRL)
DRL can make it easier for others to
see the front of the vehicle during
the day. Fully functional DRL are
required on all vehicles first sold in
Canada.
The DRL system comes on when
the following conditions are met:
.The ignition is on.
.The exterior lamp control is
in AUTO.
.The transmission is not in
P (Park).
.The light sensor determines it is
daytime.
When the DRL system is on, only
the DRL are on. The taillamps,
sidemarker lamps, instrument panel
lights, and other lamps will not
be on.
When it begins to get dark, the
automatic headlamp system
switches from DRL to the
headlamps. To turn off the DRL, turn the exterior
lamp control to the off position and
then release. For vehicles first sold
in Canada, off will only work when
the vehicle is in P (Park).
Automatic Headlamp
System
When the exterior lamp control is
set to AUTO and it is dark enough
outside, the headlamps come on
automatically.
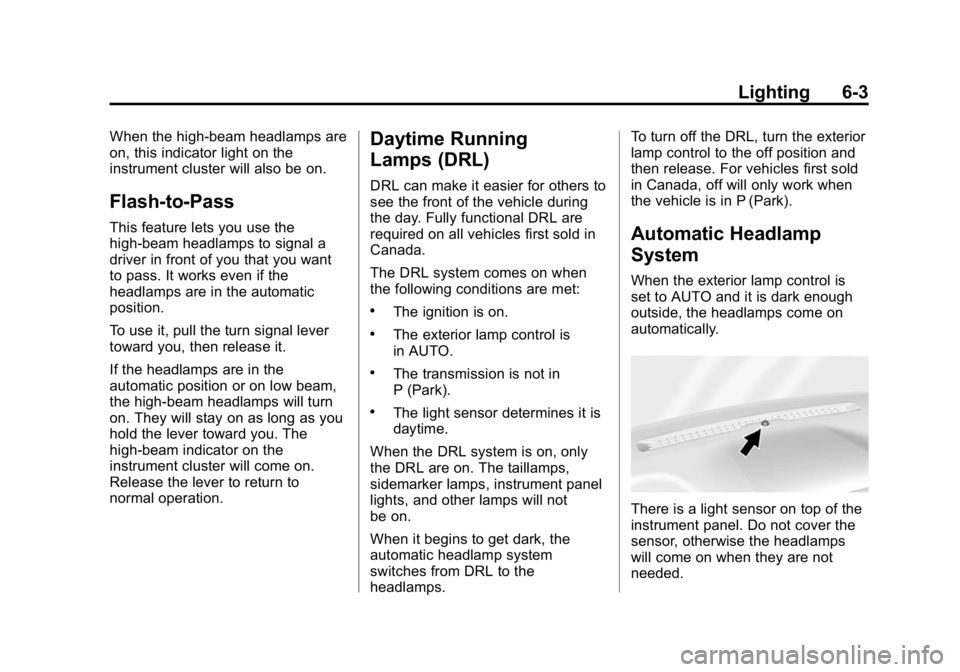
There is a light sensor on top of the
instrument panel. Do not cover the
sensor, otherwise the headlamps
will come on when they are not
needed.
Page 163 of 433
Black plate (4,1)GMC Canyon Owner Manual (GMNA-Localizing-U.S./Canada-7587000) -
2015 - CRC - 3/17/15
6-4 Lighting
The system may also turn on the
headlamps when driving through a
parking garage or tunnel.
If the vehicle is started in a dark
garage, the automatic headlamp
system comes on immediately. If it
is light outside when the vehicle
leaves the garage, there is a slight
delay before the automatic
headlamp system changes to the
DRL. During that delay, the
instrument cluster may not be as
bright as usual. Make sure the
instrument panel brightness control
is in the full bright position. See
Instrument Panel Illumination
Control on page 6-6.
When it is bright enough outside,
the headlamps will turn off or may
change to Daytime Running
Lamps (DRL).
The automatic headlamp system
turns off when the exterior lamp
control is turned to
Oor the
ignition is off.
Lights On with Wipers
If the windshield wipers are
activated in daylight with the engine
on, and the exterior lamp control is
in AUTO, the headlamps, parking
lamps, and other exterior lamps
come on. The transition time for the
lamps coming on varies based on
wiper speed. When the wipers are
not operating, these lamps turn off.
Move the exterior lamp control to
O
or;to disable this feature.
Hazard Warning Flashers
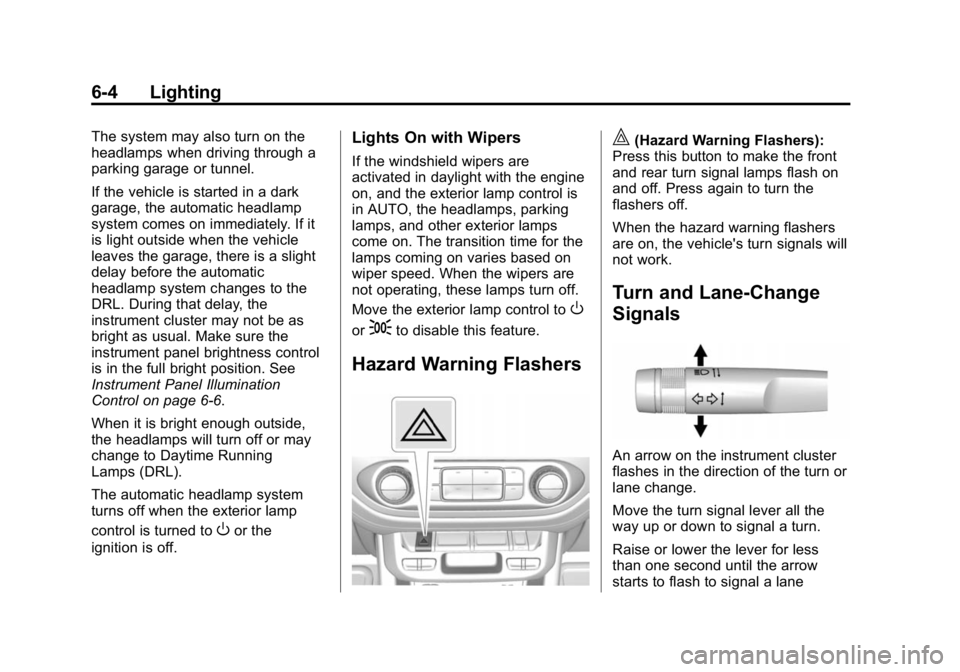
|(Hazard Warning Flashers):
Press this button to make the front
and rear turn signal lamps flash on
and off. Press again to turn the
flashers off.
When the hazard warning flashers
are on, the vehicle's turn signals will
not work.
Turn and Lane-Change
Signals
An arrow on the instrument cluster
flashes in the direction of the turn or
lane change.
Move the turn signal lever all the
way up or down to signal a turn.
Raise or lower the lever for less
than one second until the arrow
starts to flash to signal a lane
Page 164 of 433
Black plate (5,1)GMC Canyon Owner Manual (GMNA-Localizing-U.S./Canada-7587000) -
2015 - CRC - 3/17/15
Lighting 6-5
change. This causes the turn
signals to automatically flash three
times. Holding the turn signal lever
for more than one second will cause
the turn signals to flash until the
lever is released.
The lever returns to its starting
position whenever it is released.
If after signaling a turn or a lane
change the arrows flash rapidly or
do not come on, a signal bulb could
be burned out.
Replace any burned out bulbs. If a
bulb is not burned out, check the
fuse. SeeFuses on page 10-34.
Turn Signal On Chime
If the turn signal is left on for more
than 1.2 km (0.75 mi), a chime
sounds at each flash of the turn
signal. The message TURN
SIGNAL ON will also appear in the
Driver Information Center (DIC). To
turn the chime and message off,
move the turn signal lever to the
off position.Fog Lamps
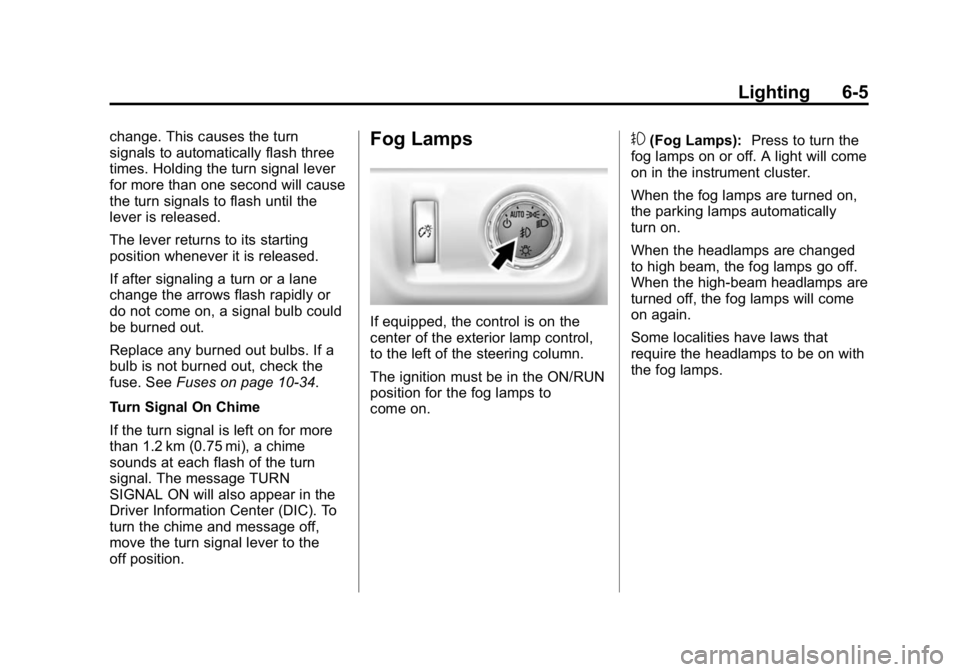
If equipped, the control is on the
center of the exterior lamp control,
to the left of the steering column.
The ignition must be in the ON/RUN
position for the fog lamps to
come on.
#(Fog Lamps): Press to turn the
fog lamps on or off. A light will come
on in the instrument cluster.
When the fog lamps are turned on,
the parking lamps automatically
turn on.
When the headlamps are changed
to high beam, the fog lamps go off.
When the high-beam headlamps are
turned off, the fog lamps will come
on again.
Some localities have laws that
require the headlamps to be on with
the fog lamps.
Page 169 of 433
Black plate (2,1)GMC Canyon Owner Manual (GMNA-Localizing-U.S./Canada-7587000) -
2015 - CRC - 3/17/15
7-2 Infotainment System
The infotainment system has built-in
features intended to help avoid
distraction by disabling some
functions when driving. These
functions may gray out when they
are unavailable. Many infotainment
features are also available through
the instrument cluster and steering
wheel controls.
Before driving:
.Become familiar with the
operation, faceplate buttons, and
screen buttons.
.Set up the audio by presetting
favorite stations, setting the
tone, and adjusting the
speakers.
.Set up phone numbers in
advance so they can be called
easily by pressing a single
button or by using a single voice
command if equipped with
Bluetooth phone capability.
See Defensive Driving on page 9-3.
To play the infotainment system with
the ignition off, see Retained
Accessory Power (RAP) on
page 9-24.Theft-Deterrent Feature
TheftLock®is designed to
discourage theft of the vehicle's
radio by learning a portion of the
Vehicle Identification Number (VIN).
The radio does not operate if it is
stolen or moved to a different
vehicle.
Overview
Infotainment System Overview
The infotainment system is
controlled by using the buttons on
the faceplate.
Page 172 of 433

Black plate (5,1)GMC Canyon Owner Manual (GMNA-Localizing-U.S./Canada-7587000) -
2015 - CRC - 3/17/15
Infotainment System 7-5
Pandora (If Equipped)
Select the PANDORA icon to begin
Pandora. SeePandora Internet
Radio on page 7-9.
Setting Radio Preferences
Select the SETTINGS screen icon
to display the Settings menu and
the following may display:
Time and Date: SeeClock on
page 5-4.
Language (Current Language):
This will set the display language in
the radio and instrument cluster.
Select to display a list of languages.
Select
oBACK to go back to the
previous menu.
Valet Mode:
Using the circular numeric keypad,
enter a four-digit code:
1. Turn the MENU knob to highlight a number. 2. Press the MENU knob to select
it. Do this for each one of the
four digits. Select Enter to go to
the confirmation screen.
3. Re-enter the four-digit code. Select LOCK to lock the system.
4. Enter the four-digit code to unlock the system. Select
o
BACK to go back to the
previous menu.
Radio: See“Radio Setup” later in
this section.
Vehicle: SeeVehicle
Personalization on page 5-41.
Display: Press the MENU knob to
turn the display on or off.
Return to Factory Settings: See
“Return to Factory Settings” later in
this section.
Software Information (If
Equipped): Press the MENU knob
to select Save Vehicle Info to USB.
Press the MENU knob again to start
downloading the vehicle information
to the USB. Radio Setup
Press the RADIO button and the
following may display:
Manage Favorites:
.Turn the MENU knob and press
to select a favorite.
.To delete a favorite, press
the button just below the
DELETE screen button.
.To move a favorite, press the
MOVE screen button. Turn
the MENU knob to select a
new location, then press the
DROP screen button to
select the new location.
.SelectoBACK to go back to
the previous menu.
Number of Favorites Shown:
Select Auto and the system will
automatically adjust the number of
favorite pages when favorites are
added and removed, or select a
number from 5–25 to manually
adjust the number of favorites
shown.