2015 FORD SUPER DUTY automatic transmission
[x] Cancel search: automatic transmissionPage 5 of 470
Lighting
Lighting Control..............................................65
Autolamps........................................................65
Instrument Lighting Dimmer.....................66
Daytime Running Lamps............................66
Front Fog Lamps............................................67
Direction Indicators........................................67
Interior Lamps.................................................67
Windows and Mirrors
Power Windows.............................................69
Global Opening...............................................70
Exterior Mirrors................................................70
Interior Mirror....................................................72
Sun Visors..........................................................73
Moonroof...........................................................73
Instrument Cluster
Gauges................................................................75
Warning Lamps and Indicators..................77
Audible Warnings and Indicators............80
Information Displays
General Information.......................................81
Information Messages..................................92
Climate Control
Manual Climate Control............................103
Automatic Climate Control......................104
Hints on Controlling the InteriorClimate........................................................106
Heated Windows and Mirrors..................108
Remote Start.................................................109
Seats
Sitting in the Correct Position...................110
Head Restraints.............................................110
Manual Seats..................................................112
Power Seats.....................................................113
Memory Function...........................................113
Rear Seats........................................................114
Heated Seats..................................................116
Climate Controlled Seats...........................118
Front Seat Armrest.......................................119
Rear Seat Armrest........................................120
Universal Garage DoorOpener
Universal Garage Door Opener.................121
Auxiliary Power Points
Auxiliary Power Points................................129
Storage Compartments
Center Console...............................................131
Overhead Console.........................................131
Starting and Stopping theEngine
General Information....................................132
Ignition Switch...............................................132
Starting a Gasoline Engine........................133
Engine Block Heater....................................134
Fuel and Refueling
Safety Precautions......................................136
Fuel Quality.....................................................137
Running Out of Fuel....................................138
Refueling..........................................................138
Fuel Consumption.......................................140
Emission Control System...........................141
Transmission
Automatic Transmission...........................144
Power Take-Off.............................................150
Four-Wheel Drive
Using Four-Wheel Drive..............................151
2Super Duty (), enUSATable of Contents
Page 7 of 470
Changing a Fuse............................................231
Maintenance
General Information....................................232
Opening and Closing the Hood..............232
Under Hood Overview - 6.2L...................233
Under Hood Overview - 6.8L..................234
Engine Oil Dipstick......................................235
Engine Oil Check..........................................235
Engine Coolant Check...............................236
Automatic Transmission FluidCheck...........................................................240
Transfer Case Fluid Check........................243
Brake Fluid Check........................................243
Power Steering Fluid Check.....................243
Washer Fluid Check....................................244
Fuel Filter........................................................244
Changing the 12V Battery.........................244
Checking the Wiper Blades.....................246
Changing the Wiper Blades.....................246
Adjusting the Headlamps.........................247
Removing a Headlamp.............................248
Changing a Bulb..........................................250
Bulb Specification Chart...........................252
Changing the Engine Air Filter................254
Vehicle Care
General Information...................................256
Cleaning Products.......................................256
Cleaning the Exterior..................................256
Waxing..............................................................257
Cleaning the Engine....................................257
Cleaning the Windows and WiperBlades..........................................................258
Cleaning the Interior...................................258
Cleaning the Instrument Panel andInstrument Cluster Lens.......................258
Cleaning Leather Seats.............................259
Repairing Minor Paint Damage..............260
Cleaning the Alloy Wheels........................261
Vehicle Storage.............................................261
Wheels and Tires
General Information...................................263
Tire Care..........................................................265
Using Snow Chains.....................................282
Tire Pressure Monitoring System...........282
Changing a Road Wheel...........................288
Technical Specifications..........................299
Capacities and Specific-ations
Engine Specifications.................................301
Motorcraft Parts..........................................302
Vehicle Identification Number................303
Vehicle Certification Label.......................303
Transmission Code Designation............304
Technical Specifications..........................305
Audio System
General Information....................................310
Audio unit - Vehicles With: AM/FM.........311
Audio unit - Vehicles With: AM/FM/CD/SYNC.............................................................312
Audio unit - Vehicles With: Sony AM/FM/CD...................................................................315
Digital Radio...................................................316
Satellite Radio...............................................318
Audio Input Jack............................................321
USB Port...........................................................321
Media Hub......................................................322
SYNC™
General Information...................................323
Using Voice Recognition...........................325
Using SYNC™ With Your Phone.............327
SYNC™ Applications and Services......338
Using SYNC™ With Your MediaPlayer...........................................................345
SYNC™ Troubleshooting.........................353
4Super Duty (), enUSATable of Contents
Page 51 of 470
Sounding a Panic Alarm
Note:The panic alarm will only operatewhen the ignition is off.
Press the button to activate thealarm. Press the button again orturn the ignition on to deactivateit.
Remote Start (If Equipped)
WARNING
To avoid exhaust fumes, do not useremote start if your vehicle is parkedindoors or areas that are not wellventilated.
Note:Do not use remote start if your vehicleis low on fuel.
The remote start button is on thetransmitter.
This feature allows you to start yourvehicle from outside the vehicle. Thetransmitter has an extended operatingrange.
Vehicles with automatic climate controlcan be set to operate when you remotestart the vehicle. See Climate Control(page 103). A manual climate controlsystem will run at the setting it was set towhen you switch the vehicle off.
Many states and provinces haverestrictions for the use of remote start.Check your local and state or provinciallaws for specific requirements regardingremote start systems.
The remote start system will not work if:
•the ignition is on
•the alarm system is triggered
•you disable the feature
•the hood is open
•the transmission is not in P
•the vehicle battery voltage is too low
•the service engine soon indicator is on.
Remote Starting the Vehicle
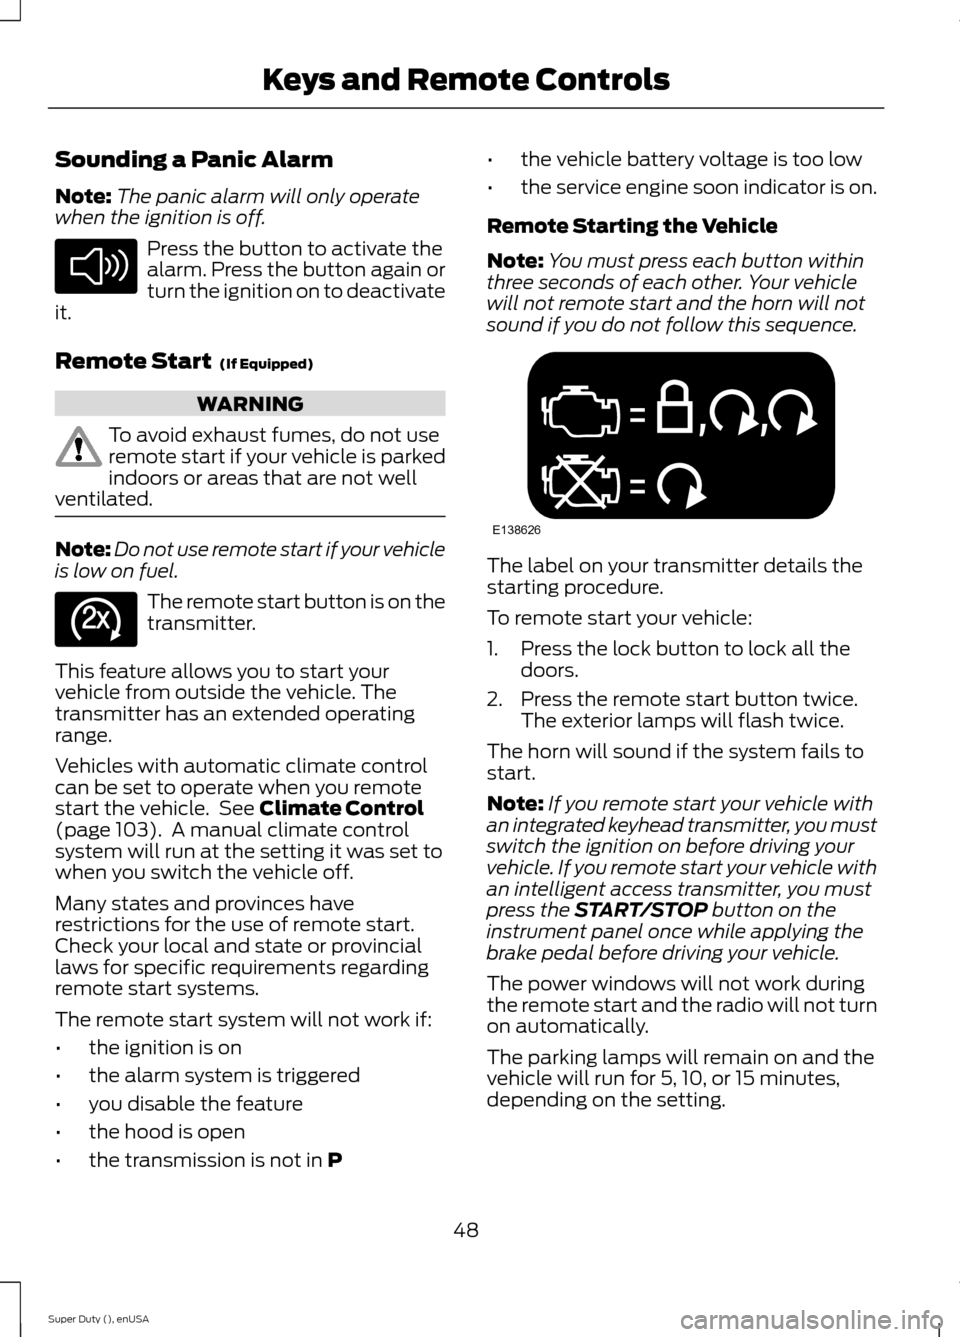
Note:You must press each button withinthree seconds of each other. Your vehiclewill not remote start and the horn will notsound if you do not follow this sequence.
The label on your transmitter details thestarting procedure.
To remote start your vehicle:
1.Press the lock button to lock all thedoors.
2.Press the remote start button twice.The exterior lamps will flash twice.
The horn will sound if the system fails tostart.
Note:If you remote start your vehicle withan integrated keyhead transmitter, you mustswitch the ignition on before driving yourvehicle. If you remote start your vehicle withan intelligent access transmitter, you mustpress the START/STOP button on theinstrument panel once while applying thebrake pedal before driving your vehicle.
The power windows will not work duringthe remote start and the radio will not turnon automatically.
The parking lamps will remain on and thevehicle will run for 5, 10, or 15 minutes,depending on the setting.
48Super Duty (), enUSAKeys and Remote ControlsE138624 E138625 E138626
Page 95 of 470
Compass/Transmission indicatordisplay (if equipped)
The compass heading will display in theupper right corner of the informationdisplay; the transmission gear indicatordisplays in the right side of the informationdisplay when using the SelectShiftAutomatic™ transmission feature. Thesedisplays will not be shown in all screenmodes. For example: when programmingcertain vehicle features or in certaininformation menus.
INFORMATION MESSAGES
Note:Depending on your vehicle optionsand instrument cluster type, not all of themessages will display or be available.Additionally, the information display mayabbreviate or shorten certain messages.
Press the RESET button for Type 1 displaysor the OK button for Type 2 displays toacknowledge and remove some messagesfrom the information display. Theinformation display will automaticallyremove other messages after a short time.
You need to confirm certain messagesbefore you can access the menus.
AdvanceTrac™
ActionMessage
The system detects a condition that requires service. Havethe system checked by an authorized dealer.SERVICE ADVAN-CETRAC
The driver has disabled the stability control system. SeeUsing Stability Control (page 167).ADVANCETRAC OFF
The driver has disabled the traction control system. See UsingTraction Control (page 165).TRACTION CONTROLOFF
Alarm
ActionMessage
An unauthorized entry has triggered the alarm. See Anti-TheftAlarm (page 59).TO STOP ALARMSTART VEHICLE
The security system has detected a fault. Have the systemchecked by an authorized dealer.SECURITY SYSTEMFAULT
92Super Duty (), enUSAInformation Displays
Page 117 of 470
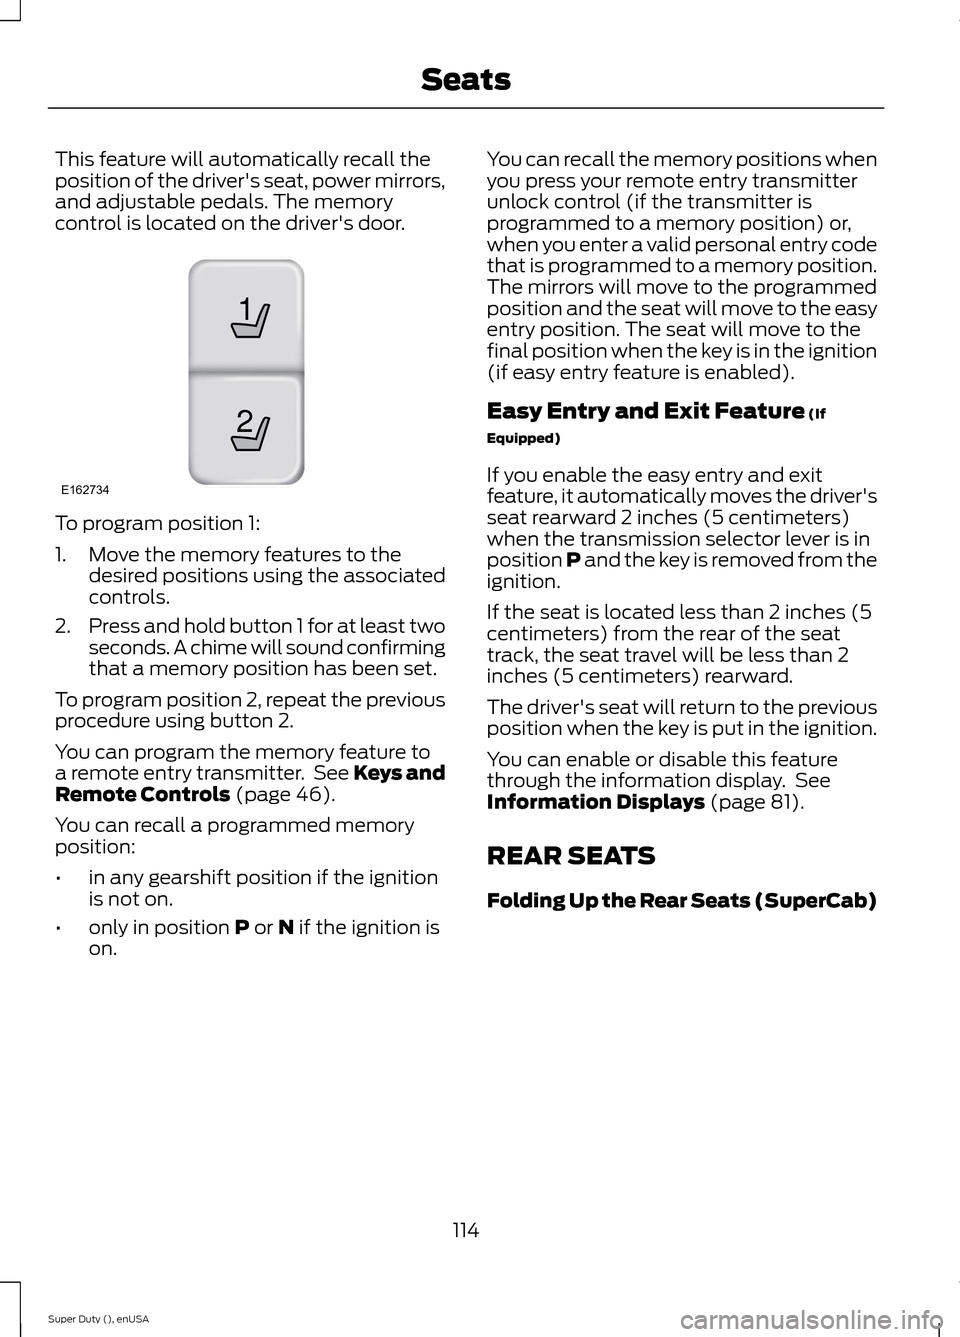
This feature will automatically recall theposition of the driver's seat, power mirrors,and adjustable pedals. The memorycontrol is located on the driver's door.
To program position 1:
1.Move the memory features to thedesired positions using the associatedcontrols.
2.Press and hold button 1 for at least twoseconds. A chime will sound confirmingthat a memory position has been set.
To program position 2, repeat the previousprocedure using button 2.
You can program the memory feature toa remote entry transmitter. See Keys andRemote Controls (page 46).
You can recall a programmed memoryposition:
•in any gearshift position if the ignitionis not on.
•only in position P or N if the ignition ison.
You can recall the memory positions whenyou press your remote entry transmitterunlock control (if the transmitter isprogrammed to a memory position) or,when you enter a valid personal entry codethat is programmed to a memory position.The mirrors will move to the programmedposition and the seat will move to the easyentry position. The seat will move to thefinal position when the key is in the ignition(if easy entry feature is enabled).
Easy Entry and Exit Feature (If
Equipped)
If you enable the easy entry and exitfeature, it automatically moves the driver'sseat rearward 2 inches (5 centimeters)when the transmission selector lever is inposition P and the key is removed from theignition.
If the seat is located less than 2 inches (5centimeters) from the rear of the seattrack, the seat travel will be less than 2inches (5 centimeters) rearward.
The driver's seat will return to the previousposition when the key is put in the ignition.
You can enable or disable this featurethrough the information display. SeeInformation Displays (page 81).
REAR SEATS
Folding Up the Rear Seats (SuperCab)
114Super Duty (), enUSASeats21E162734
Page 136 of 470
STARTING A GASOLINE
ENGINE
When you start the engine, the idle speedincreases, this helps to warm up theengine. If the engine idle speed does notslow down automatically, have yourvehicle checked by an authorized dealer.
Before starting the engine check thefollowing:
•Make sure all occupants have fastenedtheir safety belts.
•Make sure the headlamps andelectrical accessories are off.
•Make sure the parking brake is on.
•Move the transmission selector leverto position P.
•Turn the ignition key to the on position.
Note:Do not touch the accelerator pedal.
1.Fully press the brake pedal.
2.Turn the key to the start position tostart the engine. Release the key whenthe engine starts.
Note:The engine may continue crankingfor up to 15 seconds or until it starts.
Note:If you cannot start the engine on thefirst try, wait for a short period and try again.
Failure to Start
If you cannot start the engine after threeattempts, wait 10 seconds and follow thisprocedure:
1.Fully press the brake pedal.
2.Fully press the accelerator pedal andhold it there.
3.Start the engine.
Stopping the Engine When YourVehicle is Stationary
1.Move the transmission selector leverto position P.
2.Turn the key to the off position.
3.Apply the parking brake.
Stopping the Engine When YourVehicle is Moving
WARNING
Switching off the engine when thevehicle is still moving will result in aloss of brake and steering assistance.The steering will not lock, but higher effortwill be required. When the ignition isswitched off, some electrical circuits,warning lamps and indicators may also beoff.
1.Move the transmission selector leverto position N and use the brakes tobring your vehicle to a safe stop.
2.When your vehicle has stopped, movethe transmission selector lever toposition P and turn the key to the offposition.
3.Apply the parking brake.
Cold Weather Starting (FlexibleFuel Vehicles Only)
The starting characteristics of all gradesof E85 ethanol make it unsuitable for usewhen ambient temperatures fall below0°F (-18°C). Consult your fuel distributorfor the availability of winter grade ethanol.As the outside temperature approachesfreezing, ethanol fuel distributors shouldsupply winter grade ethanol (same as withunleaded gasoline). If summer gradeethanol is used in cold weather conditions,0°F to 32°F (-18°C to 0°C), you mayexperience increased cranking times, roughidle or hesitation until the engine haswarmed up.
You may experience a decrease in peakperformance when the engine is cold whenoperating on E85 ethanol.
133Super Duty (), enUSAStarting and Stopping the Engine
Page 147 of 470
AUTOMATIC TRANSMISSION
WARNING
Always set the parking brake fullyand make sure the gearshift islatched in P (Park). Turn the ignitionto the off position and remove the keywhenever you leave your vehicle.
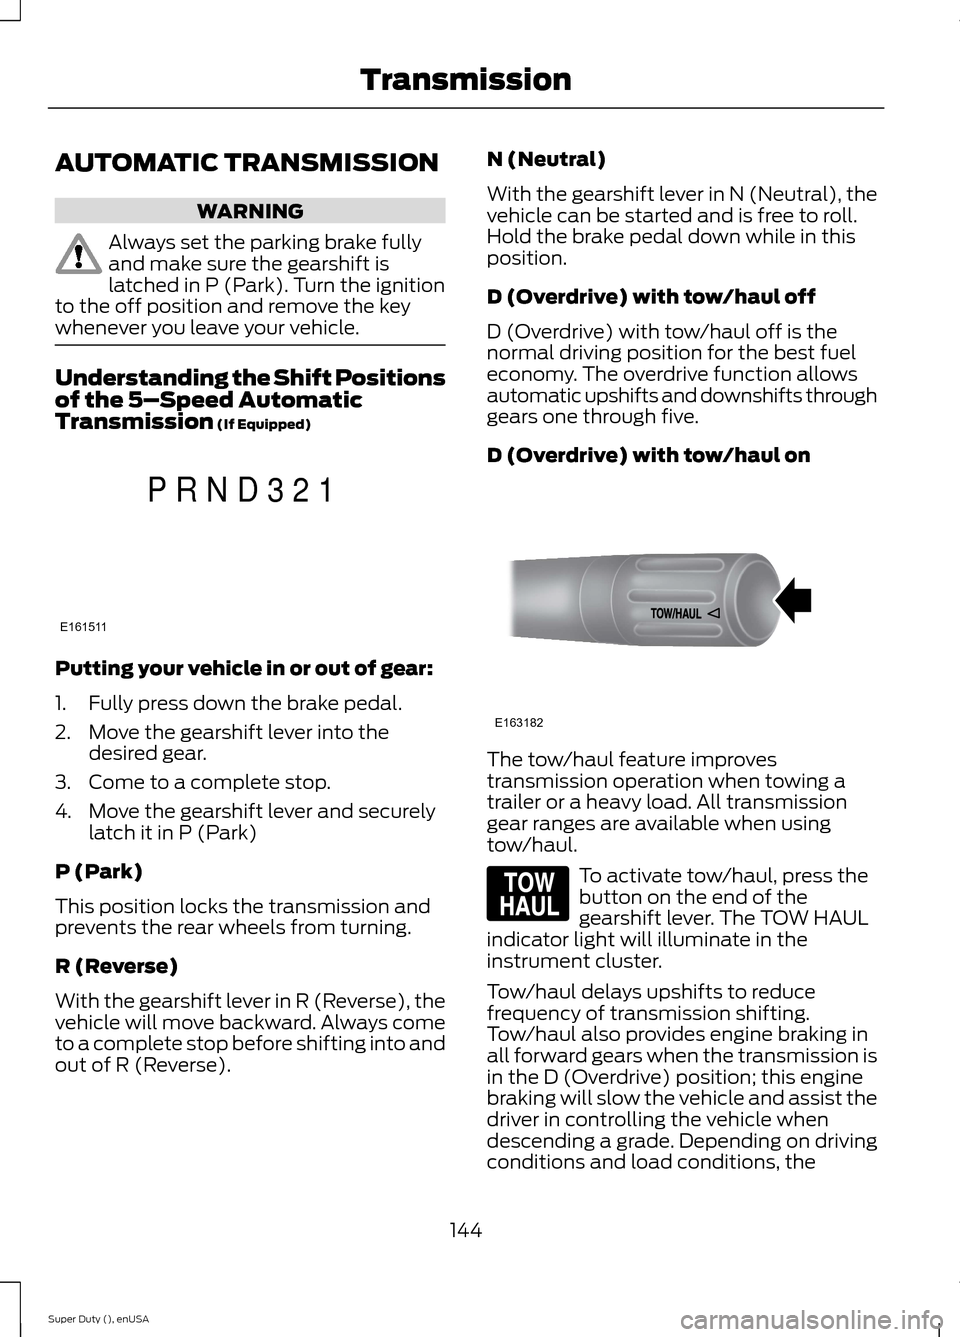
Understanding the Shift Positionsof the 5–Speed AutomaticTransmission (If Equipped)
Putting your vehicle in or out of gear:
1.Fully press down the brake pedal.
2.Move the gearshift lever into thedesired gear.
3.Come to a complete stop.
4.Move the gearshift lever and securelylatch it in P (Park)
P (Park)
This position locks the transmission andprevents the rear wheels from turning.
R (Reverse)
With the gearshift lever in R (Reverse), thevehicle will move backward. Always cometo a complete stop before shifting into andout of R (Reverse).
N (Neutral)
With the gearshift lever in N (Neutral), thevehicle can be started and is free to roll.Hold the brake pedal down while in thisposition.
D (Overdrive) with tow/haul off
D (Overdrive) with tow/haul off is thenormal driving position for the best fueleconomy. The overdrive function allowsautomatic upshifts and downshifts throughgears one through five.
D (Overdrive) with tow/haul on
The tow/haul feature improvestransmission operation when towing atrailer or a heavy load. All transmissiongear ranges are available when usingtow/haul.
To activate tow/haul, press thebutton on the end of thegearshift lever. The TOW HAULindicator light will illuminate in theinstrument cluster.
Tow/haul delays upshifts to reducefrequency of transmission shifting.Tow/haul also provides engine braking inall forward gears when the transmission isin the D (Overdrive) position; this enginebraking will slow the vehicle and assist thedriver in controlling the vehicle whendescending a grade. Depending on drivingconditions and load conditions, the
144Super Duty (), enUSATransmissionE161511PRND321 E163182 E161509
Page 148 of 470
transmission may downshift, slow thevehicle and control the vehicle speed whendescending a hill, without the acceleratorpedal being pressed. The amount ofdownshift braking provided will vary basedupon the amount the brake pedal ispressed.
To deactivate the tow/haul feature andreturn to normal driving mode, press thebutton on the end of the gearshift lever.The TOW HAUL light will no longer beilluminated.
When you shut-off and restart the engine,the transmission will automatically returnto normal D (Overdrive) mode (tow/hauloff).
WARNING
Do not use the tow/haul or enginebrake features when driving in icy orslippery conditions as the increasedengine braking can cause the rear wheelsto slide and your vehicle to swing aroundwith the possible loss of vehicle control.
3 (Third)
Transmission starts and operates in thirdgear only
Used for improved traction on slipperyroads. Selecting 3 (Third) provides enginebraking.
2 (Second)
Use 2 (Second) to start-up on slipperyroads or to provide additional enginebraking on downgrades.
1 (First)
•Provides maximum engine braking
•Allows upshifts by moving gearshiftlever
•The transmission will not downshiftinto 1 (First) at high speeds; it willdownshift to a lower gear and thenshift into 1 (First) when the vehiclereaches slower speeds.
Forced downshifts
•Allowed in D (Overdrive) with thetow/haul feature on or off
•Press the accelerator to the floor
•Allows transmission to select anappropriate gear
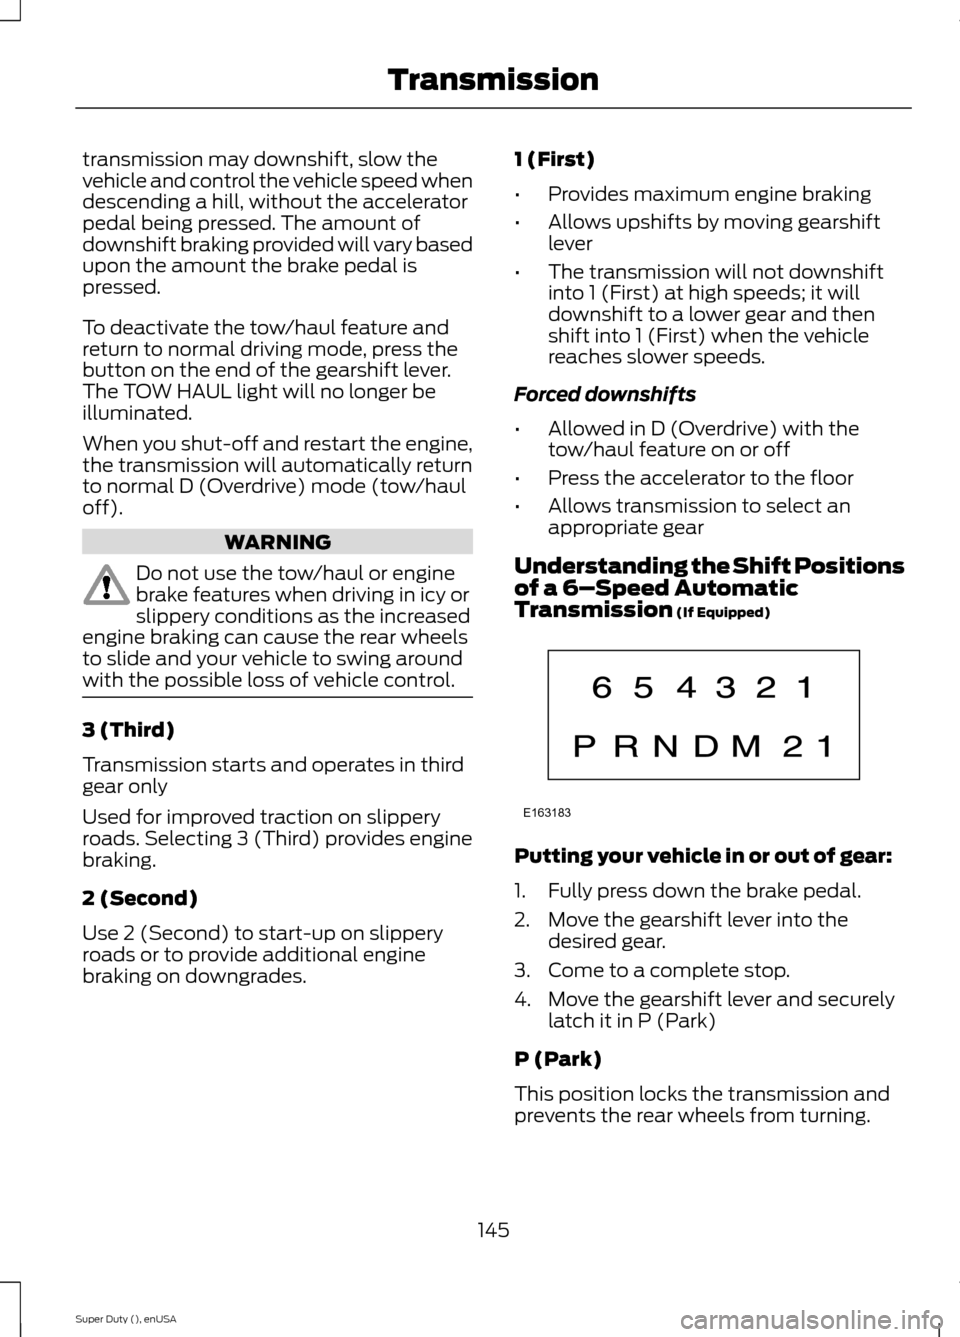
Understanding the Shift Positionsof a 6–Speed AutomaticTransmission (If Equipped)
Putting your vehicle in or out of gear:
1.Fully press down the brake pedal.
2.Move the gearshift lever into thedesired gear.
3.Come to a complete stop.
4.Move the gearshift lever and securelylatch it in P (Park)
P (Park)
This position locks the transmission andprevents the rear wheels from turning.
145Super Duty (), enUSATransmissionE163183