2015 FORD SUPER DUTY lock
[x] Cancel search: lockPage 30 of 470
Recommendations for attaching child safety restraints for children
Use any attachment method as indicated below by XCombinedchild andseatweight
RestraintTypeSafety beltonlySafety beltand LATCH(loweranchorsand toptetheranchor)
Safety beltand toptetheranchor
LATCH(loweranchorsonly)
LATCH(loweranchorsand toptetheranchor)
XUp to 65 lb(29 kg)Rear facingchild seat
XOver 65 lb(29 kg)Rear facingchild seat
XUp to 65 lb(29 kg)Forwardfacingchild seat
XOver 65 lb(29 kg)Forwardfacingchild seat
Note:The child seat must rest tightlyagainst the vehicle seat upon which it isinstalled. It may be necessary to lift orremove the head restraint. See HeadRestraints (page 110).
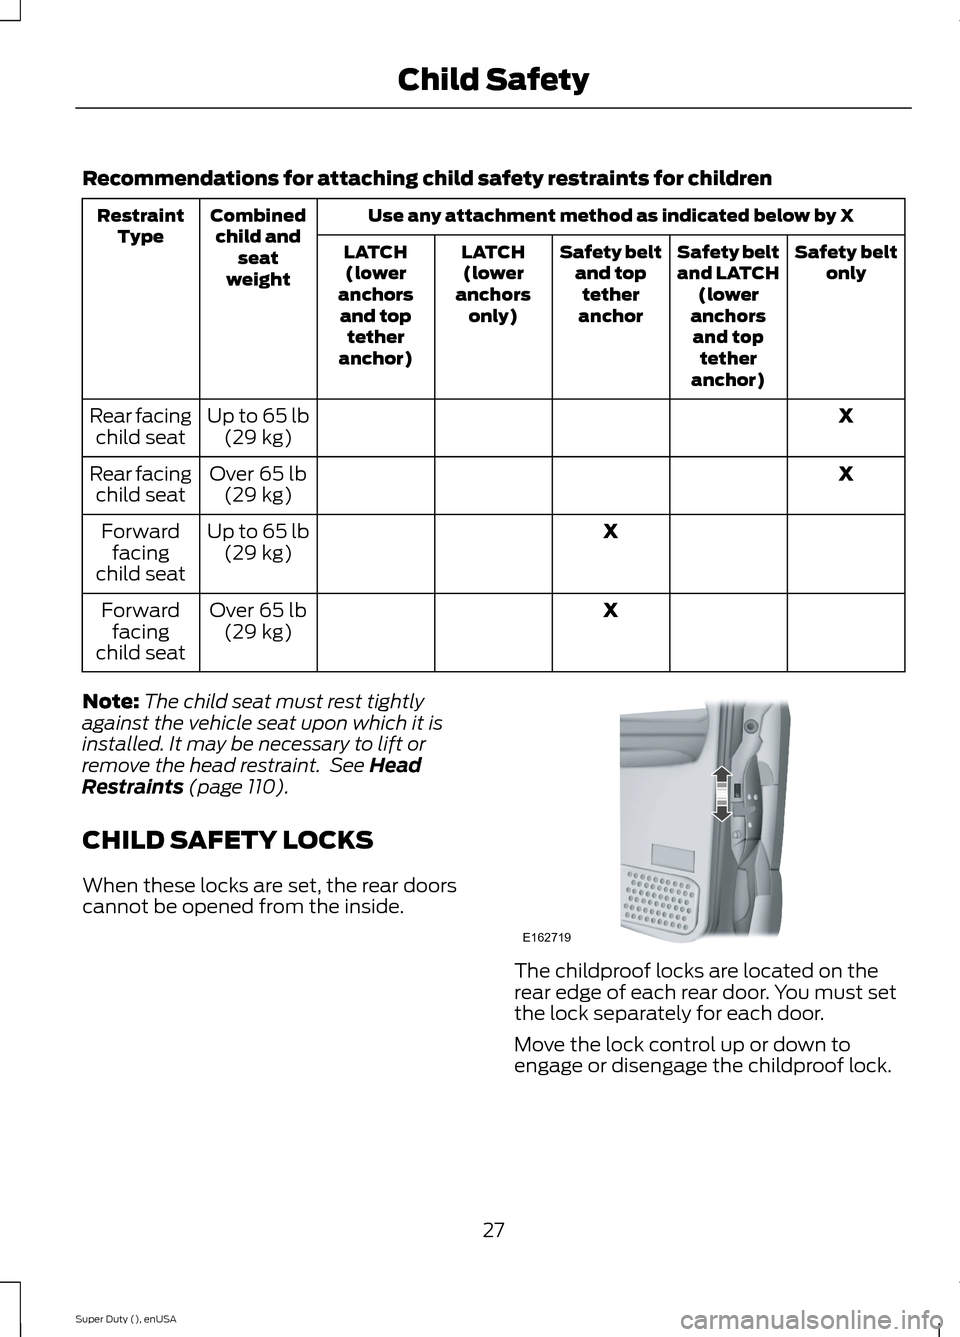
CHILD SAFETY LOCKS
When these locks are set, the rear doorscannot be opened from the inside.
The childproof locks are located on therear edge of each rear door. You must setthe lock separately for each door.
Move the lock control up or down toengage or disengage the childproof lock.
27Super Duty (), enUSAChild SafetyE162719
Page 31 of 470
PRINCIPLE OF OPERATION
WARNINGS
Always drive and ride with your seatback upright and the lap belt snugand low across the hips.
To reduce the risk of injury, makesure children sit where they can beproperly restrained.
Never let a passenger hold a child onhis or her lap while the vehicle ismoving. The passenger cannotprotect the child from injury in a crashwhich may result in serious injury or death.
All occupants of the vehicle,including the driver, should alwaysproperly wear their safety belts, evenwhen an airbag supplemental restraintsystem is provided. Failure to properly wearyour safety belt could seriously increasethe risk of injury or death.
It is extremely dangerous to ride in acargo area, inside or outside of avehicle. In a crash, people riding inthese areas are more likely to be seriouslyinjured or killed. Do not allow people to ridein any area of your vehicle that is notequipped with seats and safety belts. Besure everyone in your vehicle is in a seatand using a safety belt properly.
In a rollover crash, an unbeltedperson is significantly more likely todie than a person wearing a safetybelt.
Each seating position in your vehiclehas a specific safety belt assemblywhich is made up of one buckle andone tongue that are designed to be usedas a pair. 1) Use the shoulder belt on theoutside shoulder only. Never wear theshoulder belt under the arm. 2) Neverswing the safety belt around your neck overthe inside shoulder. 3) Never use a singlebelt for more than one person.
WARNINGS
When possible, all children 12 yearsold and under should be properlyrestrained in a rear seating position.Failure to follow this could seriouslyincrease the risk of injury or death.
Safety belts and seats can becomehot in a vehicle that has been closedup in sunny weather; they could burna small child. Check seat covers andbuckles before you place a child anywherenear them.
Front and rear seat occupants,including pregnant women, shouldwear safety belts for optimumprotection in an accident.
All seating positions in this vehicle havelap and shoulder safety belts. Alloccupants of the vehicle should alwaysproperly wear their safety belts, even whenan airbag supplemental restraint systemis provided.
The safety belt system consists of:
•Lap and shoulder safety belts.
•Shoulder safety belt with automaticlocking mode, (except driver safetybelt).
•Height adjuster at the front outboardseating positions.
•Safety belt pretensioner at the frontoutboard seating positions.
•Safety belt warning light and chime.
•Crash sensors and monitoring systemwith readiness indicator.
28Super Duty (), enUSASafety Belts
Page 33 of 470
Fastening the Cinch Tongue
WARNING
The lap belt should fit snugly and aslow as possible around the hips, notacross the waist.
1.Pull the lap and shoulder belt from theretractor so that the shoulder beltportion of the safety belt crosses yourshoulder and chest.
2.Be sure the belt is not twisted. If thebelt is twisted, remove the twist.
3.Insert the belt tongue into the properbuckle for your seating position untilyou hear a snap and feel it latch.
4.Make sure the tongue is securelyfastened to the buckle by pulling onthe tongue.
While you are fastened in the safety belt,the lap and shoulder belt with a cinchtongue adjusts to your movement.However, if you brake hard, turn hard, or ifyour vehicle receives an impact of 5 mph(8 km/h) or more, the safety belt willbecome locked and help reduce yourforward movement.
Using Safety Belts DuringPregnancy
WARNING
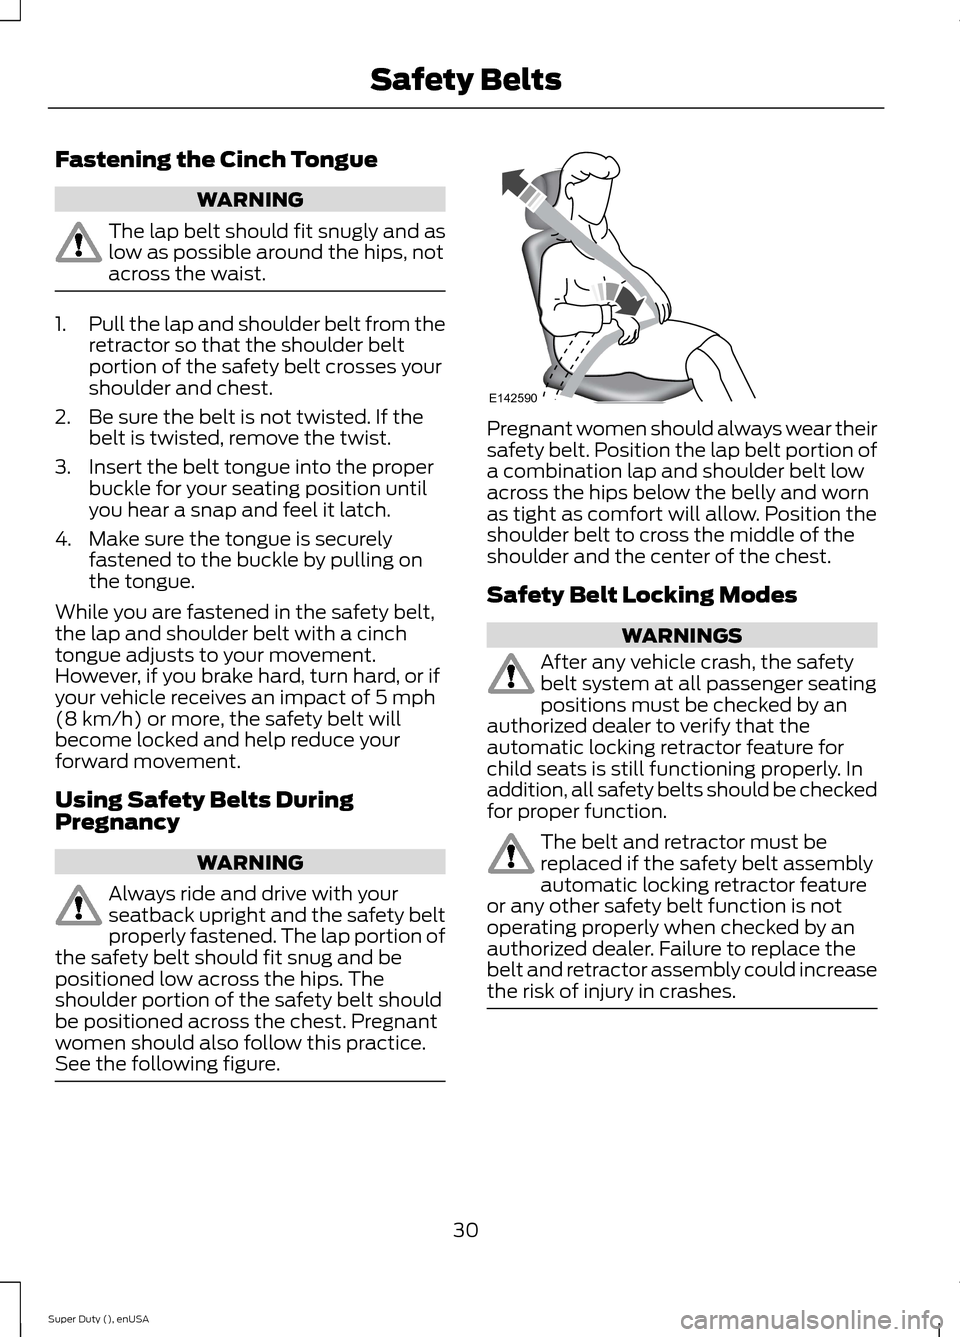
Always ride and drive with yourseatback upright and the safety beltproperly fastened. The lap portion ofthe safety belt should fit snug and bepositioned low across the hips. Theshoulder portion of the safety belt shouldbe positioned across the chest. Pregnantwomen should also follow this practice.See the following figure.
Pregnant women should always wear theirsafety belt. Position the lap belt portion ofa combination lap and shoulder belt lowacross the hips below the belly and wornas tight as comfort will allow. Position theshoulder belt to cross the middle of theshoulder and the center of the chest.
Safety Belt Locking Modes
WARNINGS
After any vehicle crash, the safetybelt system at all passenger seatingpositions must be checked by anauthorized dealer to verify that theautomatic locking retractor feature forchild seats is still functioning properly. Inaddition, all safety belts should be checkedfor proper function.
The belt and retractor must bereplaced if the safety belt assemblyautomatic locking retractor featureor any other safety belt function is notoperating properly when checked by anauthorized dealer. Failure to replace thebelt and retractor assembly could increasethe risk of injury in crashes.
30Super Duty (), enUSASafety BeltsE142590
Page 34 of 470
All safety restraints in the vehicle arecombination lap and shoulder belts. Thedriver safety belt has the first type oflocking mode. The front outboardpassenger and rear outboard seat safetybelts have both types of locking modesdescribed as follows:
Vehicle Sensitive Mode
This is the normal retractor mode, whichallows free shoulder belt lengthadjustment to your movements andlocking in response to vehicle movement.For example, if the driver brakes suddenlyor turns a corner sharply, or the vehiclereceives an impact of about 5 mph(8 km/h) or more, the combination safetybelts will lock to help reduce forwardmovement of the driver and passengers.
In addition, the retractor is designed to lockif the webbing is pulled out too quickly. Ifthis occurs, let the belt retract slightly andpull webbing out again in a slow andcontrolled manner.
Automatic Locking Mode
In this mode, the shoulder belt isautomatically pre-locked. The belt will stillretract to remove any slack in the shoulderbelt. The automatic locking mode is notavailable on the driver safety belt.
When to Use the Automatic LockingMode
Use this mode any time a child safety seat,except a booster, is installed in passengerfront or rear seating positions. You shouldproperly restrain children 12 years old andunder in a rear seating position wheneverpossible. See Child Safety (page 15).
How to Use the Automatic LockingMode
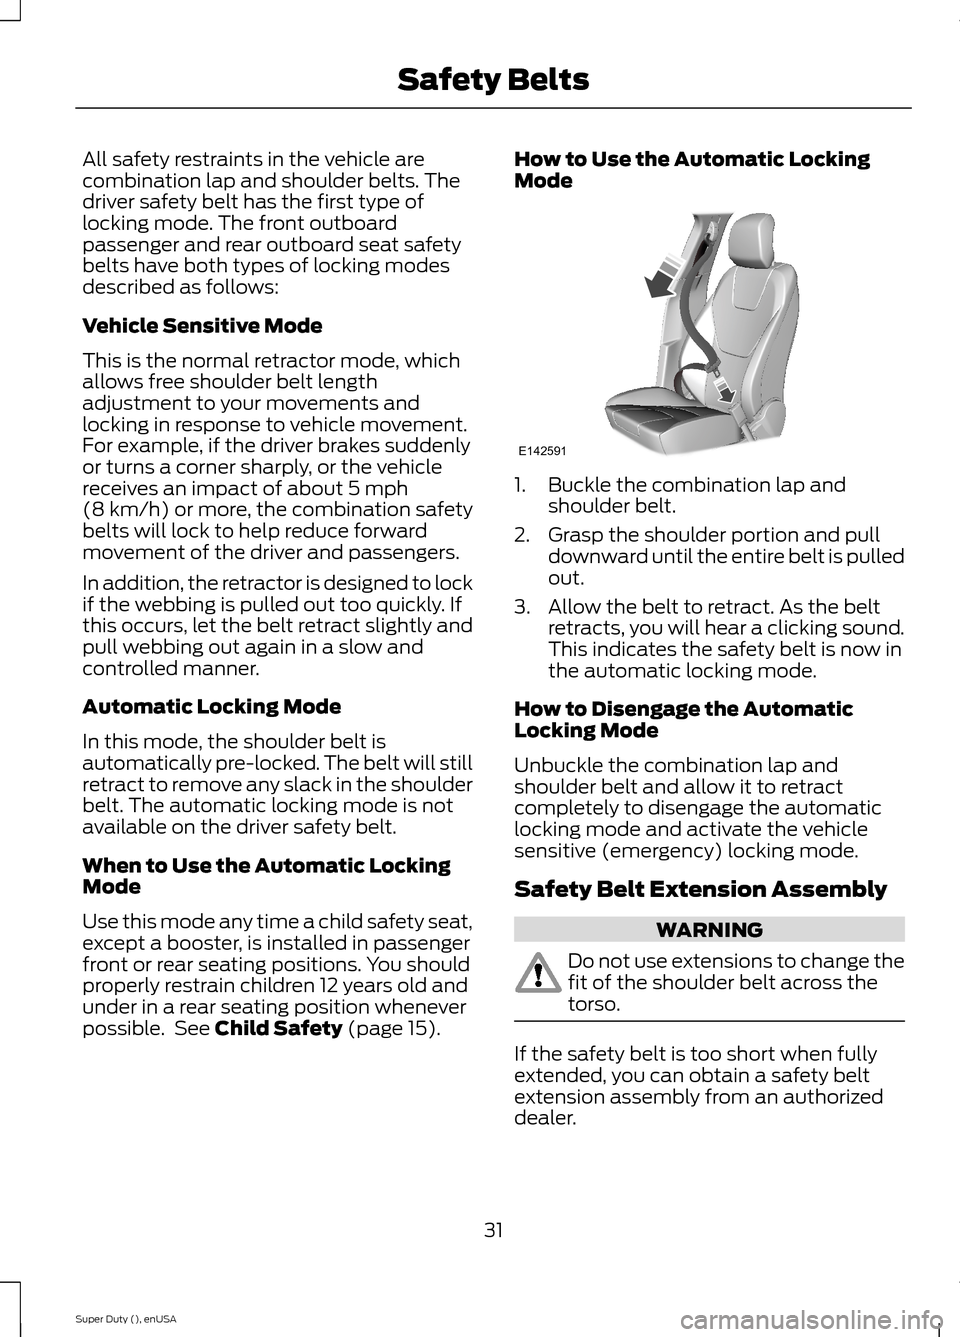
1.Buckle the combination lap andshoulder belt.
2.Grasp the shoulder portion and pulldownward until the entire belt is pulledout.
3.Allow the belt to retract. As the beltretracts, you will hear a clicking sound.This indicates the safety belt is now inthe automatic locking mode.
How to Disengage the AutomaticLocking Mode
Unbuckle the combination lap andshoulder belt and allow it to retractcompletely to disengage the automaticlocking mode and activate the vehiclesensitive (emergency) locking mode.
Safety Belt Extension Assembly
WARNING
Do not use extensions to change thefit of the shoulder belt across thetorso.
If the safety belt is too short when fullyextended, you can obtain a safety beltextension assembly from an authorizeddealer.
31Super Duty (), enUSASafety BeltsE142591
Page 35 of 470
Use only extensions manufactured by thesame supplier as the safety belt.Manufacturer identification is located atthe end of the webbing on the label. Also,use the safety belt extension only if thesafety belt is too short for you when fullyextended.
SAFETY BELT HEIGHT
ADJUSTMENT
WARNING
Position the safety belt heightadjuster so that the belt rests acrossthe middle of your shoulder. Failureto adjust the safety belt properly couldreduce the effectiveness of the safety beltand increase the risk of injury in a crash.
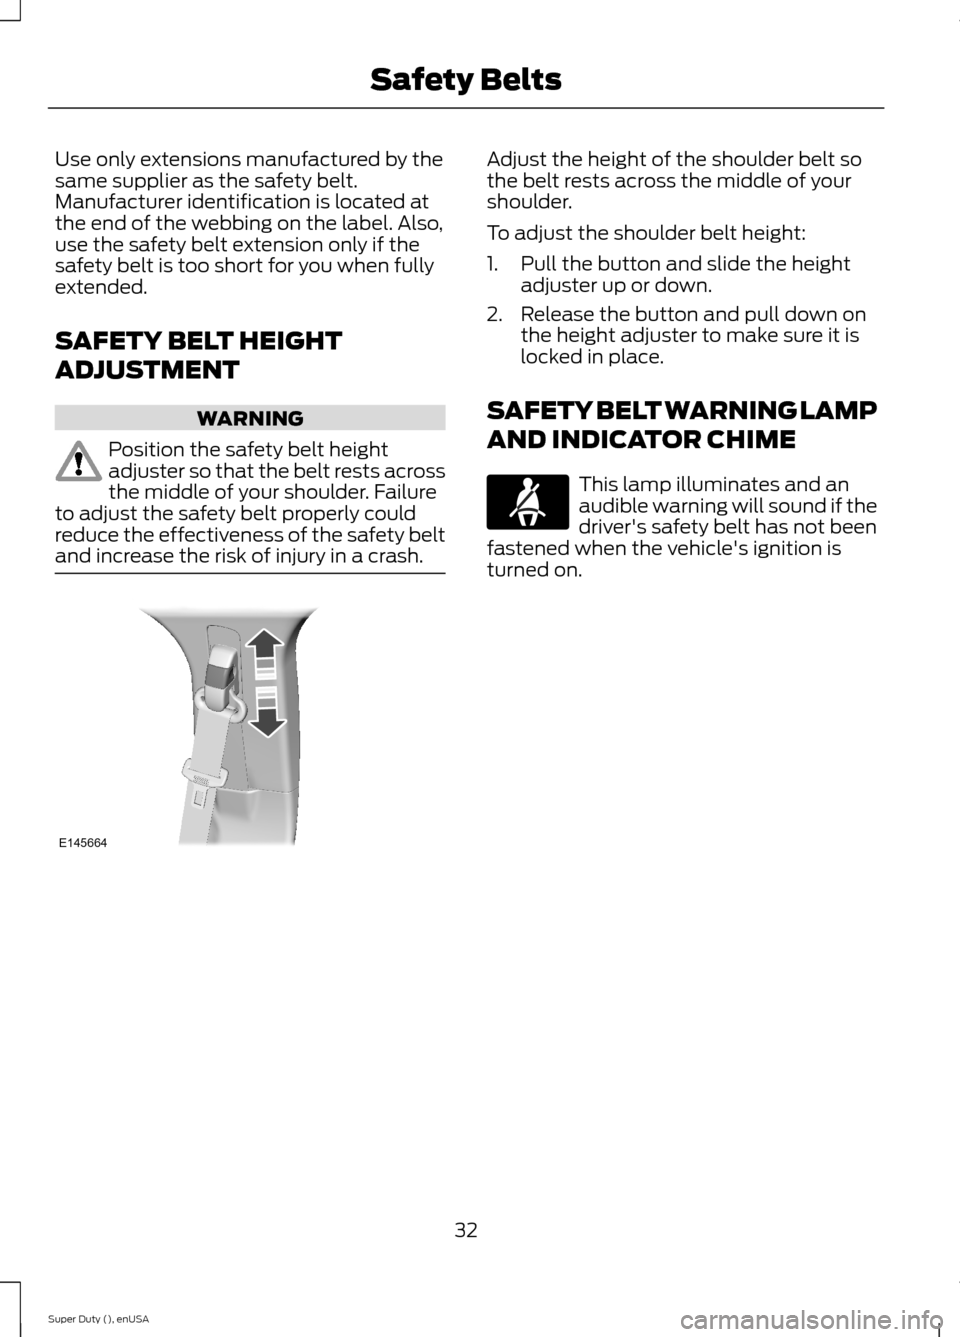
Adjust the height of the shoulder belt sothe belt rests across the middle of yourshoulder.
To adjust the shoulder belt height:
1.Pull the button and slide the heightadjuster up or down.
2.Release the button and pull down onthe height adjuster to make sure it islocked in place.
SAFETY BELT WARNING LAMP
AND INDICATOR CHIME
This lamp illuminates and anaudible warning will sound if thedriver's safety belt has not beenfastened when the vehicle's ignition isturned on.
32Super Duty (), enUSASafety BeltsE145664
Page 49 of 470
GENERAL INFORMATION ON
RADIO FREQUENCIES
This device complies with Part 15 of theFCC Rules and with Industry Canadalicense-exempt RSS standard(s).Operation is subject to the following twoconditions: (1) This device may not causeharmful interference, and (2) This devicemust accept any interference received,including interference that may causeundesired operation.
Note:Changes or modifications notexpressively approved by the partyresponsible for compliance could void theuser's authority to operate the equipment.The term IC before the radio certificationnumber only signifies that Industry Canadatechnical specifications were met.
The typical operating range for yourtransmitter is approximately 33 feet (10meters). Vehicles with the remote startfeature will have a greater range. One ofthe following could cause a decrease inoperating range:
•weather conditions
•nearby radio towers
•structures around the vehicle
•other vehicles parked next to yourvehicle
The radio frequency used by your remotecontrol can also be used by other shortdistance radio transmissions, for exampleamateur radios, medical equipment,wireless headphones, remote controls andalarm systems. If the frequencies arejammed, you will not be able to use yourremote control. You can lock and unlockthe doors with the key.
Note:Make sure to lock your vehicle beforeleaving it unattended.
Note:If you are in range, the remote controlwill operate if you press any buttonunintentionally.
REMOTE CONTROL
Integrated Keyhead Transmitters
(If Equipped)
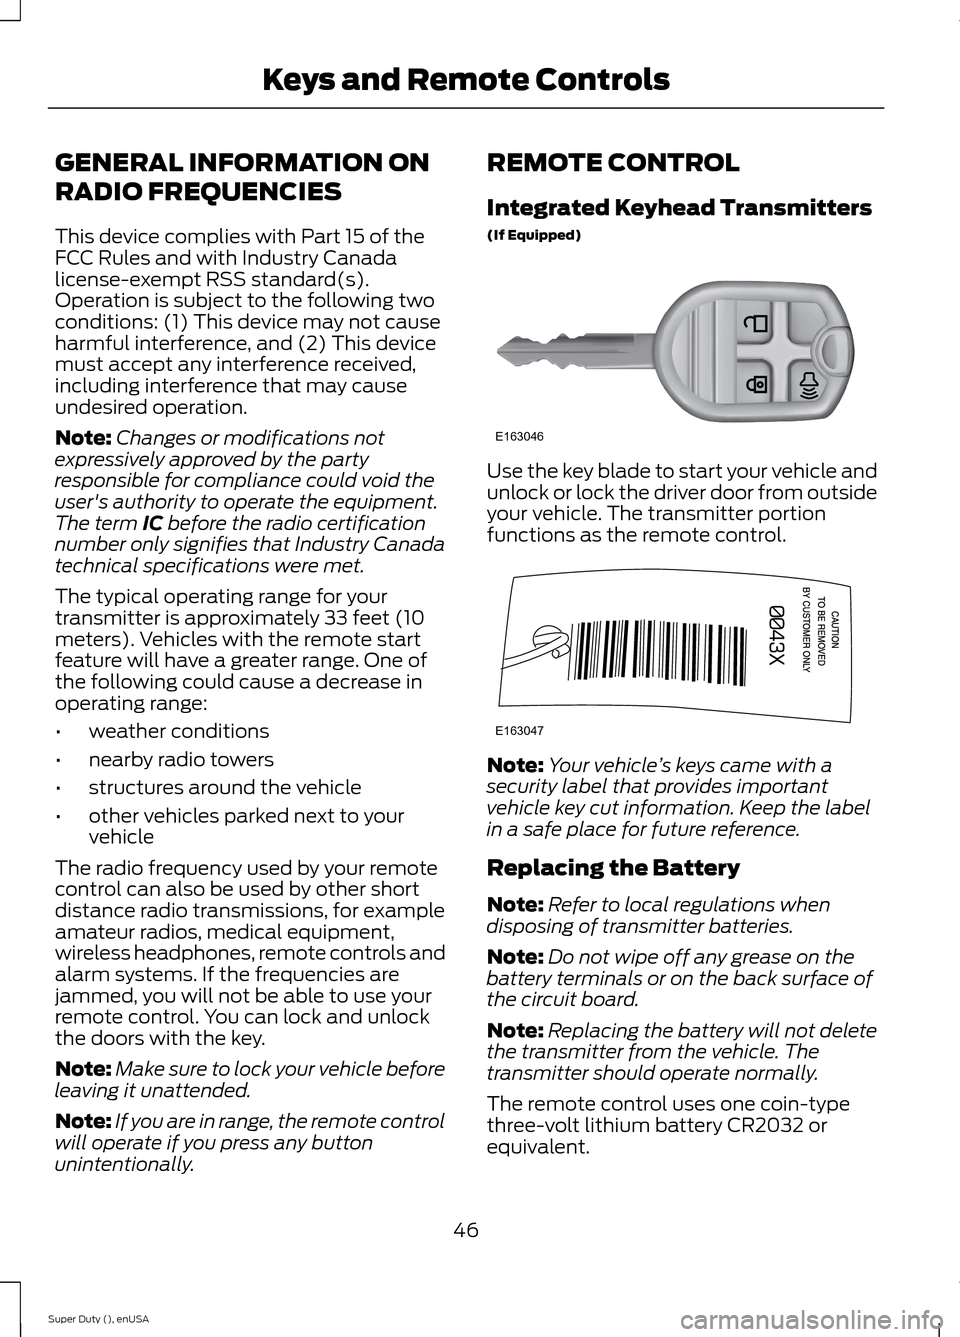
Use the key blade to start your vehicle andunlock or lock the driver door from outsideyour vehicle. The transmitter portionfunctions as the remote control.
Note:Your vehicle’s keys came with asecurity label that provides importantvehicle key cut information. Keep the labelin a safe place for future reference.
Replacing the Battery
Note:Refer to local regulations whendisposing of transmitter batteries.
Note:Do not wipe off any grease on thebattery terminals or on the back surface ofthe circuit board.
Note:Replacing the battery will not deletethe transmitter from the vehicle. Thetransmitter should operate normally.
The remote control uses one coin-typethree-volt lithium battery CR2032 orequivalent.
46Super Duty (), enUSAKeys and Remote ControlsE163046 E163047
Page 50 of 470
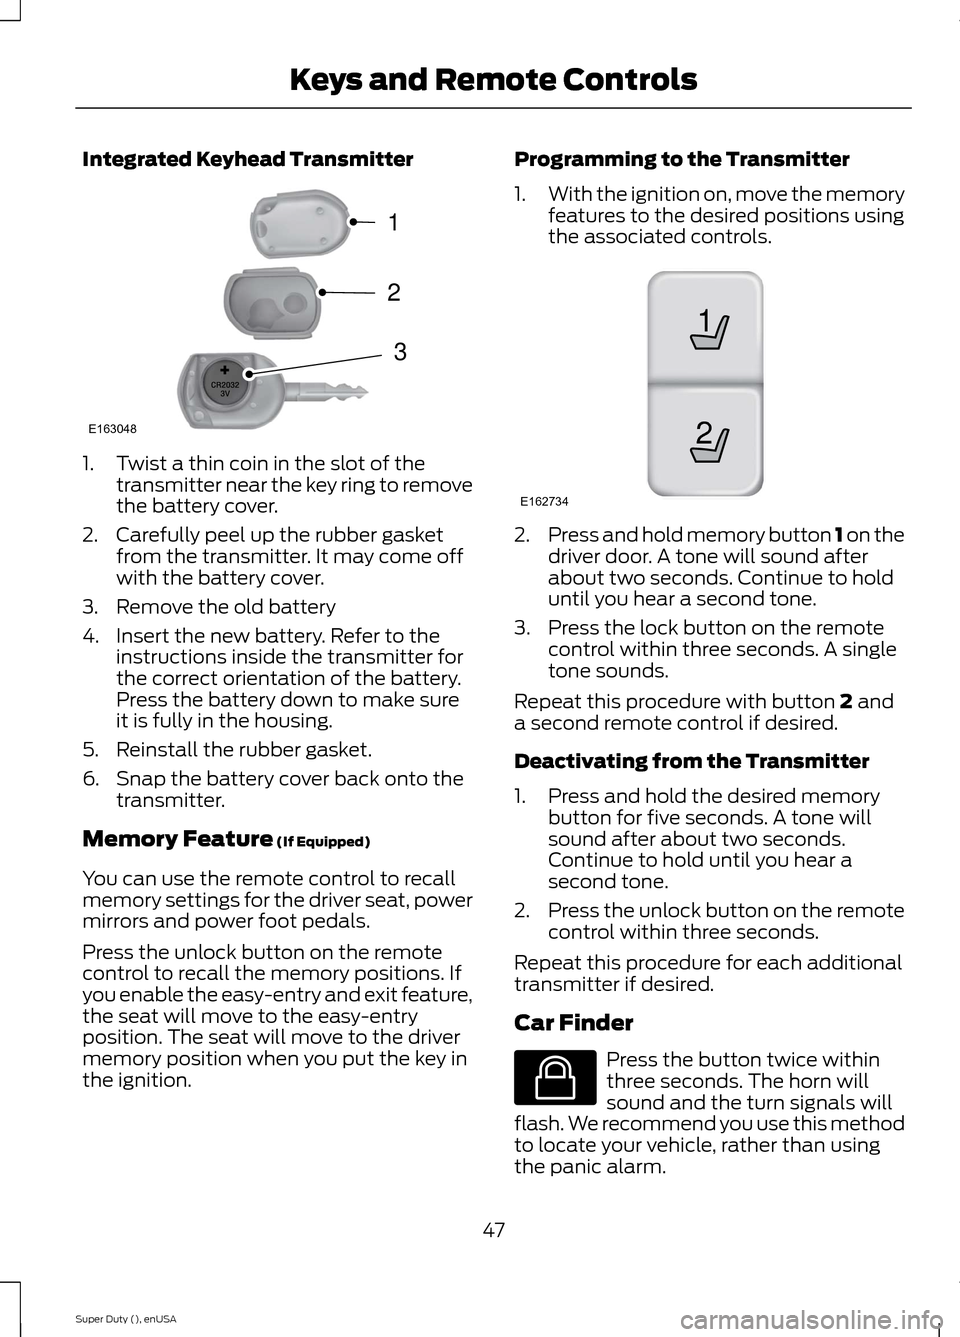
Integrated Keyhead Transmitter
1.Twist a thin coin in the slot of thetransmitter near the key ring to removethe battery cover.
2.Carefully peel up the rubber gasketfrom the transmitter. It may come offwith the battery cover.
3.Remove the old battery
4.Insert the new battery. Refer to theinstructions inside the transmitter forthe correct orientation of the battery.Press the battery down to make sureit is fully in the housing.
5.Reinstall the rubber gasket.
6.Snap the battery cover back onto thetransmitter.
Memory Feature (If Equipped)
You can use the remote control to recallmemory settings for the driver seat, powermirrors and power foot pedals.
Press the unlock button on the remotecontrol to recall the memory positions. Ifyou enable the easy-entry and exit feature,the seat will move to the easy-entryposition. The seat will move to the drivermemory position when you put the key inthe ignition.
Programming to the Transmitter
1.With the ignition on, move the memoryfeatures to the desired positions usingthe associated controls.
2.Press and hold memory button 1 on thedriver door. A tone will sound afterabout two seconds. Continue to holduntil you hear a second tone.
3.Press the lock button on the remotecontrol within three seconds. A singletone sounds.
Repeat this procedure with button 2 anda second remote control if desired.
Deactivating from the Transmitter
1.Press and hold the desired memorybutton for five seconds. A tone willsound after about two seconds.Continue to hold until you hear asecond tone.
2.Press the unlock button on the remotecontrol within three seconds.
Repeat this procedure for each additionaltransmitter if desired.
Car Finder
Press the button twice withinthree seconds. The horn willsound and the turn signals willflash. We recommend you use this methodto locate your vehicle, rather than usingthe panic alarm.
47Super Duty (), enUSAKeys and Remote ControlsE163048321 21E162734 E138623
Page 51 of 470
Sounding a Panic Alarm
Note:The panic alarm will only operatewhen the ignition is off.
Press the button to activate thealarm. Press the button again orturn the ignition on to deactivateit.
Remote Start (If Equipped)
WARNING
To avoid exhaust fumes, do not useremote start if your vehicle is parkedindoors or areas that are not wellventilated.
Note:Do not use remote start if your vehicleis low on fuel.
The remote start button is on thetransmitter.
This feature allows you to start yourvehicle from outside the vehicle. Thetransmitter has an extended operatingrange.
Vehicles with automatic climate controlcan be set to operate when you remotestart the vehicle. See Climate Control(page 103). A manual climate controlsystem will run at the setting it was set towhen you switch the vehicle off.
Many states and provinces haverestrictions for the use of remote start.Check your local and state or provinciallaws for specific requirements regardingremote start systems.
The remote start system will not work if:
•the ignition is on
•the alarm system is triggered
•you disable the feature
•the hood is open
•the transmission is not in P
•the vehicle battery voltage is too low
•the service engine soon indicator is on.
Remote Starting the Vehicle
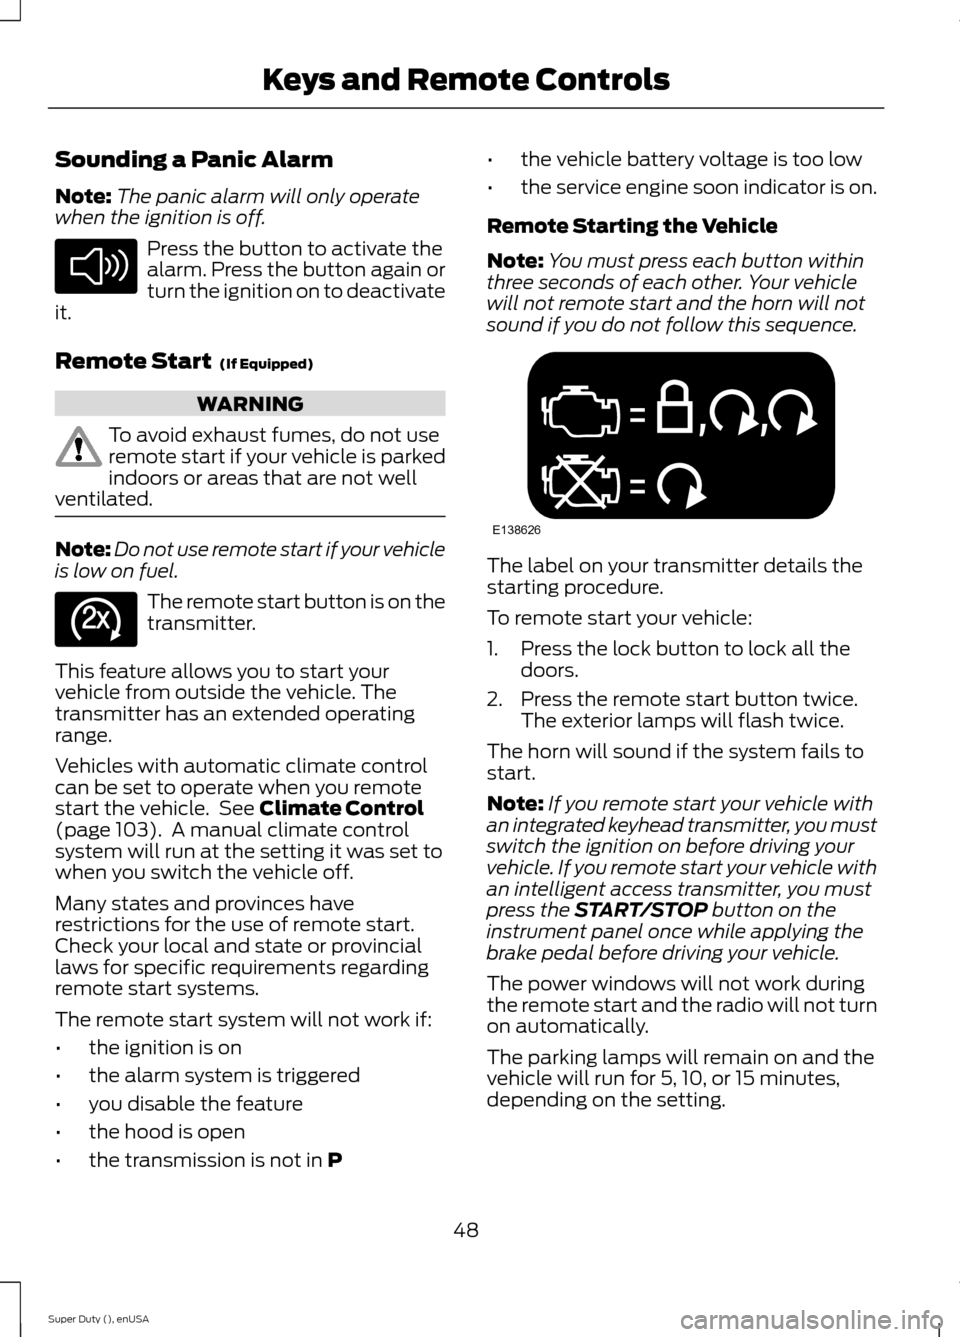
Note:You must press each button withinthree seconds of each other. Your vehiclewill not remote start and the horn will notsound if you do not follow this sequence.
The label on your transmitter details thestarting procedure.
To remote start your vehicle:
1.Press the lock button to lock all thedoors.
2.Press the remote start button twice.The exterior lamps will flash twice.
The horn will sound if the system fails tostart.
Note:If you remote start your vehicle withan integrated keyhead transmitter, you mustswitch the ignition on before driving yourvehicle. If you remote start your vehicle withan intelligent access transmitter, you mustpress the START/STOP button on theinstrument panel once while applying thebrake pedal before driving your vehicle.
The power windows will not work duringthe remote start and the radio will not turnon automatically.
The parking lamps will remain on and thevehicle will run for 5, 10, or 15 minutes,depending on the setting.
48Super Duty (), enUSAKeys and Remote ControlsE138624 E138625 E138626