2015 FORD MUSTANG headlamp
[x] Cancel search: headlampPage 84 of 441
It will also illuminate momentarily when
you switch the ignition on to confirm the
lamp is functional. If it does not illuminate
when you switch the ignition on, or begins
to flash at any time, have the system
checked by your authorized dealer.
Parking Lamps
It will illuminate when you switch
the parking lamps on.
Service Engine Soon If the service engine soon
indicator light stays illuminated
after the engine is started, it
indicates that the On Board Diagnostics
system (OBD) has detected a malfunction
of the vehicle emissions control system.
Refer to On board diagnostics (OBD) in
the Fuel and Refueling chapter for more
information about having your vehicle
serviced. See Emission Control System
(page 131).
If the light is blinking, engine misfire is
occurring which could damage your
catalytic converter. Drive in a moderate
fashion (avoid heavy acceleration and
deceleration) and have your vehicle
serviced immediately.
Note: Under engine misfire conditions,
excessive exhaust temperatures could
damage the catalytic converter or other
vehicle components.
The service engine soon indicator light
illuminates when the ignition is first turned
on prior to engine start to check the bulb
and to indicate whether the vehicle is ready
for Inspection/Maintenance (I/M) testing. Normally, the service engine soon light will
stay on until the engine is cranked, then
turn itself off if no malfunctions are
present. However, if after 15 seconds the
service engine soon light blinks eight times,
it means that the vehicle is not ready for
I/M testing. See
Emission Control
System (page 131).
Stability Control It will flash when the system is
active. If it remains illuminated
or does not illuminate when you
switch the ignition on, this indicates a
malfunction. During a malfunction the
system will switch off. Have the system
checked by your authorized dealer
immediately. See
Using Stability
Control (page 144).
Stability Control Off It will illuminate when you switch
the system off. It will go out
when you switch the system
back on or when you switch the ignition
off. See
Using Stability Control (page
144).
AUDIBLE WARNINGS AND
INDICATORS
Keyless Warning Alert
The horn will sound twice when you exit
your vehicle with the intelligent access key
and your vehicle is in RUN, indicating your
vehicle is still on.
Headlamps On Warning Chime
Sounds when you remove the key from the
ignition and open the driver's door and you
have left the headlamps or parking lamps
on.
81
Mustang (), enUSA, First Printing Instrument Cluster E138639
Page 125 of 441
STEERING WHEEL LOCK (If
Equipped)
The steering wheel locks automatically
when you leave your vehicle and take the
intelligent access key with you. The
steering wheel unlocks automatically when
you enter your vehicle with the intelligent
access key.
Note: You may need to turn the steering
wheel left or right if the wheel does not
unlock completely. This may happen in
certain situations, such as parking your
vehicle on a steep grade.
STARTING A GASOLINE
ENGINE
When you start the engine, the idle speed
increases, this helps to warm up the
engine. If the engine idle speed does not
slow down automatically, have your
vehicle checked by an authorized dealer.
Note: You can crank the engine for a total
of 60 seconds (without the engine starting)
before the starting system temporarily
disables. The 60 seconds does not have to
be all at once. For example, if you crank the
engine three times for 20 seconds each
time, without the engine starting, you
reached the 60-second time limit. A
message appears in the information display
alerting you that you exceeded the cranking
time. You cannot attempt to start the engine
for at least 15 minutes. After 15 minutes, you
are limited to a 15-second engine cranking
time. You need to wait 60 minutes before
you can crank the engine for 60 seconds
again. Before starting the engine, check the
following:
•
Make sure all occupants have fastened
their safety belts.
• Make sure the headlamps and
electrical accessories are off.
• Make sure the parking brake is on.
• Move the transmission selector lever
to park (P) (automatic transmission)
or neutral (manual transmission)
Note: Do not touch the accelerator pedal.
Note: You must have your intelligent access
key in the vehicle in order to shift the
transmission out of position
P.
1. Fully press the brake pedal.
2. Press the button.
The system does not function if:
• The key frequencies are jammed.
• The key battery has no charge.
If you are unable to start the engine, do the
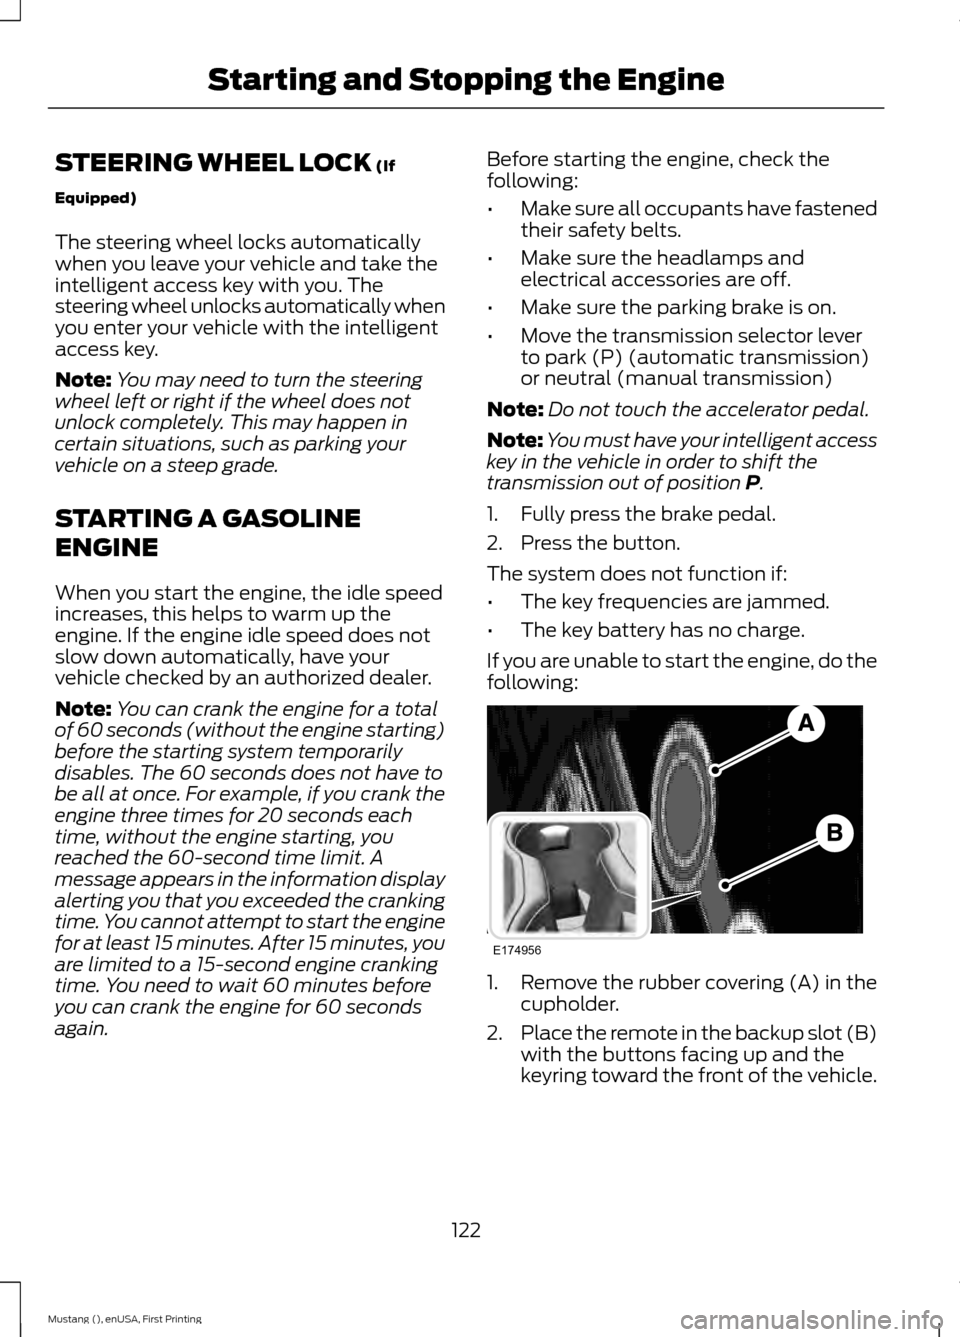
following: 1. Remove the rubber covering (A) in the
cupholder.
2. Place the remote in the backup slot (B)
with the buttons facing up and the
keyring toward the front of the vehicle.
122
Mustang (), enUSA, First Printing Starting and Stopping the EngineE174956
Page 169 of 441

System Limitations
WARNING
The collision warning system
’s brake
support can only help reduce the
speed at which a collision occurs if
the driver applies the vehicle ’s brakes. The
brake pedal must be pressed just like any
typical braking situation. Due to the nature of radar technology,
there may be certain instances where
vehicles do not provide a collision warning.
These include:
•
Stationary vehicles or vehicles moving
below 6 mph (10 km/h).
• Pedestrians or objects in the roadway.
• Oncoming vehicles in the same lane.
• Severe weather conditions (see
blocked sensor section).
• Debris build-up on the grille near the
headlamps (see blocked sensor
section).
• Small distance to vehicle ahead.
• Steering wheel and pedal movements
are large (very active driving style).
If the front end of the vehicle is hit or
damaged, the radar sensing zone may be
altered causing missed or false collision
warnings. See your authorized dealer to
have your collision warning radar checked
for proper coverage and operation.
DRIVE CONTROL
Selectable Drive Modes
Selectable drive modes delivers a driving
experience through a suite of sophisticated
electronic vehicle systems. These systems
optimize steering, handling and powertrain
response. This provides a single location
to control multiple systems performance
settings. Selectable drive modes consists of the
following systems:
•
Electronically power-assisted steering
adjusts steering effort and feel based
on your selected mode. See Steering
(page 163).
• Electronic stability control and traction
control maintain your vehicle control
in adverse conditions or high
performance driving. See
Stability
Control (page 143).
• Electronic throttle control enhances
the powertrain response to your inputs.
Using Selectable Drive Modes
Selectable drive modes automatically
tailors your vehicle configuration for each
mode selected. To change the drive mode
setting, toggle the mode
button/switch on the instrument
panel under the display. The first press of
the mode button/switch illuminates the
selected mode, subsequent presses will
change the selected mode.
Note: Mode changes are not available when
the vehicle ignition is off or reverse (R) gear
is selected. In gear position drive (D), the
available modes are Normal, Sport+, Track
and Snow/Wet. In gear position sport (S)
Snow/Wet and Normal mode are
unavailable.
Modes:
• Normal – Delivers a balanced
combination of comfort and handling.
This mode provides an engaging drive
experience and a direct connection to
the road without sacrificing any of the
composure demanded from your
vehicle.
• Sport+ – Provides a sportier steering
feel and throttle response. Sport+
mode is ideal for use during more
spirited driving.
166
Mustang (), enUSA, First Printing Driving AidsE174706
Page 208 of 441

Protected components
Fuse amp rating
Fuse or relay number
Not used.
—
58
Not used.
—
59
Powertrain control module.
5A***
60
Not used.
—
61
Anti-lock brakes run-start switch.
5A***
62
Not used.
—
63
Electronic power assist steering.
5A***
64
Not used.
—
65
Blind spot information system.
5A***
66
Rear view camera.
Air conditioning compressor relay coils.
Not used.
—
67
Headlamp leveling switch.
10A***
68
Auxiliary power point relay.
—
69
Heated exterior mirrors.
10A***
70
Not used.
—
71
Rain sensor module.
5A***
72
Not used.
—
73
Mass air flow sensor.
5A***
74
Not used.
—
75
Rear window defroster.
—
76
Electronic cooling fan 2.
—
77
Left-hand high-intensity discharge head-
lamp relay (export).
—
78
Right-hand high-intensity-discharge
headlamp relay (export).
—
79
Windshield wiper relay.
—
80
Starter motor solenoid.
—
81
205
Mustang (), enUSA, First Printing Fuses
Page 226 of 441
Poor wiper quality can be improved by
cleaning the wiper blades and the
windshield. See Cleaning the Windows
and Wiper Blades (page 230).
ADJUSTING THE HEADLAMPS
Vertical Aim Adjustment
The headlamps on your vehicle are
properly aimed at the assembly plant. If
your vehicle has been in an accident, have
the alignment of your headlamps checked
by an authorized dealer.
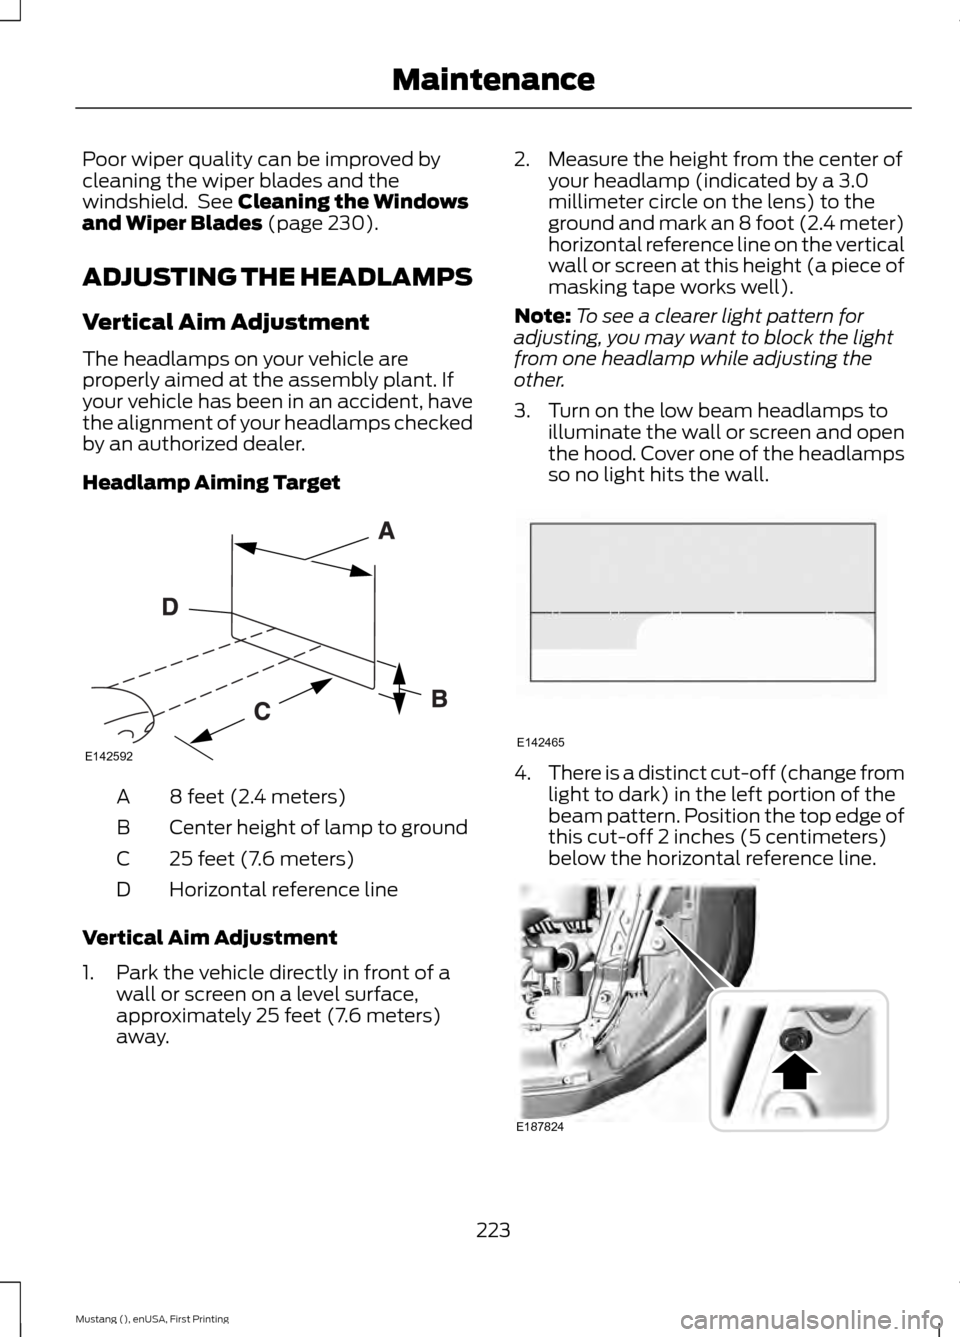
Headlamp Aiming Target 8 feet (2.4 meters)
A
Center height of lamp to ground
B
25 feet (7.6 meters)
C
Horizontal reference line
D
Vertical Aim Adjustment
1. Park the vehicle directly in front of a wall or screen on a level surface,
approximately 25 feet (7.6 meters)
away. 2. Measure the height from the center of
your headlamp (indicated by a 3.0
millimeter circle on the lens) to the
ground and mark an 8 foot (2.4 meter)
horizontal reference line on the vertical
wall or screen at this height (a piece of
masking tape works well).
Note: To see a clearer light pattern for
adjusting, you may want to block the light
from one headlamp while adjusting the
other.
3. Turn on the low beam headlamps to illuminate the wall or screen and open
the hood. Cover one of the headlamps
so no light hits the wall. 4.
There is a distinct cut-off (change from
light to dark) in the left portion of the
beam pattern. Position the top edge of
this cut-off 2 inches (5 centimeters)
below the horizontal reference line. 223
Mustang (), enUSA, First Printing MaintenanceE142592 E142465 E187824
Page 227 of 441
5. Locate the vertical adjuster on each
headlamp. Use a Phillips #2
screwdriver to turn the adjuster either
clockwise or counterclockwise to
adjust the vertical aim of the
headlamp. The horizontal edge of the
brighter light should touch the
horizontal reference line.
6. Repeat Steps 3 through 7 to adjust the
other headlamp.
7. Close the hood and turn off the lamps.
Horizontal Aim Adjustment
Horizontal aim is not required for this
vehicle and is not adjustable.
CHANGING A BULB
Lamp Assembly Condensation
Exterior lamps have vents to
accommodate normal changes in pressure.
Condensation can be a natural occurrence
of this design. When moist air enters the
lamp assembly through the vents, there is
a possibility that condensation can occur
in cold temperatures. When normal
condensation occurs, a thin film of mist
can form on the interior of the lens. The
mist eventually clears and exits through
the vents during normal operation. Clearing
time may take as long as 48 hours under
dry weather conditions.
Examples of acceptable condensation are:
• Thin mist without streaks, drip marks
or droplets.
• Fine mist that covers less than 50% of
the lens.
Examples of unacceptable moisture are:
• Water puddle inside the lamp.
• Large water droplets, drip marks or
streaks on the interior of the lens. If any of the above conditions of
unacceptable moisture are present,
contact an authorized.
Replacing HID Headlamp Bulbs
Your vehicle has high intensity discharge
lamps. These lamps operate at a high
voltage. Contact an authorized dealer.
Accessing the Direction Indicator
and Fog Lamp Bulbs
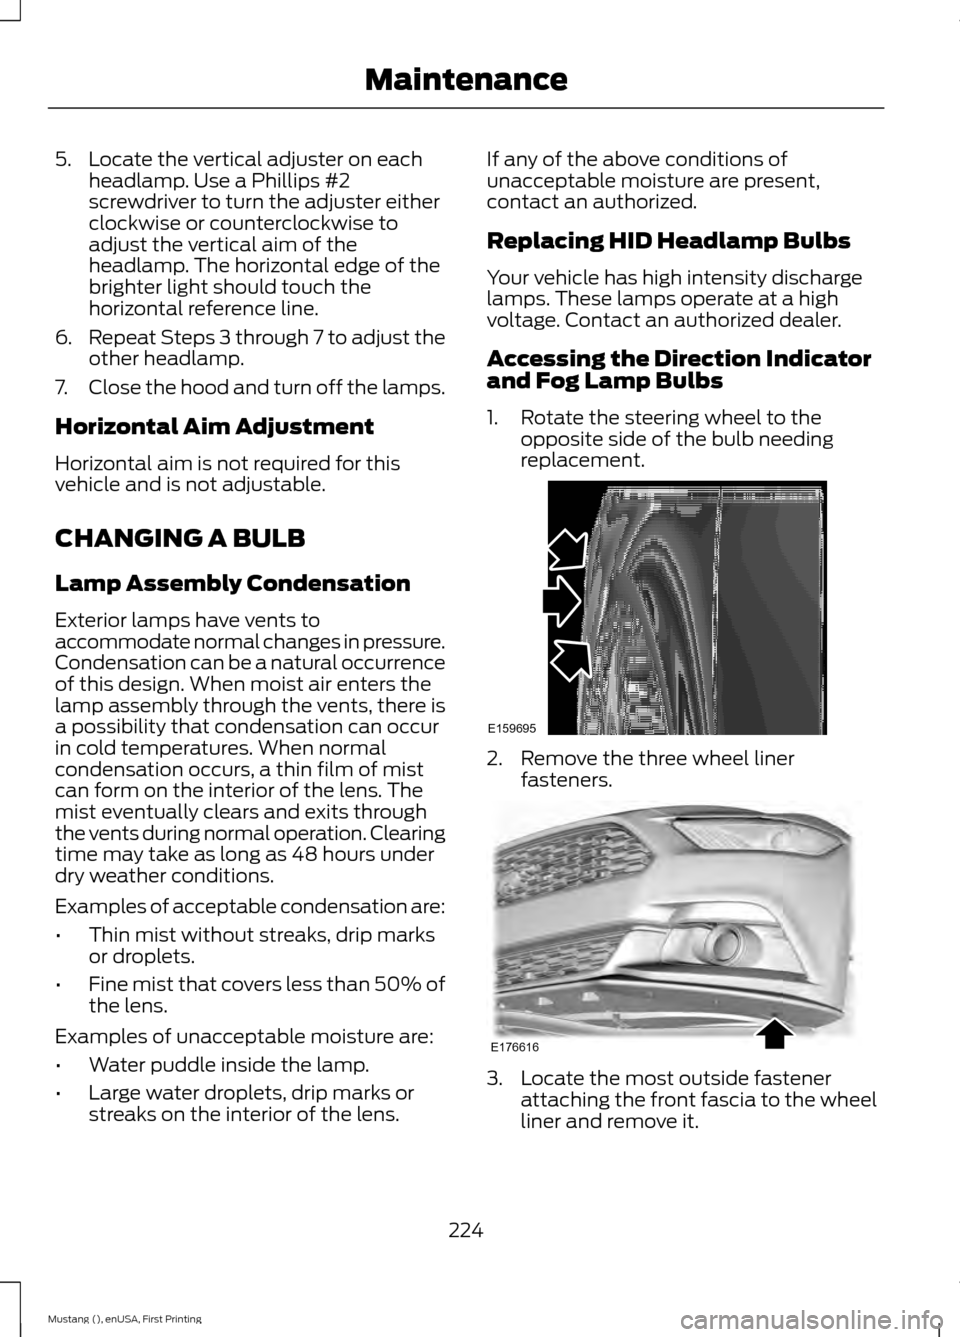
1. Rotate the steering wheel to the
opposite side of the bulb needing
replacement. 2. Remove the three wheel liner
fasteners. 3. Locate the most outside fastener
attaching the front fascia to the wheel
liner and remove it.
224
Mustang (), enUSA, First Printing MaintenanceE159695 E176616
Page 229 of 441

BULB SPECIFICATION CHART
Replacement bulbs are specified in the
chart below. Headlamp bulbs must be
marked with an authorized "D.O.T." for
North America and an "E" for Europe to
make sure lamp performance, light
brightness and pattern and safe visibility.
The correct bulbs do not damage the lamp
assembly or void the lamp assembly
warranty and provide quality bulb
illumination time. Trade name
Function
D3S
Headlamps - high intensity discharge
(HID)*
7444NA (amber)
Front park and Direction indicators
WY5W (amber)
Sidemarker
LED
Fog lamp
H11
LED
Rear lamp, brake lamp and direction
indicator lamp*
LED
High-mount brake lamp*
3156 or 3157
Backup lamp
LED
License plate lamp*
W5W
Dome and Map lamp
W5W
Glove box and Cargo lamp
To replace all instrument panel lights, contact an authorized dealer
* Contact an authorized dealer to replace the bulb.
226
Mustang (), enUSA, First Printing Maintenance
Page 432 of 441
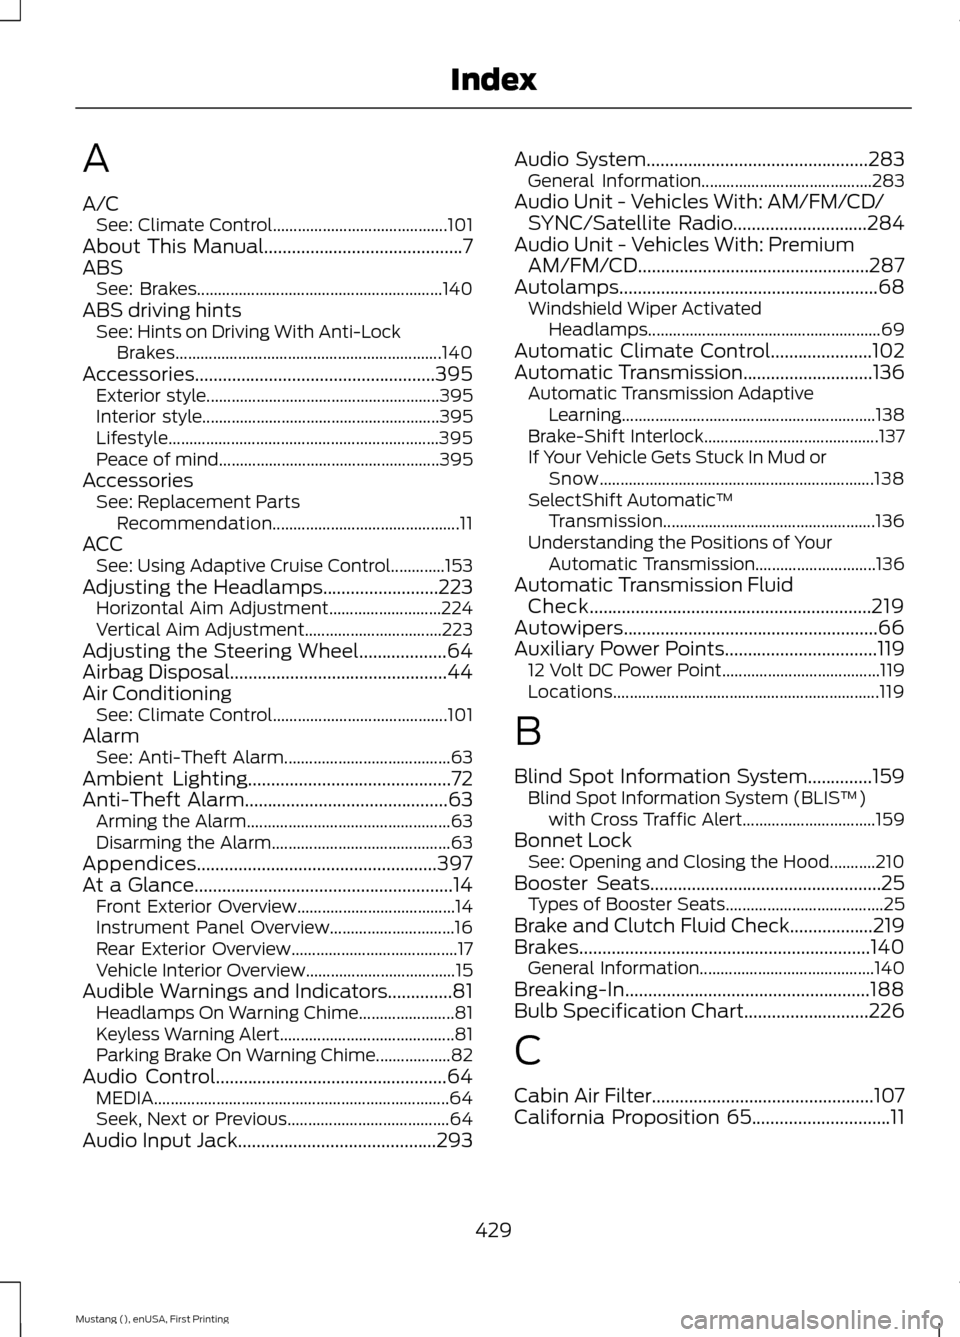
A
A/C
See: Climate Control.......................................... 101
About This Manual...........................................7
ABS See: Brakes........................................................... 140
ABS driving hints See: Hints on Driving With Anti-Lock
Brakes................................................................ 140
Accessories....................................................395 Exterior style........................................................ 395
Interior style......................................................... 395
Lifestyle................................................................. 395
Peace of mind..................................................... 395
Accessories See: Replacement Parts
Recommendation............................................. 11
ACC See: Using Adaptive Cruise Control.............153
Adjusting the Headlamps
.........................223
Horizontal Aim Adjustment........................... 224
Vertical Aim Adjustment................................. 223
Adjusting the Steering Wheel...................64
Airbag Disposal...............................................44
Air Conditioning See: Climate Control.......................................... 101
Alarm See: Anti-Theft Alarm........................................ 63
Ambient Lighting............................................72
Anti-Theft Alarm
............................................63
Arming the Alarm................................................. 63
Disarming the Alarm........................................... 63
Appendices....................................................397
At a Glance........................................................14 Front Exterior Overview...................................... 14
Instrument Panel Overview.............................. 16
Rear Exterior Overview........................................ 17
Vehicle Interior Overview.................................... 15
Audible Warnings and Indicators
..............81
Headlamps On Warning Chime....................... 81
Keyless Warning Alert.......................................... 81
Parking Brake On Warning Chime.................. 82
Audio Control..................................................64 MEDIA....................................................................... 64
Seek, Next or Previous....................................... 64
Audio Input Jack...........................................293 Audio System
................................................283
General Information......................................... 283
Audio Unit - Vehicles With: AM/FM/CD/ SYNC/Satellite Radio
.............................284
Audio Unit - Vehicles With: Premium AM/FM/CD..................................................287
Autolamps
........................................................68
Windshield Wiper Activated
Headlamps........................................................ 69
Automatic Climate Control......................102
Automatic Transmission............................136 Automatic Transmission Adaptive
Learning............................................................. 138
Brake-Shift Interlock.......................................... 137
If Your Vehicle Gets Stuck In Mud or Snow.................................................................. 138
SelectShift Automatic ™
Transmission................................................... 136
Understanding the Positions of Your Automatic Transmission............................. 136
Automatic Transmission Fluid Check.............................................................219
Autowipers.......................................................66
Auxiliary Power Points.................................119 12 Volt DC Power Point...................................... 119
Locations................................................................ 119
B
Blind Spot Information System..............159 Blind Spot Information System (BLIS ™)
with Cross Traffic Alert................................ 159
Bonnet Lock See: Opening and Closing the Hood...........210
Booster Seats..................................................25 Types of Booster Seats...................................... 25
Brake and Clutch Fluid Check..................219
Brakes...............................................................140 General Information.......................................... 140
Breaking-In.....................................................188
Bulb Specification Chart...........................226
C
Cabin Air Filter................................................107
California Proposition 65..............................11
429
Mustang (), enUSA, First Printing Index