2015 FORD FUSION (AMERICAS) fuel
[x] Cancel search: fuelPage 164 of 488
MANUAL TRANSMISSION
Using the Clutch
Note:
Failure to fully press the clutch pedal
to the floor may cause increased shift
efforts, prematurely wear transmission
components or damage the transmission.
Note: Do not drive with your foot resting on
the clutch pedal or use the clutch pedal to
hold your vehicle at a standstill while
waiting on a hill. These actions will reduce
the life of the clutch and could nullify a
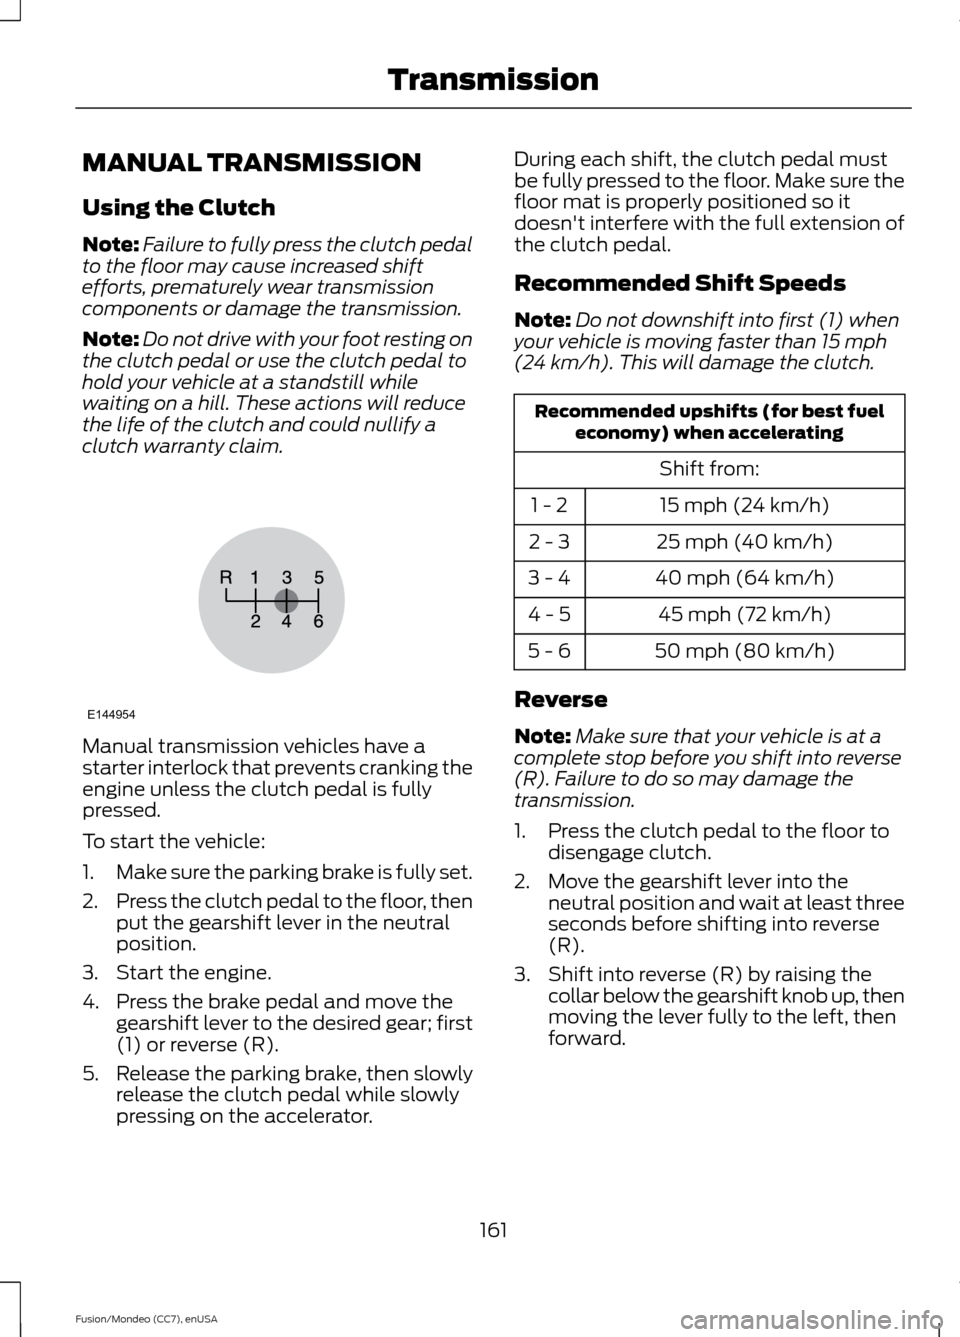
clutch warranty claim. Manual transmission vehicles have a
starter interlock that prevents cranking the
engine unless the clutch pedal is fully
pressed.
To start the vehicle:
1.
Make sure the parking brake is fully set.
2. Press the clutch pedal to the floor, then
put the gearshift lever in the neutral
position.
3. Start the engine.
4. Press the brake pedal and move the gearshift lever to the desired gear; first
(1) or reverse (R).
5. Release the parking brake, then slowly
release the clutch pedal while slowly
pressing on the accelerator. During each shift, the clutch pedal must
be fully pressed to the floor. Make sure the
floor mat is properly positioned so it
doesn't interfere with the full extension of
the clutch pedal.
Recommended Shift Speeds
Note:
Do not downshift into first (1) when
your vehicle is moving faster than 15 mph
(24 km/h). This will damage the clutch. Recommended upshifts (for best fuel
economy) when accelerating
Shift from:15 mph (24 km/h)
1 - 2
25 mph (40 km/h)
2 - 3
40 mph (64 km/h)
3 - 4
45 mph (72 km/h)
4 - 5
50 mph (80 km/h)
5 - 6
Reverse
Note: Make sure that your vehicle is at a
complete stop before you shift into reverse
(R). Failure to do so may damage the
transmission.
1. Press the clutch pedal to the floor to disengage clutch.
2. Move the gearshift lever into the neutral position and wait at least three
seconds before shifting into reverse
(R).
3. Shift into reverse (R) by raising the collar below the gearshift knob up, then
moving the lever fully to the left, then
forward.
161
Fusion/Mondeo (CC7), enUSA TransmissionE144954
Page 166 of 488

P (Park)
This position locks the transmission and
prevents the front wheels from turning.
Come to a complete stop before putting
your vehicle into and out of P (Park)
R (Reverse)
With the gearshift lever in R (Reverse), the
vehicle will move backward. Always come
to a complete stop before shifting into and
out of
R (Reverse).
N (Neutral)
With the gearshift lever in N (Neutral), the
vehicle can be started and is free to roll.
Hold the brake pedal down while in this
position.
D (Drive)
The normal driving position for the best
fuel economy. Transmission operates in
gears one through six.
S (Sport)
Moving the gearshift lever to
S (Sport):
• Provides additional grade (engine)
braking and extends lower gear
operation to enhance performance for
uphill climbs, hilly terrain or
mountainous areas. This will increase
engine RPM during engine braking.
• Provides additional lower gear
operation through the automatic
transmission shift strategy.
• Gears are selected more quickly and
at higher engine speeds.
SelectShift Automatic ™
Transmission
(If Equipped)
Your SelectShift Automatic transmission
gives you the ability to change gears
manually. If equipped with the toggle on the
gearshift lever:
•
Press the (+) button to upshift.
• Press the (-) button to downshift. If equipped with steering wheel
paddles:
With your vehicle in
D (Drive), the paddle
shifters provide temporary manual control.
They allow you the ability to shift gears
quickly, without taking your hands off the
steering wheel.
You can achieve extensive manual control
by moving the gearshift lever to
S (Sport)
position.
• Pull the right paddle (+) to upshift.
• Pull the left paddle (–) to downshift. The system determines when temporary
manual control is no longer in use and
returns to automatic control.
Upshift to the recommended shift speeds
according to the following chart:
163
Fusion/Mondeo (CC7), enUSA TransmissionE142629 E144821
Page 167 of 488
Upshifts when accelerating (recom-
mended for best fuel economy)
Shift from:15 mph (24 km/h)
1 - 2
25 mph (40 km/h)
2 - 3
40 mph (64 km/h)
3 - 4
45 mph (72 km/h)
4 - 5
50 mph (80 km/h)
5 - 6
The instrument cluster will display your
currently selected gear.
The transmission will automatically upshift
if your engine speed is too high or
downshift if your engine speed is too low.
Note: The system will stay in manual
control until you make another shift button
selection. For example, D (Drive).
Note: Engine damage may occur if
excessive engine revving is held without
shifting.
Brake-Shift Interlock WARNINGS
Do not drive your vehicle until you
verify that the brake lamps are
working.
When doing this procedure, you will
be taking the vehicle out of park
which means the vehicle can roll
freely. To avoid unwanted vehicle
movement, always fully set the parking
brake prior to doing this procedure. Use
wheel chocks if appropriate. If the parking brake is fully released,
but the brake warning lamp remains
illuminated, the brakes may not be
working properly. See your authorized
dealer. Note:
See your authorized dealer as soon
as possible if this procedure is used.
Note: For some markets this feature will be
disabled.
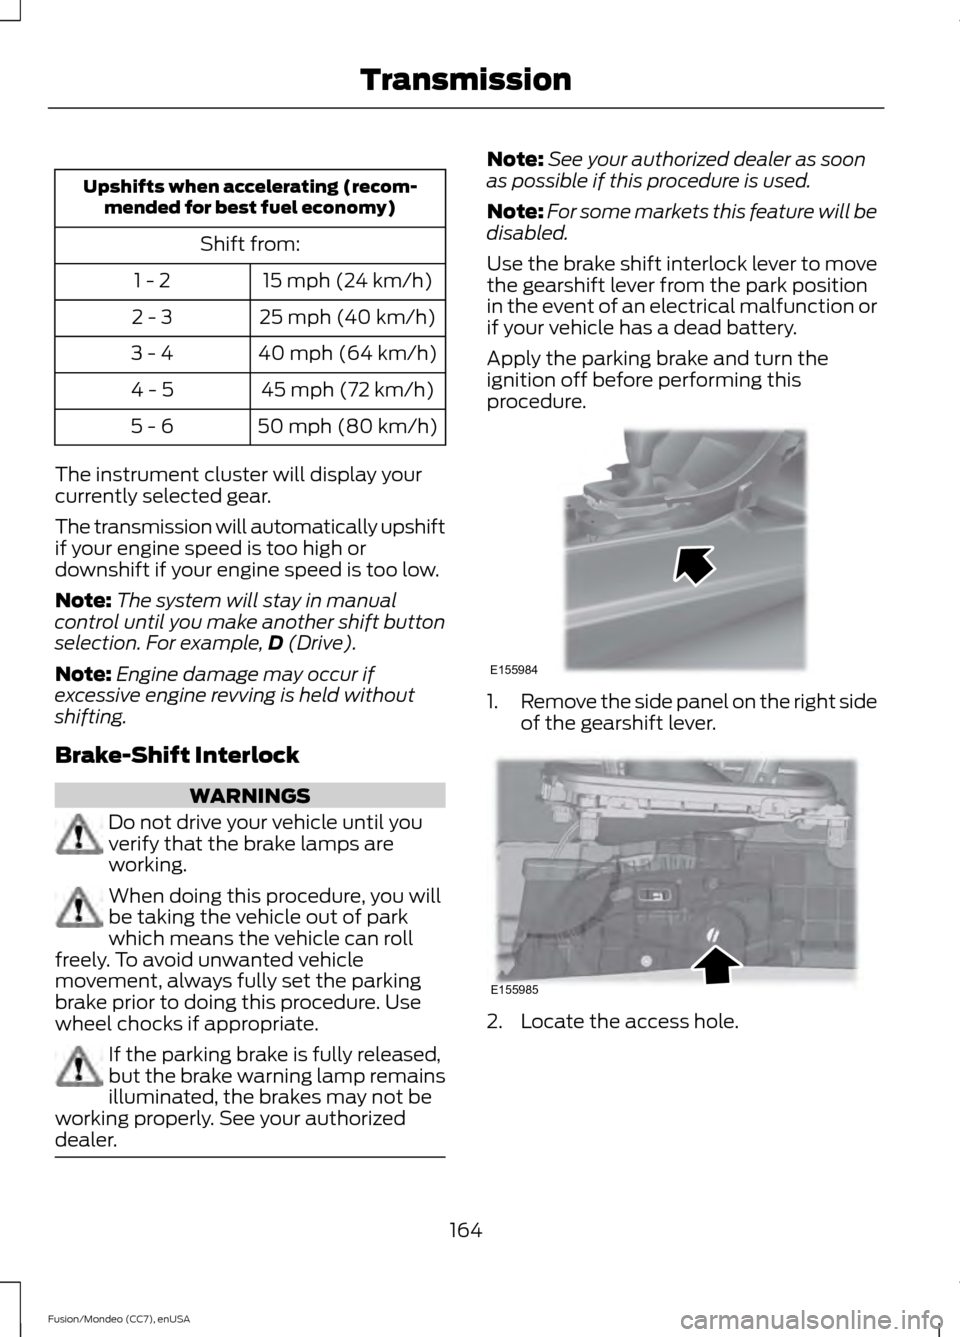
Use the brake shift interlock lever to move
the gearshift lever from the park position
in the event of an electrical malfunction or
if your vehicle has a dead battery.
Apply the parking brake and turn the
ignition off before performing this
procedure. 1.
Remove the side panel on the right side
of the gearshift lever. 2. Locate the access hole.
164
Fusion/Mondeo (CC7), enUSA TransmissionE155984 E155985
Page 210 of 488
LOAD LIMIT
Vehicle Loading - with and
without a Trailer
This section will guide you in the
proper loading of your vehicle,
trailer or both, to keep your loaded
vehicle weight within its design
rating capability, with or without
a trailer. Properly loading your
vehicle will provide maximum
return of vehicle design
performance. Before loading your
vehicle, familiarize yourself with
the following terms for
determining your vehicle
’s weight
ratings, with or without a trailer,
from the vehicle ’s Tire Label or
Safety Compliance Certification
Label:
Base Curb Weight - is the weight
of the vehicle including a full tank
of fuel and all standard
equipment. It does not include
passengers, cargo, or optional
equipment.
Vehicle Curb Weight -
is the
weight of your new vehicle when
you picked it up from your
authorized dealer plus any
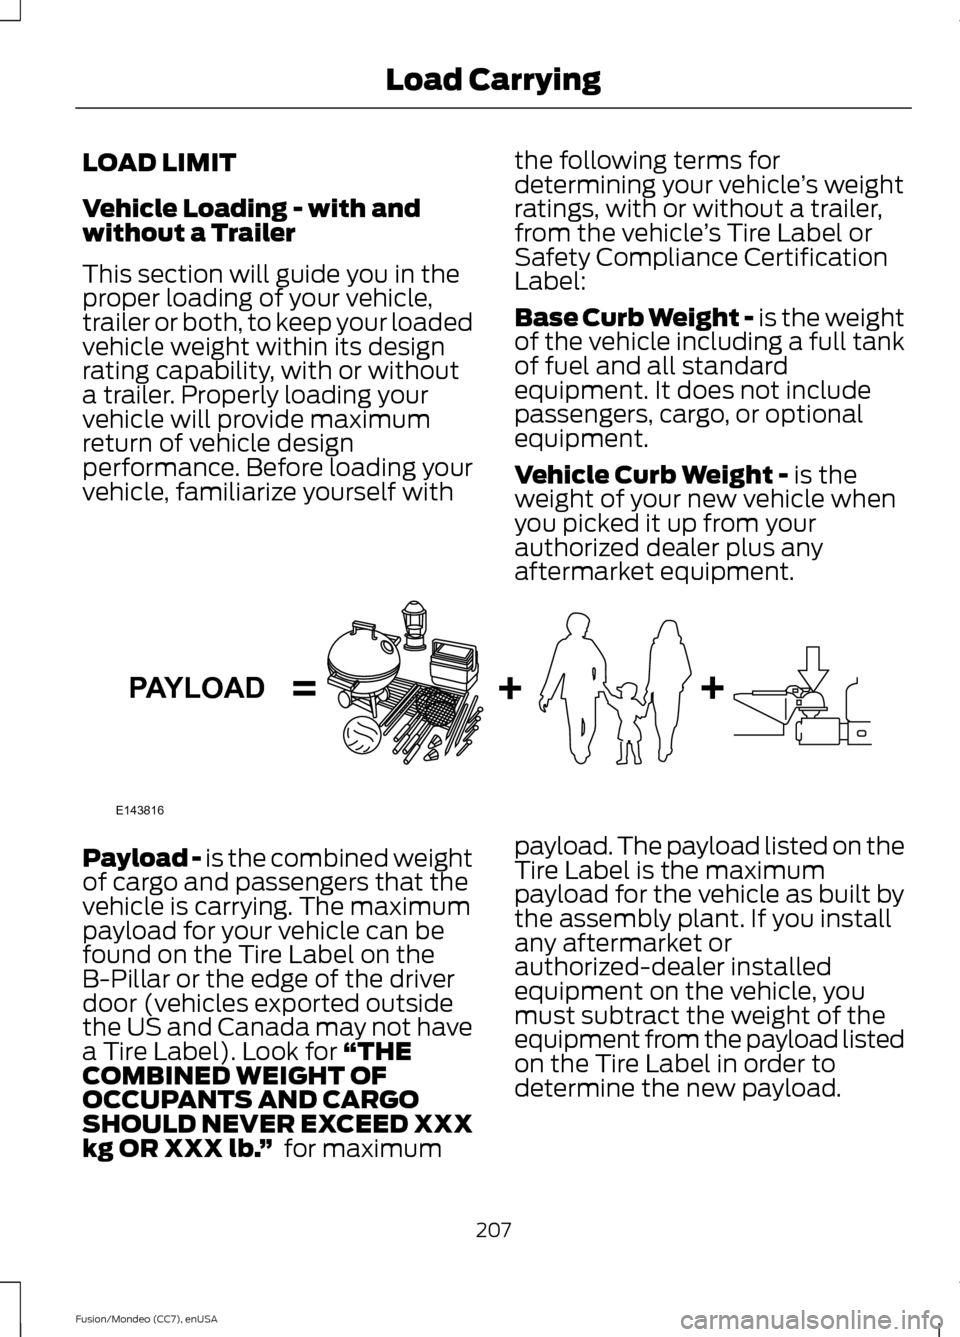
aftermarket equipment. Payload -
is the combined weight
of cargo and passengers that the
vehicle is carrying. The maximum
payload for your vehicle can be
found on the Tire Label on the
B-Pillar or the edge of the driver
door (vehicles exported outside
the US and Canada may not have
a Tire Label). Look for
“THE
COMBINED WEIGHT OF
OCCUPANTS AND CARGO
SHOULD NEVER EXCEED XXX
kg OR XXX lb. ” for maximum payload. The payload listed on the
Tire Label is the maximum
payload for the vehicle as built by
the assembly plant. If you install
any aftermarket or
authorized-dealer installed
equipment on the vehicle, you
must subtract the weight of the
equipment from the payload listed
on the Tire Label in order to
determine the new payload.
207
Fusion/Mondeo (CC7), enUSA Load CarryingE143816PAYLOAD
Page 221 of 488

Trailer lamps are required on most towed
vehicles. Make sure all running lights, brake
lights, turn signals and hazard lights are
working.
Before Towing a Trailer
Practice turning, stopping and backing-up
to get the feel of your vehicle-trailer
combination before starting on a trip.
When turning, make wider turns so the
trailer wheels clear curbs and other
obstacles.
When Towing a Trailer
•
Do not drive faster than 70 mph (113
km/h) during the first 500 miles (800
kilometers).
• Do not make full-throttle starts.
• Check your hitch, electrical connections
and trailer wheel lug nuts thoroughly
after you have traveled 50 miles (80
kilometers).
• When stopped in congested or heavy
traffic during hot weather, place the
gearshift in position P (automatic
transmission) or neutral (manual
transmission) to aid engine and
transmission cooling and to help A/C
performance.
• Turn off the speed control with heavy
loads or in hilly terrain. The speed
control may turn off automatically
when you are towing on long, steep
grades.
• Shift to a lower gear when driving down
a long or steep hill. Do not apply the
brakes continuously, as they may
overheat and become less effective.
• If your transmission is equipped with a
Grade Assist or Tow/Haul feature, use
this feature when towing. This provides
engine braking and helps eliminate
excessive transmission shifting for
optimum fuel economy and
transmission cooling. •
Allow more distance for stopping with
a trailer attached. Anticipate stops and
brake gradually.
• Avoid parking on a grade. However, if
you must park on a grade:
1. Turn the steering wheel to point your vehicle tires away from traffic flow.
2. Set your vehicle parking brake.
3. Place the automatic transmission in position
P or manual transmission in a
low gear.
4. Place wheel chocks in front and back of the trailer wheels. (Chocks not
included with vehicle.)
Launching or Retrieving a Boat or
Personal Watercraft (PWC)
Note: Disconnect the wiring to the trailer
before
backing the trailer into the water.
Note: Reconnect the wiring to the trailer
after
removing the trailer from the water.
When backing down a ramp during boat
launching or retrieval:
• Do not allow the static water level to
rise above the bottom edge of the rear
bumper.
• Do not allow waves to break higher
than 6 inches (15 centimeters) above
the bottom edge of the rear bumper.
Exceeding these limits may allow water to
enter vehicle components:
• Causing internal damage to the
components.
• Affecting drivability, emissions, and
reliability.
Replace the rear axle lubricant anytime
the rear axle has been submerged in water.
Water may have contaminated the rear
axle lubricant, which is not normally
checked or changed unless a leak is
suspected or other axle repair is required.
218
Fusion/Mondeo (CC7), enUSA Towing
Page 224 of 488

BREAKING-IN
You need to break in new tires for
approximately 300 miles (480
kilometers). During this time, your vehicle
may exhibit some unusual driving
characteristics.
Avoid driving too fast during the first 1000
miles (1600 kilometers). Vary your speed
frequently and change up through the
gears early. Do not labor the engine.
Do not tow during the first 1000 miles
(1600 kilometers).
ECONOMICAL DRIVING
Fuel economy is affected by several things
such as how you drive, the conditions you
drive under and how you maintain your
vehicle.
There are some things to keep in mind that
may improve your fuel economy:
•
Accelerate and slow down in a smooth,
moderate fashion.
• Drive at steady speeds.
• Anticipate stops; slowing down may
eliminate the need to stop.
• Combine errands and minimize
stop-and-go driving.
•When running errands, go to the
furthest destination first and then
work your way back home.
• Close the windows for high-speed
driving.
• Drive at reasonable speeds. (Traveling
at 65 mph/105 kph uses about 15%
less fuel than traveling at 75 mph/121
kph).
• Keep the tires properly inflated and use
only the recommended size. •
Use the recommended engine oil.
• Perform all regularly scheduled
maintenance.
There are also some things you may want
to avoid doing because they reduce your
fuel economy:
• Avoid sudden or hard accelerations.
• Avoid revving the engine before turning
off the car.
• Avoid long idle periods.
• Do not warm up your vehicle on cold
mornings.
• Reduce the use of air conditioning and
heat.
• Avoid using speed control in hilly
terrain.
• Do not rest your foot on the brake
pedal while driving.
• Avoid carrying unnecessary weight
(approximately 1 mpg [0.4
kilometers/liter] is lost for every 400
lbs [180 kilograms] of weight carried).
• Avoid adding particular accessories to
your vehicle (e.g. bug deflectors,
rollbars/light bars, running boards, ski
racks).
• Avoid driving with the wheels out of
alignment.
DRIVING THROUGH WATER WARNING
Do not drive through flowing or deep
water as you may lose control of your
vehicle.
Note:
Driving through standing water can
cause vehicle damage.
Note: Engine damage can occur if water
enters the air filter.
221
Fusion/Mondeo (CC7), enUSA Driving Hints
Page 227 of 488

ROADSIDE ASSISTANCE
Vehicles Sold In The U.S.: Getting
Roadside Assistance
To fully assist you should you have a
vehicle concern, Ford Motor Company
offers a complimentary roadside
assistance program. This program is
separate from the New Vehicle Limited
Warranty. The service is available:
•
24 hours, seven days a week.
• for the coverage period listed on the
Roadside Assistance Card included in
your Owner's Manual portfolio.
Roadside assistance will cover:
• a flat tire change with a good spare, if
provided with the vehicle (except
vehicles that have been supplied with
a tire inflation kit).
• battery jump start.
• lock-out assistance (key replacement
cost is the customer's responsibility).
• fuel delivery — Independent Service
Contractors, if not prohibited by state,
local or municipal law, shall deliver up
to 2.0 gallons (7.5 liters) of gasoline or
5.0 gallons (18.9 liters) of diesel fuel
to a disabled vehicle. Fuel delivery
service is limited to two no-charge
occurrences within a 12-month period.
• winch out — available within 100 feet
(30.5 meters) of a paved or county
maintained road, no recoveries.
• towing — Ford and Lincoln eligible
vehicles towed to an authorized dealer
within 35 miles (56.3 kilometers) of the
disablement location or to the nearest
authorized dealer. If a member
requests to be towed to an authorized
dealer more than 35 miles (56.3
kilometers) from the disablement
location, the member shall be
responsible for any mileage costs in
excess of 35 miles (56.3 kilometers). Trailers shall be covered up to $200 if the
disabled eligible vehicle requires service at
the nearest authorized dealer. If the trailer
is disabled, but the towing vehicle is
operational, the trailer does not qualify for
any roadside services.
Vehicles Sold In The U.S. : Using
Roadside Assistance
Complete the roadside assistance
identification card and place it in your
wallet for quick reference. This card is
found in the owner's information portfolio
in the glove compartment.
U.S. Ford vehicle customers who require
Roadside Assistance, call 1-800-241-3673.
If you need to arrange roadside assistance
for yourself, Ford Motor Company will
reimburse a reasonable amount for towing
to the nearest dealership within 35 miles
(56.3 kilometers). To obtain
reimbursement information, U.S. Ford
vehicle customers call 1-800-241-3673.
Customers will be asked to submit their
original receipts.
Vehicles Sold In Canada : Getting
Roadside Assistance
Canadian customers who require roadside
assistance, call 1-800-665-2006.
Vehicles Sold In Canada : Using
Roadside Assistance
For your convenience, you may complete
the roadside assistance identification card
found in the centerfold of your warranty
guide and retain for future reference.
Canadian roadside coverage and benefits
may differ from the U.S. coverage. If you
require more information, please refer to
the coverage section of your warranty
guide, call us in Canada at
1-800-665-2006, or visit our website at
www.ford.ca.
224
Fusion/Mondeo (CC7), enUSA Roadside Emergencies
Page 228 of 488

HAZARD WARNING FLASHERS
Note:
If used when the vehicle is not
running, the battery will lose charge. There
may be insufficient power to restart your
vehicle. The hazard warning button is
located on the instrument panel.
Use it when your vehicle is
creating a safety hazard for other
motorists.
• Press the button to turn on the hazard
warning function, and the front and
rear direction indicators will flash.
• Press the button again to turn them
off.
FUEL SHUTOFF WARNING
Failure to inspect and, if necessary,
repair fuel leaks after a collision may
increase the risk of fire and serious
injury. Ford Motor Company recommends
that the fuel system be inspected by an
authorized dealer after any collision. In the event of a moderate to severe
collision, this vehicle includes a fuel pump
shutoff feature that stops the flow of fuel
to the engine. Not every impact will cause
a shutoff.
Should your vehicle shut off after a
collision, you may restart your vehicle. For
vehicles equipped with a key system:
1. Switch off the ignition.
2. Switch on the ignition.
3. Repeat Steps 1 and 2 to re-enable the
fuel pump. For vehicles equipped with a push button
start system:
1. Press the START/STOP button to
switch off the ignition.
2. Press the brake pedal and press the START/STOP
button to start the
vehicle.
3. Remove your foot from the brake pedal
and press the
START/STOP button
to switch off the ignition.
4. You can either attempt to start the engine by pressing the brake pedal and
the
START/STOP button, or switch
on the ignition only by pressing the
START/STOP
button without
pressing the brake pedal. Both ways
re-enable the fuel system.
Note: When you try to restart your vehicle
after a fuel shutoff, the vehicle makes sure
that various systems are safe to restart.
Once your vehicle determines that the
systems are safe, then the vehicle will allow
you to restart.
Note: In the event that your vehicle does
not restart after your third attempt, contact
an authorized dealer.
JUMP STARTING THE VEHICLE WARNINGS
The gases around the battery can
explode if exposed to flames, sparks,
or lit cigarettes. An explosion could
result in personal injury or vehicle damage. Batteries contain sulfuric acid which
can burn skin, eyes and clothing, if
contacted.
Use only an adequate-sized cable
with insulated clamps.
225
Fusion/Mondeo (CC7), enUSA Roadside Emergencies