Page 180 of 470

STEERING
To help prevent damage to the powersteering system:
•Never hold the steering wheel at itsfurthest turning points (until it stops)for more than three to five secondswhen the engine is running.
•Do not operate the vehicle with a lowpower steering pump fluid level (belowthe MIN mark on the reservoir).
•Some noise is normal during operation.If excessive, check for low powersteering pump fluid level beforeseeking service by your dealer.
•Heavy or uneven efforts may be causedby low power steering fluid. Check forlow power steering pump fluid levelbefore seeking service by your dealer.
•Do not fill the power steering pumpreservoir above the MAX mark on thereservoir, as this may result in leaksfrom the reservoir.
If the power steering system breaks down(or if the engine is turned off), you cansteer the vehicle manually, but it takesmore effort.
If the steering wanders or pulls, check for:
•an improperly inflated tire
•uneven tire wear
•loose or worn suspension components
•loose or worn steering components
•improper vehicle alignment
If any steering components are serviced orreplaced, install new fasteners (many arecoated with thread adhesive or haveprevailing torque features which may notbe re-used). Never re-use a bolt or nut.Torque fasteners to specifications.
A high crown in the road or high crosswindsmay also make the steering seem towander or pull.
177
Super Duty (), enUSA
Driving Aids
Page 297 of 470

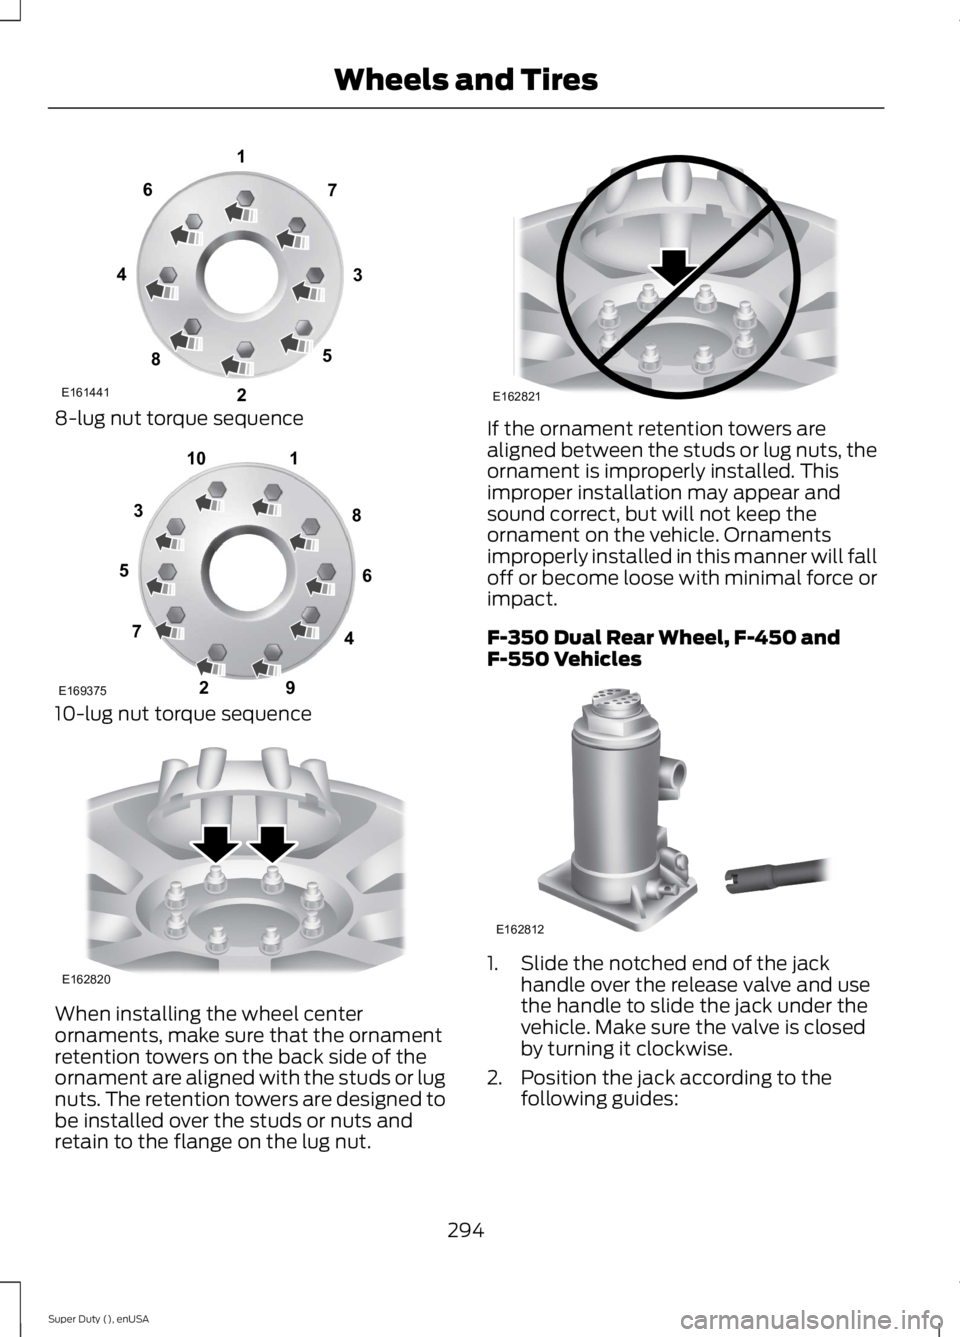
8-lug nut torque sequence
10-lug nut torque sequence
When installing the wheel centerornaments, make sure that the ornamentretention towers on the back side of theornament are aligned with the studs or lugnuts. The retention towers are designed tobe installed over the studs or nuts andretain to the flange on the lug nut.
If the ornament retention towers arealigned between the studs or lug nuts, theornament is improperly installed. Thisimproper installation may appear andsound correct, but will not keep theornament on the vehicle. Ornamentsimproperly installed in this manner will falloff or become loose with minimal force orimpact.
F-350 Dual Rear Wheel, F-450 andF-550 Vehicles
1. Slide the notched end of the jackhandle over the release valve and usethe handle to slide the jack under thevehicle. Make sure the valve is closedby turning it clockwise.
2. Position the jack according to thefollowing guides:
294
Super Duty (), enUSA
Wheels and TiresE161441
13
4
27
6
5
8 1
2
3
4
5
6
7 8
9
10
E169375 E162820 E162821 E162812
Page 299 of 470

Jacking the Vehicle
1. Insert the jack handle into the pumplinkage.
2. Use an up-and-down motion with thejack handle to raise the wheelcompletely off the ground.
Note:Hydraulic jacks are equipped with apressure release valve that prevents liftingloads which exceed the jack's ratedcapacity.
3. Remove the lug nuts with the lugwrench.
4.Replace the flat tire with the spare tire,making sure the valve stem is facingoutward on all front an inboard rearwheels. If you are replacing theoutboard wheel, the valve stem mustbe facing inward. Reinstall the lug nutsuntil the wheel is snug against the hub.Do not fully tighten the lug nuts untilthe wheel has been lowered.
5. Lower the wheel by slowly turning therelease valve counterclockwise.Opening the release valve slowly willprovide a more controlled rate ofdescent.
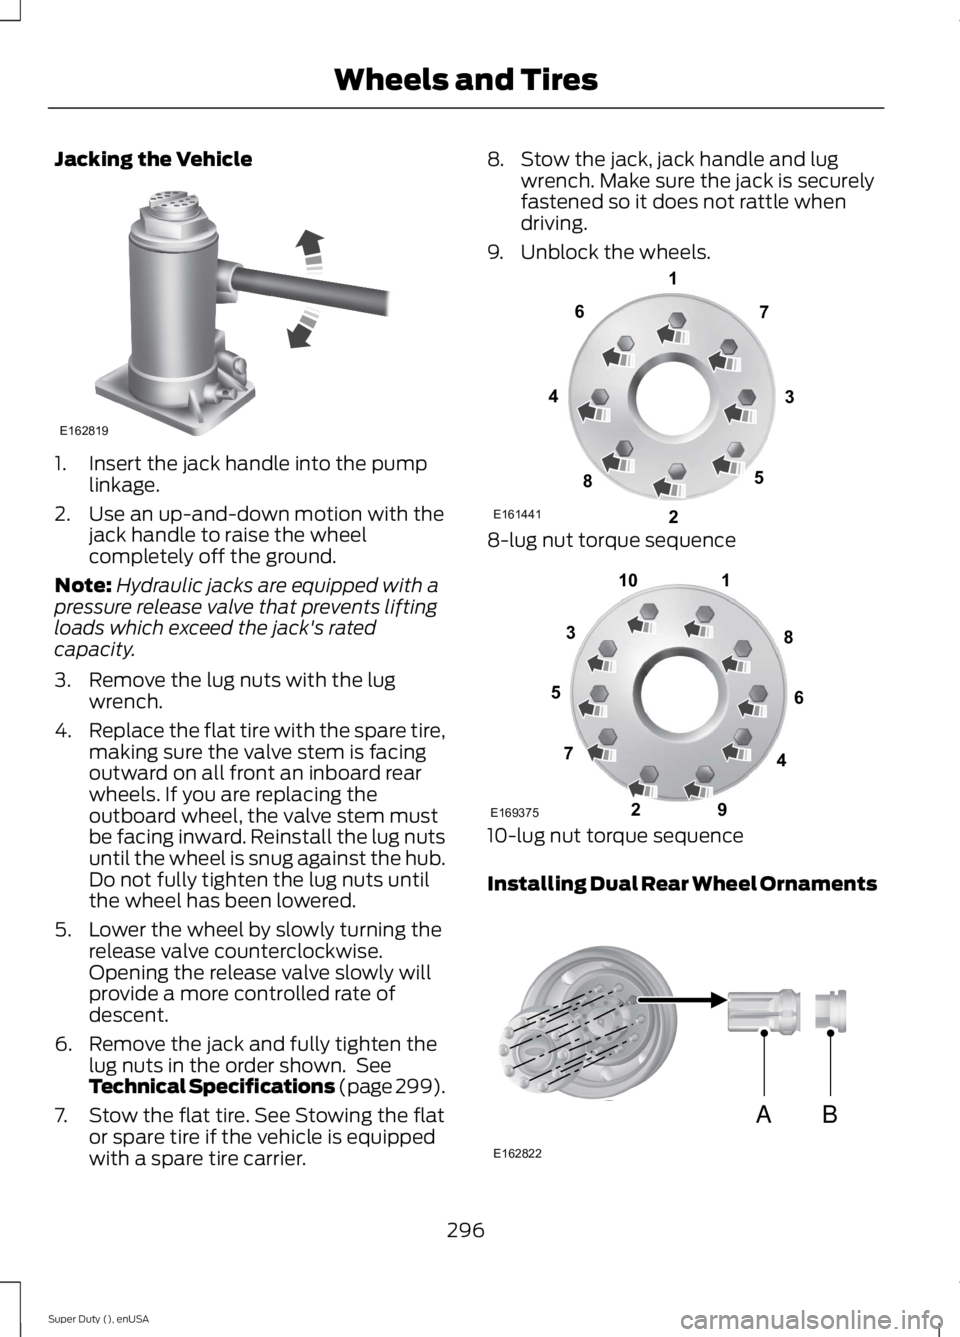
6. Remove the jack and fully tighten thelug nuts in the order shown. SeeTechnical Specifications (page 299).
7. Stow the flat tire. See Stowing the flator spare tire if the vehicle is equippedwith a spare tire carrier.
8. Stow the jack, jack handle and lugwrench. Make sure the jack is securelyfastened so it does not rattle whendriving.
9. Unblock the wheels.
8-lug nut torque sequence
10-lug nut torque sequence
Installing Dual Rear Wheel Ornaments
296
Super Duty (), enUSA
Wheels and TiresE162819 E161441
13
4
27
6
5
8 1
2
3
4
5
6
7 8
9
10
E169375 AB
E162822
Page 302 of 470

TECHNICAL SPECIFICATIONS
Wheel Lug Nut Torque Specifications
WARNING
When a wheel is installed, always remove any corrosion, dirt or foreign materialspresent on the mounting surfaces of the wheel or the surface of the wheel hub,brake drum or brake disc that contacts the wheel. Make sure that any fastenersthat attach the rotor to the hub are secured so they do not interfere with the mountingsurfaces of the wheel. Installing wheels without correct metal-to-metal contact at thewheel mounting surfaces can cause the wheel nuts to loosen and the wheel to come offwhile the vehicle is in motion, resulting in loss of control.
lb.ft (Nm)Bolt size
165 lb.ft (224 Nm)M14 x 1.5
*Torque specifications are for nut and bolt threads free of dirt and rust. Use only Fordrecommended replacement fasteners.
On vehicles equipped with single rear wheels, retighten the lug nuts to the specified torqueat 100 miles (160 kilometers) after any wheel disturbance (such as tire rotation, changinga flat tire, wheel removal).
On vehicles equipped with dual rear wheels, retighten the wheel lug nuts to the specifiedtorque at 100 miles (160 kilometers), and again at 500 miles (800 kilometers) of newvehicle operation and after any wheel disturbance (such as tire rotation, changing a flattire, wheel removal).
It is important to follow the proper wheel mounting and lug nut torque procedures.
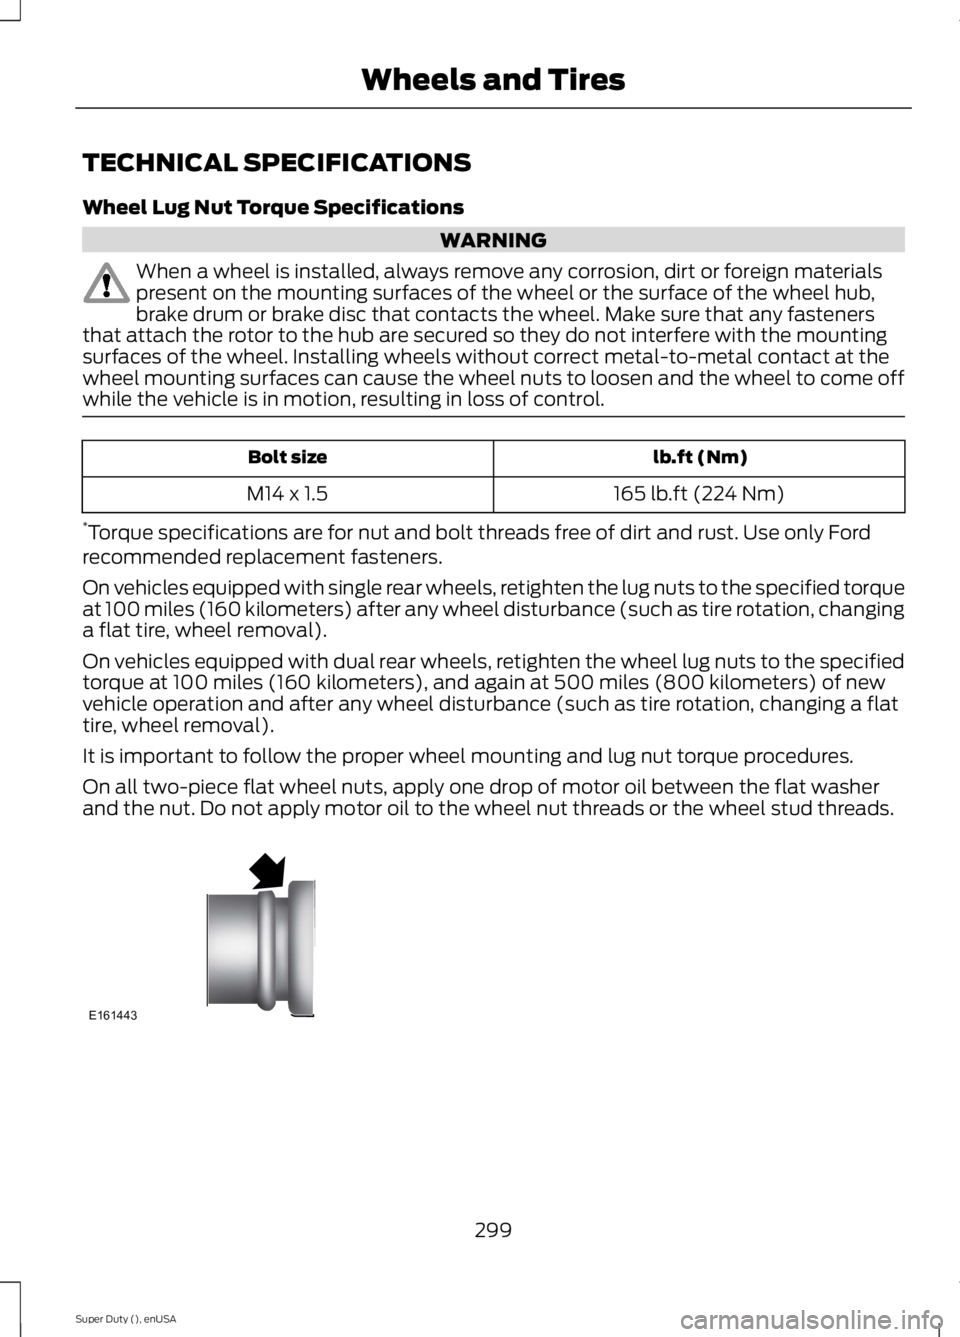
On all two-piece flat wheel nuts, apply one drop of motor oil between the flat washerand the nut. Do not apply motor oil to the wheel nut threads or the wheel stud threads.
299
Super Duty (), enUSA
Wheels and TiresE161443