2015 FORD F250 SUPER DUTY bulb
[x] Cancel search: bulbPage 7 of 470
Changing a Fuse............................................231
Maintenance
General Information....................................232
Opening and Closing the Hood..............232
Under Hood Overview - 6.2L...................233
Under Hood Overview - 6.8L..................234
Engine Oil Dipstick......................................235
Engine Oil Check..........................................235
Engine Coolant Check...............................236
Automatic Transmission FluidCheck...........................................................240
Transfer Case Fluid Check........................243
Brake Fluid Check........................................243
Power Steering Fluid Check.....................243
Washer Fluid Check....................................244
Fuel Filter........................................................244
Changing the 12V Battery.........................244
Checking the Wiper Blades.....................246
Changing the Wiper Blades.....................246
Adjusting the Headlamps.........................247
Removing a Headlamp.............................248
Changing a Bulb..........................................250
Bulb Specification Chart...........................252
Changing the Engine Air Filter................254
Vehicle Care
General Information...................................256
Cleaning Products.......................................256
Cleaning the Exterior..................................256
Waxing..............................................................257
Cleaning the Engine....................................257
Cleaning the Windows and WiperBlades..........................................................258
Cleaning the Interior...................................258
Cleaning the Instrument Panel andInstrument Cluster Lens.......................258
Cleaning Leather Seats.............................259
Repairing Minor Paint Damage..............260
Cleaning the Alloy Wheels........................261
Vehicle Storage.............................................261
Wheels and Tires
General Information...................................263
Tire Care..........................................................265
Using Snow Chains.....................................282
Tire Pressure Monitoring System...........282
Changing a Road Wheel...........................288
Technical Specifications..........................299
Capacities and Specific-ations
Engine Specifications.................................301
Motorcraft Parts..........................................302
Vehicle Identification Number................303
Vehicle Certification Label.......................303
Transmission Code Designation............304
Technical Specifications..........................305
Audio System
General Information....................................310
Audio unit - Vehicles With: AM/FM.........311
Audio unit - Vehicles With: AM/FM/CD/SYNC.............................................................312
Audio unit - Vehicles With: Sony AM/FM/CD...................................................................315
Digital Radio...................................................316
Satellite Radio...............................................318
Audio Input Jack............................................321
USB Port...........................................................321
Media Hub......................................................322
SYNC™
General Information...................................323
Using Voice Recognition...........................325
Using SYNC™ With Your Phone.............327
SYNC™ Applications and Services......338
Using SYNC™ With Your MediaPlayer...........................................................345
SYNC™ Troubleshooting.........................353
4
Super Duty (), enUSA
Table of Contents
Page 81 of 470

WARNING
Driving your vehicle with the warninglamp on is dangerous. A significantdecrease in braking performancemay occur. It will take you longer to stopyour vehicle. Have your vehicle checked byyour authorized dealer immediately. Drivingextended distances with the parking brakeengaged can cause brake failure and therisk of personal injury.
Check Fuel Cap (If Equipped)
Illuminates when the fuel capmay not be properly installed.Continued driving with this lighton may cause the Service enginesoon warning indicator to come on.
Cruise Control (If Equipped)
Illuminates when you switch thisfeature on. See Using CruiseControl (page 176).
Direction Indicator
Illuminates when the left or rightturn signal or the hazard warningflasher is turned on. If theindicators stay on or flash faster, check fora burned out bulb.
Door Ajar
Displays when the ignition is onand any door is not completelyclosed.
Electronic Locking Differential
Illuminates when using theelectronic locking differential.
Engine Coolant Temperature
Illuminates when the enginecoolant temperature is high.Stop the vehicle as soon aspossible, switch off the engine and let cool.
Engine Oil
If it illuminates with the enginerunning or when you are driving,this indicates a malfunction.Stop your vehicle as soon as it is safe todo so and switch the engine off. Check theengine oil level. See Engine Oil Check(page 235).
Note:Do not resume your journey if itilluminates despite the level being correct.Have the system checked by your authorizeddealer immediately.
Fasten Safety Belt
It will illuminate and a chime willsound to remind you to fastenyour safety belt.
Front Airbag
If it fails to illuminate when youstart your vehicle, continues toflash or remains on, it indicatesa malfunction. Have the system checkedby your authorized dealer.
High Beam
Illuminates when you switch thehigh beam headlamps on. It willflash when you use theheadlamp flasher.
Hill Descent (If Equipped)
Illuminates when hill descent isswitched on.
78
Super Duty (), enUSA
Instrument Cluster E71340 E163170 E163171
Page 82 of 470
Low Fuel Level
Illuminates when the fuel levelis low or the fuel tank is nearlyempty. Refuel as soon aspossible.
Low Tire Pressure Warning
Illuminates when your tirepressure is low. If the lampremains on with the enginerunning or when driving, checkyour tire pressure as soon as possible.
It will also illuminate momentarily whenyou switch the ignition on to confirm thelamp is functional. If it does not illuminatewhen you switch the ignition on, or beginsto flash at any time, have the systemchecked by your authorized dealer.
Powertrain Malfunction/ReducedPower/Electronic Throttle Control
Illuminates when a powertrainor an AWD fault has beendetected. Contact yourauthorized dealer as soon as possible.
Service Engine Soon
If the service engine soonindicator light stays illuminatedafter the engine is started, itindicates that the On-Board Diagnostics(OBD-II) system has detected amalfunction of the vehicle emissionscontrol system. Refer to On-BoardDiagnostics (OBD-II) in the Fuel andRefueling chapter for more informationabout having your vehicle serviced. SeeEmission Control System (page 141).
If the light is blinking, engine misfire isoccurring which could damage yourcatalytic converter. Drive in a moderatefashion (avoid heavy acceleration anddeceleration) and have your vehicleserviced immediately.
Note:Under engine misfire conditions,excessive exhaust temperatures coulddamage the catalytic converter or othervehicle components.
The service engine soon indicator lightilluminates when the ignition is first turnedon prior to engine start to check the bulband to indicate whether the vehicle is readyfor Inspection/Maintenance (I/M) testing.
Normally, the service engine soon light willstay on until the engine is cranked, thenturn itself off if no malfunctions arepresent. However, if after 15 seconds theservice engine soon light blinks eight times,it means that the vehicle is not ready forI/M testing. See Emission ControlSystem (page 141).
Stability Control
Illuminates when the system isactive. If it remains illuminatedor does not illuminate when youswitch the ignition on, this indicates amalfunction. During a malfunction thesystem will switch off. Have the systemchecked by your authorized dealerimmediately. See Using StabilityControl (page 167).
Stability Control Off
Illuminates when you switch thesystem off. It will go out whenyou switch the system back onor when you switch the ignition off. SeeUsing Stability Control (page 167).
79
Super Duty (), enUSA
Instrument Cluster E138639
Page 145 of 470
On-Board Diagnostics (OBD-II)
Your vehicle is equipped with an on-boarddiagnostics system (OBD-II) that monitorsthe engine’s emission control system. Thissystem protects the environment byensuring that your vehicle continues tomeet government emission standards. TheOBD-II system also assists your authorizeddealer in properly servicing your vehicle.
When the service engine soonindicator illuminates, the OBD-IIsystem has detected amalfunction. Temporary malfunctions maycause the service engine soon indicator toilluminate.
Examples of temporary malfunctions are:
•the vehicle has run out of fuel—theengine may misfire or run poorly
•poor fuel quality or water in thefuel—the engine may misfire or runpoorly
•the fuel fill inlet may not have beenproperly closed See Refueling (page138).
•driving through deep water—theelectrical system may be wet.
You can correct these temporarymalfunctions by filling the fuel tank withgood quality fuel, properly closing the fuelfill inlet or letting the electrical system dryout. After three driving cycles without theseor any other temporary malfunctionspresent, the service engine soon indicatorshould stay off the next time you start theengine. A driving cycle consists of a coldengine startup followed by mixedcity/highway driving. No additional vehicleservice is required.
If the service engine soon indicator remainson, have your vehicle serviced at the firstavailable opportunity. Although somemalfunctions detected by the OBD-II maynot have symptoms that are apparent,continued driving with the service enginesoon indicator on can result in increasedemissions, lower fuel economy, reducedengine and transmission smoothness, andlead to more costly repairs.
Readiness forInspection/Maintenance (I/M)Testing
Some state/provincial and localgovernments may haveInspection/Maintenance (I/M) programsto inspect the emission control equipmenton your vehicle. Failure to pass thisinspection could prevent you from gettinga vehicle registration.
If the service engine soonindicator is on or the bulb doesnot work, you may need to havethe vehicle serviced. See On-BoardDiagnostics (OBD-II).
Your vehicle may not pass the I/M test ifthe service engine soon indicator is on ornot working properly (bulb is burned out),or if the OBD-II system has determinedthat some of the emission control systemshave not been properly checked. In thiscase, your vehicle is not ready for I/Mtesting.
If the vehicle’s engine or transmission hasjust been serviced, or the battery hasrecently run down or been replaced, theOBD-II system may indicate that thevehicle is not ready for I/M testing. Todetermine if the vehicle is ready for I/Mtesting, turn the ignition key to the onposition for 15 seconds without cranking
142
Super Duty (), enUSA
Fuel and Refueling
Page 171 of 470
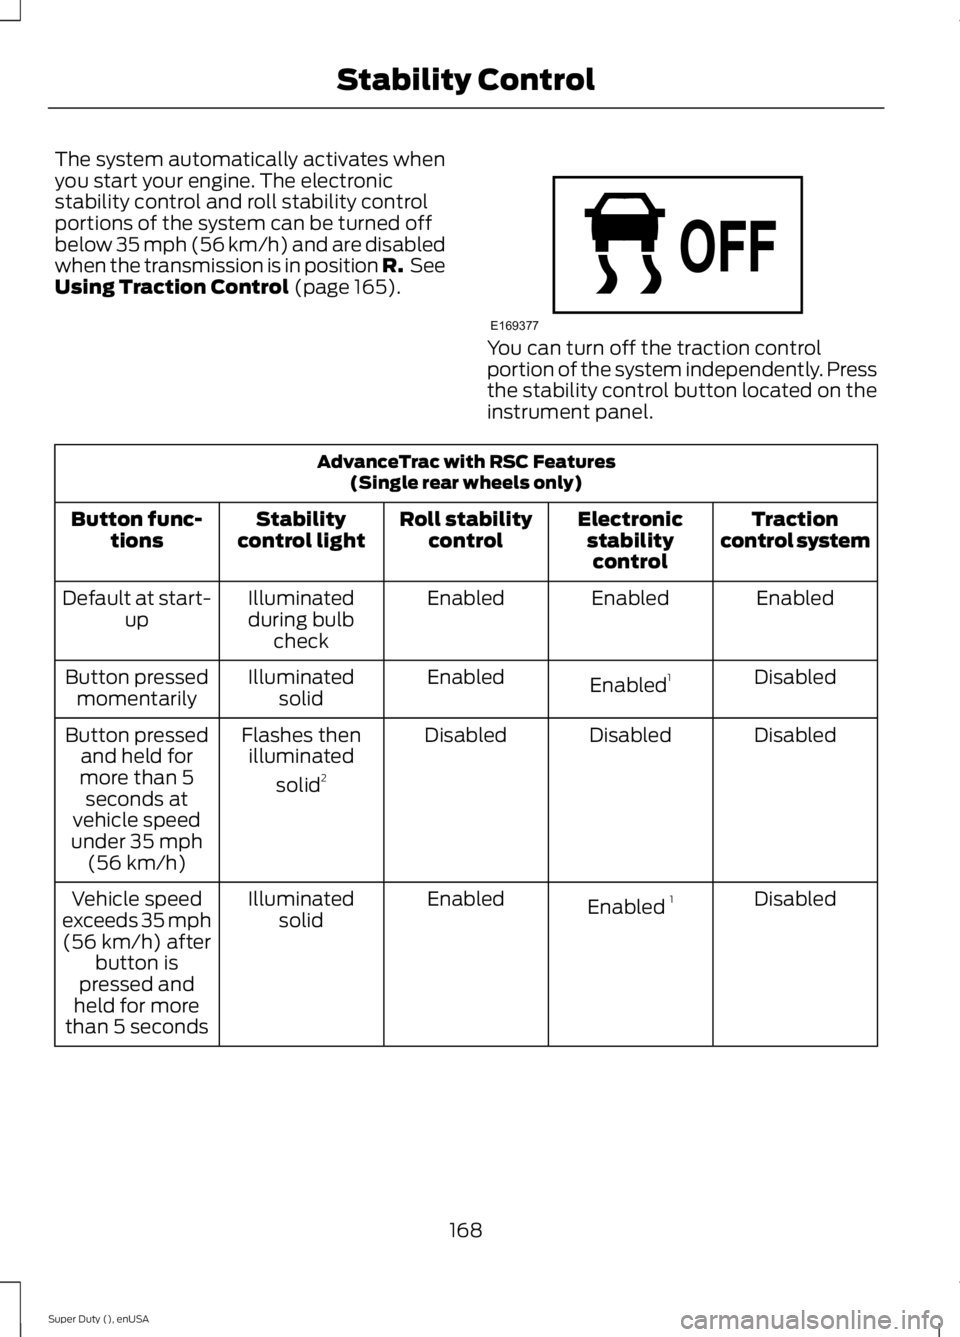
The system automatically activates whenyou start your engine. The electronicstability control and roll stability controlportions of the system can be turned offbelow 35 mph (56 km/h) and are disabledwhen the transmission is in position R. SeeUsing Traction Control (page 165).
You can turn off the traction controlportion of the system independently. Pressthe stability control button located on theinstrument panel.
AdvanceTrac with RSC Features(Single rear wheels only)
Tractioncontrol systemElectronicstabilitycontrol
Roll stabilitycontrolStabilitycontrol lightButton func-tions
EnabledEnabledEnabledIlluminatedduring bulbcheck
Default at start-up
DisabledEnabled1EnabledIlluminatedsolidButton pressedmomentarily
DisabledDisabledDisabledFlashes thenilluminated
solid2
Button pressedand held formore than 5seconds atvehicle speedunder 35 mph(56 km/h)
DisabledEnabled 1EnabledIlluminatedsolidVehicle speedexceeds 35 mph(56 km/h) afterbutton ispressed andheld for morethan 5 seconds
168
Super Duty (), enUSA
Stability ControlE169377
Page 250 of 470
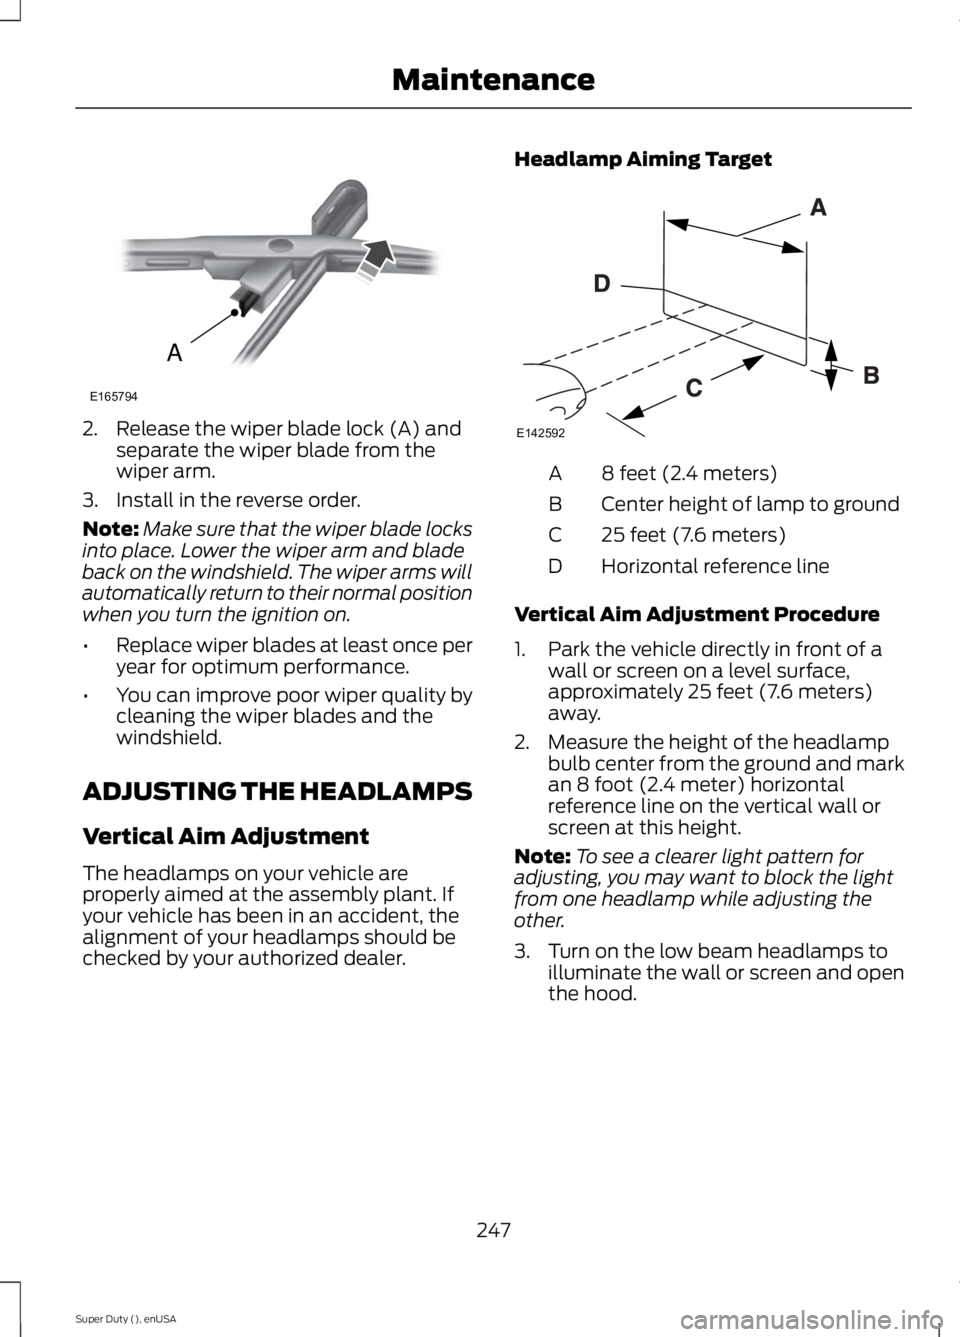
2. Release the wiper blade lock (A) andseparate the wiper blade from thewiper arm.
3. Install in the reverse order.
Note:Make sure that the wiper blade locksinto place. Lower the wiper arm and bladeback on the windshield. The wiper arms willautomatically return to their normal positionwhen you turn the ignition on.
•Replace wiper blades at least once peryear for optimum performance.
•You can improve poor wiper quality bycleaning the wiper blades and thewindshield.
ADJUSTING THE HEADLAMPS
Vertical Aim Adjustment
The headlamps on your vehicle areproperly aimed at the assembly plant. Ifyour vehicle has been in an accident, thealignment of your headlamps should bechecked by your authorized dealer.
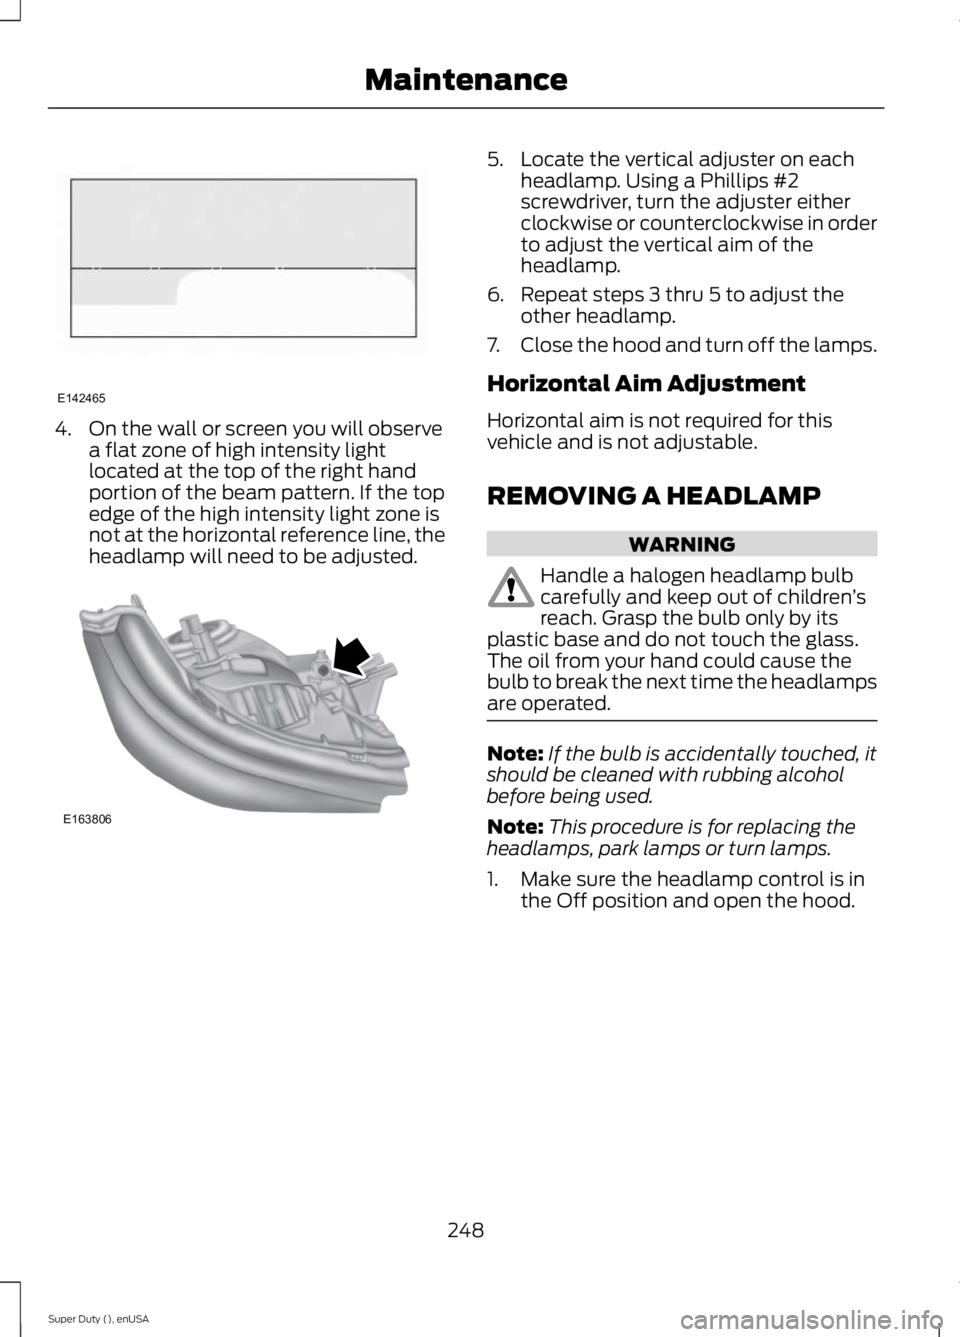
Headlamp Aiming Target
8 feet (2.4 meters)A
Center height of lamp to groundB
25 feet (7.6 meters)C
Horizontal reference lineD
Vertical Aim Adjustment Procedure
1. Park the vehicle directly in front of awall or screen on a level surface,approximately 25 feet (7.6 meters)away.
2. Measure the height of the headlampbulb center from the ground and markan 8 foot (2.4 meter) horizontalreference line on the vertical wall orscreen at this height.
Note:To see a clearer light pattern foradjusting, you may want to block the lightfrom one headlamp while adjusting theother.
3. Turn on the low beam headlamps toilluminate the wall or screen and openthe hood.
247
Super Duty (), enUSA
MaintenanceA
E165794 E142592
Page 251 of 470
4. On the wall or screen you will observea flat zone of high intensity lightlocated at the top of the right handportion of the beam pattern. If the topedge of the high intensity light zone isnot at the horizontal reference line, theheadlamp will need to be adjusted.
5. Locate the vertical adjuster on eachheadlamp. Using a Phillips #2screwdriver, turn the adjuster eitherclockwise or counterclockwise in orderto adjust the vertical aim of theheadlamp.
6. Repeat steps 3 thru 5 to adjust theother headlamp.
7.Close the hood and turn off the lamps.
Horizontal Aim Adjustment
Horizontal aim is not required for thisvehicle and is not adjustable.
REMOVING A HEADLAMP
WARNING
Handle a halogen headlamp bulbcarefully and keep out of children’sreach. Grasp the bulb only by itsplastic base and do not touch the glass.The oil from your hand could cause thebulb to break the next time the headlampsare operated.
Note:If the bulb is accidentally touched, itshould be cleaned with rubbing alcoholbefore being used.
Note:This procedure is for replacing theheadlamps, park lamps or turn lamps.
1. Make sure the headlamp control is inthe Off position and open the hood.
248
Super Duty (), enUSA
MaintenanceE142465 E163806
Page 252 of 470
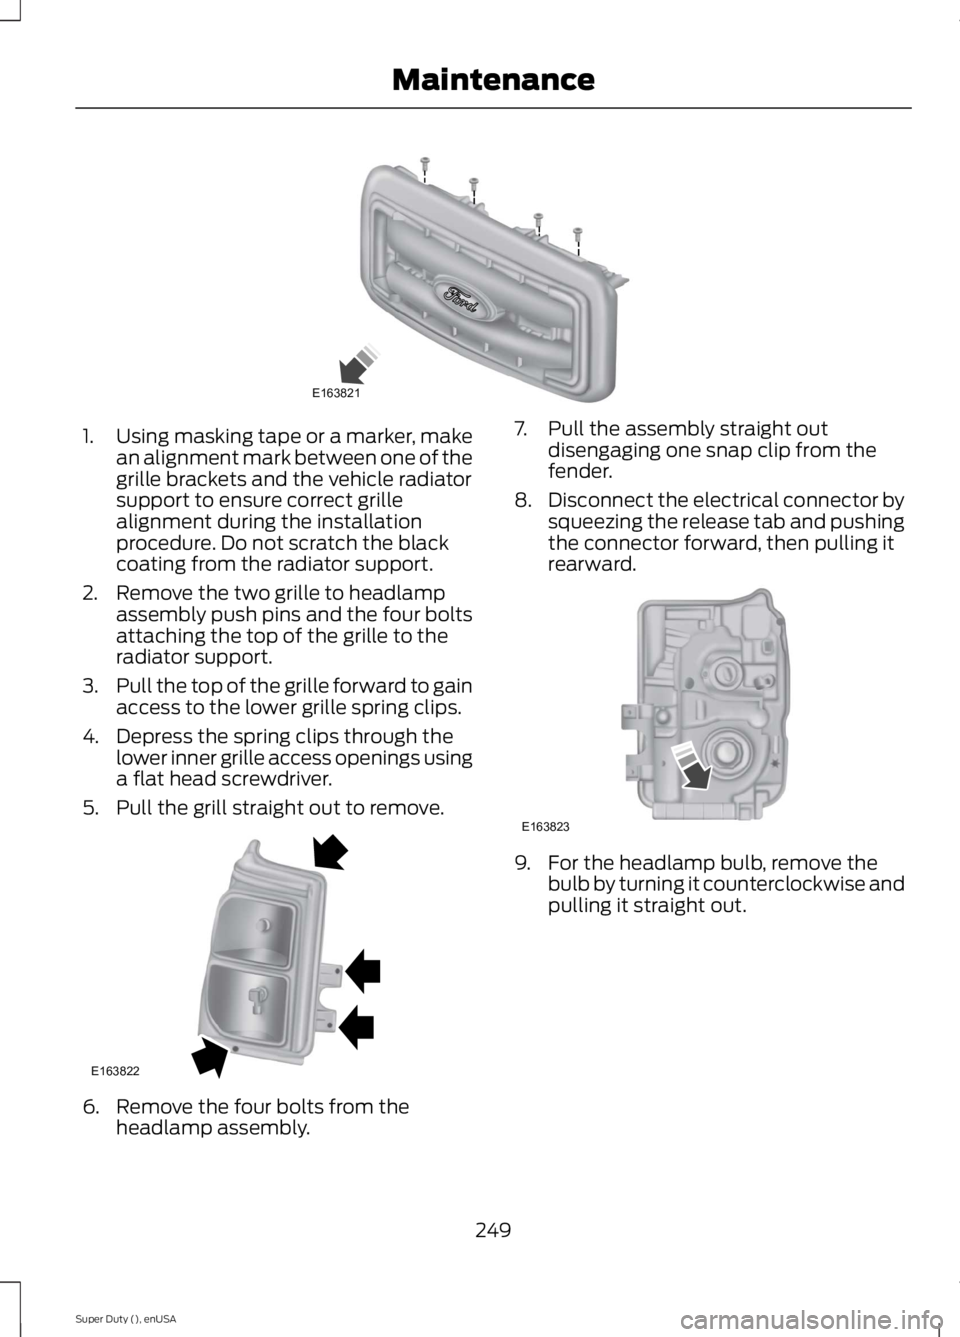
1.Using masking tape or a marker, makean alignment mark between one of thegrille brackets and the vehicle radiatorsupport to ensure correct grillealignment during the installationprocedure. Do not scratch the blackcoating from the radiator support.
2. Remove the two grille to headlampassembly push pins and the four boltsattaching the top of the grille to theradiator support.
3.Pull the top of the grille forward to gainaccess to the lower grille spring clips.
4. Depress the spring clips through thelower inner grille access openings usinga flat head screwdriver.
5. Pull the grill straight out to remove.
6. Remove the four bolts from theheadlamp assembly.
7. Pull the assembly straight outdisengaging one snap clip from thefender.
8.Disconnect the electrical connector bysqueezing the release tab and pushingthe connector forward, then pulling itrearward.
9. For the headlamp bulb, remove thebulb by turning it counterclockwise andpulling it straight out.
249
Super Duty (), enUSA
MaintenanceE163821 E163822 E163823