2015 FORD F250 key
[x] Cancel search: keyPage 4 of 485

Introduction
About This Manual...........................................7
Symbols Glossary
.............................................7
Data Recording
..................................................9
California Proposition 65..............................11
Perchlorate.........................................................11
Ford Credit
..........................................................11
Replacement Parts Recommendation.......................................12
Special Notices................................................12
Mobile Communications Equipment.....................................................13
Export Unique Options
.................................14
Child Safety
General Information
.......................................15
Installing Child Seats.....................................16
Booster Seats
..................................................24
Child Seat Positioning..................................26
Child Safety Locks..........................................27
Safety Belts
Principle of Operation
..................................28
Fastening the Safety Belts
..........................29
Safety Belt Height Adjustment.................32
Safety Belt Warning Lamp and Indicator Chime
..............................................................32
Safety Belt Minder.........................................33
Child Restraint and Safety Belt Maintenance
................................................35
Supplementary Restraints System
Principle of Operation..................................36
Driver and Passenger Airbags....................37
Side Airbags
.....................................................43
Safety Canopy ™
............................................44
Crash Sensors and Airbag Indicator.......45
Airbag Disposal
..............................................46 Keys and Remote Controls
General Information on Radio
Frequencies..................................................47
Remote Control
...............................................47
Replacing a Lost Key or Remote Control...........................................................50
MyKey ™
Principle of Operation
...................................51
Creating a MyKey.............................................51
Clearing All MyKeys.......................................53
Checking MyKey System Status...............53
Using MyKey With Remote Start Systems.........................................................55
MyKey Troubleshooting...............................55
Locks
Locking and Unlocking
.................................56
Keyless Entry
....................................................57
Security
Passive Anti-Theft System........................60
Anti-Theft Alarm
.............................................61
Steering Wheel
Adjusting the Steering Wheel....................62
Audio Control
...................................................62
Voice Control
...................................................63
Cruise Control
..................................................63
Information Display Control.......................63
Heated Steering Wheel
...............................64
Pedals
Adjusting the Pedals.....................................65
Wipers and Washers
Windshield Wipers
........................................66
Windshield Washers.....................................66
1
Super Duty (), enUSA Table of Contents
Page 37 of 485

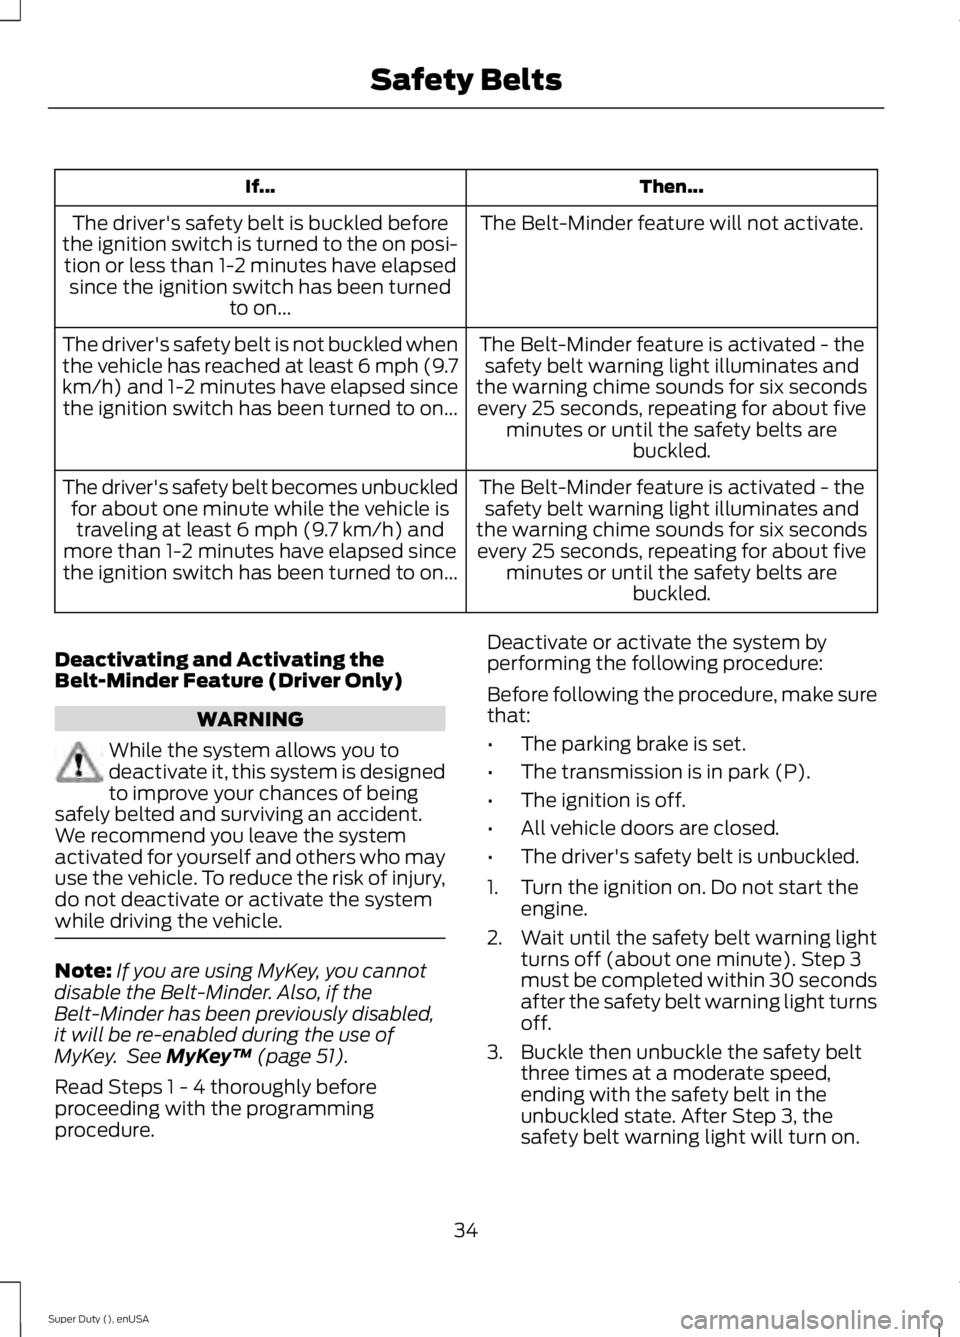
Then...
If...
The Belt-Minder feature will not activate.
The driver's safety belt is buckled before
the ignition switch is turned to the on posi- tion or less than 1-2 minutes have elapsed since the ignition switch has been turned to on...
The Belt-Minder feature is activated - thesafety belt warning light illuminates and
the warning chime sounds for six seconds every 25 seconds, repeating for about five minutes or until the safety belts are buckled.
The driver's safety belt is not buckled when
the vehicle has reached at least 6 mph (9.7
km/h) and 1-2 minutes have elapsed since
the ignition switch has been turned to on...
The Belt-Minder feature is activated - thesafety belt warning light illuminates and
the warning chime sounds for six seconds every 25 seconds, repeating for about five minutes or until the safety belts are buckled.
The driver's safety belt becomes unbuckled
for about one minute while the vehicle istraveling at least 6 mph (9.7 km/h) and
more than 1-2 minutes have elapsed since
the ignition switch has been turned to on...
Deactivating and Activating the
Belt-Minder Feature (Driver Only) WARNING
While the system allows you to
deactivate it, this system is designed
to improve your chances of being
safely belted and surviving an accident.
We recommend you leave the system
activated for yourself and others who may
use the vehicle. To reduce the risk of injury,
do not deactivate or activate the system
while driving the vehicle. Note:
If you are using MyKey, you cannot
disable the Belt-Minder. Also, if the
Belt-Minder has been previously disabled,
it will be re-enabled during the use of
MyKey. See MyKey ™ (page 51).
Read Steps 1 - 4 thoroughly before
proceeding with the programming
procedure. Deactivate or activate the system by
performing the following procedure:
Before following the procedure, make sure
that:
•
The parking brake is set.
• The transmission is in park (P).
• The ignition is off.
• All vehicle doors are closed.
• The driver's safety belt is unbuckled.
1. Turn the ignition on. Do not start the engine.
2. Wait until the safety belt warning light turns off (about one minute). Step 3
must be completed within 30 seconds
after the safety belt warning light turns
off.
3. Buckle then unbuckle the safety belt three times at a moderate speed,
ending with the safety belt in the
unbuckled state. After Step 3, the
safety belt warning light will turn on.
34
Super Duty (), enUSA Safety Belts
Page 41 of 485

WARNINGS
The front passenger airbag is not
designed to offer protection to a
passenger in the center seating
position. An airbag ON and OFF switch may
be installed in this vehicle. Before
driving, always look at the face of the
switch to be sure the switch is in the
correct position in accordance with these
instructions and warnings. Failure to put
the switch in a correct position can
increase the risk of serious injury or death
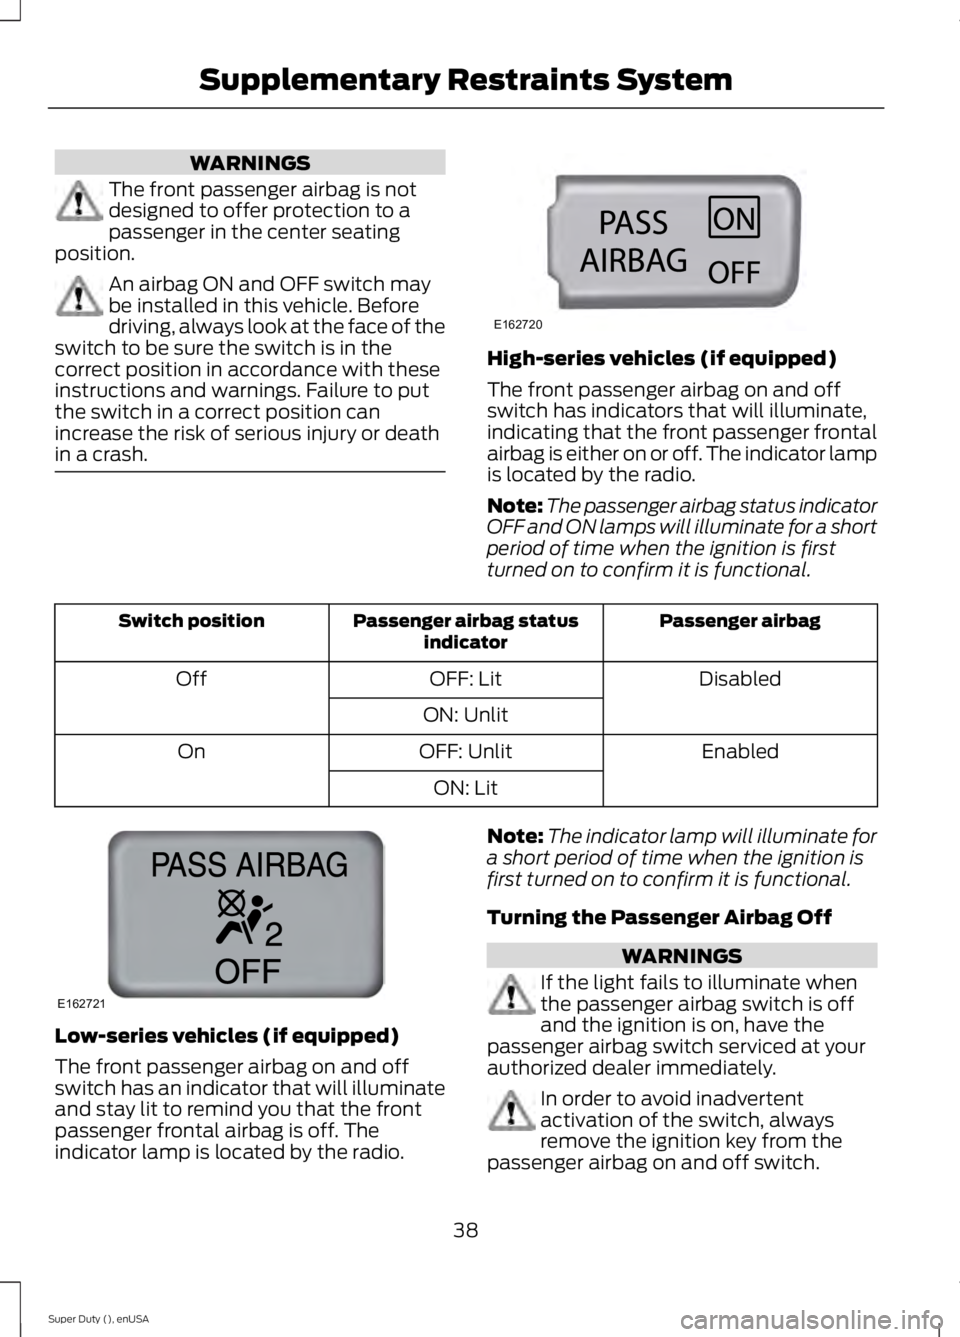
in a crash. High-series vehicles (if equipped)
The front passenger airbag on and off
switch has indicators that will illuminate,
indicating that the front passenger frontal
airbag is either on or off. The indicator lamp
is located by the radio.
Note:
The passenger airbag status indicator
OFF and ON lamps will illuminate for a short
period of time when the ignition is first
turned on to confirm it is functional. Passenger airbag
Passenger airbag status
indicator
Switch position
Disabled
OFF: Lit
Off
ON: Unlit Enabled
OFF: Unlit
On
ON: LitLow-series vehicles (if equipped)
The front passenger airbag on and off
switch has an indicator that will illuminate
and stay lit to remind you that the front
passenger frontal airbag is off. The
indicator lamp is located by the radio. Note:
The indicator lamp will illuminate for
a short period of time when the ignition is
first turned on to confirm it is functional.
Turning the Passenger Airbag Off WARNINGS
If the light fails to illuminate when
the passenger airbag switch is off
and the ignition is on, have the
passenger airbag switch serviced at your
authorized dealer immediately. In order to avoid inadvertent
activation of the switch, always
remove the ignition key from the
passenger airbag on and off switch.
38
Super Duty (), enUSA Supplementary Restraints SystemE162720 E162721
Page 42 of 485

WARNINGS
An infant in a rear-facing seat faces
a high risk of serious or fatal injuries
from a deploying passenger airbag.
Rear facing infant seats should never be
placed in the front seats, unless the
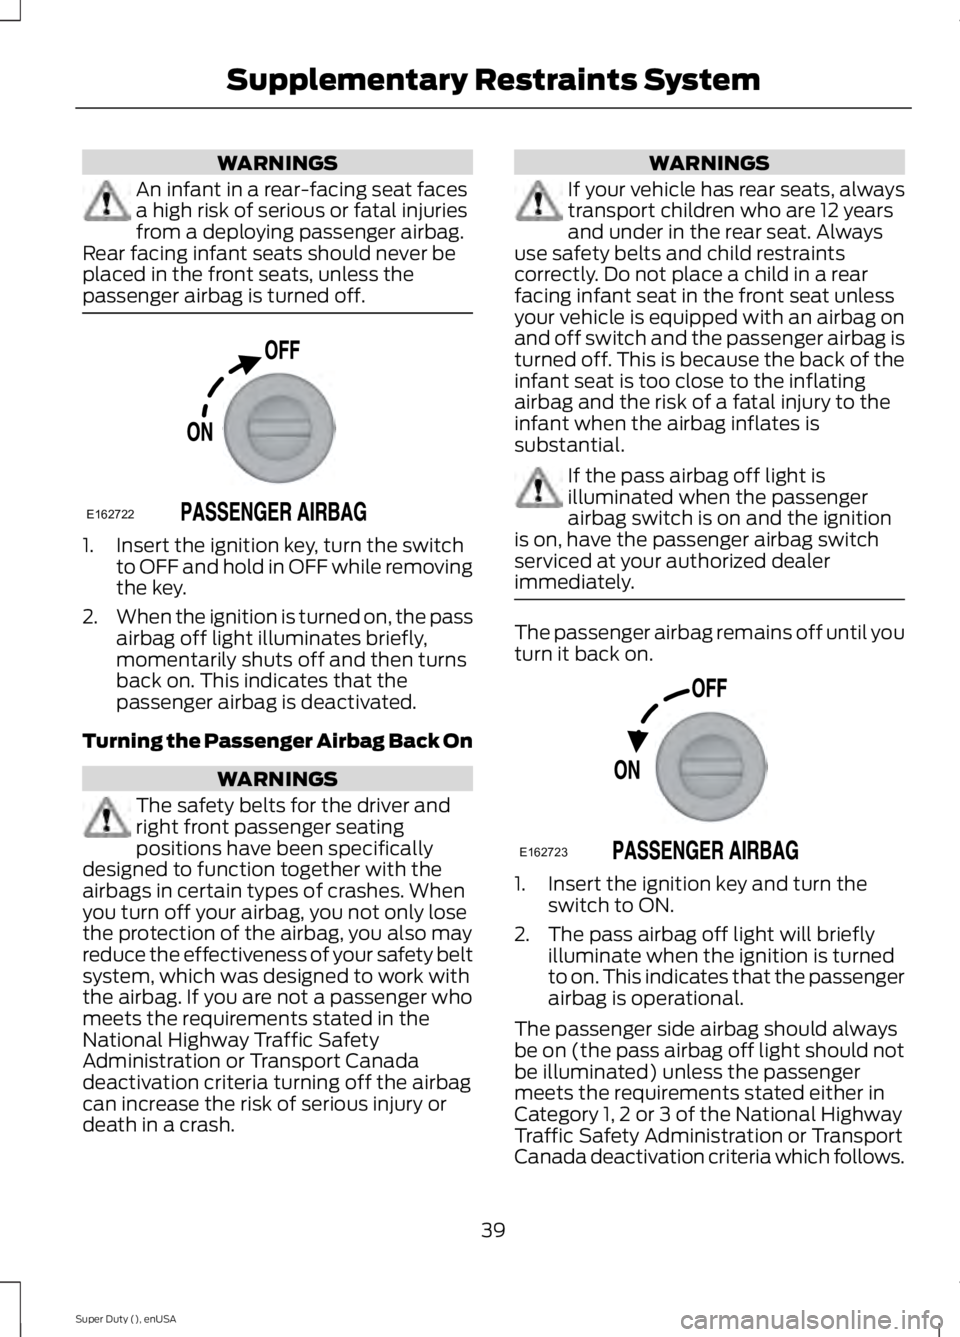
passenger airbag is turned off. 1. Insert the ignition key, turn the switch
to OFF and hold in OFF while removing
the key.
2. When the ignition is turned on, the pass
airbag off light illuminates briefly,
momentarily shuts off and then turns
back on. This indicates that the
passenger airbag is deactivated.
Turning the Passenger Airbag Back On WARNINGS
The safety belts for the driver and
right front passenger seating
positions have been specifically
designed to function together with the
airbags in certain types of crashes. When
you turn off your airbag, you not only lose
the protection of the airbag, you also may
reduce the effectiveness of your safety belt
system, which was designed to work with
the airbag. If you are not a passenger who
meets the requirements stated in the
National Highway Traffic Safety
Administration or Transport Canada
deactivation criteria turning off the airbag
can increase the risk of serious injury or
death in a crash. WARNINGS
If your vehicle has rear seats, always
transport children who are 12 years
and under in the rear seat. Always
use safety belts and child restraints
correctly. Do not place a child in a rear
facing infant seat in the front seat unless
your vehicle is equipped with an airbag on
and off switch and the passenger airbag is
turned off. This is because the back of the
infant seat is too close to the inflating
airbag and the risk of a fatal injury to the
infant when the airbag inflates is
substantial. If the pass airbag off light is
illuminated when the passenger
airbag switch is on and the ignition
is on, have the passenger airbag switch
serviced at your authorized dealer
immediately. The passenger airbag remains off until you
turn it back on.
1. Insert the ignition key and turn the
switch to ON.
2. The pass airbag off light will briefly illuminate when the ignition is turned
to on. This indicates that the passenger
airbag is operational.
The passenger side airbag should always
be on (the pass airbag off light should not
be illuminated) unless the passenger
meets the requirements stated either in
Category 1, 2 or 3 of the National Highway
Traffic Safety Administration or Transport
Canada deactivation criteria which follows.
39
Super Duty (), enUSA Supplementary Restraints SystemE162722 E162723
Page 50 of 485

GENERAL INFORMATION ON
RADIO FREQUENCIES
This device complies with Part 15 of the
FCC Rules and with Industry Canada
license-exempt RSS standard(s).
Operation is subject to the following two
conditions: (1) This device may not cause
harmful interference, and (2) This device
must accept any interference received,
including interference that may cause
undesired operation.
Note:
Changes or modifications not
expressively approved by the party
responsible for compliance could void the
user's authority to operate the equipment.
The term IC before the radio certification
number only signifies that Industry Canada
technical specifications were met.
The typical operating range for your
transmitter is approximately 33 feet (10
meters). Vehicles with the remote start
feature will have a greater range. One of
the following could cause a decrease in
operating range:
• weather conditions
• nearby radio towers
• structures around the vehicle
• other vehicles parked next to your
vehicle
The radio frequency used by your remote
control can also be used by other short
distance radio transmissions, for example
amateur radios, medical equipment,
wireless headphones, remote controls and
alarm systems. If the frequencies are
jammed, you will not be able to use your
remote control. You can lock and unlock
the doors with the key.
Note: Make sure to lock your vehicle before
leaving it unattended.
Note: If you are in range, the remote control
will operate if you press any button
unintentionally. Note:
The remote control contains sensitive
electrical components. Exposure to moisture
or impact may cause permanent damage.
REMOTE CONTROL
Integrated Keyhead Transmitters
(If Equipped) Use the key blade to start your vehicle and
unlock or lock the driver door from outside
your vehicle. The transmitter portion
functions as the remote control.
Note:
Your vehicle ’s keys came with a
security label that provides important
vehicle key cut information. Keep the label
in a safe place for future reference.
Replacing the Battery
Note: Refer to local regulations when
disposing of transmitter batteries.
Note: Do not wipe off any grease on the
battery terminals or on the back surface of
the circuit board.
Note: Replacing the battery will not delete
the transmitter from the vehicle. The
transmitter should operate normally.
47
Super Duty (), enUSA Keys and Remote ControlsE163046 E163047
Page 51 of 485

The remote control uses one coin-type
three-volt lithium battery CR2032 or
equivalent.
Integrated Keyhead Transmitter
1. Twist a thin coin in the slot of the
transmitter near the key ring to remove
the battery cover.
2. Carefully peel up the rubber gasket from the transmitter. It may come off
with the battery cover.
3. Remove the old battery
4. Insert the new battery. Refer to the instructions inside the transmitter for
the correct orientation of the battery.
Press the battery down to make sure
it is fully in the housing.
5. Reinstall the rubber gasket.
6. Snap the battery cover back onto the transmitter.
Memory Feature (If Equipped)
You can use the remote control to recall
memory settings for the driver seat, power
mirrors and power foot pedals.
Press the unlock button on the remote
control to recall the memory positions. If
you enable the easy-entry and exit feature,
the seat will move to the easy-entry
position. The seat will move to the driver
memory position when you put the key in
the ignition. Programming to the Transmitter
1.
With the ignition on, move the memory
features to the desired positions using
the associated controls. 2.
Press and hold memory button 1 on the
driver door. A tone will sound after
about two seconds. Continue to hold
until you hear a second tone.
3. Press the lock button on the remote control within three seconds. A single
tone sounds.
Repeat this procedure with button
2 and
a second remote control if desired.
Deactivating from the Transmitter
1. Press and hold the desired memory button for five seconds. A tone will
sound after about two seconds.
Continue to hold until you hear a
second tone.
2. Press the unlock button on the remote
control within three seconds.
Repeat this procedure for each additional
transmitter if desired.
Car Finder Press the button twice within
three seconds. The horn will
sound and the turn signals will
flash. We recommend you use this method
to locate your vehicle, rather than using
the panic alarm.
48
Super Duty (), enUSA Keys and Remote ControlsE163048
3
2
1 21
E162734 E138623
Page 52 of 485

Sounding a Panic Alarm
Note:
The panic alarm will only operate
when the ignition is off. Press the button to activate the
alarm. Press the button again or
turn the ignition on to deactivate
it.
Remote Start (If Equipped) WARNING
To avoid exhaust fumes, do not use
remote start if your vehicle is parked
indoors or areas that are not well
ventilated. Note:
Do not use remote start if your vehicle
is low on fuel. The remote start button is on the
transmitter.
This feature allows you to start your
vehicle from outside the vehicle. The
transmitter has an extended operating
range.
Vehicles with automatic climate control
can be set to operate when you remote
start the vehicle. See
Climate Control
(page 106). A manual climate control
system will run at the setting it was set to
when you switch the vehicle off.
Many states and provinces have
restrictions for the use of remote start.
Check your local and state or provincial
laws for specific requirements regarding
remote start systems.
The remote start system will not work if:
• the ignition is on
• the alarm system is triggered
• you disable the feature
• the hood is open
• the transmission is not in
P •
the vehicle battery voltage is too low
• the service engine soon indicator is on.
Remote Starting the Vehicle
Note: You must press each button within
three seconds of each other. Your vehicle
will not remote start and the horn will not
sound if you do not follow this sequence. The label on your transmitter details the
starting procedure.
To remote start your vehicle:
1. Press the lock button to lock all the
doors.
2. Press the remote start button twice. The exterior lamps will flash twice.
The horn will sound if the system fails to
start.
Note: If you remote start your vehicle with
an integrated keyhead transmitter, you must
switch the ignition on before driving your
vehicle. If you remote start your vehicle with
an intelligent access transmitter, you must
press the
START/STOP button on the
instrument panel once while applying the
brake pedal before driving your vehicle.
The power windows will not work during
the remote start and the radio will not turn
on automatically.
The parking lamps will remain on and the
vehicle will run for 5, 10, or 15 minutes,
depending on the setting.
49
Super Duty (), enUSA Keys and Remote ControlsE138624 E138625 E138626
Page 53 of 485

Extending the Vehicle Run Time
Repeat Steps 1 and 2 with the vehicle still
running to extend the run time for another
remote start duration. If the duration is set
to last 10 minutes, the duration will extend
by another 10 minutes. For example, if the
vehicle had been running from the first
remote start for five minutes, the vehicle
will continue to run now for a total of 20
minutes.
Wait at least five seconds before remote
starting after a vehicle shutdown.
Turning the Vehicle Off After Remote
Starting
Press the button once. The
parking lamps will turn off.
You may have to be closer to the
vehicle than when starting due to ground
reflection and the added noise of the
running vehicle.
You can disable or enable the remote start
system through the information display.
See (page 84).
REPLACING A LOST KEY OR
REMOTE CONTROL
Replacement keys or remote controls can
be purchased from an authorized dealer.
Authorized dealers can program remote
controls for your vehicle. See
Passive
Anti-Theft System (page 60).
To re-program the passive anti-theft
system see an authorized dealer.
50
Super Duty (), enUSA Keys and Remote ControlsE138625