Page 7 of 596

Load Carrying 264
Cargonet...........................................264
Roof racks and load carriers.............................264
Vehicle loading.......................................265
Towing 273
Trailertowing........................................273
Wrecker towing......................................280
Recreational towing...................................281
Driving Hints 283
Economical driving....................................283
Floormats..........................................284
Roadside Emergencies 286
Getting roadside assistance..............................286
Hazard warning flashers................................288
Fuel cut-off switch....................................288
Jump-starting the vehicle...............................289
Customer Assistance 292
Reporting safety defects (U.S. only).......................299
Reporting safety defects (Canada only).....................299
Fuses 300
Changing a fuse......................................300
Fuse specification chart................................300
6Table of Contents
2015 Explorer(exp)
Owners Guide gf, 2nd Printing, September 2014
USA(fus)
Page 117 of 596
•The fuel amount dispensed into the tank is a little less or more than
the gauge indicated. This is normal and depends upon the slope of
pavement at the gas station.
•If the gas station nozzle shuts off before the tank is full, try a different
gas pump nozzle.
Low Fuel Reminder
A low fuel reminder triggers when the fuel gauge needle is at 1/16th.
Driving type (fuel
economy conditions)Fuel gauge position Distance-to-empty
Highway driving 1/16th 35 miles to 80 miles
(56 km to 129 km)
Severe duty driving
(trailer towing,
extended idle)1/16th 35 miles (56km)
Type 2
Cluster shown in standard measure – metric clusters similar.
A. Left information display. SeeInformation displaysfor more
information.
B. Speedometer
C. Right information display. SeeMyFord Touch®for more information.
ABC
11 6Instrument Cluster
2015 Explorer(exp)
Owners Guide gf, 2nd Printing, September 2014
USA(fus)
Page 127 of 596
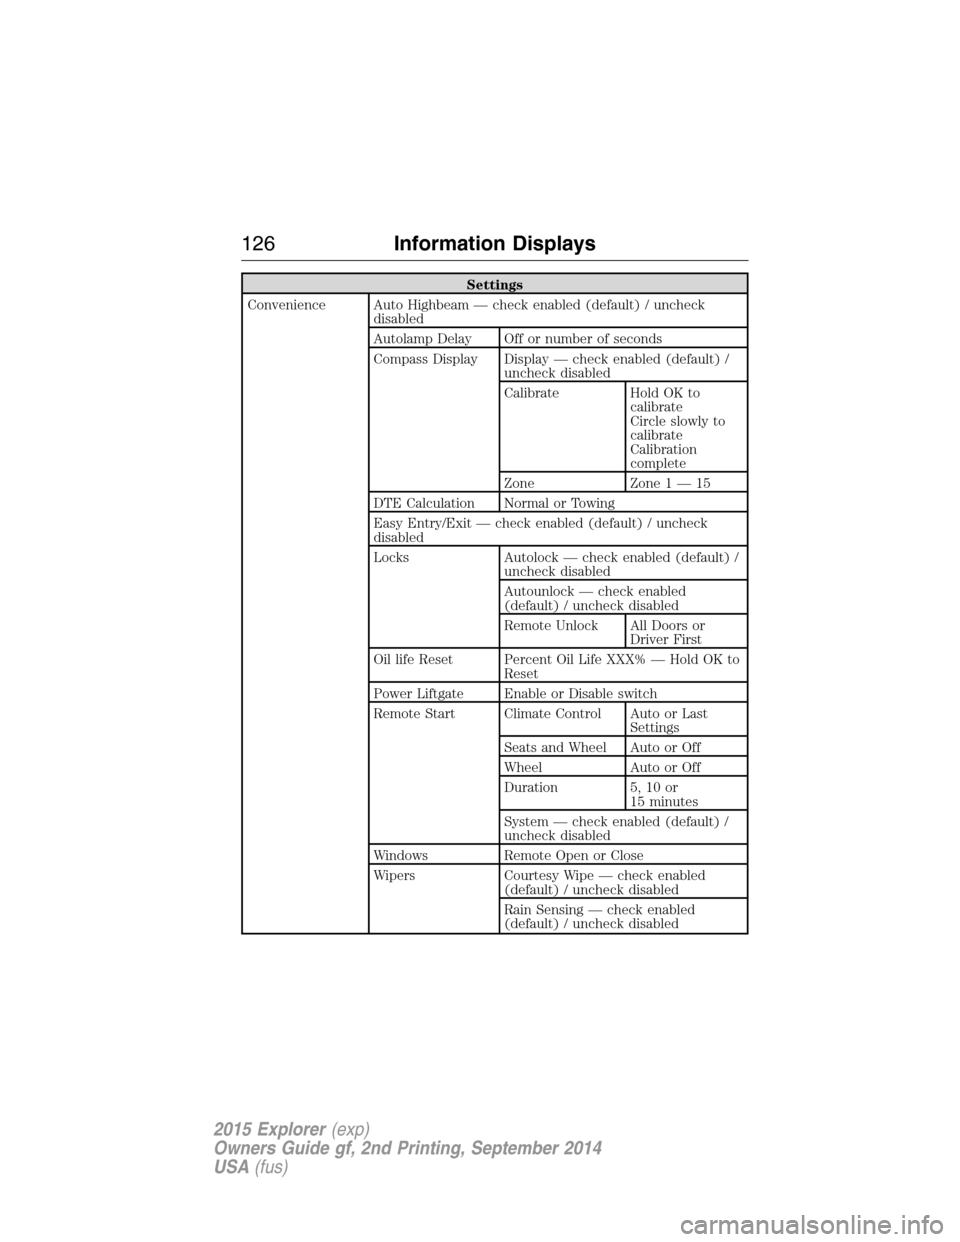
Settings
Convenience Auto Highbeam — check enabled (default) / uncheck
disabled
Autolamp Delay Off or number of seconds
Compass Display Display — check enabled (default) /
uncheck disabled
Calibrate Hold OK to
calibrate
Circle slowly to
calibrate
Calibration
complete
Zone Zone 1 — 15
DTE Calculation Normal or Towing
Easy Entry/Exit — check enabled (default) / uncheck
disabled
Locks Autolock — check enabled (default) /
uncheck disabled
Autounlock — check enabled
(default) / uncheck disabled
Remote Unlock All Doors or
Driver First
Oil life Reset Percent Oil Life XXX% — Hold OK to
Reset
Power Liftgate Enable or Disable switch
Remote Start Climate Control Auto or Last
Settings
Seats and Wheel Auto or Off
Wheel Auto or Off
Duration 5, 10 or
15 minutes
System — check enabled (default) /
uncheck disabled
Windows Remote Open or Close
Wipers Courtesy Wipe — check enabled
(default) / uncheck disabled
Rain Sensing — check enabled
(default) / uncheck disabled
126Information Displays
2015 Explorer(exp)
Owners Guide gf, 2nd Printing, September 2014
USA(fus)
Page 133 of 596
Settings
In this mode, you can configure different driver setting choices.
Note:Some items are optional and may not appear.
Settings
Vehicle DTE Calculation Normal / Towing
Easy Entry/Exit — check enabled / uncheck disabled
Lighting Auto highbeam On / Off
Autolamp Delay Off or number of
seconds
Locks Autolock On / Off
Autounlock On / Off
Remote
UnlockingAll doors /
Driver’s door
Oil Life ResetPercent Oil Life XXX %
Hold OK to Reset
Power Liftgate Enabled or Disabled
Remote StartClimate Control
(using this
feature allows
you to select
different climate
control modes
when the vehicle
is started using
the remote start
feature)Auto / Last
Settings
Seats and Wheel
or SeatsAuto / Off
Duration5/10
/15 minutes
System Enable / Disable
Windows Remote Open or Close
WipersCourtesy Wipe On / Off
Rain Sensing On / Off
132Information Displays
2015 Explorer(exp)
Owners Guide gf, 2nd Printing, September 2014
USA(fus)
Page 175 of 596
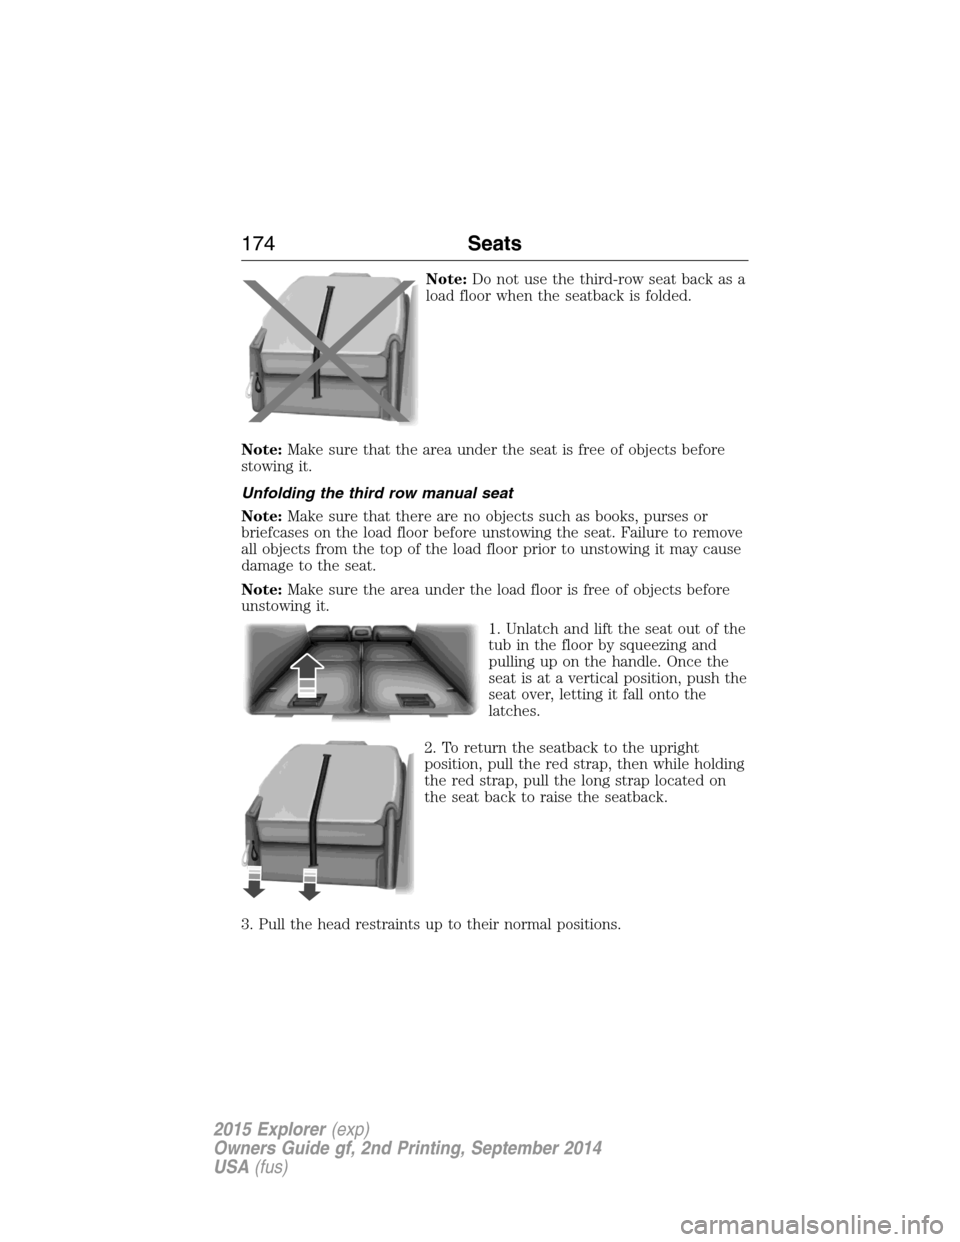
Note:Do not use the third-row seat back as a
load floor when the seatback is folded.
Note:Make sure that the area under the seat is free of objects before
stowing it.
Unfolding the third row manual seat
Note:Make sure that there are no objects such as books, purses or
briefcases on the load floor before unstowing the seat. Failure to remove
all objects from the top of the load floor prior to unstowing it may cause
damage to the seat.
Note:Make sure the area under the load floor is free of objects before
unstowing it.
1. Unlatch and lift the seat out of the
tub in the floor by squeezing and
pulling up on the handle. Once the
seat is at a vertical position, push the
seat over, letting it fall onto the
latches.
2. To return the seatback to the upright
position, pull the red strap, then while holding
the red strap, pull the long strap located on
the seat back to raise the seatback.
3. Pull the head restraints up to their normal positions.
174Seats
2015 Explorer(exp)
Owners Guide gf, 2nd Printing, September 2014
USA(fus)
Page 176 of 596
WARNING:Make sure seat is latched to vehicle floor by pushing
and pulling on the seat. If not latched, the seat may cause injury
during a sudden stop.
WARNING:Before returning the seatback to its original position,
make sure that cargo or any objects are not trapped behind the
seatback. After returning the seat back to its original position, pull on
the seatback to make sure that it has fully latched. An unlatched seat
may become dangerous in the event of a sudden stop or crash.
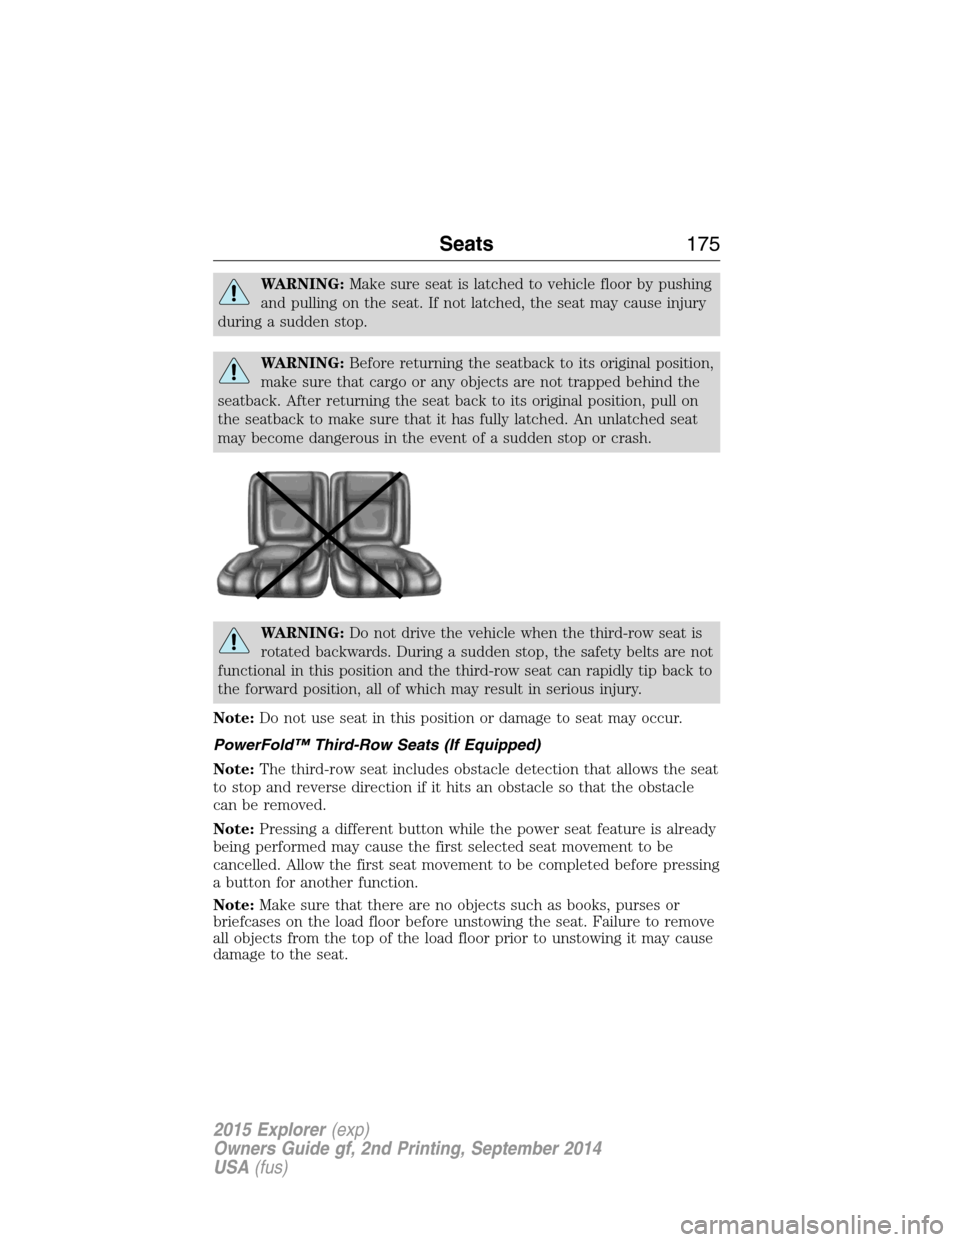
WARNING:Do not drive the vehicle when the third-row seat is
rotated backwards. During a sudden stop, the safety belts are not
functional in this position and the third-row seat can rapidly tip back to
the forward position, all of which may result in serious injury.
Note:Do not use seat in this position or damage to seat may occur.
PowerFold™ Third-Row Seats (If Equipped)
Note:The third-row seat includes obstacle detection that allows the seat
to stop and reverse direction if it hits an obstacle so that the obstacle
can be removed.
Note:Pressing a different button while the power seat feature is already
being performed may cause the first selected seat movement to be
cancelled. Allow the first seat movement to be completed before pressing
a button for another function.
Note:Make sure that there are no objects such as books, purses or
briefcases on the load floor before unstowing the seat. Failure to remove
all objects from the top of the load floor prior to unstowing it may cause
damage to the seat.
Seats175
2015 Explorer(exp)
Owners Guide gf, 2nd Printing, September 2014
USA(fus)
Page 177 of 596
Note:In order to allow the seat to complete the stowed position, do not
place objects under the seat before stowing. Remove all objects from the
seat and stowage tub.
Note:In the unlikely event that the third-row power seat stops
prematurely or travels to an unexpected position, press the FOLD button
(C) to reset the seat and return it to a normal position.
These seats feature a power one-touch operation that allows you fold
and stow the seats.
•The power fold seats work only when the transmission is in park (P)
and the liftgate is open.
•If the ignition is off and the feature is still running, the battery saver
will turn it off after 10 minutes. Press unlock on the remote entry key
transmitter to reactivate the power seats or unlock it with the keyless
entry keypad. See theKeys and Remote Controlchapter.
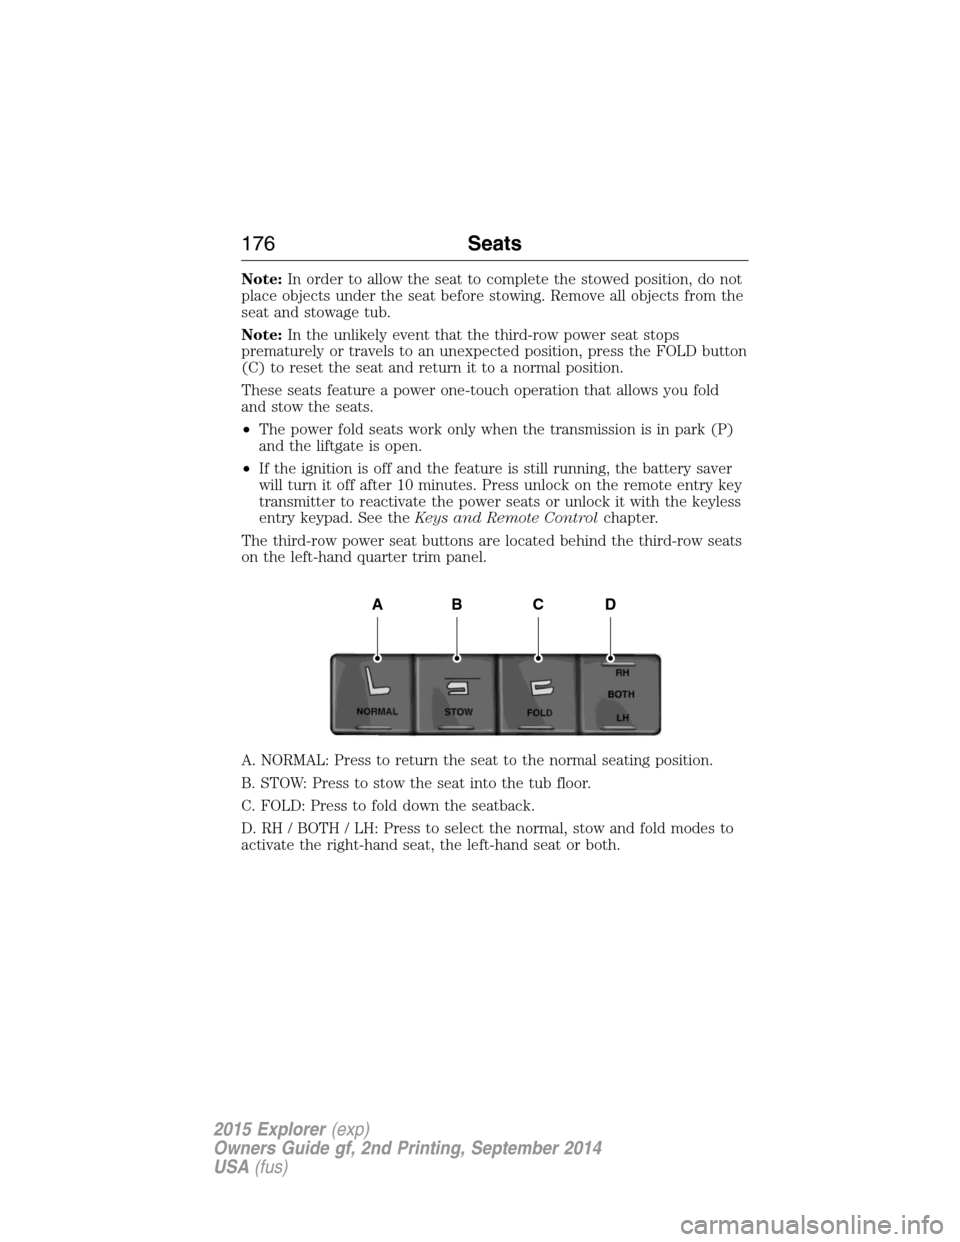
The third-row power seat buttons are located behind the third-row seats
on the left-hand quarter trim panel.
A. NORMAL: Press to return the seat to the normal seating position.
B. STOW: Press to stow the seat into the tub floor.
C. FOLD: Press to fold down the seatback.
D. RH / BOTH / LH: Press to select the normal, stow and fold modes to
activate the right-hand seat, the left-hand seat or both.
ABCD
176Seats
2015 Explorer(exp)
Owners Guide gf, 2nd Printing, September 2014
USA(fus)
Page 207 of 596
D (Drive) with Overdrive
The normal driving position for the best fuel economy. Transmission
operates in gears one through six.
The automatic transmission shift strategy has the ability to detect hilly
terrain or mountainous areas and will provide a limited amount of grade
assist features automatically. Refer toD(Drive) with Grade assist or
SelectShift for more information.
D (Drive) with Tow on
Press theTOWswitch located on the instrument panel by the headlamp
control to activate tow. TheTOW/HAULmessage will illuminate in the
instrument cluster.
The tow feature improves transmission operation when towing a trailer or a
heavy load. All transmission gear ranges are available when using tow.
The tow feature delays upshifts to reduce frequency of transmission
shifting. Tow also provides engine braking in all forward gears when the
transmission is in theD(Overdrive) position. This engine braking will
slow the vehicle and assist the driver in controlling the vehicle when
descending a grade. Depending on driving conditions and load
conditions, the transmission may downshift, slow the vehicle and control
the vehicle speed when descending a hill, without the accelerator pedal
being pressed. The amount of downshift braking provided will vary based
upon the amount the brake pedal is depressed.
Press theTOWbutton to deactivate the tow feature and return to
normal driving mode. The tow light will no longer be illuminated.
When you shut-off and restart the engine, the transmission will
automatically return to normalD(Overdrive) mode (tow off).
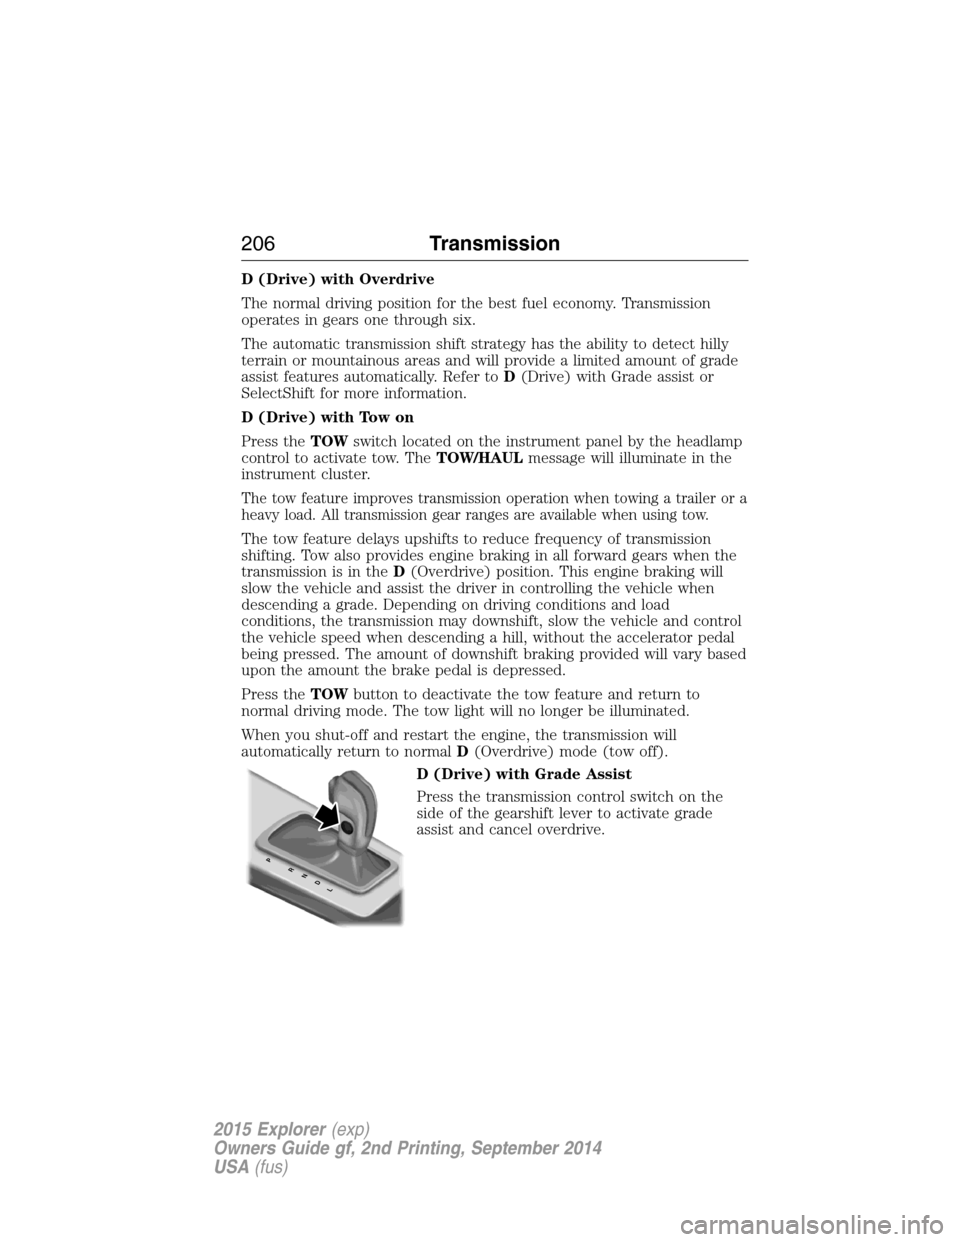
D (Drive) with Grade Assist
Press the transmission control switch on the
side of the gearshift lever to activate grade
assist and cancel overdrive.
PRNDL
206Transmission
2015 Explorer(exp)
Owners Guide gf, 2nd Printing, September 2014
USA(fus)