2015 FORD EXPLORER turn signal
[x] Cancel search: turn signalPage 244 of 596
To help you to pass, the system may provide a small, temporary
acceleration when you switch on the left turn signal while following a
lead vehicle.
If the system predicts that its maximum braking level will not be
sufficient, an audible warning will sound while the system continues to
brake. This is accompanied by a heads-up display; a red warning bar
illuminating on the windshield. You should take immediate action.
Setting the Gap Distance
Note:It is your responsibility to select a gap appropriate to the driving
conditions.
You can decrease or increase the
distance between your vehicle and
the vehicle in front of you by
pressing theGAPcontrolupor
down. The selected gap will display
in the information display as shown by the bars in the graphic. Four gap
distance settings are available.
Graphic display (bars
between vehicles)Following
distanceFollowing distance at
60 mph (100 km/h)Dynamic
behavior
1 bar 1 second 31 yards (28 m) Sporty
2 bars 1.4 seconds 43 yards (39 m) Normal
3 bars 1.8 seconds 55 yards (50 m) Normal
4 bars 2.2 seconds 67 yards (61 m) Comfort
Each time you restart your vehicle, the system will select the last chosen
gap for the current driver.
Disengaging Adaptive Cruise Control
Press the brake pedal or pressCNCLto disengage the system.
Disengaging the system will not erase your previous set speed.
Overriding Adaptive Cruise Control
WARNING:Whenever the driver is overriding the ACC by
pressing the accelerator pedal, the ACC will not automatically
apply the brakes to maintain separation from any vehicle ahead.
You can override the set speed and gap distance by pressing the
accelerator pedal.
Cruise Control243
2015 Explorer(exp)
Owners Guide gf, 2nd Printing, September 2014
USA(fus)
Page 251 of 596
LANE KEEPING SYSTEM (IF EQUIPPED)
WARNING:The system is designed to aid the driver. It is not
intended to replace the driver’s attention and judgment. The
driver is still responsible to drive with due care and attention.
The system notifies you to stay in your lane through the steering system
and the instrument cluster display when the front camera detects an
unintentional drift out of your lane is likely to occur. The system
automatically detects and tracks the road lane markings using a camera
that is mounted behind the interior rear view mirror.
Note:The system works above 40 mph (64 km/h).
Note:The system works as long as one lane marking can be detected by
the camera.
Note:If the camera is blocked or if the windshield is damaged, the
system may not function.
Note:When Aid mode is on and the system detects no driver steering
activity for a short period after system activation, the system alerts the
driver to keep their hands on the steering wheel. The system may detect
a light touch or grip on the steering wheel as hands-off driving.
Switching the System On and Off
Press the button located on the turn signal lever to switch the
system on or off.
Note:The system on/off setting is stored until it is manual changed,
unless a MyKey® is detected. If a MyKey® is detected, the system is
defaulted to on and the mode is set to Alert.
Note:If a MyKey® is detected, pressing the button will not affect the
on/off status of the system. Only the Mode and Intensity settings can be
changed when a MyKey® is present.
System Settings
The system has one standard feature setting and one optional setting
menu available. To view or adjust the settings, refer to theInformation
Displayschapter. The last-known selection for each of these settings is
stored by the system. You do not need to readjust your settings each
time you turn on the system.
250Driving Aids
2015 Explorer(exp)
Owners Guide gf, 2nd Printing, September 2014
USA(fus)
Page 253 of 596
System Display
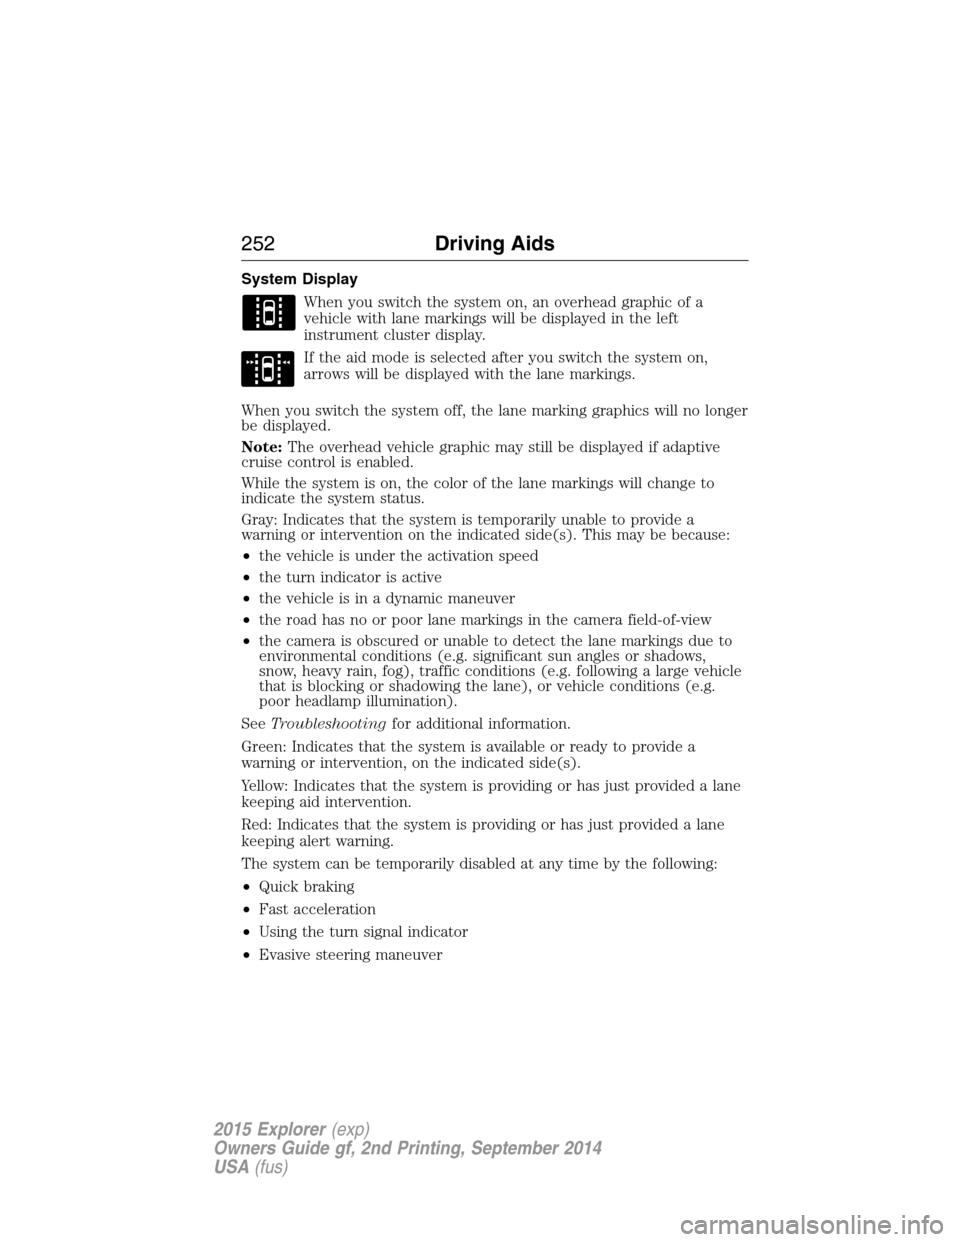
When you switch the system on, an overhead graphic of a
vehicle with lane markings will be displayed in the left
instrument cluster display.
If the aid mode is selected after you switch the system on,
arrows will be displayed with the lane markings.
When you switch the system off, the lane marking graphics will no longer
be displayed.
Note:The overhead vehicle graphic may still be displayed if adaptive
cruise control is enabled.
While the system is on, the color of the lane markings will change to
indicate the system status.
Gray: Indicates that the system is temporarily unable to provide a
warning or intervention on the indicated side(s). This may be because:
•the vehicle is under the activation speed
•the turn indicator is active
•the vehicle is in a dynamic maneuver
•the road has no or poor lane markings in the camera field-of-view
•the camera is obscured or unable to detect the lane markings due to
environmental conditions (e.g. significant sun angles or shadows,
snow, heavy rain, fog), traffic conditions (e.g. following a large vehicle
that is blocking or shadowing the lane), or vehicle conditions (e.g.
poor headlamp illumination).
SeeTroubleshootingfor additional information.
Green: Indicates that the system is available or ready to provide a
warning or intervention, on the indicated side(s).
Yellow: Indicates that the system is providing or has just provided a lane
keeping aid intervention.
Red: Indicates that the system is providing or has just provided a lane
keeping alert warning.
The system can be temporarily disabled at any time by the following:
•Quick braking
•Fast acceleration
•Using the turn signal indicator
•Evasive steering maneuver
252Driving Aids
2015 Explorer(exp)
Owners Guide gf, 2nd Printing, September 2014
USA(fus)
Page 256 of 596
Using the Systems
BLIS® turns on when the engine is started and the vehicle is driven
forward above 3 mph (5 km/h); it remains on while the transmission is in
D (Drive) or N (Neutral). If shifted out of D (Drive) or N (Neutral), the
system enters CTA mode. Once shifted back into D (Drive), BLIS® turns
back on when the vehicle is driven above 3 mph (5 km/h).
Note:BLIS® does not function in R (Reverse) or P (Park) or provide
any additional warning when a turn signal is on.
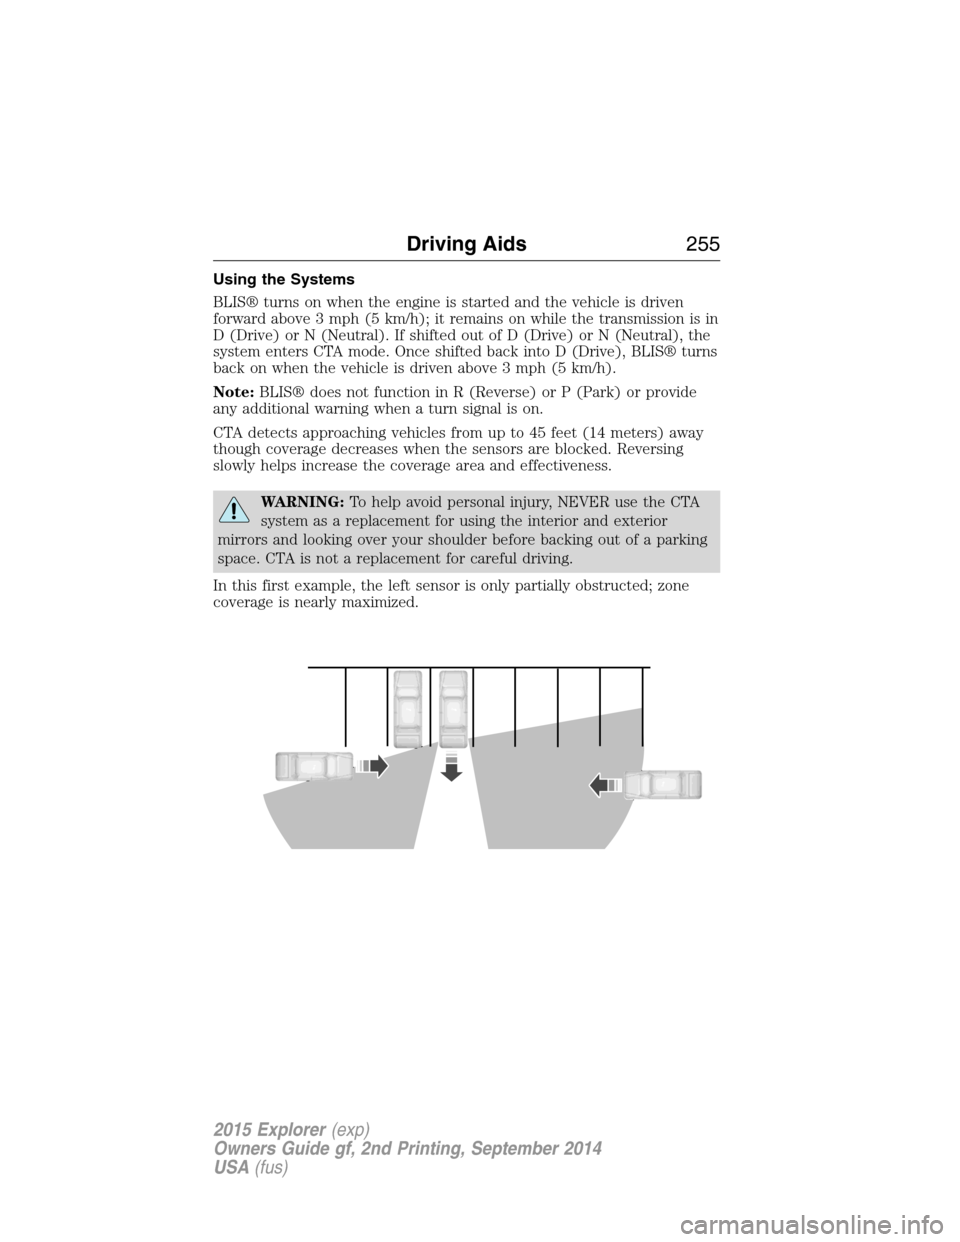
CTA detects approaching vehicles from up to 45 feet (14 meters) away
though coverage decreases when the sensors are blocked. Reversing
slowly helps increase the coverage area and effectiveness.
WARNING:To help avoid personal injury, NEVER use the CTA
system as a replacement for using the interior and exterior
mirrors and looking over your shoulder before backing out of a parking
space. CTA is not a replacement for careful driving.
In this first example, the left sensor is only partially obstructed; zone
coverage is nearly maximized.
Driving Aids255
2015 Explorer(exp)
Owners Guide gf, 2nd Printing, September 2014
USA(fus)
Page 259 of 596
Reasons for messages being displayed
Heavy rainfall/snowfall
interferes with the
radar signalsNo action required. The system automatically
resets to an unblocked state once the
rainfall/snowfall rate decreases or stops. Do
not use BLIS® and/or CTA in these conditions.
System Limitations
The BLIS® and CTA systems do have their limitations; situations such as
severe weather conditions or debris build-up on the sensor area may
limit vehicle detection.
The following are other situations that may limit the BLIS®:
•Certain maneuvering of vehicles entering and exiting the blind zone.
•Vehicles passing through the blind zone at very fast rates.
•When several vehicles forming a convoy pass through the blind zone.
The following are other situations that may limit the CTA system:
•Adjacently parked vehicles or objects obstructing the sensors.
•Approaching vehicles passing at speeds greater than 15 mph
(24 km/h).
•Driving in reverse faster than 3 mph (5 km/h).
•Backing out of an angled parking spot.
False Alerts
Note:If you connected a trailer to your vehicle the BLIS® system may
detect the trailer causing a false alert. To avoid false alerts you may want
to turn the BLIS off manually.
There may be certain instances when either the BLIS® or CTA systems
illuminate the alert indicator with no vehicle in the coverage zone; this is
known as a false alert. Some amount of false alerts are normal; they are
temporary and self-correct.
System Errors
If either system senses a problem with the left or right sensor, the
BLIS® indicator in the information display will illuminate and remain on.
Also,BLIND SPOT SYSTEM FAULTorCROSS TRAFFIC SYSTEM
FAULTmessage will appear. When problems that may cause the left or
right indicator not to illuminate, only the information display message
faults appear.
258Driving Aids
2015 Explorer(exp)
Owners Guide gf, 2nd Printing, September 2014
USA(fus)
Page 277 of 596

Trailer Towing Connector (Vehicles with a Trailer Towing Package
and 7–Pin Connector)
When attaching the trailer wiring connector to
your vehicle, only use a proper fitting connector
that works with the vehicle and trailer functions. If
your vehicle has a trailer towing package, it may
have a 7–pin connector. Some connectors may
have the SAE J2863 logo, which confirms that it is
the proper wiring connector and works correctly
with your vehicle.
Color Function
1. Yellow Left turn signal and stop lamp
2. White Ground (-)
3. Blue Electric brakes
4. Green Right turn signal and stop lamp
5. Orange Battery (+)
6. Brown Running lights
7. Grey Reverse lights
Trailer Hitch Cover
Your vehicle is equipped with a removable trailer hitch trim cover. To
remove the trim cover:
1. Loosen the two
1�4-turn fasteners
(A) in the bottom of the cover by
turning them counterclockwise. Pull
the cover rearward to remove it.
The fasteners remain attached to
the cover.
AA
276Towing
2015 Explorer(exp)
Owners Guide gf, 2nd Printing, September 2014
USA(fus)
Page 279 of 596
Safety Chains
Note:Never attach safety chains to the bumper.
Always connect the safety chains to the hook retainers of your vehicle
hitch.
To connect the safety chains, cross them under the trailer tongue and
allow enough slack for turning tight corners. Do not allow the chains to
drag on the ground.
Trailer Brakes
WARNING:Do not connect a trailer’s hydraulic brake system
directly to your vehicle’s brake system. Your vehicle may not have
enough braking power and your chances of having a collision greatly
increase.
Electric brakes and manual, automatic or surge-type trailer brakes are
safe if you install them properly and adjust them to the manufacturer’s
specifications. The trailer brakes must meet local and federal regulations.
The rating for the tow vehicle’s braking system operation is at
the gross vehicle weight rating, not the gross combined weight
rating.
Separate functioning brake systems are required for safe control
of towed vehicles and trailers weighing more than 1500 pounds
(680 kilograms) when loaded.
Trailer Lamps
WARNING:Never connect any trailer lamp wiring to the
vehicle’s tail lamp wiring; this may damage the electrical system
resulting in a fire. Contact an authorized dealer as soon as possible for
assistance in proper trailer tow wiring installation. Additional electrical
equipment may be required.
Trailer lamps are required on most towed vehicles. Make sure all running
lights, brake lights, turn signals and hazard lights are working.
Before Towing a Trailer
Practice turning, stopping and backing up to get the feel of your
vehicle-trailer combination before starting on a trip. When turning, make
wider turns so the trailer wheels clear curbs and other obstacles.
278Towing
2015 Explorer(exp)
Owners Guide gf, 2nd Printing, September 2014
USA(fus)
Page 289 of 596
HAZARD WARNING FLASHERS
The hazard flasher control is located on the instrument panel
by the radio. Use it when your vehicle is disabled and is
creating a safety hazard for other motorists.
•Press the flasher control and all front and rear direction signals will
flash.
•Press the flasher control again to turn them off.
Note:
With extended use, the flashers may run down your 12–volt battery.
FUEL SHUTOFF
WARNING:Failure to inspect and if necessary repair fuel leaks
after a collision may increase the risk of fire and serious injury.
Ford Motor Company recommends that the fuel system be inspected by
an authorized dealer after any collision.
In the event of a moderate to severe collision, this vehicle includes a fuel
pump shutoff feature that stops the flow of fuel to the engine. Not every
impact will cause a shutoff.
Should your vehicle shut off after a collision, you may restart your
vehicle. For vehicles equipped with a key system:
1. Switch off the ignition.
2. Switch on the ignition.
3. Repeat Steps 1 and 2 to re-enable fuel pump.
For vehicles equipped with a push button start system:
1. Press theSTART/STOPbutton to switch off the ignition.
2. Press the brake pedal and press theSTART/STOPbutton to start the
vehicle.
3. Remove your foot from the brake pedal and press theSTART/STOP
button to switch off the ignition.
4. You can either attempt to start the engine by pressing the brake pedal
and theSTART/STOPbutton, or switch on the ignition only by pressing
theSTART/STOPbutton without pressing the brake pedal. Both ways
re-enable the fuel system.
288Roadside Emergencies
2015 Explorer(exp)
Owners Guide gf, 2nd Printing, September 2014
USA(fus)