2015 FORD EXPLORER reset
[x] Cancel search: resetPage 133 of 596
Settings
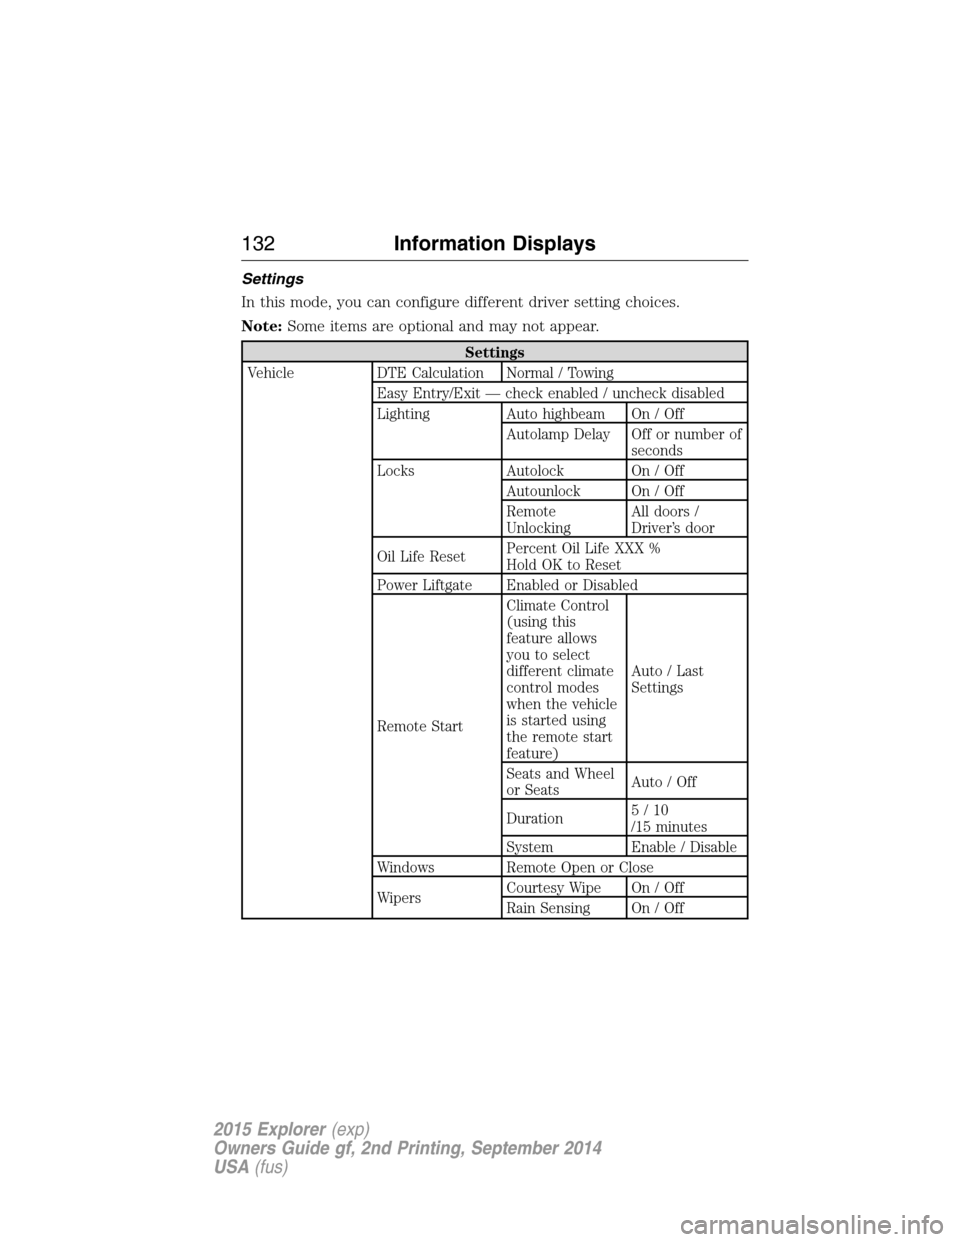
In this mode, you can configure different driver setting choices.
Note:Some items are optional and may not appear.
Settings
Vehicle DTE Calculation Normal / Towing
Easy Entry/Exit — check enabled / uncheck disabled
Lighting Auto highbeam On / Off
Autolamp Delay Off or number of
seconds
Locks Autolock On / Off
Autounlock On / Off
Remote
UnlockingAll doors /
Driver’s door
Oil Life ResetPercent Oil Life XXX %
Hold OK to Reset
Power Liftgate Enabled or Disabled
Remote StartClimate Control
(using this
feature allows
you to select
different climate
control modes
when the vehicle
is started using
the remote start
feature)Auto / Last
Settings
Seats and Wheel
or SeatsAuto / Off
Duration5/10
/15 minutes
System Enable / Disable
Windows Remote Open or Close
WipersCourtesy Wipe On / Off
Rain Sensing On / Off
132Information Displays
2015 Explorer(exp)
Owners Guide gf, 2nd Printing, September 2014
USA(fus)
Page 159 of 596
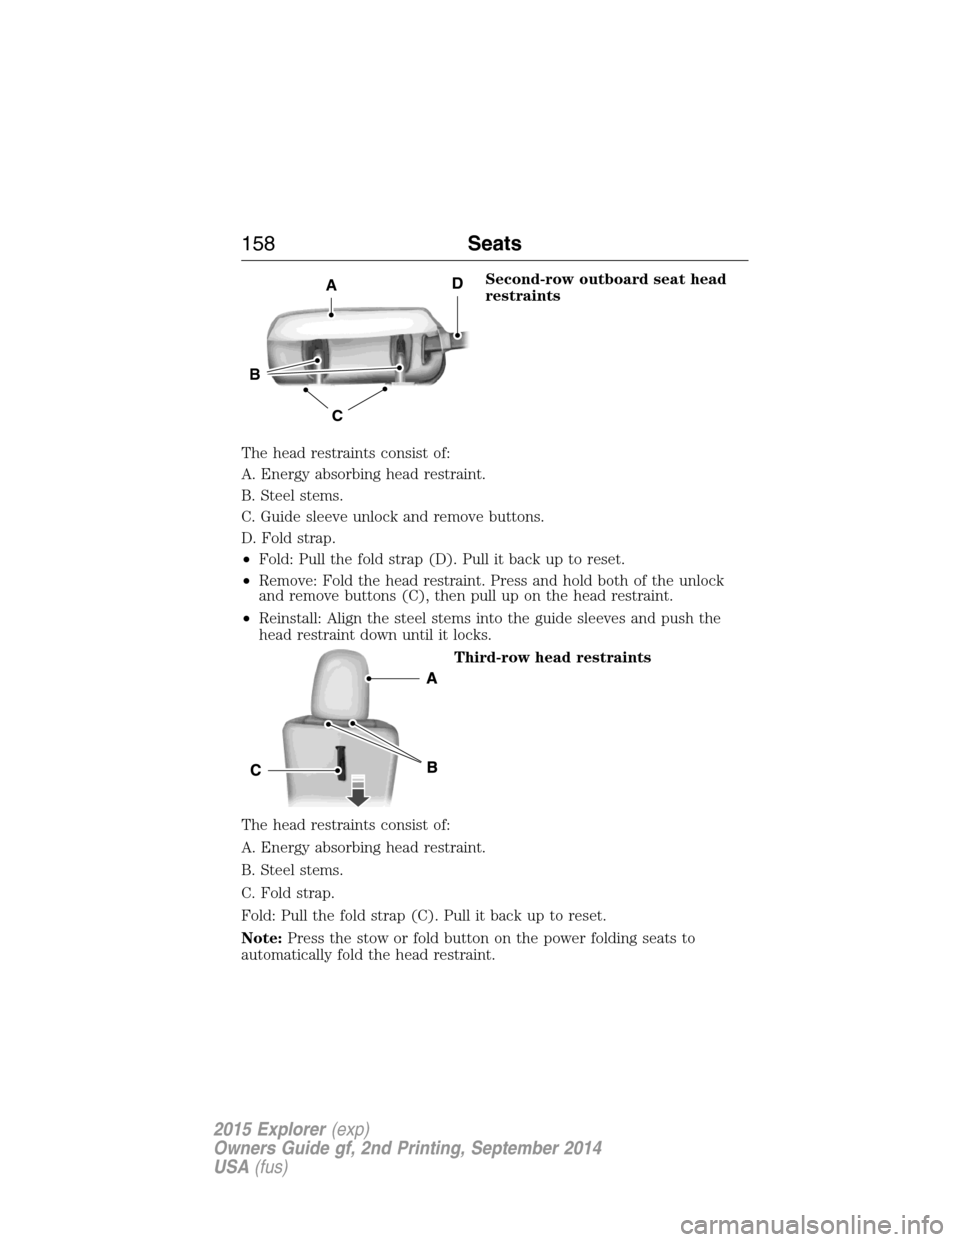
Second-row outboard seat head
restraints
The head restraints consist of:
A. Energy absorbing head restraint.
B. Steel stems.
C. Guide sleeve unlock and remove buttons.
D. Fold strap.
•Fold: Pull the fold strap (D). Pull it back up to reset.
•Remove: Fold the head restraint. Press and hold both of the unlock
and remove buttons (C), then pull up on the head restraint.
•Reinstall: Align the steel stems into the guide sleeves and push the
head restraint down until it locks.
Third-row head restraints
The head restraints consist of:
A. Energy absorbing head restraint.
B. Steel stems.
C. Fold strap.
Fold: Pull the fold strap (C). Pull it back up to reset.
Note:Press the stow or fold button on the power folding seats to
automatically fold the head restraint.
C
B
AD
158Seats
2015 Explorer(exp)
Owners Guide gf, 2nd Printing, September 2014
USA(fus)
Page 177 of 596
Note:In order to allow the seat to complete the stowed position, do not
place objects under the seat before stowing. Remove all objects from the
seat and stowage tub.
Note:In the unlikely event that the third-row power seat stops
prematurely or travels to an unexpected position, press the FOLD button
(C) to reset the seat and return it to a normal position.
These seats feature a power one-touch operation that allows you fold
and stow the seats.
•The power fold seats work only when the transmission is in park (P)
and the liftgate is open.
•If the ignition is off and the feature is still running, the battery saver
will turn it off after 10 minutes. Press unlock on the remote entry key
transmitter to reactivate the power seats or unlock it with the keyless
entry keypad. See theKeys and Remote Controlchapter.
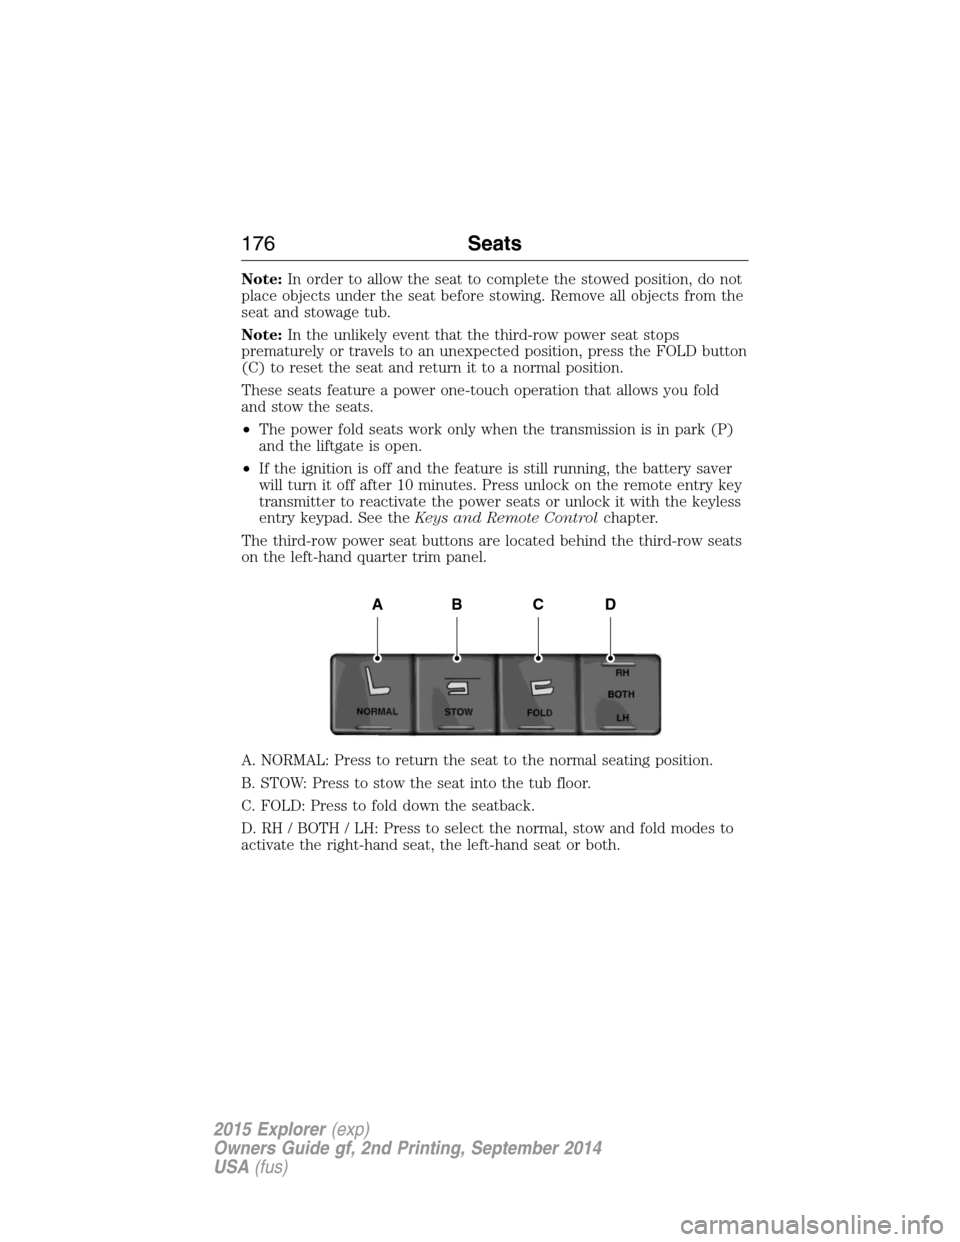
The third-row power seat buttons are located behind the third-row seats
on the left-hand quarter trim panel.
A. NORMAL: Press to return the seat to the normal seating position.
B. STOW: Press to stow the seat into the tub floor.
C. FOLD: Press to fold down the seatback.
D. RH / BOTH / LH: Press to select the normal, stow and fold modes to
activate the right-hand seat, the left-hand seat or both.
ABCD
176Seats
2015 Explorer(exp)
Owners Guide gf, 2nd Printing, September 2014
USA(fus)
Page 201 of 596
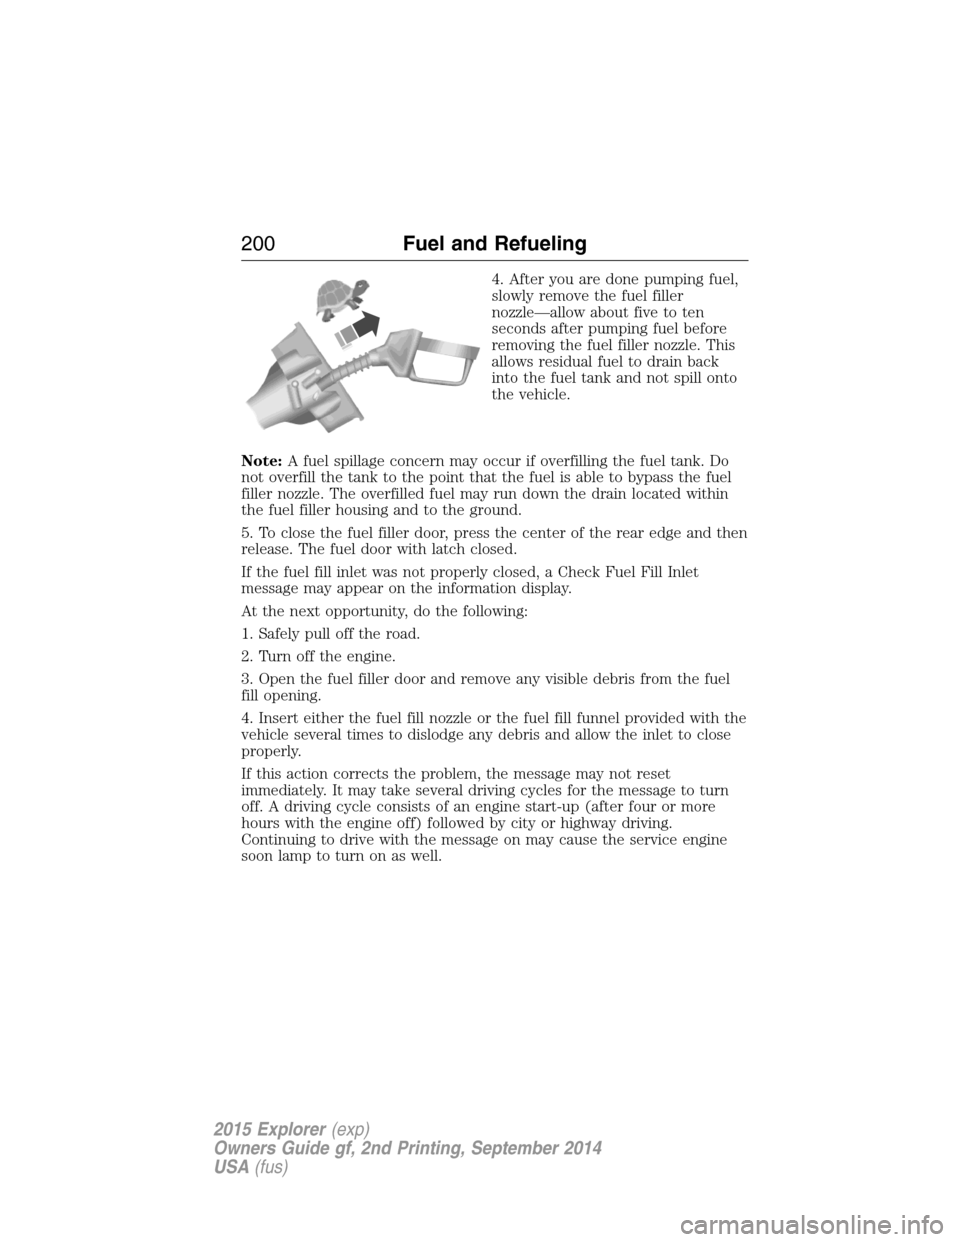
4. After you are done pumping fuel,
slowly remove the fuel filler
nozzle—allow about five to ten
seconds after pumping fuel before
removing the fuel filler nozzle. This
allows residual fuel to drain back
into the fuel tank and not spill onto
the vehicle.
Note:A fuel spillage concern may occur if overfilling the fuel tank. Do
not overfill the tank to the point that the fuel is able to bypass the fuel
filler nozzle. The overfilled fuel may run down the drain located within
the fuel filler housing and to the ground.
5. To close the fuel filler door, press the center of the rear edge and then
release. The fuel door with latch closed.
If the fuel fill inlet was not properly closed, a Check Fuel Fill Inlet
message may appear on the information display.
At the next opportunity, do the following:
1. Safely pull off the road.
2. Turn off the engine.
3. Open the fuel filler door and remove any visible debris from the fuel
fill opening.
4. Insert either the fuel fill nozzle or the fuel fill funnel provided with the
vehicle several times to dislodge any debris and allow the inlet to close
properly.
If this action corrects the problem, the message may not reset
immediately. It may take several driving cycles for the message to turn
off. A driving cycle consists of an engine start-up (after four or more
hours with the engine off) followed by city or highway driving.
Continuing to drive with the message on may cause the service engine
soon lamp to turn on as well.
200Fuel and Refueling
2015 Explorer(exp)
Owners Guide gf, 2nd Printing, September 2014
USA(fus)
Page 239 of 596
Enhanced Park Aids
Note:Enhanced park aids is only available when the transmission is in R
(Reverse).
Note:The reverse sensing system is not effective at speeds above 3 mph
(5 km/h) and may not detect certain angular or moving objects.
The enhanced park aids allows the driver to view the area that is being
detected by the reverse sensing system. The system uses red, yellow and
green highlights which appear on top of the video image when an object
is detected by the reverse sensing system. The alert highlights the
closest object detected. The reverse sensing alert can be disabled and if
enhanced park aids is enabled, highlighted areas are still displayed.
Selectable settings for this feature are ON and OFF.
Manual Zoom
WARNING:When manual zoom is on, the full area behind the
vehicle is not shown. Be aware of your surroundings when using
the manual zoom feature.
Note:Manual zoom is only available when the transmission is in R
(Reverse).
Note:When manual zoom is enabled, only the centerline is shown.
Allows the driver to get a closer view of an object behind the vehicle.
The zoomed image keeps the bumper in the image to provide a
reference. The zoom is only active while the transmission is in R
(Reverse), When the transmission is shifted out of R (Reverse), the
feature automatically turns off and must be reset when it is used again.
Selectable settings for this feature are OFF and ON. Press the zoom
button to change the view. The default setting for the manual zoom is
OFF.
Rear Camera Delay
When shifting the transmission out of R (Reverse) and into any gear
other than P (Park), the camera image remains in the display until the
vehicle speed reaches 6 mph (10 km/h). This occurs when the rear
camera delay feature is on, or until a radio button is selected.
Selectable settings for this feature are ON and OFF. The default setting
for the rear camera delay is OFF.
238Parking Aids
2015 Explorer(exp)
Owners Guide gf, 2nd Printing, September 2014
USA(fus)
Page 243 of 596
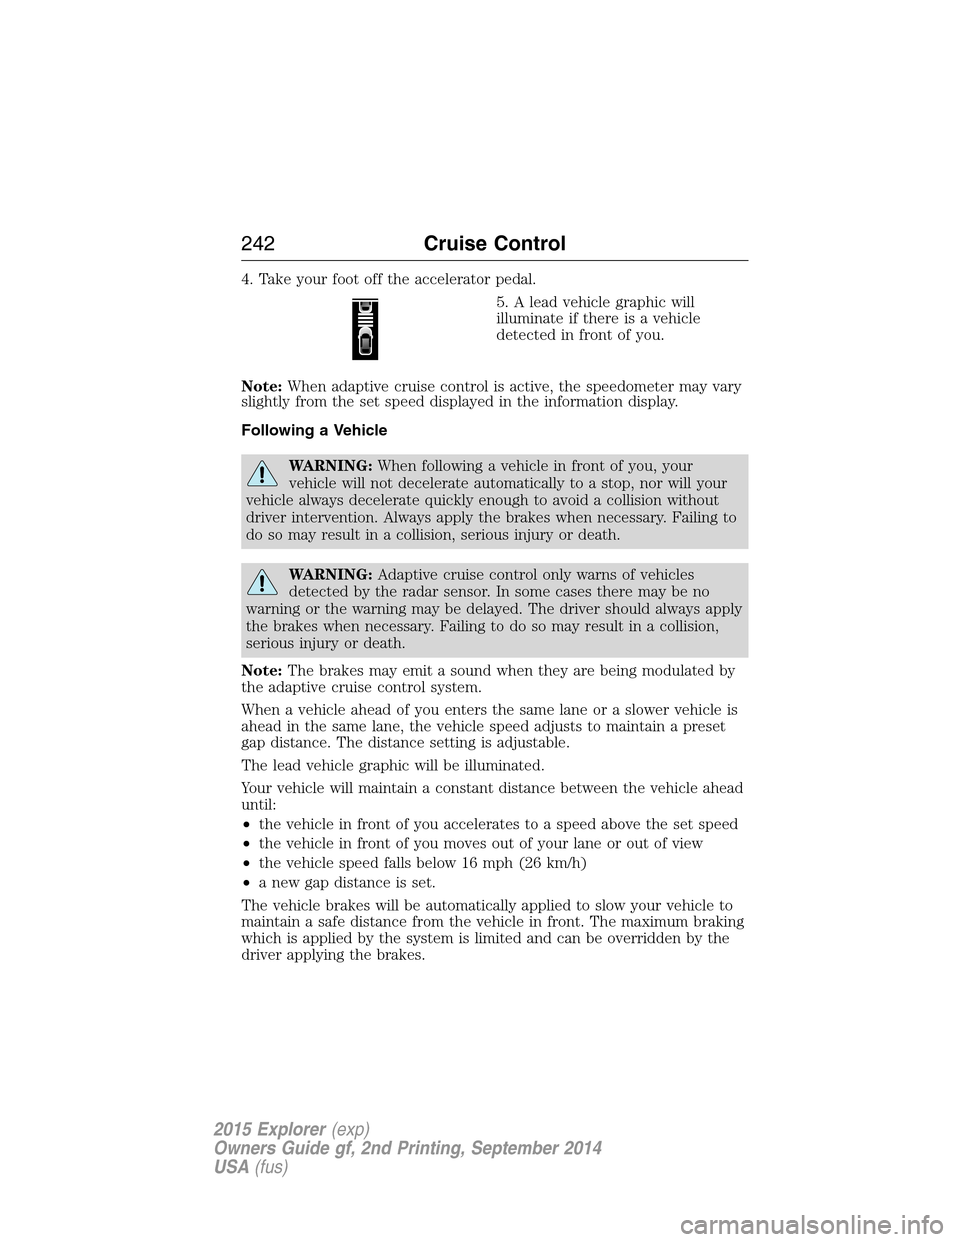
4. Take your foot off the accelerator pedal.
5. A lead vehicle graphic will
illuminate if there is a vehicle
detected in front of you.
Note:When adaptive cruise control is active, the speedometer may vary
slightly from the set speed displayed in the information display.
Following a Vehicle
WARNING:When following a vehicle in front of you, your
vehicle will not decelerate automatically to a stop, nor will your
vehicle always decelerate quickly enough to avoid a collision without
driver intervention. Always apply the brakes when necessary. Failing to
do so may result in a collision, serious injury or death.
WARNING:Adaptive cruise control only warns of vehicles
detected by the radar sensor. In some cases there may be no
warning or the warning may be delayed. The driver should always apply
the brakes when necessary. Failing to do so may result in a collision,
serious injury or death.
Note:The brakes may emit a sound when they are being modulated by
the adaptive cruise control system.
When a vehicle ahead of you enters the same lane or a slower vehicle is
ahead in the same lane, the vehicle speed adjusts to maintain a preset
gap distance. The distance setting is adjustable.
The lead vehicle graphic will be illuminated.
Your vehicle will maintain a constant distance between the vehicle ahead
until:
•the vehicle in front of you accelerates to a speed above the set speed
•the vehicle in front of you moves out of your lane or out of view
•the vehicle speed falls below 16 mph (26 km/h)
•a new gap distance is set.
The vehicle brakes will be automatically applied to slow your vehicle to
maintain a safe distance from the vehicle in front. The maximum braking
which is applied by the system is limited and can be overridden by the
driver applying the brakes.
242Cruise Control
2015 Explorer(exp)
Owners Guide gf, 2nd Printing, September 2014
USA(fus)
Page 250 of 596
System Display
When active the system will run automatically in the background and
only issue a warning if required. You can view the status at any time
using the information display. Refer to theInformation Displays
chapter.
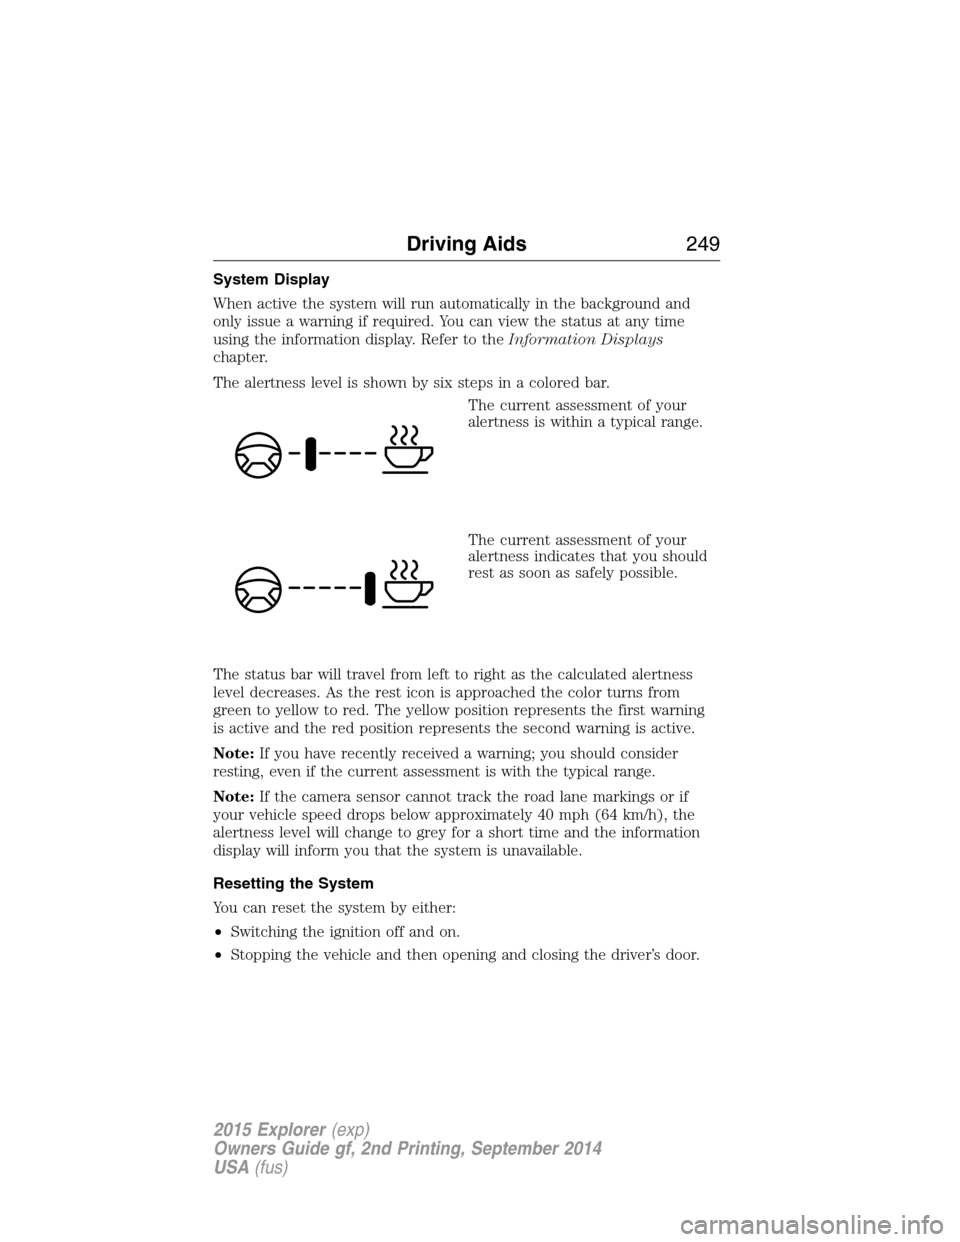
The alertness level is shown by six steps in a colored bar.
The current assessment of your
alertness is within a typical range.
The current assessment of your
alertness indicates that you should
rest as soon as safely possible.
The status bar will travel from left to right as the calculated alertness
level decreases. As the rest icon is approached the color turns from
green to yellow to red. The yellow position represents the first warning
is active and the red position represents the second warning is active.
Note:If you have recently received a warning; you should consider
resting, even if the current assessment is with the typical range.
Note:If the camera sensor cannot track the road lane markings or if
your vehicle speed drops below approximately 40 mph (64 km/h), the
alertness level will change to grey for a short time and the information
display will inform you that the system is unavailable.
Resetting the System
You can reset the system by either:
•Switching the ignition off and on.
•Stopping the vehicle and then opening and closing the driver’s door.
Driving Aids249
2015 Explorer(exp)
Owners Guide gf, 2nd Printing, September 2014
USA(fus)
Page 258 of 596
System Sensors
WARNING:Just prior to the system recognizing a blocked
condition and alerting the driver, the number of missed objects
will increase. To help avoid injuries, NEVER use the BLIS® as a
replacement for using the side and rear view mirrors and looking over
your shoulder before changing lanes. BLIS® is not a replacement for
careful driving.
Note:It is possible to get a blockage warning with no blockage present;
this is rare and known as a false blockage warning. A false blocked
condition either self-corrects or clears after a key cycle.
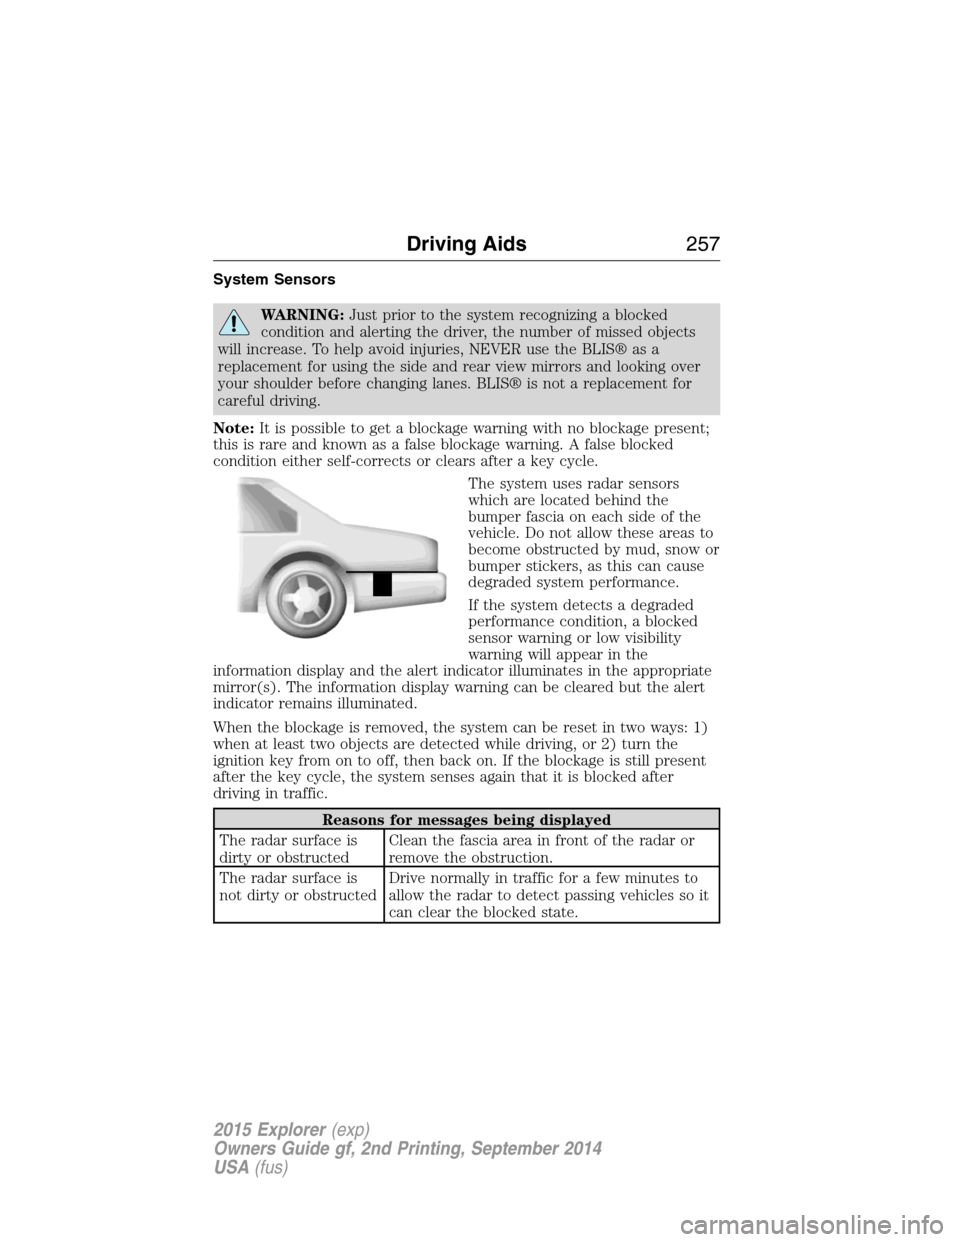
The system uses radar sensors
which are located behind the
bumper fascia on each side of the
vehicle. Do not allow these areas to
become obstructed by mud, snow or
bumper stickers, as this can cause
degraded system performance.
If the system detects a degraded
performance condition, a blocked
sensor warning or low visibility
warning will appear in the
information display and the alert indicator illuminates in the appropriate
mirror(s). The information display warning can be cleared but the alert
indicator remains illuminated.
When the blockage is removed, the system can be reset in two ways: 1)
when at least two objects are detected while driving, or 2) turn the
ignition key from on to off, then back on. If the blockage is still present
after the key cycle, the system senses again that it is blocked after
driving in traffic.
Reasons for messages being displayed
The radar surface is
dirty or obstructedClean the fascia area in front of the radar or
remove the obstruction.
The radar surface is
not dirty or obstructedDrive normally in traffic for a few minutes to
allow the radar to detect passing vehicles so it
can clear the blocked state.
Driving Aids257
2015 Explorer(exp)
Owners Guide gf, 2nd Printing, September 2014
USA(fus)