Page 334 of 596

7. Lower the driver’s side of the cover and slide the
three tabs on the cover into the three slots in the
housing.
8. Lower the passenger’s side of the cover. Engage
the two clamps to secure the cover to the housing.
ADJUSTING THE HEADLAMPS
The headlamps on your vehicle are properly aimed at the assembly plant.
If your vehicle has been in an accident, an authorized dealer should
check the alignment of your headlamps.
Vertical Aim Adjustment
The headlamps on your vehicle can only be vertically adjusted. Your
vehicle does not require horizontal aim adjustments.
To adjust the headlamps:
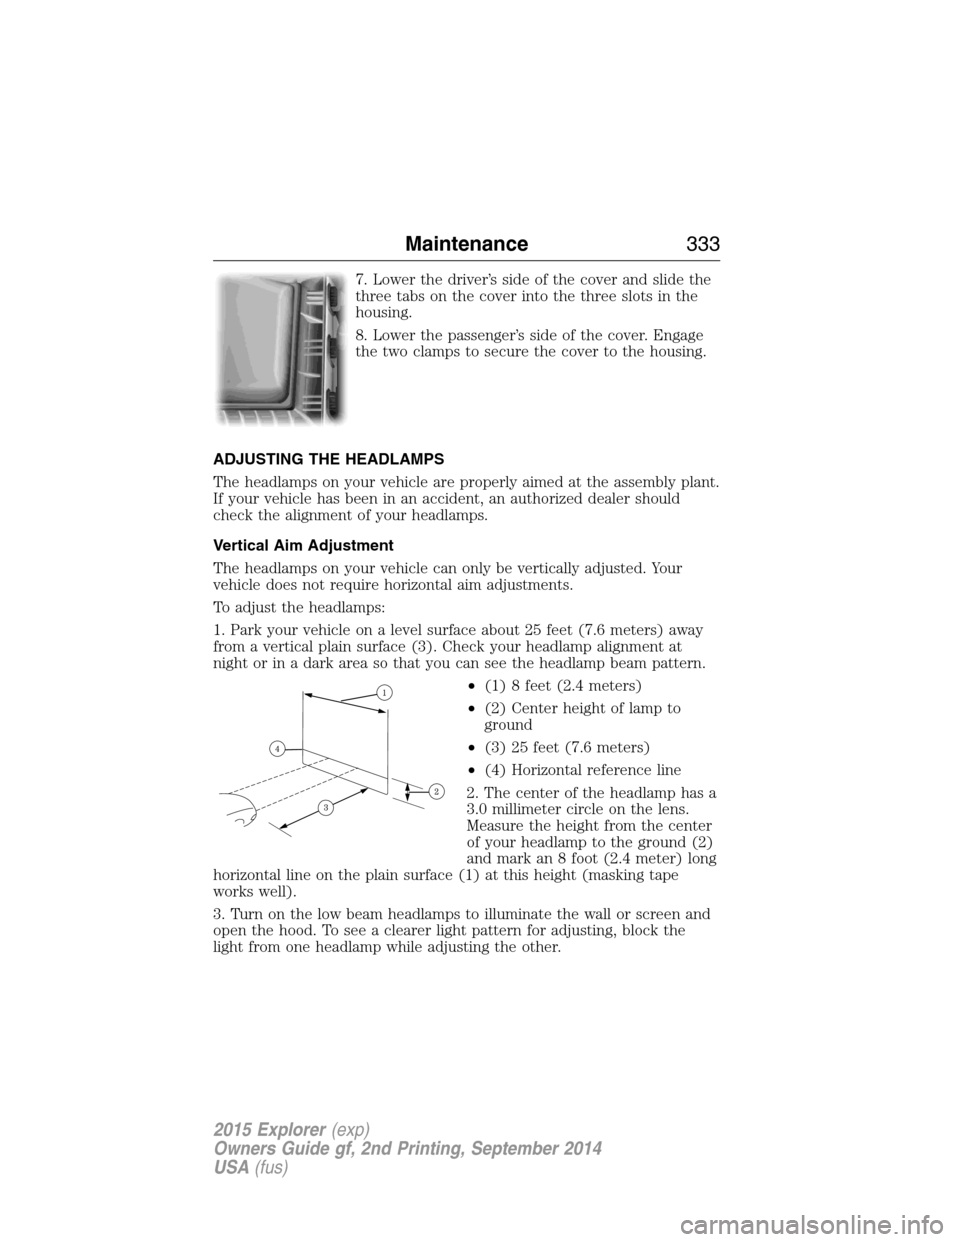
1. Park your vehicle on a level surface about 25 feet (7.6 meters) away
from a vertical plain surface (3). Check your headlamp alignment at
night or in a dark area so that you can see the headlamp beam pattern.
•(1) 8 feet (2.4 meters)
•(2) Center height of lamp to
ground
•(3) 25 feet (7.6 meters)
•(4) Horizontal reference line
2. The center of the headlamp has a
3.0 millimeter circle on the lens.
Measure the height from the center
of your headlamp to the ground (2)
and mark an 8 foot (2.4 meter) long
horizontal line on the plain surface (1) at this height (masking tape
works well).
3. Turn on the low beam headlamps to illuminate the wall or screen and
open the hood. To see a clearer light pattern for adjusting, block the
light from one headlamp while adjusting the other.
Maintenance333
2015 Explorer(exp)
Owners Guide gf, 2nd Printing, September 2014
USA(fus)
Page 335 of 596
For vehicles with halogen headlamps:
On the wall or screen you will
observe a flat zone of high intensity
light located at the top of the right
hand portion of the beam pattern. If
the top edge of the high intensity
light zone is not at the horizontal
reference line, the headlamp will
need to be adjusted.
For vehicles with HID headlamps:
There is a distinct cut-off (change
from light to dark) in the left
portion of the beam pattern. The
top edge of this cut-off should be
positioned two inches (50.8
millimeters) below the horizontal
reference line.
4. Open the hood.
5. Locate the vertical adjuster for
each headlamp. Using a Phillips #2
screwdriver, turn the adjuster
control either clockwise or
counterclockwise in order to adjust
the vertical aim of the headlamp.
Note:HORIZONTAL AIMING IS
NOT REQUIRED FOR THIS
VEHICLE AND IS
NON-ADJUSTABLE.
334Maintenance
2015 Explorer(exp)
Owners Guide gf, 2nd Printing, September 2014
USA(fus)
Page 340 of 596

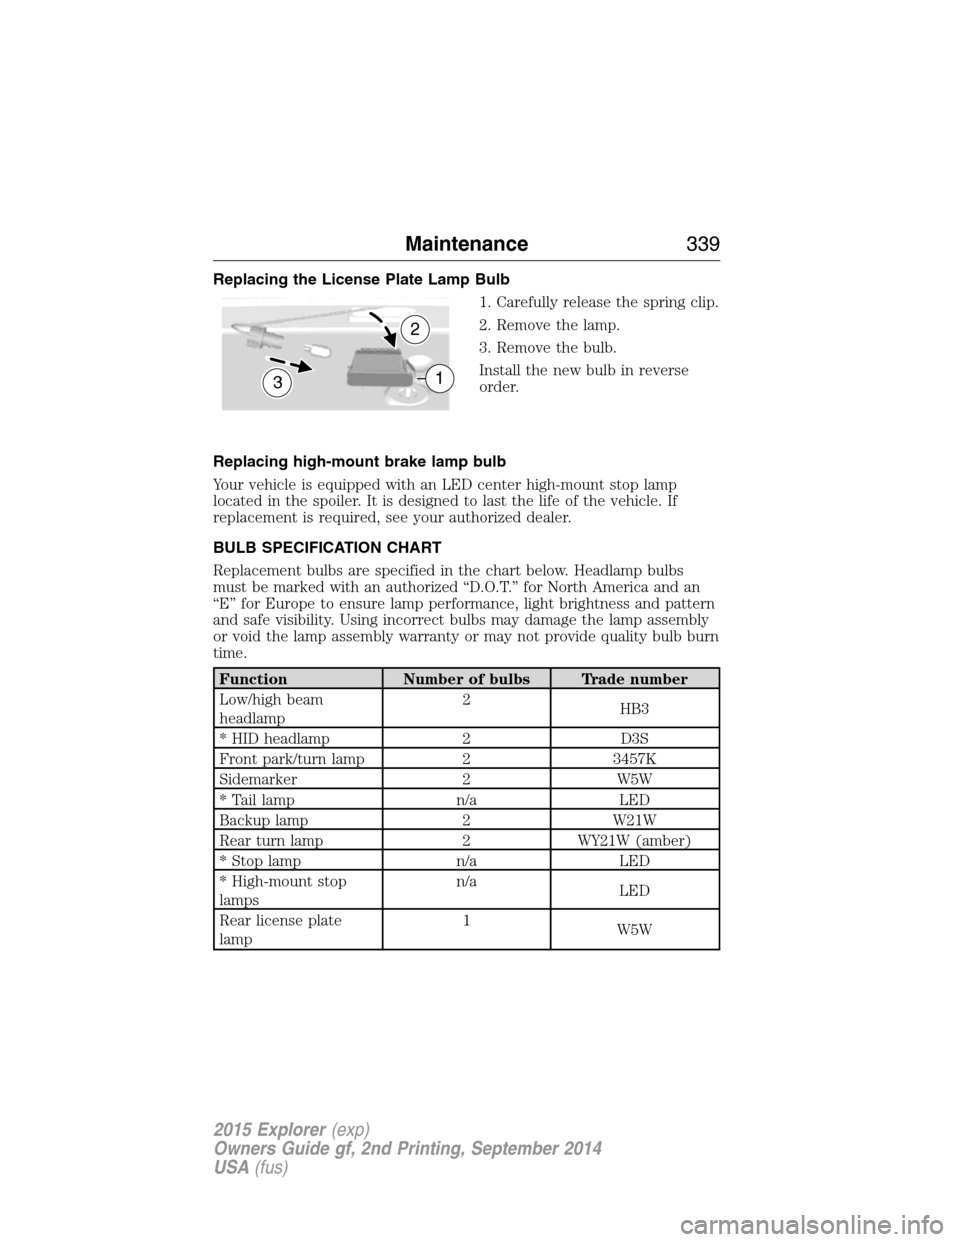
Replacing the License Plate Lamp Bulb
1. Carefully release the spring clip.
2. Remove the lamp.
3. Remove the bulb.
Install the new bulb in reverse
order.
Replacing high-mount brake lamp bulb
Your vehicle is equipped with an LED center high-mount stop lamp
located in the spoiler. It is designed to last the life of the vehicle. If
replacement is required, see your authorized dealer.
BULB SPECIFICATION CHART
Replacement bulbs are specified in the chart below. Headlamp bulbs
must be marked with an authorized “D.O.T.” for North America and an
“E” for Europe to ensure lamp performance, light brightness and pattern
and safe visibility. Using incorrect bulbs may damage the lamp assembly
or void the lamp assembly warranty or may not provide quality bulb burn
time.
Function Number of bulbs Trade number
Low/high beam
headlamp2
HB3
* HID headlamp 2 D3S
Front park/turn lamp 2 3457K
Sidemarker 2 W5W
* Tail lamp n/a LED
Backup lamp 2 W21W
Rear turn lamp 2 WY21W (amber)
* Stop lamp n/a LED
* High-mount stop
lampsn/a
LED
Rear license plate
lamp1
W5W
3
2
1
Maintenance339
2015 Explorer(exp)
Owners Guide gf, 2nd Printing, September 2014
USA(fus)