2015 FORD EXPLORER tire type
[x] Cancel search: tire typePage 216 of 596
If your vehicle gets stuck in mud or snow it may be rocked out by
shifting between forward and reverse gears, stopping between shifts, in a
steady pattern. Press lightly on the accelerator in each gear.
Note:Do not rock the vehicle if the engine is not at normal operating
temperature or damage to the transmission may occur.
Note:Do not rock the vehicle for more than a few minutes or damage to
the transmission and tires may occur or the engine may overheat.
Emergency maneuvers
WARNING:Vehicles with a higher center of gravity such as
utility and four-wheel drive vehicles handle differently than
vehicles with a lower center of gravity. Utility and four-wheel drive
vehicles are not designed for cornering at speeds as high as passenger
cars any more than low-slung sports cars are designed to perform
satisfactorily under off-road conditions. Avoid sharp turns, excessive
speed and abrupt maneuvers in these vehicles. Failure to drive
cautiously could result in an increased risk of loss of vehicle control,
vehicle rollover, personal injury and death.
•In an unavoidable emergency situation where a sudden sharp turn
must be made, remember to avoid “over-driving” your vehicle, i.e.,
turn the steering wheel only as rapidly and as far as required to avoid
the emergency. Excessive steering will result in less vehicle control,
not more. Additionally, smooth variations of the accelerator and/or
brake pedal pressure should be utilized if changes in vehicle speed are
called for. Avoid abrupt steering, acceleration or braking which could
result in an increased risk of loss of vehicle control, vehicle rollover
and/or personal injury. Use all available road surface to return the
vehicle to a safe direction of travel.
•In the event of an emergency stop, avoid skidding the tires and do not
attempt any sharp steering wheel movements.
•If the vehicle goes from one type of surface to another (i.e., from
concrete to gravel) there will be a change in the way the vehicle
responds to a maneuver (steering, acceleration or braking). Again,
avoid these abrupt inputs.
Sand
When driving over sand, try to keep all four wheels on the most solid
area of the trail. Avoid reducing the tire pressures but shift to a lower
gear and drive steadily through the terrain. Apply the accelerator slowly
and avoid spinning the wheels.
Four-Wheel Drive (If Equipped)215
2015 Explorer(exp)
Owners Guide gf, 2nd Printing, September 2014
USA(fus)
Page 352 of 596
GENERAL INFORMATION
Notice to Utility Vehicle, Van and Truck Owners
WARNING:Utility vehicles have a significantly higher rollover
rate than other types of vehicles. To reduce the risk of serious
injury or death from a rollover or other crash you must:
•Avoid sharp turns and abrupt maneuvers.
•Drive at safe speeds for the conditions.
•Keep tires properly inflated.
•Never overload or improperly load your vehicle.
•Make sure every passenger is properly restrained.
WARNING:In a rollover crash, an unbelted person is
significantly more likely to die than a person wearing a seat belt.
All occupants must wear seat belts. Children and infants must use
appropriate restraints to minimize the risk of injury or ejection.
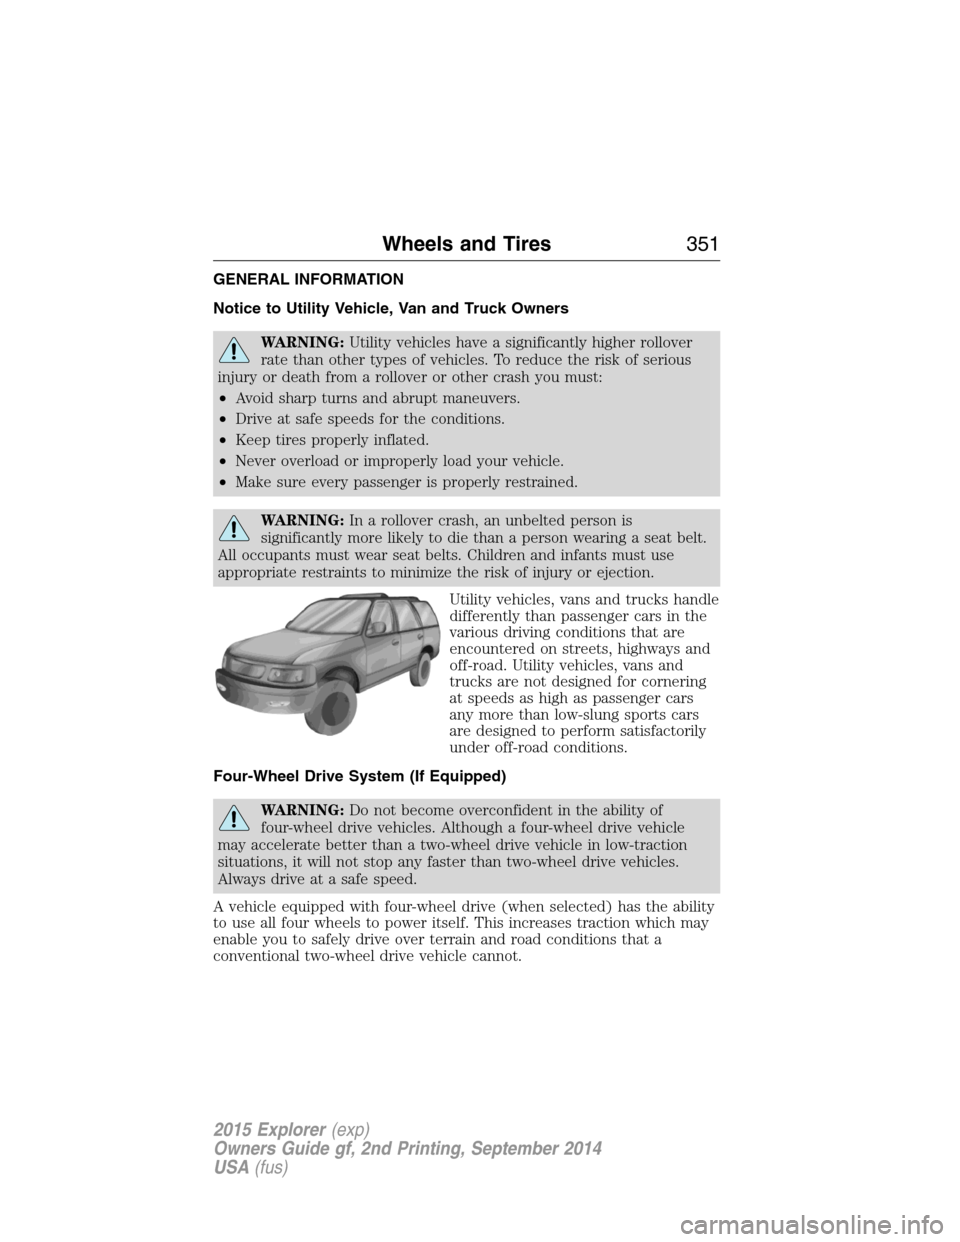
Utility vehicles, vans and trucks handle
differently than passenger cars in the
various driving conditions that are
encountered on streets, highways and
off-road. Utility vehicles, vans and
trucks are not designed for cornering
at speeds as high as passenger cars
any more than low-slung sports cars
are designed to perform satisfactorily
under off-road conditions.
Four-Wheel Drive System (If Equipped)
WARNING:Do not become overconfident in the ability of
four-wheel drive vehicles. Although a four-wheel drive vehicle
may accelerate better than a two-wheel drive vehicle in low-traction
situations, it will not stop any faster than two-wheel drive vehicles.
Always drive at a safe speed.
A vehicle equipped with four-wheel drive (when selected) has the ability
to use all four wheels to power itself. This increases traction which may
enable you to safely drive over terrain and road conditions that a
conventional two-wheel drive vehicle cannot.
Wheels and Tires351
2015 Explorer(exp)
Owners Guide gf, 2nd Printing, September 2014
USA(fus)
Page 355 of 596
•The Sport, optional 265/45ZR20 tires were designed for track use and
may exhibit significantly reduced tread life and increased tire noise
compared to the standard equipment tires under normal driving
conditions. Increasing the front camber settings beyond the factory
settings may further accelerate tread wear and induce tire noise.
•Do not use tire chains on the optional 265/45ZR20 Sport tires and
wheels of your vehicle. The use of any type of tire chain on these tires
may damage your vehicle.
•For tire pressures, see the placard located on the B-pillar inside the
driver’s door.
•Always maintain your tire pressures according to the tire information
placard on the driver’s door jamb, using an accurate gauge.
Note:Tires should always be kept at the correct inflation pressures and
extra caution should be taken when operating on rough roads to avoid
impacts that could cause wheel and tire damage.
Information About Uniform Tire Quality Grading
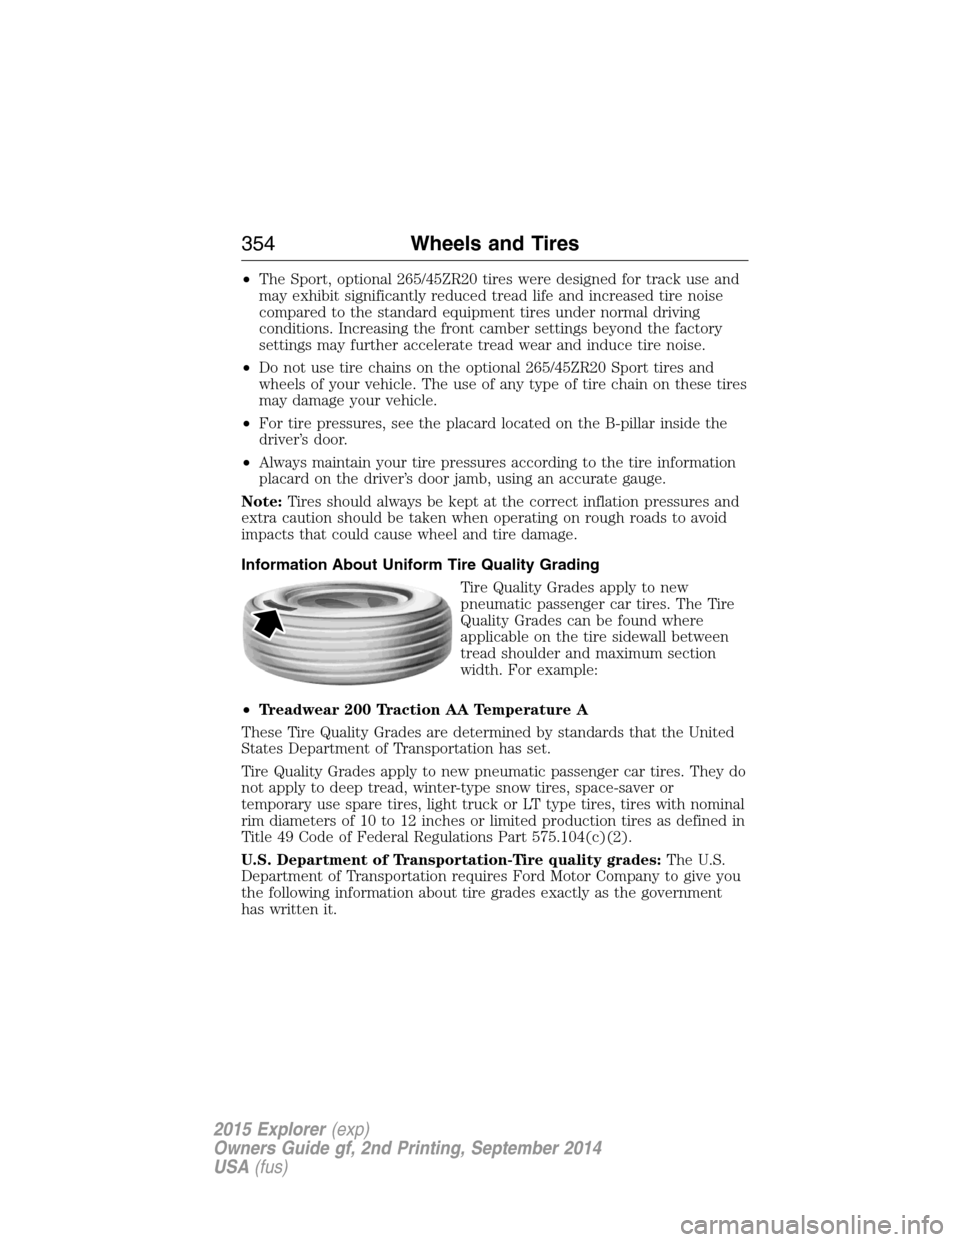
Tire Quality Grades apply to new
pneumatic passenger car tires. The Tire
Quality Grades can be found where
applicable on the tire sidewall between
tread shoulder and maximum section
width. For example:
•Treadwear 200 Traction AA Temperature A
These Tire Quality Grades are determined by standards that the United
States Department of Transportation has set.
Tire Quality Grades apply to new pneumatic passenger car tires. They do
not apply to deep tread, winter-type snow tires, space-saver or
temporary use spare tires, light truck or LT type tires, tires with nominal
rim diameters of 10 to 12 inches or limited production tires as defined in
Title 49 Code of Federal Regulations Part 575.104(c)(2).
U.S. Department of Transportation-Tire quality grades:The U.S.
Department of Transportation requires Ford Motor Company to give you
the following information about tire grades exactly as the government
has written it.
354Wheels and Tires
2015 Explorer(exp)
Owners Guide gf, 2nd Printing, September 2014
USA(fus)
Page 358 of 596
INFORMATION CONTAINED ON THE TIRE SIDEWALL
Both U.S. and Canada Federal regulations require tire manufacturers to
place standardized information on the sidewall of all tires. This
information identifies and describes the fundamental characteristics of
the tire and also provides a U.S. DOT Tire Identification Number for
safety standard certification and in case of a recall.
Information on P Type Tires
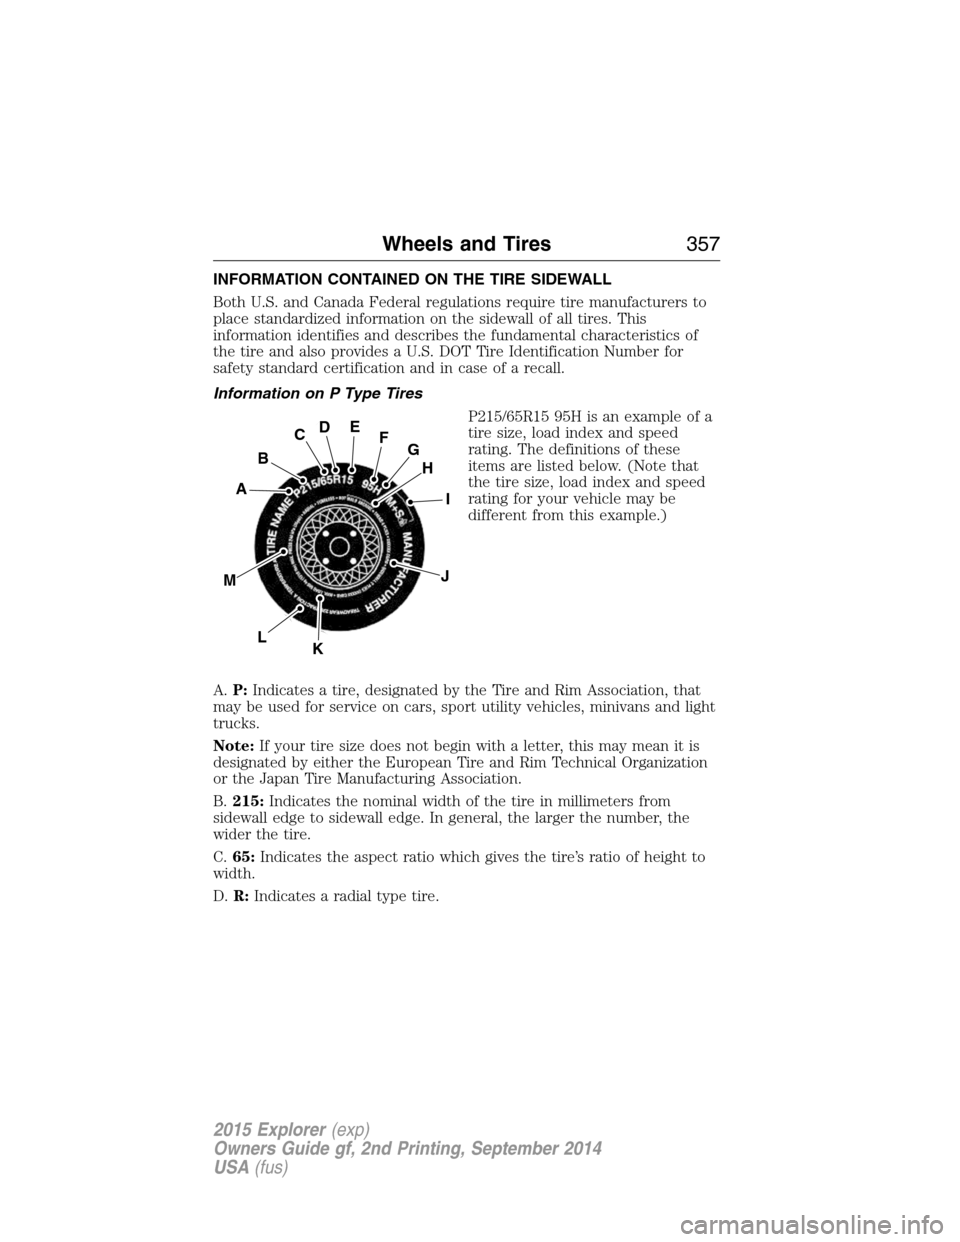
P215/65R15 95H is an example of a
tire size, load index and speed
rating. The definitions of these
items are listed below. (Note that
the tire size, load index and speed
rating for your vehicle may be
different from this example.)
A.P:Indicates a tire, designated by the Tire and Rim Association, that
may be used for service on cars, sport utility vehicles, minivans and light
trucks.
Note:If your tire size does not begin with a letter, this may mean it is
designated by either the European Tire and Rim Technical Organization
or the Japan Tire Manufacturing Association.
B.215:Indicates the nominal width of the tire in millimeters from
sidewall edge to sidewall edge. In general, the larger the number, the
wider the tire.
C.65:Indicates the aspect ratio which gives the tire’s ratio of height to
width.
D.R:Indicates a radial type tire.
H
I
J
KL
M
A
B
CDEFG
Wheels and Tires357
2015 Explorer(exp)
Owners Guide gf, 2nd Printing, September 2014
USA(fus)
Page 361 of 596
M.Maximum Inflation Pressure:Indicates the tire manufacturer’s
maximum permissible pressure or the pressure at which the maximum
load can be carried by the tire. This pressure is normally higher than the
vehicle manufacturer’s recommended cold inflation pressure, which can
be found on the Safety Compliance Certification Label (affixed to either
the door hinge pillar, door-latch post, or the door edge that meets the
door-latch post, next to the driver’s seating position), or Tire Label which
is located on the B-Pillar or the edge of the driver’s door. The cold
inflation pressure should never be set lower than the recommended
pressure on the vehicle label.
The tire suppliers may have additional markings, notes or warnings, such
as standard load or radial tubeless.
Additional Information Contained on the Tire Sidewall for LT Type
Tires
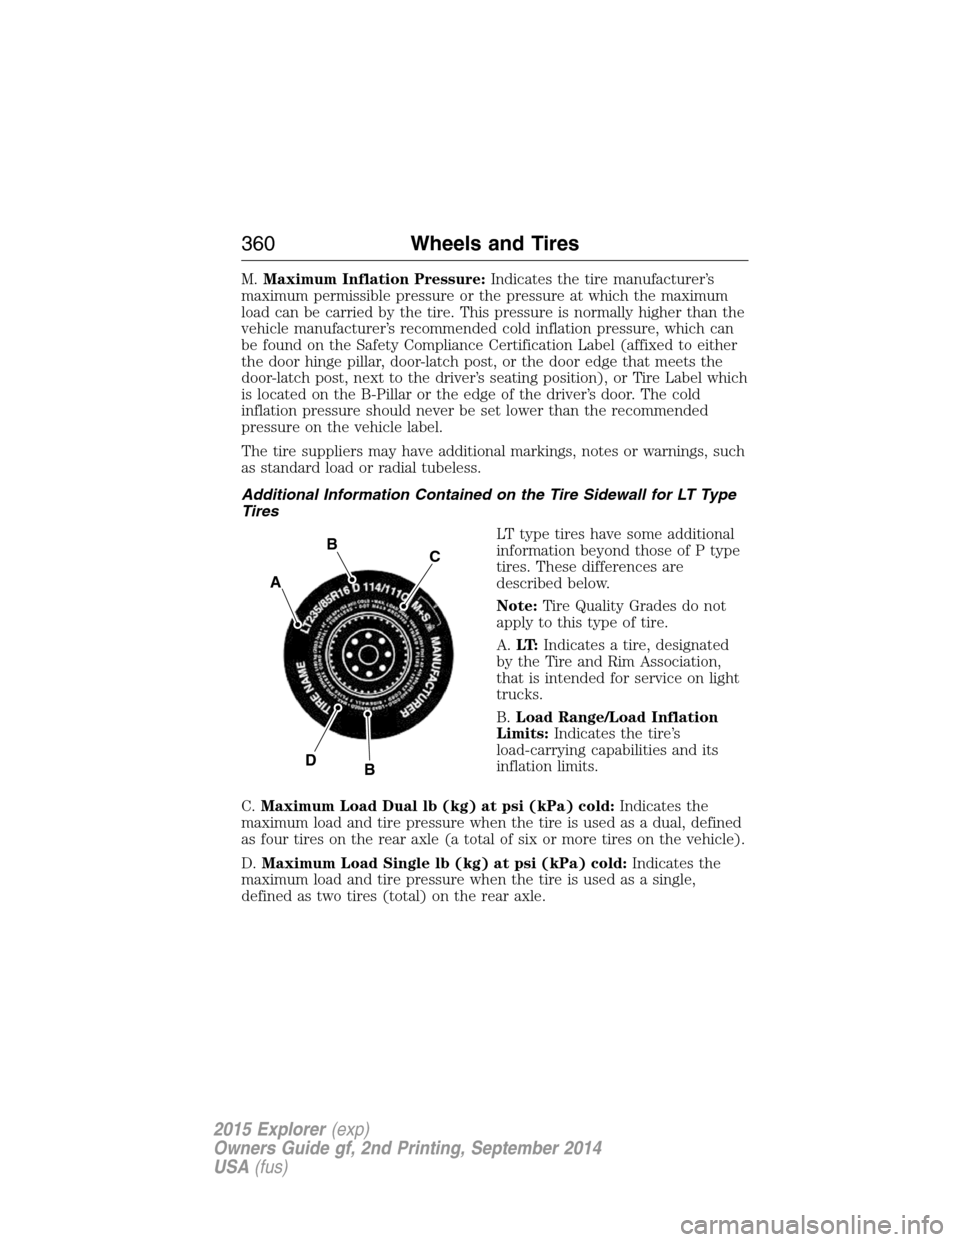
LT type tires have some additional
information beyond those of P type
tires. These differences are
described below.
Note:Tire Quality Grades do not
apply to this type of tire.
A.LT:Indicates a tire, designated
by the Tire and Rim Association,
that is intended for service on light
trucks.
B.Load Range/Load Inflation
Limits:Indicates the tire’s
load-carrying capabilities and its
inflation limits.
C.Maximum Load Dual lb (kg) at psi (kPa) cold:Indicates the
maximum load and tire pressure when the tire is used as a dual, defined
as four tires on the rear axle (a total of six or more tires on the vehicle).
D.Maximum Load Single lb (kg) at psi (kPa) cold:Indicates the
maximum load and tire pressure when the tire is used as a single,
defined as two tires (total) on the rear axle.
A
BC
BD
360Wheels and Tires
2015 Explorer(exp)
Owners Guide gf, 2nd Printing, September 2014
USA(fus)
Page 362 of 596
Information on T Type Tires
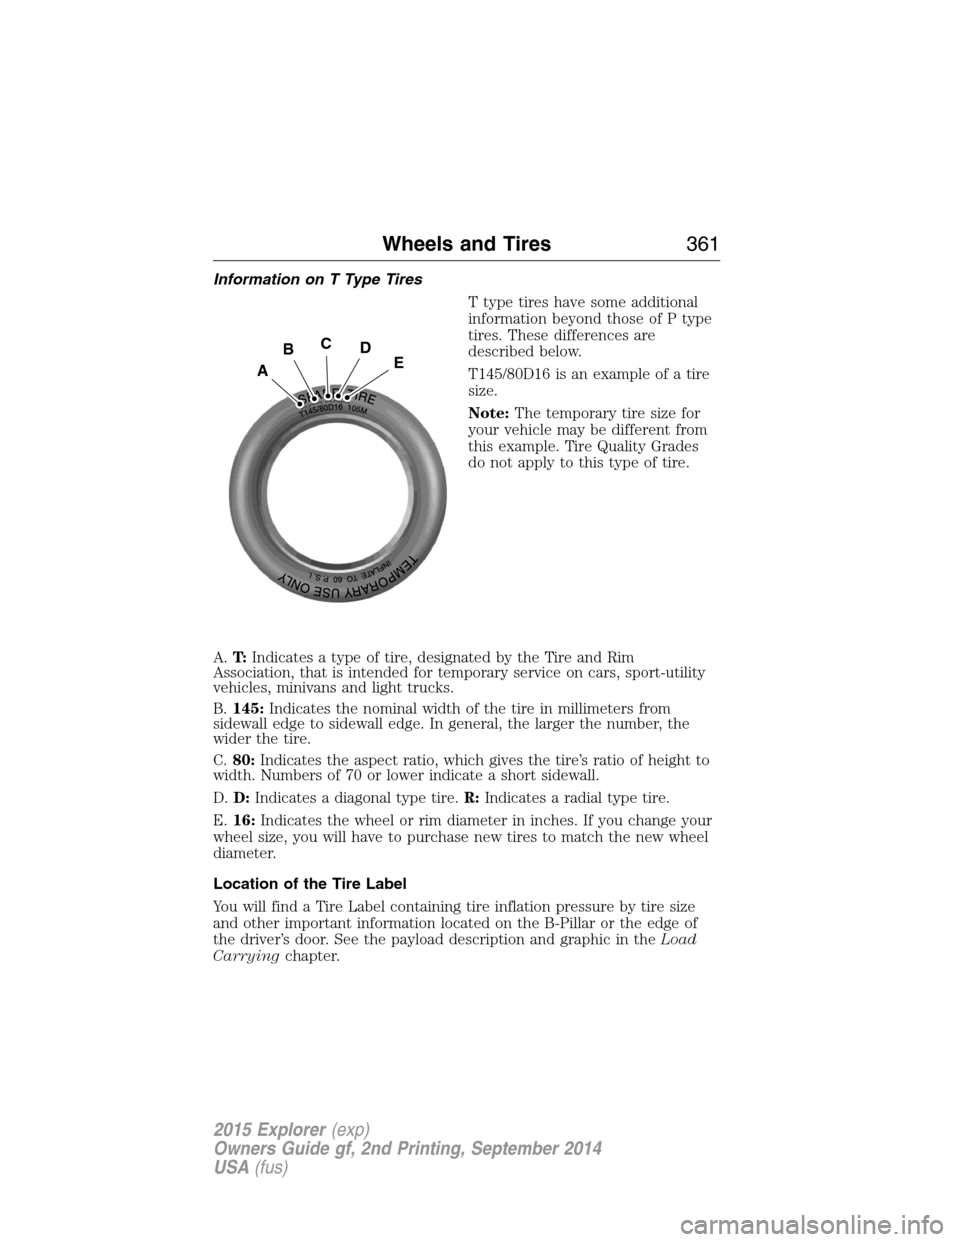
T type tires have some additional
information beyond those of P type
tires. These differences are
described below.
T145/80D16 is an example of a tire
size.
Note:The temporary tire size for
your vehicle may be different from
this example. Tire Quality Grades
do not apply to this type of tire.
A.T:Indicates a type of tire, designated by the Tire and Rim
Association, that is intended for temporary service on cars, sport-utility
vehicles, minivans and light trucks.
B.145:Indicates the nominal width of the tire in millimeters from
sidewall edge to sidewall edge. In general, the larger the number, the
wider the tire.
C.80:Indicates the aspect ratio, which gives the tire’s ratio of height to
width. Numbers of 70 or lower indicate a short sidewall.
D.D:Indicates a diagonal type tire.R:Indicates a radial type tire.
E.16:Indicates the wheel or rim diameter in inches. If you change your
wheel size, you will have to purchase new tires to match the new wheel
diameter.
Location of the Tire Label
You will find a Tire Label containing tire inflation pressure by tire size
and other important information located on the B-Pillar or the edge of
the driver’s door. See the payload description and graphic in theLoad
Carryingchapter.
A
BCDE
Wheels and Tires361
2015 Explorer(exp)
Owners Guide gf, 2nd Printing, September 2014
USA(fus)
Page 363 of 596
INFLATING YOUR TIRES
Safe operation of your vehicle requires that your tires are properly
inflated. Remember that a tire can lose up to half of its air pressure
without appearing flat.
Every day before you drive, check your tires. If one looks lower than the
others, use a tire gauge to check pressure of all tires and adjust if
required.
At least once a month and before long trips, inspect each tire and check
the tire pressure with a tire gauge (including spare, if equipped). Inflate
all tires to the inflation pressure recommended by Ford Motor Company.
WARNING:Under-inflation is the most common cause of tire
failures and may result in severe tire cracking, tread separation
or blowout, with unexpected loss of vehicle control and increased risk
of injury. Under-inflation increases sidewall flexing and rolling
resistance, resulting in heat build-up and internal damage to the tire. It
also may result in unnecessary tire stress, irregular wear, loss of vehicle
control and accidents. A tire can lose up to half of its air pressure and
not appear to be flat!
You are strongly urged to buy a reliable tire pressure gauge, as automatic
service station gauges may be inaccurate. Ford recommends the use of a
digital or dial-type tire pressure gauge rather than a stick-type tire
pressure gauge.
Use the recommended cold inflation pressure for optimum tire
performance and wear. Under-inflation or over-inflation may cause
uneven treadwear patterns.
Always inflate your tires to the Ford recommended inflation pressure
even if it is less than the maximum inflation pressure information found
on the tire. The Ford recommended tire inflation pressure is found on
the Safety Compliance Certification Label (affixed to either the door
hinge pillar, door-latch post, or the door edge that meets the door-latch
post, next to the driver’s seating position), or Tire Label which is located
on the B-Pillar or the edge of the driver’s door. Failure to follow the tire
pressure recommendations can cause uneven treadwear patterns and
adversely affect the way your vehicle handles.
Maximum Inflation Pressureis the tire manufacturer’s maximum
permissible pressure or the pressure at which the maximum load can be
carried by the tire. This pressure is normally higher than the
manufacturer’s recommended cold inflation pressure, which can be found
362Wheels and Tires
2015 Explorer(exp)
Owners Guide gf, 2nd Printing, September 2014
USA(fus)
Page 364 of 596
on the Safety Compliance Certification Label (affixed to either the door
hinge pillar, door-latch post, or the door edge that meets the door-latch
post, next to the driver’s seating position), or Tire Label which is located
on the B-Pillar or the edge of the driver’s door. The cold inflation
pressure should never be set lower than the recommended pressure on
the Safety Compliance Certification Label or Tire Label.
When weather temperature changes occur, tire inflation pressures also
change. A 10°F (6°C) temperature drop can cause a corresponding drop
of 1 psi (7 kPa) in inflation pressure. Check your tire pressures
frequently and adjust them to the proper pressure which can be found
on the Safety Compliance Certification Label or Tire Label.
To check the pressure in your tire(s):
1. Make sure the tires are cool, meaning they are not hot from driving
even a mile.
Note:If you are checking tire pressure when the tire is hot (for
example, driven more than 1 mile [1.6 kilometers]), never bleed or
reduce air pressure. The tires are hot from driving and it is normal for
pressures to increase above recommended cold pressures. A hot tire at
or below recommended cold inflation pressure could be significantly
under-inflated.
Note:If you have to drive a distance to get air for your tire(s), check
and record the tire pressure first and add the appropriate air pressure
when you get to the pump. It is normal for tires to heat up and the air
pressure inside to go up as you drive.
2. Remove the cap from the valve on one tire, then firmly press the tire
gauge onto the valve and measure the pressure.
3. Add enough air to reach the recommended air pressure.
Note:If you overfill the tire, release air by pressing on the metal stem in
the center of the valve. Then recheck the pressure with your tire gauge.
4. Replace the valve cap.
5. Repeat this procedure for each tire, including the spare.
Note:Some spare tires operate at a higher inflation pressure than the
other tires. For T-type mini-spare tires, see theDissimilar Spare Tire
and Wheel Assembly Informationsection. Store and maintain at 60 psi
(4.15 bar). For full-size and dissimilar spare tires, seeDissimilar Spare
Tire and Wheel Assembly InformationunderChanging a Road Wheel
in this chapter. Store and maintain at the higher of the front and rear
inflation pressure as shown on the Tire Label.
Wheels and Tires363
2015 Explorer(exp)
Owners Guide gf, 2nd Printing, September 2014
USA(fus)