2015 FIAT 500X lights
[x] Cancel search: lightsPage 119 of 240
TOWING TRAILERSIMPORTANT
120) 121)
For towing caravans or trailers the
vehicle must be fitted with an approved
tow hook and an adequate electrical
system. Should aftermarket installation
be requested, this must be carried
out by specialists.
Install any specific and/or additional
door mirrors as specified by the
Highway Code.
Remember that when towing a trailer,
steep hills are harder to climb, braking
distances increase and overtaking
takes longer depending on the overall
weight of the trailer. Engage a low gear
when driving downhill, rather than
constantly using the brake. The weight
the trailer exerts on the vehicle tow
hook reduces the vehicle's loading
capacity by the same amount. To make
sure that the maximum towable weight
is not exceeded (given in the vehicle
registration document) account should
be taken of the fully laden trailer,
including accessories and luggage.
Do not exceed the speed limits specific
to each country you are driving in, in
the case of vehicles towing trailers.
In any case, the top speed must not
exceed 100 km/h.Any electric brake must be powered
directly by the battery through a cable
with a cross-section of no less than 2.5
mm
2. In addition to the electrical
branches, the vehicle electrical system
can only be connected to the supply
cable for an electric brake and to the
cable for an internal light for the trailer,
not exceeding 15 W. For connections,
use the preset control unit with a
battery cable with section not less than
2.5 mm
2. The use of auxiliary loads
other than external lights (e.g. electric
brake) must take place with engine
running.
INSTALLING A TOW
HOOKThe towing device should be fastened
to the body by specialised personnel
according to any additional and/or
integrative information supplied by the
Manufacturer of the device. It must also
meet current regulations with reference
to Directive 94/20/EC and subsequent
amendments.
For any version the towing device used
must be right for the towable weight
of the vehicle on which it is to be
installed.For the electrical connection a standard
connector should be used which is
generally placed on a special bracket
normally fastened to the towing device,
and a special ECU for external trailer
light control must be installed on the
vehicle. 7 or 13-pin 12 V DC
connections should be used (CUNA/
UNI and ISO/DIN Standards). Follow
any instructions provided by the vehicle
manufacturer and/or the towing device
manufacturer.
117
15-12-2014 8:23 Pagina 117
Page 123 of 240
IN AN EMERGENCY
A punctured tyre or a burnt-out bulb?
At times, a problem may interfere
with our journey.
The pages on emergencies can help
you to deal with critical situations
independently and with calm.
In an emergency we recommend that
you call the freephone number found in
the Warranty Booklet.
It is also possible to call the national or
international universal freephone
number to search for the nearest Fiat
Dealership.HAZARD WARNING LIGHTS...........122
BULB REPLACEMENT....................122
REPLACING FUSES........................128
CHANGING A WHEEL ....................133
FIX&GO AUTOMATIC KIT ................136
EMERGENCY STARTING ................138
FUEL CUT-OFF SYSTEM ................140
AUTOMATIC TRANSMISSION
GEAR LEVER UNLOCKING.............140
TOWING THE VEHICLE ..................142
121
15-12-2014 8:23 Pagina 121
Page 124 of 240
HAZARD WARNING
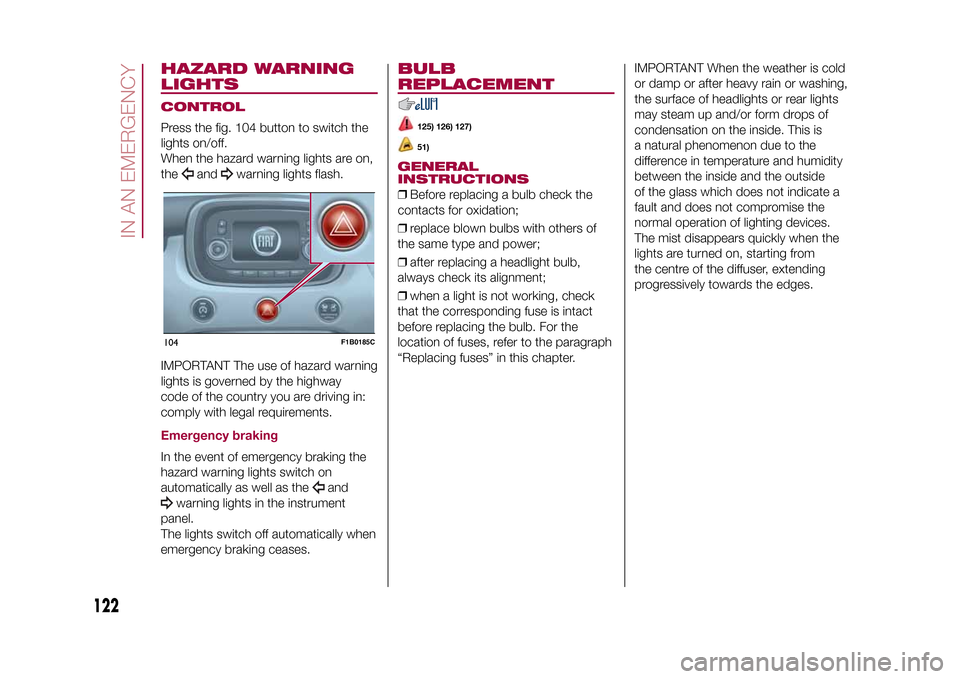
LIGHTSCONTROLPress the fig. 104 button to switch the
lights on/off.
When the hazard warning lights are on,
the
and
warning lights flash.
IMPORTANT The use of hazard warning
lights is governed by the highway
code of the country you are driving in:
comply with legal requirements.
Emergency brakingIn the event of emergency braking the
hazard warning lights switch on
automatically as well as the
and
warning lights in the instrument
panel.
The lights switch off automatically when
emergency braking ceases.
BULB
REPLACEMENT
125) 126) 127)51)
GENERAL
INSTRUCTIONS❒Before replacing a bulb check the
contacts for oxidation;
❒replace blown bulbs with others of
the same type and power;
❒after replacing a headlight bulb,
always check its alignment;
❒when a light is not working, check
that the corresponding fuse is intact
before replacing the bulb. For the
location of fuses, refer to the paragraph
“Replacing fuses” in this chapter.IMPORTANT When the weather is cold
or damp or after heavy rain or washing,
the surface of headlights or rear lights
may steam up and/or form drops of
condensation on the inside. This is
a natural phenomenon due to the
difference in temperature and humidity
between the inside and the outside
of the glass which does not indicate a
fault and does not compromise the
normal operation of lighting devices.
The mist disappears quickly when the
lights are turned on, starting from
the centre of the diffuser, extending
progressively towards the edges.
104
F1B0185C
122
IN AN EMERGENCY
15-12-2014 8:23 Pagina 122
Page 126 of 240
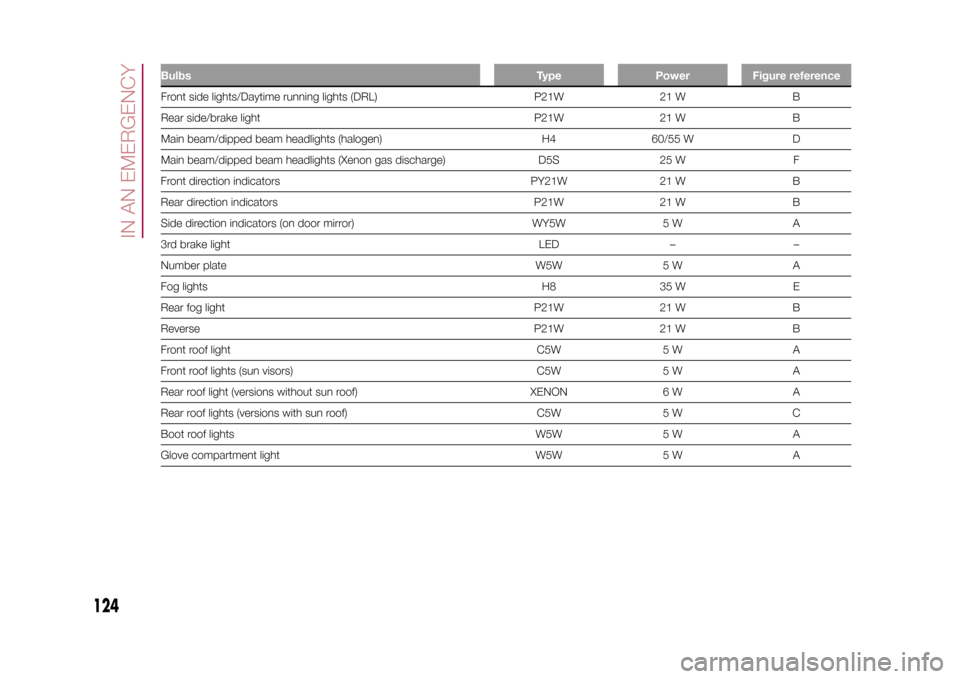
Bulbs Type Power Figure referenceFront side lights/Daytime running lights (DRL) P21W 21 W B
Rear side/brake light P21W 21 W B
Main beam/dipped beam headlights (halogen) H4 60/55 W D
Main beam/dipped beam headlights (Xenon gas discharge) D5S 25 W F
Front direction indicators PY21W 21 W B
Rear direction indicators P21W 21 W B
Side direction indicators (on door mirror) WY5W 5 W A
3rd brake light LED – –
Number plate W5W 5 W A
Fog lights H8 35 W E
Rear fog light P21W 21 W B
Reverse P21W 21 W B
Front roof light C5W 5 W A
Front roof lights (sun visors) C5W 5 W A
Rear roof light (versions without sun roof) XENON 6 W A
Rear roof lights (versions with sun roof) C5W 5 W C
Boot roof lights W5W 5 W A
Glove compartment light W5W 5 W A
124
IN AN EMERGENCY
15-12-2014 8:23 Pagina 124
Page 127 of 240
REPLACING AN
EXTERNAL BULB
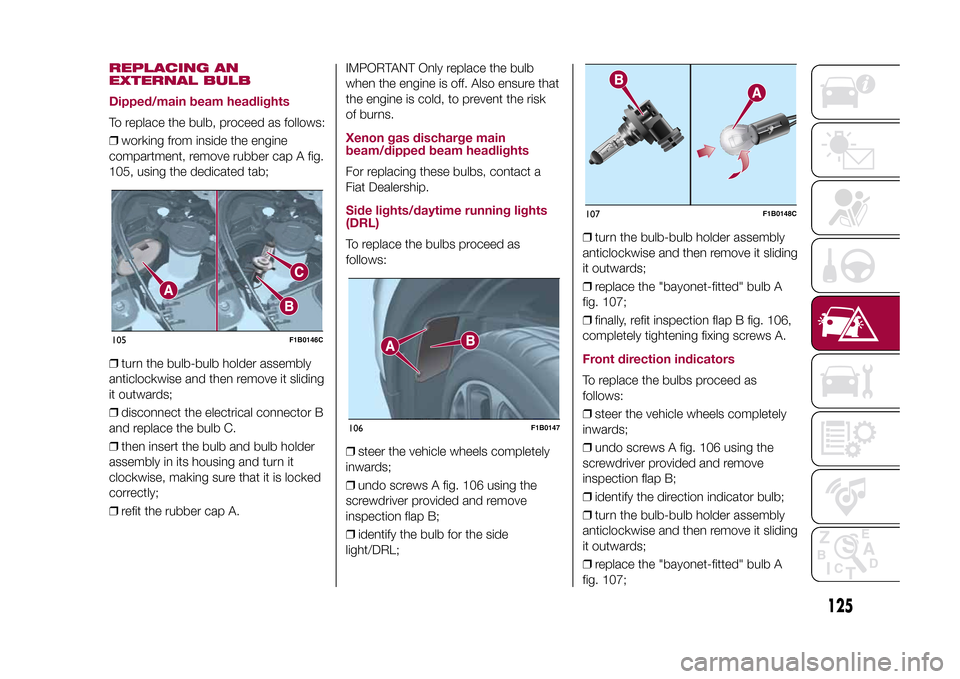
Dipped/main beam headlightsTo replace the bulb, proceed as follows:
❒working from inside the engine
compartment, remove rubber cap A fig.
105, using the dedicated tab;
❒turn the bulb-bulb holder assembly
anticlockwise and then remove it sliding
it outwards;
❒disconnect the electrical connector B
and replace the bulb C.
❒then insert the bulb and bulb holder
assembly in its housing and turn it
clockwise, making sure that it is locked
correctly;
❒refit the rubber cap A.IMPORTANT Only replace the bulb
when the engine is off. Also ensure that
the engine is cold, to prevent the risk
of burns.
Xenon gas discharge main
beam/dipped beam headlightsFor replacing these bulbs, contact a
Fiat Dealership.Side lights/daytime running lights
(DRL)To replace the bulbs proceed as
follows:
❒steer the vehicle wheels completely
inwards;
❒undo screws A fig. 106 using the
screwdriver provided and remove
inspection flap B;
❒identify the bulb for the side
light/DRL;❒turn the bulb-bulb holder assembly
anticlockwise and then remove it sliding
it outwards;
❒replace the "bayonet-fitted" bulb A
fig. 107;
❒finally, refit inspection flap B fig. 106,
completely tightening fixing screws A.
Front direction indicatorsTo replace the bulbs proceed as
follows:
❒steer the vehicle wheels completely
inwards;
❒undo screws A fig. 106 using the
screwdriver provided and remove
inspection flap B;
❒identify the direction indicator bulb;
❒turn the bulb-bulb holder assembly
anticlockwise and then remove it sliding
it outwards;
❒replace the "bayonet-fitted" bulb A
fig. 107;
105
F1B0146C
106
F1B0147
107
F1B0148C
125
15-12-2014 8:23 Pagina 125
Page 128 of 240
❒finally, refit inspection flap B fig. 106,
completely tightening fixing screws A.Fog lightsTo replace the bulbs proceed as
follows:
❒steer the vehicle wheels completely
inwards;
❒undo screws A fig. 106 using the
screwdriver provided and remove
inspection flap B;
❒identify the fog light bulb;
❒turn the bulb-bulb holder assembly
anticlockwise and then remove it sliding
it outwards;
❒disconnect the electrical connector;
❒replace the bulb-bulb holder
assembly B fig. 107.
❒reconnect the electrical connector to
the new bulb-bulb holder assembly,
then fit it ensuring that it locks correctly;
❒fit the assembly turning it clockwise,
ensuring that it locks correctly;
❒finally, refit inspection flap B fig. 106,
completely tightening fixing screws A.Side direction indicatorsIMPORTANT The procedure is only
described by way of illustration. It
is advisable to contact a Fiat Dealership
for bulb replacement.To replace the bulb, proceed as follows:
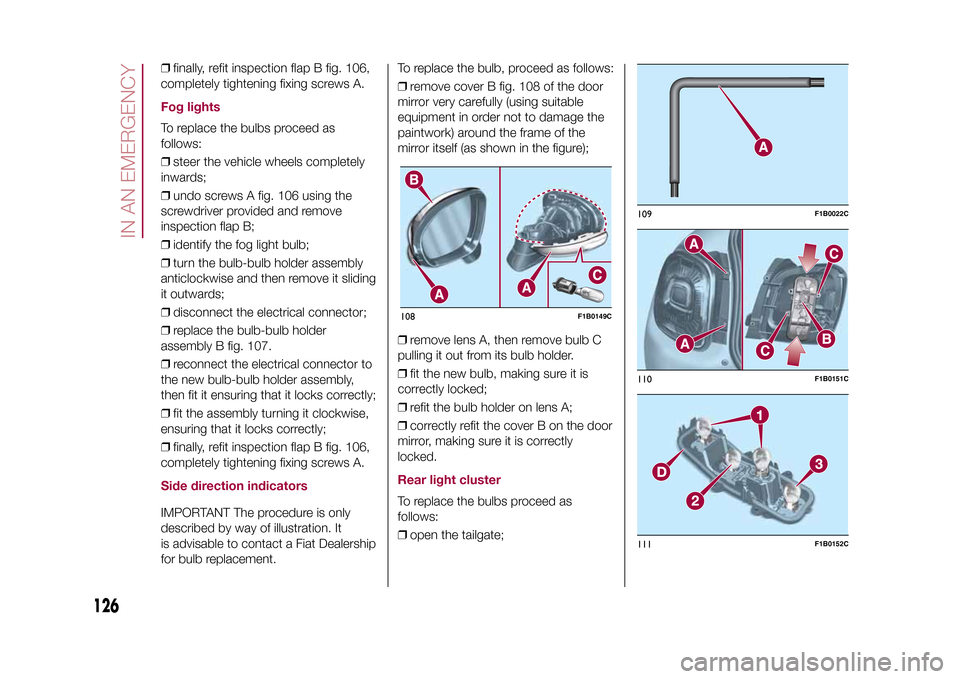
❒remove cover B fig. 108 of the door
mirror very carefully (using suitable
equipment in order not to damage the
paintwork) around the frame of the
mirror itself (as shown in the figure);
❒remove lens A, then remove bulb C
pulling it out from its bulb holder.
❒fit the new bulb, making sure it is
correctly locked;
❒refit the bulb holder on lens A;
❒correctly refit the cover B on the door
mirror, making sure it is correctly
locked.
Rear light clusterTo replace the bulbs proceed as
follows:
❒open the tailgate;108
F1B0149C
109
F1B0022C
110
F1B0151C
111
F1B0152C
126
IN AN EMERGENCY
15-12-2014 8:23 Pagina 126
Page 129 of 240
❒use the wrench A fig. 109 supplied
with the vehicle (located inside the case
with the on-board documentation),
undo the two screws A fig. 110, then
release the light cluster from the
relevant pin fastenings, pulling
cautiously;
❒disconnect the central connector B,
then undo the two screws C;
❒release the tabs indicated by the
arrows and extract the bulb holder
assembly D fig. 111;
❒identify the bulb to be replaced (1
Side/Stop - 2 Direction indicator -
3 Rear fog light or Reverse);
❒all bulbs are "bayonet-fitted";
therefore they must be lightly pressed
and simultaneously turned to be
replaced: anticlockwise for extraction,
clockwise for fitting;
❒correctly refit the bulb holder
assembly D in the light casing; stop
when you hear that the tabs click into
place;
❒tighten the two screws C fig. 110 and
reconnect the central connector B;
❒refit the lens unit, fully tightening the
two screws A;
❒reclose the tailgate.
3rd
brake lights
The 3
rd
brake lights are LED-based. For
their replacement, contact a Fiat
Dealership.
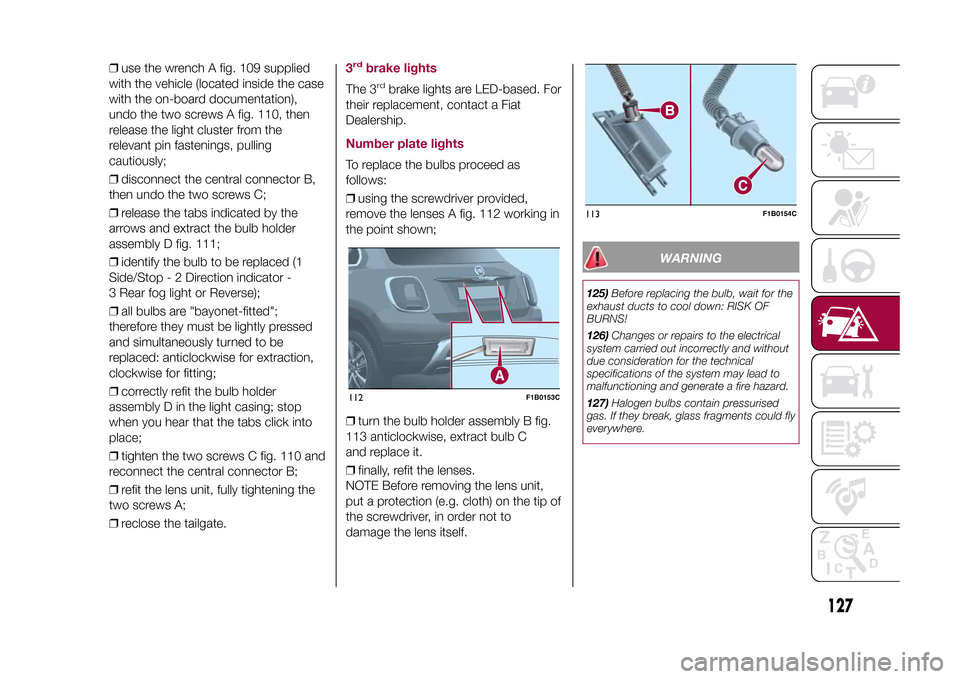
Number plate lightsTo replace the bulbs proceed as
follows:
❒using the screwdriver provided,
remove the lenses A fig. 112 working in
the point shown;
❒turn the bulb holder assembly B fig.
113 anticlockwise, extract bulb C
and replace it.
❒finally, refit the lenses.
NOTE Before removing the lens unit,
put a protection (e.g. cloth) on the tip of
the screwdriver, in order not to
damage the lens itself.
WARNING
125)Before replacing the bulb, wait for the
exhaust ducts to cool down: RISK OF
BURNS!
126)Changes or repairs to the electrical
system carried out incorrectly and without
due consideration for the technical
specifications of the system may lead to
malfunctioning and generate a fire hazard.
127)Halogen bulbs contain pressurised
gas. If they break, glass fragments could fly
everywhere.
112
F1B0153C
113
F1B0154C
127
15-12-2014 8:23 Pagina 127
Page 133 of 240

ENGINE COMPARTMENT FUSE BOXUSERSFUSE AMPEREHornF10 10
Power supply for cigar lighter/power socket F84 20
.
DASHBOARD FUSE BOXUSERSFUSE AMPEREFront electric window (passenger side) F33 20
Front electric window (driver side) F34 20
Supply forUconnect
™
system, Climate Control system, Electric
door mirror folding, EOBD system, USB port/AUX socket, rear
side roof lights (versions with sun roof)F36 15
Dead Lock device (Driver side door unlocking for versions/
markets, where provided)/Door unlocking/Central locking/Electric
tailgate unlockingF38 20
Rear left electric window F47 20
Rear right electric window F48 20
131
15-12-2014 8:23 Pagina 131