Page 209 of 240

User not connectedIf the user does not carry out the
Bluetooth pairing of the phone, when
the Uconnect™ button is pressed, the
radio menu shows disabled icons,
excepteco:Drive™.
Further information about the
eco:Drive™functions is available in
the dedicated chapter.Settings of the
Uconnect™ LIVE
services that can be
managed through the
radioThe "Settings" sections can be
accessed through the
icon in the
Radio menu dedicated to the
Uconnect™LIVEservices. In this
section the user can check the system
options and change them according
to their preferences.
System updatesIf an update for theUconnect™
system is available while the
Uconnect™LIVEservices are being
used, the user will be informed with
a message on the radio screen.The update includes the download of
the new software version for managing
theUconnect™LIVEservices. The
update is made using the data
connection of the paired smartphone.
The amount of traffic generated will
be communicated to the user.
IMPORTANT Do not carry out other
operations during installation and wait
for its completion, in order not to affect
correct operation of the radio.
Uconnect™ LIVE appsTheApp Uconnect™LIVEmust be
installed on your smartphone to access
the connected services on the vehicle,
this can be used to access your profile
and customise yourUconnect™
LIVEexperience.
The App can by downloaded from:
"App Store" or "Google play".
For safety reasons, the App cannot be
accessed when the phone is paired
with the radio.
Personal details (e-mail and password)
are required to access theUconnect™
LIVEradio services, therefore the
content of your personal accounts is
protected and can only be accessed by
the real user.
Connected services
that can be accessed
on the vehicleTheUconnect™LIVEservices
available in the radio menu can change
according to the market.
Theeco:Drive™and my:Car
applications are developed to improve
the customer's driving experience,
therefore they are available in all
markets where theUconnect™LIVE
services can be accessed.
For further information visit
www.DriveUconnect.eu.
If the navigation system is installed in
the radio, accessing theUconnect™
LIVEservices enables use of the
TomTom "LIVE" services. Further
information about the "LIVE" functions
is available in the dedicated chapter.eco:Drive™Theeco:Drive™application allows you
to display your driving behaviour in
real time, in order to help you reach a
more efficient driving style as far as
consumption and emissions are
concerned.
207
15-12-2014 8:23 Pagina 207
Page 210 of 240

In addition, the data can be saved on
an USB device or through theApp
Uconnect™LIVE; the data analysis
can be made on your personal
computer thanks to theeco:Drive™
desktop application, available on
www.fiat.it or www.DriveUconnect.eu.
Evaluation of the driving style is
dependent on four indices that monitor
the following parameters:
❒Acceleration
❒Deceleration
❒Gearbox
❒SpeedDisplay of the
eco:Drive™Press theeco:Drive™button to use
the function
A screen will be displayed on the radio,
showing the 4 indices described above.
These indices are grey until the system
has enough data to evaluate the driving
style.
Once sufficient data is available, the
indices will have 5 colours depending
on the evaluation: dark green (very
good), light green, yellow, orange and
red (very bad).
"Current route index" refers to the entire
value calculated in real time based on
the average of the described indices. It
represents eco-friendliness of the
driving style: from 0 (low) to 100 (high).In the event of extended inactivity the
display will show the average of the
indices until that moment (the "Average
index"), then the indices will be
coloured again in real time as soon as
the vehicle is restarted.
To check the data average of previous
route (the "route" starts when the
ignition key is turned to MAR and stops
when it is turned to STOP), select the
"Previous route" button.
The details of the previous trip can also
be displayed by pressing the "Details"
button, in which journey duration (time
and mileage) and average speed will be
reported.
Trip data storage and
transferThe trip data can be stored in the
system memory and transferred
through a properly configured USB
memory stick or theApp Uconnect™
LIVE. This allows you to display the
history of the collected data, showing
the complete analysis of the trip data
and of your driving style.
Further information is available at
www.DriveUconnect.eu.IMPORTANT Do not remove the USB
memory stick nor unpair the
smartphone and theApp Uconnect™
LIVEbefore the system has
downloaded the data, since these
could be lost. During the transfer of
data to the devices, messages may
appear on the radio display to guide the
user correctly through the operation;
follow these instructions. These
messages are only displayed with the
ignition key at STOP and when a delay
in the system switching off is set. The
data are automatically transferred to the
devices when the engine is switched
off. The data transferred are deleted
from the system memory. You can
choose to store the trip data or not, by
pressing the "Settings" button and by
setting the storage activation and
the USB or Cloud transfer mode.
When the USB memory stick is full, the
dedicated messages are shown on
the radio display.
When theeco:Drive™data are not
transferred to the USB memory stick for
a long time, the internal memory of the
Uconnect™LIVEsystem may be
full. Follow the instructions given by the
messages on the radio display.
208
MULTIMEDIA
15-12-2014 8:23 Pagina 208
Page 211 of 240

my:Carmy:Car allows you to keep the
condition of your vehicle always under
control.
my:Car can detect malfunction in real
time and inform the user about the
expiry of the servicing interval. Press
the "my:Car" button to interact with the
application.
The display will show a screen with the
"care:Index" section, which provides
all the detailed information about the
status of the vehicle. Press the "Active
warnings" button to show (if present)
the details of the vehicle's faults which
caused a warning light to switch on.
The vehicle status can be seen both on
www.DriveUconnect.eu or through
theApp Uconnect™LIVE.SETTINGSPress the
button on the front panel
to display the main "Settings" menu.
Note: The menu items displayed vary
according to the versions.
The menu includes the following items:
❒Display;
❒Units;
❒Voice commands;
❒Clock & Date;
❒Safety/Assistance (where provided);
❒Lights (where provided);
❒Doors & Locks;❒Vehicle Off Options;
❒Audio;
❒Phone/Bluetooth;
❒SiriusXM Setup (where provided);
❒Radio Setup;
❒Restore Settings
Safety/Assistance(where provided)
This function can be used to carry out
the following adjustments:
❒"Rear View camera"(where
provided): this function can be used to
carry out the following adjustments:
- "Active Guidelines" (where provided):
permits the activation of dynamic grids
that indicate the route of the vehicle
on the display.
- "Rear View cam.delay" (where
provided): permits a delay in the
disappearance of images from the
camera when reverse is disengaged.
❒"Frnt Coll. Warning"(where provided):
this function can be used to select the
Full Brake Control system intervention
mode.
The options available are:
- "Off": the system is deactivated;
- "Only warning": the system intervenes
only by providing the driver with an
acoustic warning (where provided);- "Only active braking": the system
intervenes by activating automatic
braking (where provided);
- "Warning + active braking": the
system intervenes by providing the
driver with an acoustic warning and
activating automatic braking.
❒"Fwd Coll. Sensitivity"(where
provided): this function can be used to
select the "readiness" of the system
to intervene, on the basis of distance
from the obstacle.
The options available are "Near",
"Med", "Far".
❒"Park Assist"(where provided): this
function can be used to select the type
of warning provided by the Park Assist
system.
The options available are:
- "Sound Only": the system warns the
driver that an obstacle is present
through acoustic warnings only, via the
speakers in the vehicle.
- "Sound & Display": the system warns
the driver that an obstacle is present
through acoustic (via the speakers
in the vehicle) and visual (on the
instrument panel) warnings.
❒"Front Park Assist vol."(where
provided): this function can be used to
select the volume of the acoustic
warnings provided by the front Park
Assist system.
209
15-12-2014 8:23 Pagina 209
Page 212 of 240
: this function can be used to
select the volume of the acoustic
warnings provided by the rear Park
Assist system.
❒\"Park Assist vol.\"(where provided):
this")
❒"Rear Park Assist vol."(where
provided): this function can be used to
select the volume of the acoustic
warnings provided by the rear Park
Assist system.
❒"Park Assist vol."(where provided):
this function can be used to select
the volume of the acoustic warnings
provided by the Park Assist system.
❒"Lane Assist Warning"(where
provided): this function can be used to
select the LaneAssist system
intervention "readiness".
❒"Lane Assist Strength"(where
provided): this function can be used to
select the force to apply to the steering
wheel to put the vehicle back in the
lane through the electric steering
system, in the event of Lane Assist
system intervention.
❒"Blind Spot Alert"(where provided):
this function can be used to select
the type of warning ("Sound Only" or
"Sound & Display") to indicate the
presence of objects in the blind spot of
the door mirror.
❒"Rain sensor"(where provided): this
function can be used to activate/
deactivate the automatic operation of
the wipers in the event of rain.
❒"Brakes"(where provided): this
function can be used to select the
following submenus:- "Brake Service" (where provided):
allows you to activate the procedure for
carrying out braking system servicing;
- "Auto Park Brake" (where provided):
allows you to activate/deactivate the
automatic park brake engagement.
NAVIGATION(5" Uconnect Radio Nav LIVE only)Programming a routeIMPORTANT In the interest of safety
and to reduce distractions while you are
driving, you should always plan a route
before you start driving.
To plan a route, do the following:
❒tap the screen to open the Main
menu;
❒Tap "Navigate to" or "Drive to".
❒Tap "Address". You can change the
country or state setting by tapping
the flag before you select a city.
❒Enter the town or city name, or the
zip code. Towns with similar names are
shown in the list while you type. When
the desired city or town appears in
the list, tap the name to select the
destination.
❒Enter the street name. Streets with
similar names are shown in the list while
you type. When the correct street
name appears in the list, tap the name
to select the destination.❒Enter the house number, then tap
"Done".
❒The location will be shown on the
map. Tap "Select" to continue or tap
"Back" to enter another address.
❒When the new route is shown, tap
"Done". For more information about the
route, tap "Details". To change your
route, for example, to travel via a
particular location or to select a new
destination, tap "Change route".
You are guided to your destination,
using spoken instructions and
on-screen directions.
Map updatingTwo modes for downloading a map
update are available:
❒Most recent maps guarantee: if a
new map is available for your system
within 90 days of initial use, you can
download it once free of charge.
❒Map update: you can purchase a
new version of the map installed on
your system.USB device setupTo update the map, use an USB device
that meets the following requirements:
❒Ideally, the USB device should be
empty.
❒The USB device must have at least
8 GB of memory free.
210
MULTIMEDIA
15-12-2014 8:23 Pagina 210
Page 213 of 240

❒The USB device must use a FAT-32
file system.
❒The USB device must not be blocked
and must allow files to be saved.
Note: the use of a memory stick is
recommended, while the use of mass
storage devices, such as mobile
phones or multimedia players, is not
recommended.
To prepare an USB device, proceed as
follows:
❒SelectNavigation updatesin the
settingsmenu.
You are asked whether you wish to
prepare an USB device for
downloading updates.
❒SelectYe s.
❒Insert the USB device.
Note: if the system continues to ask
you to insert the USB device, check
that the device meets the requirements
indicated previously, then retry.
The system starts to prepare the USB
device.
When the USB device is ready, a
dedicated message is displayed.
❒Remove the USB device and connect
it to the computer. The new map can
now be downloaded to the USB
device.
TomTom HOME
installationTo install TomTom HOME and create a
MyTomTom account, proceed as
follows:
❒Download and install the TomTom
HOME application on the computer. On
the computer, access
www.tomtom.com/getstarted. Select
"Download TomTom HOME", then
follow the instructions provided.
❒Connect the USB device prepared
with the computer. TomTom HOME
is started automatically.
❒Select "Enter" in the top right corner.
❒Select "Create account" and enter
the required details to create a
MyTomTom account. A MyTomTom
account is required to receive map
updates.
After the account is created, you are
asked whether you wish to connect the
Uconnect™system to your account.
The USB device prepared represents
yourUconnect™system.
❒Select "Connect device", then select
"close".
A map can now be downloaded to the
USB device.
Download a mapThe map can be updated in two ways:
❒Most recent maps guarantee: if a
new map is available for your system
within 90 days of initial use, it can
be downloaded once free of charge.
❒Map update: it is possible to
purchase a new version of the map
installed on the system.
To check availability or purchase a map,
make sure that you have prepared an
USB device and installed TomTom
HOME on your computer.
Connect the USB device to the
computer.
Downloading a map
If a map update is available for the
system, this update is included in the
list of updates available.
Note: if the most recent map is already
installed on the system, the update is
not proposed.
Select the map that you wish to
download, then select "Update and
install".
The map is downloaded and copied to
your USB device.
Select "Done" when the process is
complete.
Note: don’t disconnect the USB device
from the computer while map
downloading and copying is in
progress.
211
15-12-2014 8:23 Pagina 211
Page 214 of 240

The map can now be installed on the
system.Installing a mapThe map update MUST be made
with the vehicle engine running and
may require more than 30 minutes.
Do not disconnect the USB device
during the map installation process,
otherwise installation will be
interrupted.
After downloading a map to your USB
device, it can be installed on your
system.
❒Insert the USB device containing the
new map in theUconnect™system.
The system detects a new map on
the USB device.
❒Select "Start".
Keep the device inserted. Before
updating the map, the system indicates
that this process may take several
minutes. Select "OK".
Note: do not remove the USB device
and do not disconnect the system's
power supply before the update is
complete. The system cannot be used
until the update is completed correctly.
If the update is interrupted, the system
update is started again.
Once the map has been updated, a
dedicated message is displayed.
❒Click on "Close".The new map is now available on the
system.
TroubleshootingThe following problems may occur
during the update:
❒The map on the USB device is not
valid. In this case, download the map to
the USB device again, using TomTom
HOME. It may be necessary to prepare
the USB device again.
❒The version of the map on the USB
device is the same as or is a previous
version of the one already on the
system. In this case, download the map
to the USB device again, using
TomTom HOME. It may be necessary to
prepare the USB device again.VOICE COMMANDSNote: for languages not supported by
the system, voice commands are
not available.
To use the voice commands, press the
button ("Voice" button)on the steering
wheel and give the command you want
to activate, out loud.
GlobalThe following voice commands can be
given after pressing the
button
on the steering wheel:
❒Help❒Cancel
❒Redial
❒Repeat
❒Voice Prompts
PhoneThe following voice commands can be
given after pressing the button on
the steering wheel:
❒Call
❒Dial
❒Redial
❒Call back
❒Last calls
❒Outgoing calls
❒Missed calls
❒Incoming calls
❒Phonebook
❒Search
❒Show SMSRadioThe following voice commands can be
given after pressing the
button on
the steering wheel:
❒Tune to XXX FM
❒Tune to XXX AM
❒Tune to Radio XXX
❒Tune to DAB channel
212
MULTIMEDIA
15-12-2014 8:23 Pagina 212
Page 215 of 240
MediaThe following voice commands can be
given after pressing the
button on
the steering wheel:
❒Play song...
❒Play album…
❒Play artist…
❒Play genre…
❒Play playlist…
❒Play podcast…
❒Play audiobook…
❒Play track number…
❒Select the source
❒Display
Navigation(5" Uconnect Radio Nav LIVE only)
The following voice commands can
be given after pressing the
button on
the steering wheel:
❒Drive Home
❒2D view
❒3D view
❒Clear route
❒Add Favourite
❒Repeat instruction
213
15-12-2014 8:23 Pagina 213
Page 216 of 240
6.5" Uconnect Radio Nav
.
QUICK GUIDE
Controls on front panel156
F1B0004C
214
MULTIMEDIA
15-12-2014 8:23 Pagina 214
 1
1 2
2 3
3 4
4 5
5 6
6 7
7 8
8 9
9 10
10 11
11 12
12 13
13 14
14 15
15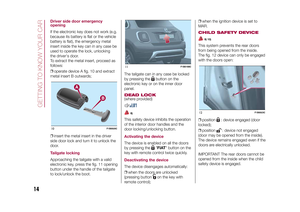 16
16 17
17 18
18 19
19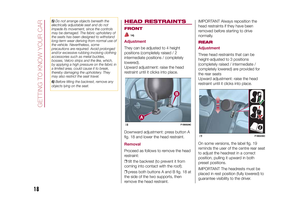 20
20 21
21 22
22 23
23 24
24 25
25 26
26 27
27 28
28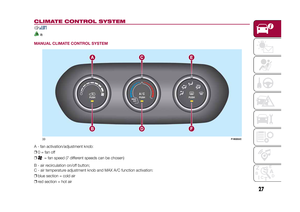 29
29 30
30 31
31 32
32 33
33 34
34 35
35 36
36 37
37 38
38 39
39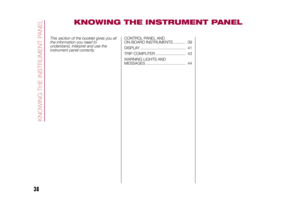 40
40 41
41 42
42 43
43 44
44 45
45 46
46 47
47 48
48 49
49 50
50 51
51 52
52 53
53 54
54 55
55 56
56 57
57 58
58 59
59 60
60 61
61 62
62 63
63 64
64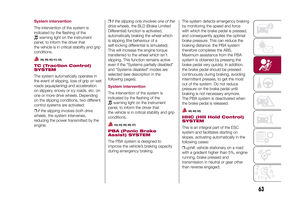 65
65 66
66 67
67 68
68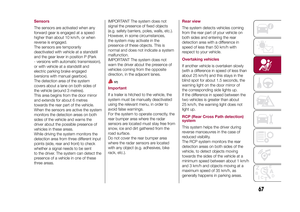 69
69 70
70 71
71 72
72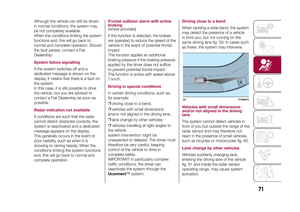 73
73 74
74 75
75 76
76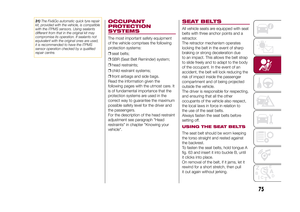 77
77 78
78 79
79 80
80 81
81 82
82 83
83 84
84 85
85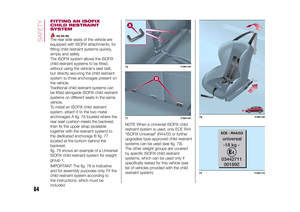 86
86 87
87 88
88 89
89 90
90 91
91 92
92 93
93 94
94 95
95 96
96 97
97 98
98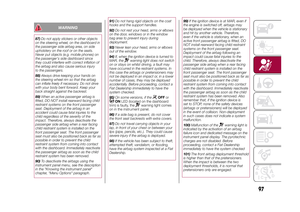 99
99 100
100 101
101 102
102 103
103 104
104 105
105 106
106 107
107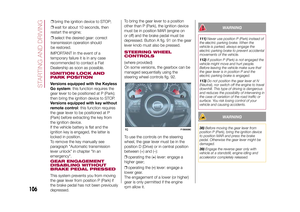 108
108 109
109 110
110 111
111 112
112 113
113 114
114 115
115 116
116 117
117 118
118 119
119 120
120 121
121 122
122 123
123 124
124 125
125 126
126 127
127 128
128 129
129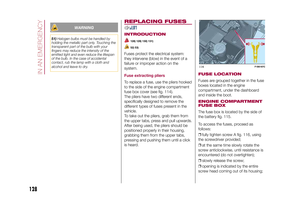 130
130 131
131 132
132 133
133 134
134 135
135 136
136 137
137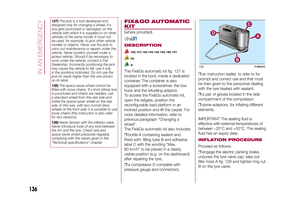 138
138 139
139 140
140 141
141 142
142 143
143 144
144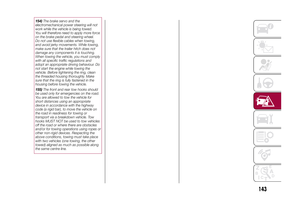 145
145 146
146 147
147 148
148 149
149 150
150 151
151 152
152 153
153 154
154 155
155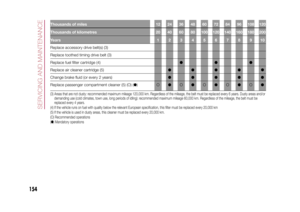 156
156 157
157 158
158 159
159 160
160 161
161 162
162 163
163 164
164 165
165 166
166 167
167 168
168 169
169 170
170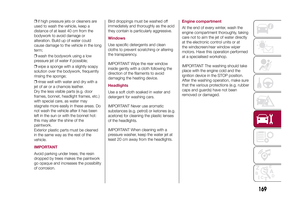 171
171 172
172 173
173 174
174 175
175 176
176 177
177 178
178 179
179 180
180 181
181 182
182 183
183 184
184 185
185 186
186 187
187 188
188 189
189 190
190 191
191 192
192 193
193 194
194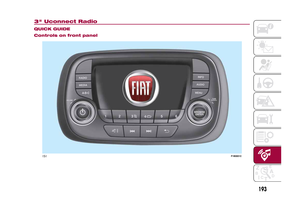 195
195 196
196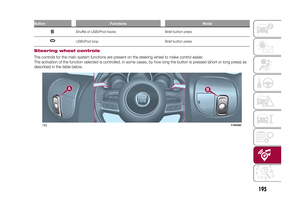 197
197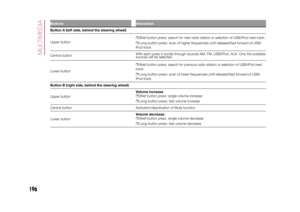 198
198 199
199 200
200 201
201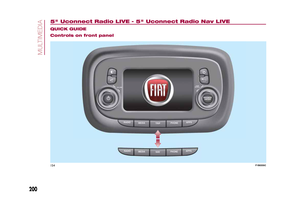 202
202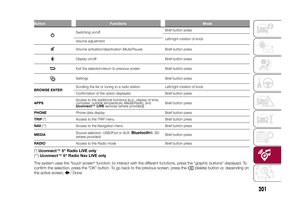 203
203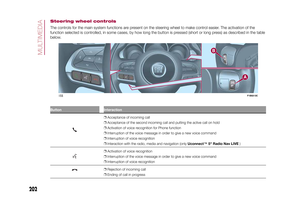 204
204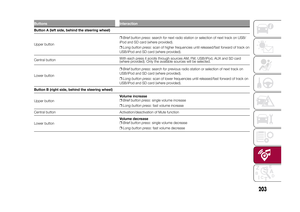 205
205 206
206 207
207 208
208 209
209 210
210 211
211 212
212 213
213 214
214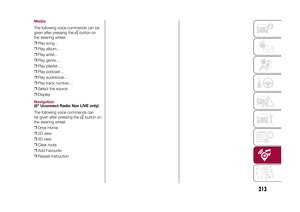 215
215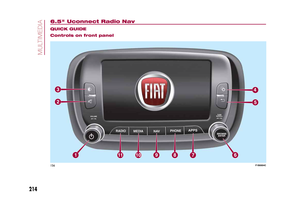 216
216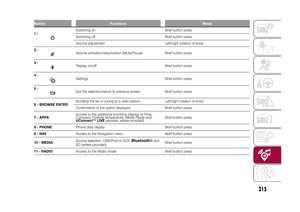 217
217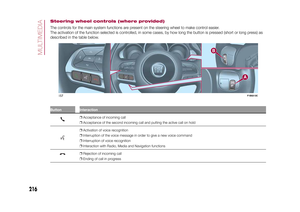 218
218 219
219 220
220 221
221 222
222 223
223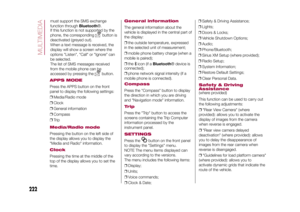 224
224 225
225 226
226 227
227 228
228 229
229 230
230 231
231 232
232 233
233 234
234 235
235 236
236 237
237 238
238 239
239
