2015 FIAT 500L display
[x] Cancel search: displayPage 82 of 148

Phonebook
The Uconnect® system will automatically sync your phonebook from your paired phone,
if this feature is supported by your phone.Phonebook contacts are updated each time
that the phone is connected.If your phone book entries do not appear, check the set-
tings on your phone.Some phones require you to enable this feature manually.
•Your phonebook can be browsed on the Uconnect® system touchscreen, but editing
can only be done on your phone.To browse, press the “Phone” button on the touch-
screen, then the “Phonebook” button on the touchscreen.
Favorite phonebook entries can be saved as Favorites for quicker access.Favorites are
shown at the top of the main phone screen.
Voice Command Tips
•Speaking complete names (i.e; Call John Doe vs.Call John) will result in greater system
accuracy.
•You can “link” commands together for faster results.Say “Call John Doe, mobile,” for
example.
•If you are listening to available voice command options, you do not have to listen to
the entire list.When you hear the command that you need, push thebutton
on the steering wheel, wait for the beep and say your command.
Changing The Volume
•Start a dialogue by pushing the Phone button, then say a command for example
- "Help."
•Use the radio VOLUME/MUTE rotary knob to adjust the volume to a comfortable
level while the Uconnect® system is speaking.Please note the volume setting for
Uconnect® is different than the audio system.
NOTE:
To access help, push the Uconnect® Phone buttonon the steering wheel and say
"help." Press the display or press either the Phoneor VRbutton and say
"cancel" to cancel the help session.
Incoming Text Messages
After pairing your Uconnect® system with a Bluetooth® enabled mobile device with the
Message Access Profile (MAP), the Uconnect® system can announce a new incoming text
message and read it to you over the vehicle’s audio system.
NOTE:
Only incoming text messages received during the current ignition cycle can be viewed/
read.
To enable incoming text messaging:
iPhone®
1.Press the settings button on the mobile phone.
ELECTRONICS
80
Page 86 of 148

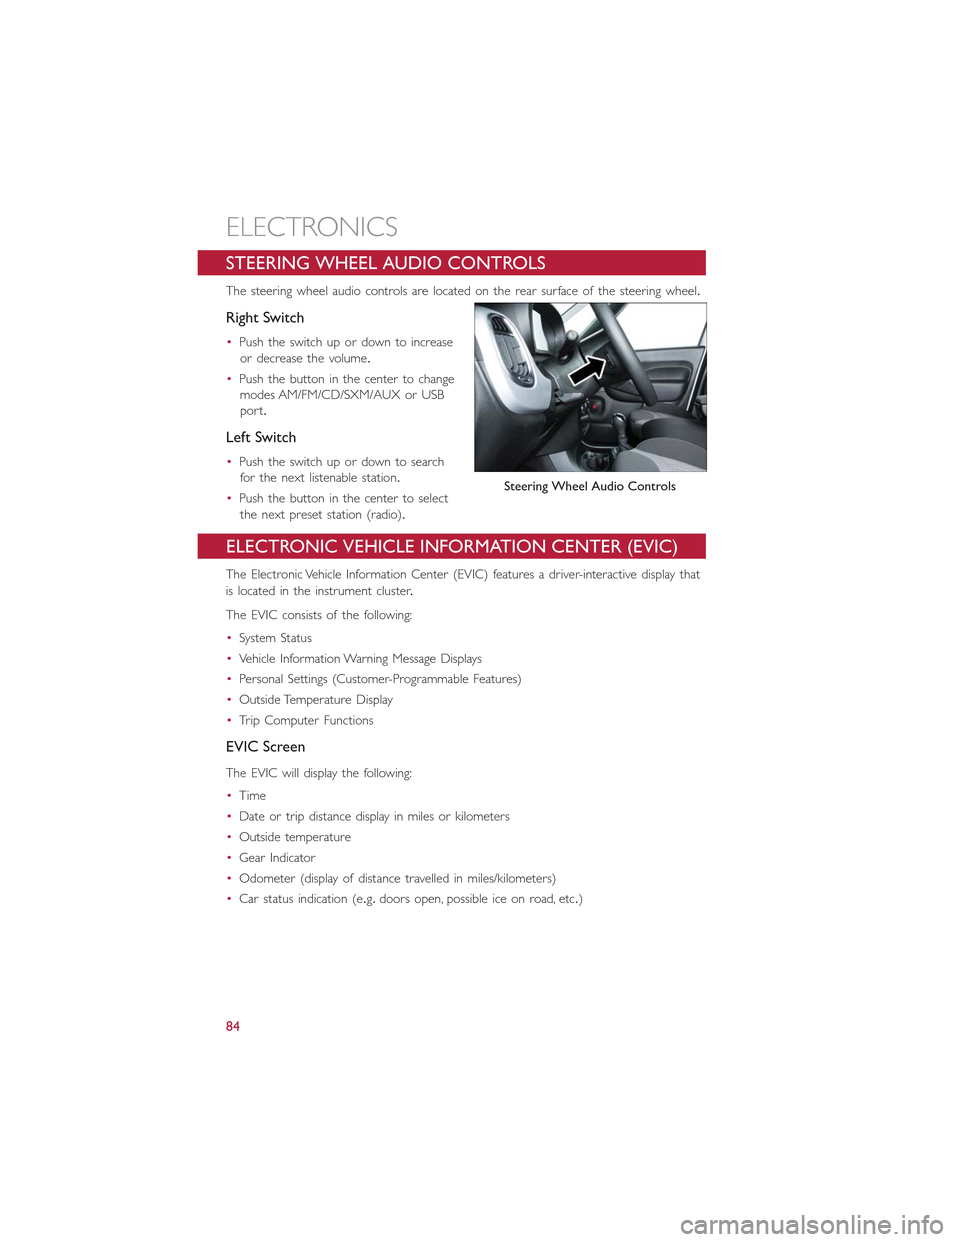
STEERING WHEEL AUDIO CONTROLS
The steering wheel audio controls are located on the rear surface of the steering wheel.
Right Switch
•Push the switch up or down to increase
or decrease the volume.
•Push the button in the center to change
modes AM/FM/CD/SXM/AUX or USB
port.
Left Switch
•Push the switch up or down to search
for the next listenable station.
•Push the button in the center to select
the next preset station (radio).
ELECTRONIC VEHICLE INFORMATION CENTER (EVIC)
The Electronic Vehicle Information Center (EVIC) features a driver-interactive display that
is located in the instrument cluster.
The EVIC consists of the following:
•System Status
•Vehicle Information Warning Message Displays
•Personal Settings (Customer-Programmable Features)
•Outside Temperature Display
•Trip Computer Functions
EVIC Screen
The EVIC will display the following:
•Time
•Date or trip distance display in miles or kilometers
•Outside temperature
•Gear Indicator
•Odometer (display of distance travelled in miles/kilometers)
•Car status indication (e.g.doors open, possible ice on road, etc.)
Steering Wheel Audio Controls
ELECTRONICS
84
Page 87 of 148

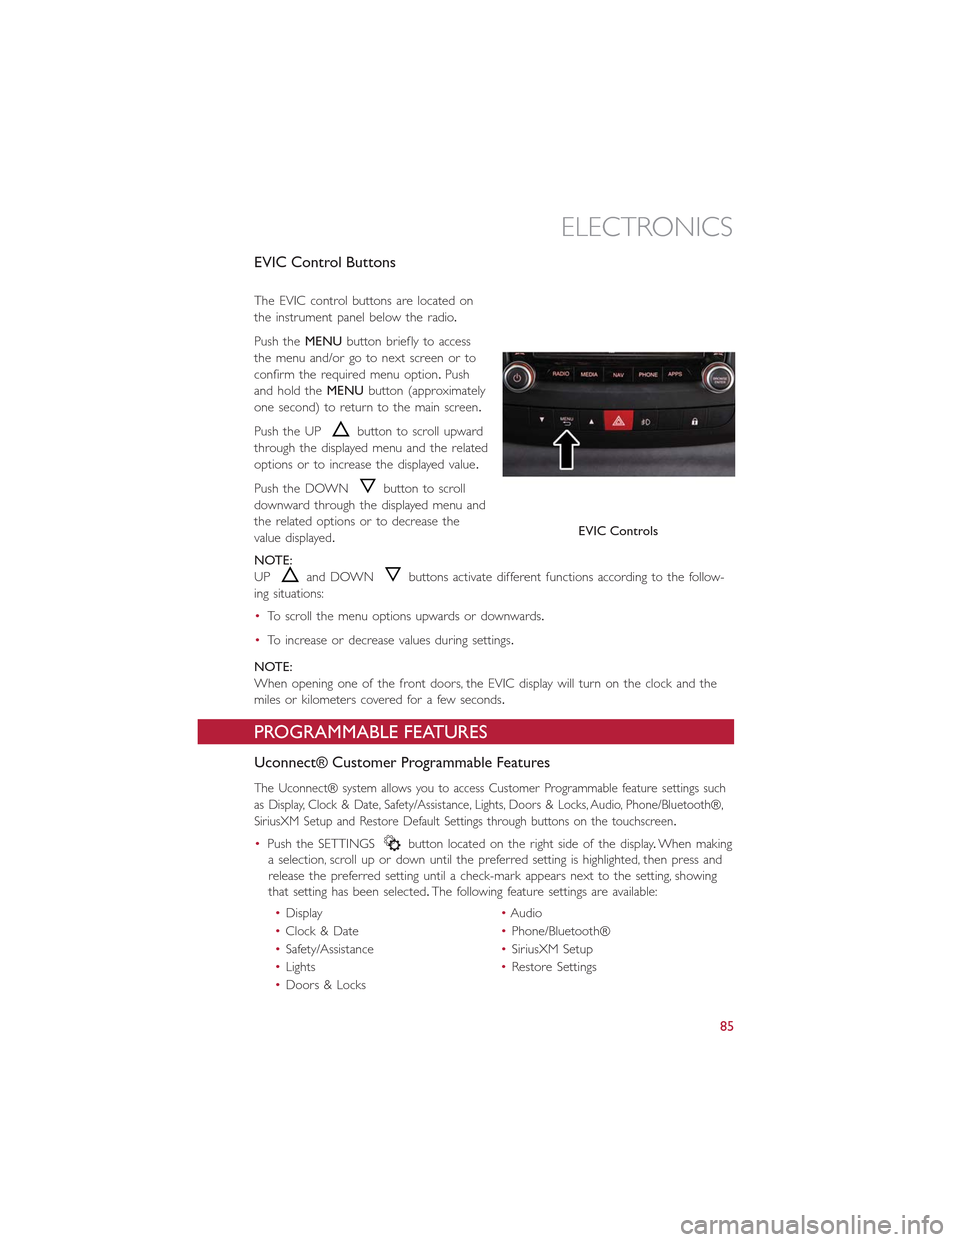
EVIC Control Buttons
The EVIC control buttons are located on
the instrument panel below the radio.
Push theMENUbutton briefly to access
the menu and/or go to next screen or to
confirm the required menu option.Push
and hold theMENUbutton (approximately
one second) to return to the main screen.
Push the UPbutton to scroll upward
through the displayed menu and the related
options or to increase the displayed value.
Push the DOWNbutton to scroll
downward through the displayed menu and
the related options or to decrease the
value displayed.
NOTE:
UPand DOWNbuttons activate different functions according to the follow-
ing situations:
•To scroll the menu options upwards or downwards.
•To increase or decrease values during settings.
NOTE:
When opening one of the front doors, the EVIC display will turn on the clock and the
miles or kilometers covered for a few seconds.
PROGRAMMABLE FEATURES
Uconnect® Customer Programmable Features
The Uconnect® system allows you to access Customer Programmable feature settings such
as Display, Clock & Date, Safety/Assistance, Lights, Doors & Locks, Audio, Phone/Bluetooth®,
SiriusXM Setup and Restore Default Settings through buttons on the touchscreen.
•Push the SETTINGSbutton located on the right side of the display.When making
a selection, scroll up or down until the preferred setting is highlighted, then press and
release the preferred setting until a check-mark appears next to the setting, showing
that setting has been selected.The following feature settings are available:
•Display•Audio
•Clock & Date•Phone/Bluetooth®
•Safety/Assistance•SiriusXM Setup
•Lights•Restore Settings
•Doors & Locks
EVIC Controls
ELECTRONICS
85
Page 99 of 148

Vehicle Security Light
This light will flash rapidly for approximately 15 seconds when the vehicle security alarm
is arming.The light will flash at a slower speed continuously after the alarm is set.The
security light will also come on for about three seconds when the ignition is first turned
on.
Front Fog Light Indicator
This indicator will illuminate when the front fog lights are on.
- Electronic Speed Control SET Indicator
This indicator will illuminate when the cruising speed has been set.
- Electronic Stability Control (ESC) OFF Indicator Light
This light indicates the ESC system has been turned off by the driver.
Partial Off
This mode is entered by momentarily pressing the ESC Off switch.This mode is intended
for times when a more spirited driving experience is desired.It is also intended for driv-
ing in deep snow, sand or gravel conditions, when more wheel spin than ESC would nor-
mally allow is required to gain traction.To turn ESC on again, momentarily press the
switch again.This will restore the normal ESC On mode of operation.
Full Off
This mode is intended for off-highway or off-road use only and should not be used on
public roadways.In this mode, all TCS and ESC stability features are turned OFF, except
for the limited slip feature described in the TCS section.To enter the “Full Off ” mode,
depress and hold the ESC OFF switch for five seconds.After five seconds, the ESC OFF
Indicator Light will illuminate, and the “ESC OFF” message will display in the EVIC.To turn
ESC ON again, momentarily press the ESC OFF switch.
- Park/Headlight ON Indicator
This indicator will illuminate when the park lights or headlights are turned on.
- Power Steering System Warning
This light is used to manage the electrical warning of the EPS (Electric Power Steering
System).When the ignition is turned to the ON/RUN position, the warning light will illu-
minate momentarily.If the warning light stays on, cycle the ignition to the OFF position
and back to ON/RUN.If the warning light stays on, contact your authorized dealer.
If the warning light switches on while driving, you may not have steering assistance.Al-
though it will still be possible to steer the car, the effort needed to operate the steering
wheel could be increased: contact an authorized dealer as soon as possible.
- Defroster Indicator
Indicates that defroster is on.
WHAT TO DO IN EMERGENCIES
97
Page 100 of 148

Change Engine Oil
•Your vehicle is equipped with an engine oil change indicator system.The “Change En-
gine Oil” message will flash in the EVIC display for approximately 10 seconds after a
single chime has sounded to indicate the next scheduled oil change interval.The engine
oil change indicator system is duty cycle based, which means the engine oil change in-
terval may fluctuate, dependent upon your personal driving style.
•Unless reset, this message will continue to display each time you turn the ignition
switch to the ON/RUN position.To turn off the message temporarily, press and re-
lease theMENUbutton.To reset the oil change indicator system (after performing the
scheduled maintenance), refer to the following procedure:
1.Turn the ignition switch to the ON position.(do not start the engine).
2.Fully depress the accelerator pedal slowly, three times within 10 seconds.
3.Turn the ignition switch to the OFF/LOCK position.
NOTE:
If the indicator message illuminates when you start the vehicle, the oil change indicator
system did not reset.If necessary, repeat this procedure.
IF YOUR ENGINE OVERHEATS
In any of the following situations, you can reduce the potential for overheating by taking
the appropriate action:
•On the highways — slow down.
•In city traffic — while stopped, shift transmission into NEUTRAL, but do not increase
engine idle speed.
NOTE:
There are steps that you can take to slow down an overheat condition:
•If your air conditioner (A/C) is on, turn it off.The A/C system adds heat to the engine
cooling system and turning the A/C off can help remove this heat.
•You can also turn the Temperature control to maximum heat, the Mode control to
floor and the Fan control to high.This allows the heater core to act as a supplement
to the radiator and aids in removing heat from the engine cooling system.
•If the temperature reading does not return to normal, turn the engine off immediately.
•We recommend that you do not operate the vehicle or engine damage will occur.
Have the vehicle serviced immediately.
WHAT TO DO IN EMERGENCIES
98
Page 128 of 148

MAINTENANCE PROCEDURES
For information on the maintenance procedures for your vehicle, please refer to “Mainte-
nance Procedures” in “Maintaining Your Vehicle” in your Owner’s Manual or applicable
supplement on the DVD for further details.
MAINTENANCE SCHEDULE
Your vehicle is equipped with an automatic oil change indicator system.The oil change
indicator system will remind you that it is time to take your vehicle in for scheduled
maintenance.
Based on engine operation conditions, the oil change indicator message will illuminate in
the instrument cluster.This means that service is required for your vehicle.Operating
conditions such as frequent short-trips, trailer tow and extremely hot or cold ambient
temperatures will influence when the “Change Oil” or “Oil Change Required” message is
displayed.Severe Operating Conditions can cause the change oil message to illuminate as
early as 3,500 miles (5,600 km) since last reset.Have your vehicle serviced as soon as
possible, within the next 500 miles (805 km).
Your authorized dealer will reset the oil change indicator message after completing the
scheduled oil change.If a scheduled oil change is performed by someone other than your
authorized dealer, the message can be reset by referring to the steps described under
“Electronic Vehicle Information Center (EVIC)” in “Understanding Your Instrument Panel”
in your Owners Manual on the DVD for further information.
NOTE:
Under no circumstances should oil change intervals exceed 10,000 miles (16,000 km) or
twelve months, whichever comes first.
Severe Duty All Models
Change Engine Oil at 4000 miles (6,500 km) if the vehicle is operated in a dusty and off
road environment.This type of vehicle use is considered Severe Duty
Once A Month Or Before A Long Trip:
•Check engine oil level.
•Check windshield washer fluid level.
•Check the tire inflation pressures and look for unusual wear or damage.
•Check the fluid levels of the coolant reservoir, and brake master cylinder reservoir, and
fill as needed.
•Check function of all interior and exterior lights.
MAINTAINING YOUR VEHICLE
126