2015 FIAT 500L hood open
[x] Cancel search: hood openPage 18 of 438

2. Lock the door using either the Central Lock/Unlock
switch or the Remote Keyless Entry (RKE) transmitter
and close all doors.
3. The horn will sound and the Vehicle Security Light in
the instrument cluster will switch on for approxi-
mately 3 seconds. This shows that the Vehicle Security
Alarm is arming. During this period, if a door is
opened, the ignition switch is turned to ON/RUN, or
the power door locks are unlocked in any manner, the
Vehicle Security Alarm will automatically disarm.
After approximately 3 seconds, the Vehicle Security
Light will flash. This shows that the Vehicle Security
Alarm is fully armed.
The activation of the Vehicle Security Alarm is followed
by a self-diagnosis stage. If a fault is detected during the
self-diagnosis stage, the horn will sound a second time.
If the horn sounds a second time, check that all doors, hood
and liftgate are closed correctly, then rearm the system.
If the Vehicle Security Alarm sounds the horn a second
time even when all doors, hood and liftgate are correctly
closed, a fault has occurred in the operation of the
system. Contact your authorized dealer.
To Disarm The System
Push UNLOCK on the RKE transmitter, or insert the key
into the ignition switch and turn the ignition switch to
the ON/RUN position.
NOTE:The Vehicle Security Alarm will not disarm when
the metal insert of the key is used on a single door lock
cylinder.
The Vehicle Security Alarm is designed to protect your
vehicle; however, you can create conditions where the
Vehicle Security Alarm will arm unexpectedly. If you
remain in the vehicle and lock the doors with the RKE
transmitter, once the Vehicle Security Alarm is armed,
when you pull the door handle to exit, the alarm will
16 THINGS TO KNOW BEFORE STARTING YOUR VEHICLE
Page 91 of 438
UNDERSTANDING THE FEATURES OF YOUR VEHICLE
CONTENTS
!MIRRORS.............................92
▫Inside Day/Night Mirror................92
▫Automatic Dimming Mirror — If Equipped . . .93
▫Conversation Mirror — If Equipped.........94
▫Power Mirrors........................95
▫Folding Mirrors........................96
▫Heated Mirrors — If Equipped............96
▫Sun Visors...........................96
!SEATS . . . . . . . . . . . . . . . . . . . . . . . . . . . . . . . .97
▫Front Seats...........................97
▫Rear Seats...........................102
▫Head Restraints......................107
!OPENING AND CLOSING THE HOOD......110
!LIGHTS.............................112
▫Multifunction Lever....................112
▫Headlights..........................113
▫Daytime Running Lights — If Equipped.....113
▫High Beams.........................113
▫Flash-To-Pass........................114
▫Parking Lights.......................114
3
Page 112 of 438
•For proper routing of a Child Seat Tether, refer to
“Occupant Restraints” in “Things to Know Before
Starting Your Vehicle”
WARNING!
The head restraints for all occupants must be prop-
erly adjusted before operating the vehicle or occupy-
ing a seat. Head restraints should never be adjusted
while the vehicle is in motion. Driving a vehicle with
the head restraints improperly adjusted or removed
could cause serious injury or death in the event of an
accident.
OPENING AND CLOSING THE HOOD
To open the hood, two latches must be released to open
the hood.
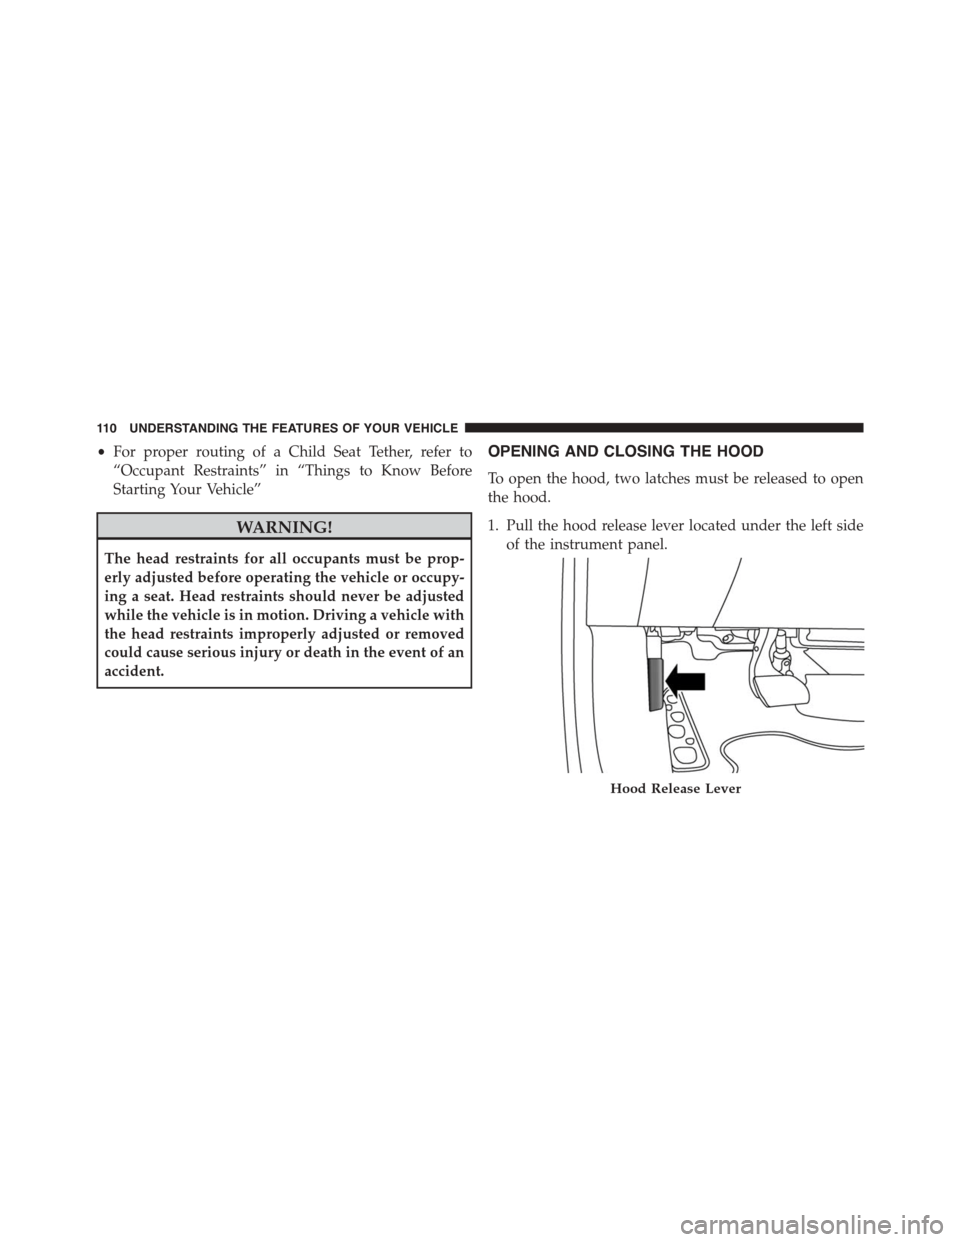
1. Pull the hood release lever located under the left side
of the instrument panel.
Hood Release Lever
11 0 U N D E R S TA N D I N G T H E F E AT U R E S O F Y O U R V E H I C L E
Page 113 of 438
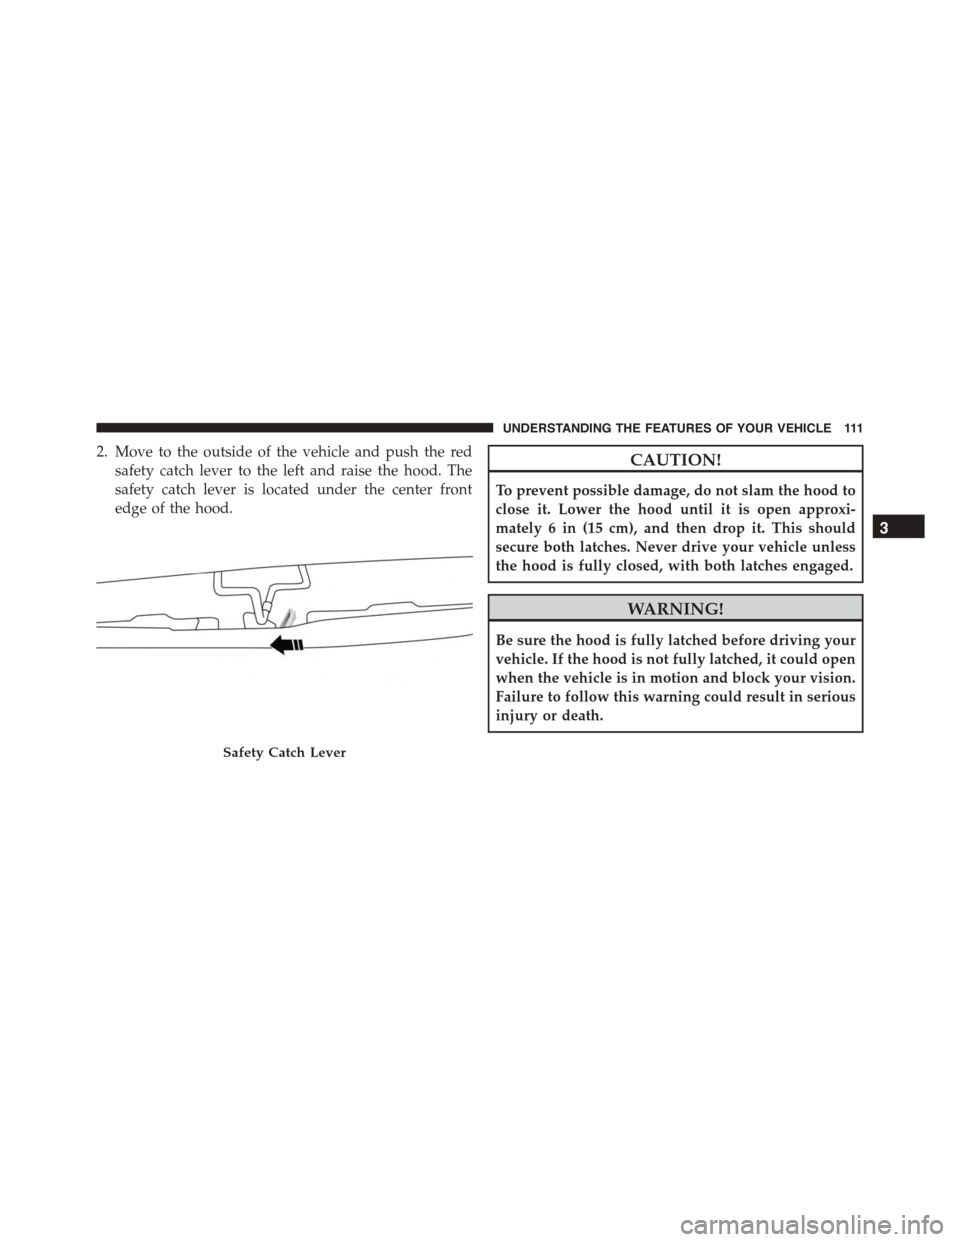
2. Move to the outside of the vehicle and push the red
safety catch lever to the left and raise the hood. The
safety catch lever is located under the center front
edge of the hood.
CAUTION!
To prevent possible damage, do not slam the hood to
close it. Lower the hood until it is open approxi-
mately 6 in (15 cm), and then drop it. This should
secure both latches. Never drive your vehicle unless
the hood is fully closed, with both latches engaged.
WARNING!
Be sure the hood is fully latched before driving your
vehicle. If the hood is not fully latched, it could open
when the vehicle is in motion and block your vision.
Failure to follow this warning could result in serious
injury or death.
Safety Catch Lever
3
UNDERSTANDING THE FEATURES OF YOUR VEHICLE 111
Page 314 of 438
CAUTION!
Driving with a hot cooling system could damage
your vehicle. If the pointer rises to the H (red) mark,
the instrument cluster will sound a chime. When
safe, pull over and stop the vehicle with the engine at
idle. Turn off the air conditioning and wait until the
pointer drops back into the normal range. If the
pointer remains on the H (red) mark for more than a
minute, turn the engine off immediately and call for
service.
WARNING!
You or others can be badly burned by hot engine
coolant (antifreeze) or steam from your radiator. If
you see or hear steam coming from under the hood,
do not open the hood until the radiator has had time
(Continued)
WARNING!(Continued)
to cool. Never try to open a cooling system pressure
cap when the radiator or coolant bottle is hot.
WHEEL AND TIRE TORQUE SPECIFICATIONS
Proper lug nut/bolt torque is very important to ensure
that the wheel is properly mounted to the vehicle. Any
time a wheel has been removed and reinstalled on the
vehicle the lug nuts/bolts should be torqued using a
properly calibrated torque wrench.
312 WHAT TO DO IN EMERGENCIES
Page 336 of 438

WARNING!
•Take care to avoid the radiator cooling fan when-
ever the hood is raised. It can start anytime the
ignition switch is ON. You can be injured by
moving fan blades.
•Remove any metal jewelry such as rings, watch
bands and bracelets that could make an inadvertent
electrical contact. You could be seriously injured.
•Batteries contain sulfuric acid that can burn your
skin or eyes and generate hydrogen gas which is
flammable and explosive. Keep open flames or
sparks away from the battery.
1. Set the parking brake, shift the Euro Twin Clutch
Transmission into PARK and turn the ignition to OFF.
2. Turn off the heater, radio, and all unnecessary electri-
cal accessories.
3. Remove the protective cover over the remote positive
(+)battery post. To remove the cover, pull upward on
the cover.
4. If using another vehicle to jump-start the battery, park
the vehicle within the jumper cables reach, set the
parking brake and make sure the ignition is OFF.
WARNING!
Do not allow vehicles to touch each other as this
could establish a ground connection and personal
injury could result.
334 WHAT TO DO IN EMERGENCIES
Page 367 of 438
Cooling System
WARNING!
•When working near the radiator cooling fan, dis-
connect the fan motor lead or turn the ignition
switch to the OFF position. The fan is temperature
controlled and can start at any time the ignition
switch is in the ON position.
•You or others can be badly burned by hot engine
coolant (antifreeze) or steam from your radiator. If
you see or hear steam coming from under the hood,
do not open the hood until the radiator has had
time to cool. Never try to open a cooling system
pressure cap when the radiator is hot.
Coolant Checks
Check engine coolant (antifreeze) protection every 12
months (before the onset of freezing weather, where
applicable). If the engine coolant (antifreeze) is dirty or
rusty in appearance, the system should be drained,
flushed and refilled with fresh engine coolant (anti-
freeze). Check the front of the A/C condenser for any
accumulation of bugs, leaves, etc. If dirty, clean by gently
spraying water from a garden hose vertically down the
face of the condenser.
Cooling System — Drain, Flush And Refill
NOTE:Some vehicles require special tools to add coolant
properly. Failure to fill these systems properly could lead
to severe internal engine damage. If any coolant is
needed to be added to the system please contact your
local authorized dealer.
If the engine coolant (antifreeze) is dirty or contains
visible sediment, have an authorized dealer clean and
flush with OAT coolant (antifreeze) (conforming to
MS.90032).
7
MAINTAINING YOUR VEHICLE 365
Page 428 of 438

Gasoline, Reformulated.....................299
Gauges
Coolant Temperature.....................169
Fuel.................................169
Odometer.............................175
Tachometer............................171
Gear Ranges.............................233
Gear Select Lever Override..................339
General Information.......................298
General Maintenance.......................175
Glass Cleaning...........................382
Hazard
Driving Through Flowing, Rising, or Shallow
Standing Water.........................252
Headlights..............................113
Cleaning.............................382
High Beam............................171
Passing..............................114
Heated Mirrors............................96
Hill Start Assist...........................260
Holder, Cup.............................150
HomeLink® (Garage Door Opener)............136
Hood Release............................110
Ignition
Key . . . . . . . . . . . . . . . . . . . . . . . . . . . . . . . . . .11
Immobilizer (Sentry Key)....................14
Information Center, Vehicle..................177
Inside Rearview Mirror......................92
Instrument Cluster........................167
Instrument Panel and Controls................165
Instrument Panel Cover.....................382
Instrument Panel Lens Cleaning...............383
Interior Appearance Care....................381
Interior Lighting..........................115
Introduction..............................4
426 INDEX