Page 13 of 224

SEATS
7) 9)
2) 3)
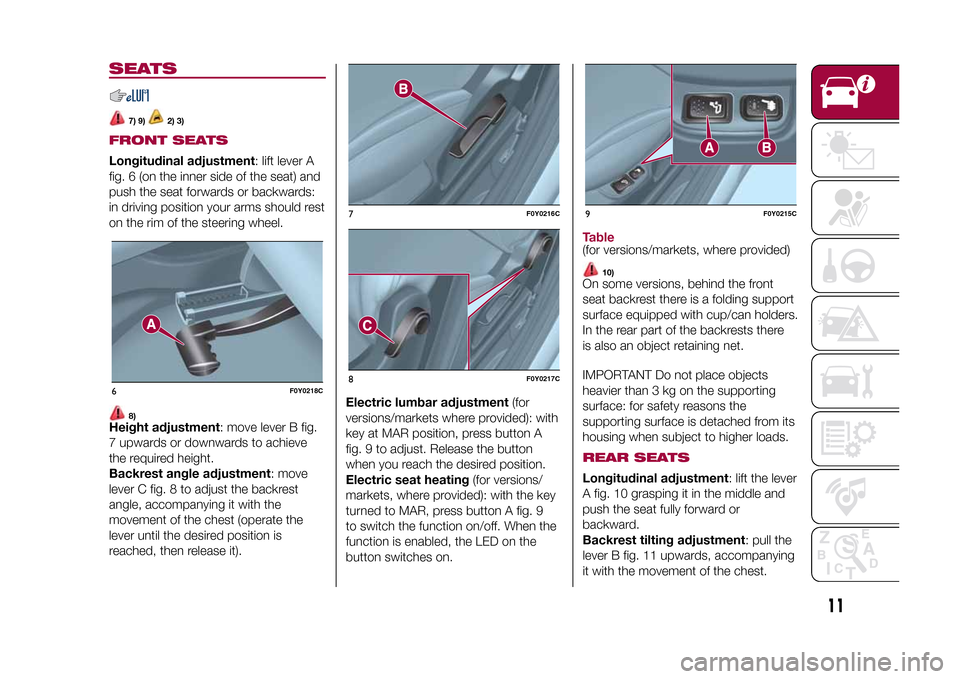
FRONT SEATSLongitudinal adjustment: lift lever A
fig. 6 (on the inner side of the seat) and
push the seat forwards or backwards:
in driving position your arms should rest
on the rim of the steering wheel.
8)
Height adjustment: move lever B fig.
7 upwards or downwards to achieve
the required height.
Backrest angle adjustment: move
lever C fig. 8 to adjust the backrest
angle, accompanying it with the
movement of the chest (operate the
lever until the desired position is
reached, then release it).Electric lumbar adjustment(for
versions/markets where provided): with
key at MAR position, press button A
fig. 9 to adjust. Release the button
when you reach the desired position.
Electric seat heating(for versions/
markets, where provided): with the key
turned to MAR, press button A fig. 9
to switch the function on/off. When the
function is enabled, the LED on the
button switches on.
Table(for versions/markets, where provided)
10)
On some versions, behind the front
seat backrest there is a folding support
surface equipped with cup/can holders.
In the rear part of the backrests there
is also an object retaining net.
IMPORTANT Do not place objects
heavier than 3 kg on the supporting
surface: for safety reasons the
supporting surface is detached from its
housing when subject to higher loads.REAR SEATSLongitudinal adjustment: lift the lever
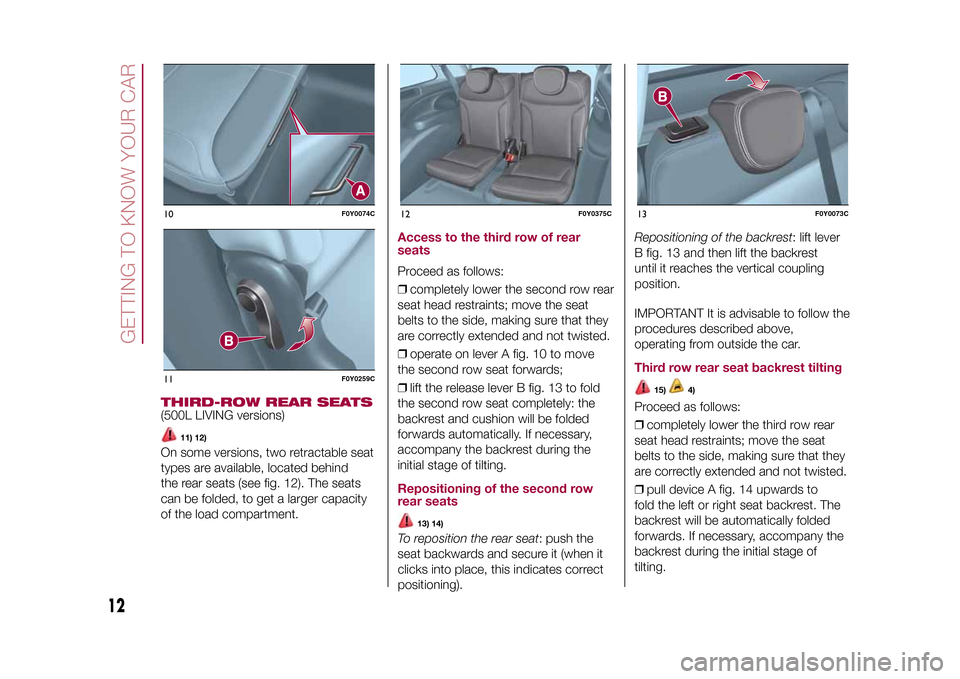
A fig. 10 grasping it in the middle and
push the seat fully forward or
backward.
Backrest tilting adjustment: pull the
lever B fig. 11 upwards, accompanying
it with the movement of the chest.
6
F0Y0218C
7
F0Y0216C
8
F0Y0217C
9
F0Y0215C
11
9-1-2015 12:9 Pagina 11
Page 14 of 224

THIRD-ROW REAR SEATS(500L LIVING versions)
11) 12)
On some versions, two retractable seat
types are available, located behind
the rear seats (see fig. 12). The seats
can be folded, to get a larger capacity
of the load compartment.
Access to the third row of rear
seatsProceed as follows:
❒completely lower the second row rear
seat head restraints; move the seat
belts to the side, making sure that they
are correctly extended and not twisted.
❒operate on lever A fig. 10 to move
the second row seat forwards;
❒lift the release lever B fig. 13 to fold
the second row seat completely: the
backrest and cushion will be folded
forwards automatically. If necessary,
accompany the backrest during the
initial stage of tilting.Repositioning of the second row
rear seats
13) 14)
To reposition the rear seat: push the
seat backwards and secure it (when it
clicks into place, this indicates correct
positioning).Repositioning of the backrest: lift lever
B fig. 13 and then lift the backrest
until it reaches the vertical coupling
position.
IMPORTANT It is advisable to follow the
procedures described above,
operating from outside the car.
Third row rear seat backrest tilting
15)
4)
Proceed as follows:
❒completely lower the third row rear
seat head restraints; move the seat
belts to the side, making sure that they
are correctly extended and not twisted.
❒pull device A fig. 14 upwards to
fold the left or right seat backrest. The
backrest will be automatically folded
forwards. If necessary, accompany the
backrest during the initial stage of
tilting.
10
F0Y0074C
11
F0Y0259C
12
F0Y0375C
13
F0Y0073C
12
GETTING TO KNOW YOUR CAR
9-1-2015 12:9 Pagina 12
Page 31 of 224

WARNING
25)Improper use of the electric windows
can be dangerous. Before and during
operation, always check that passengers
are not exposed to the risk of being injured
either directly by the moving windows or
through objects getting caught or struck by
them. When leaving the vehicle, always
remove the ignition key to avoid the risk of
injury of people still on board due to
accidental operation of the electric
windows.
LUGGAGE
COMPARTMENT
27) 28) 29) 31)
13)
Luggage compartment unlocking is
electrically operated and is deactivated
when the car is in motion.OPENING
26)
When unlocked, the luggage
compartment can be opened from
outside the car using the electric
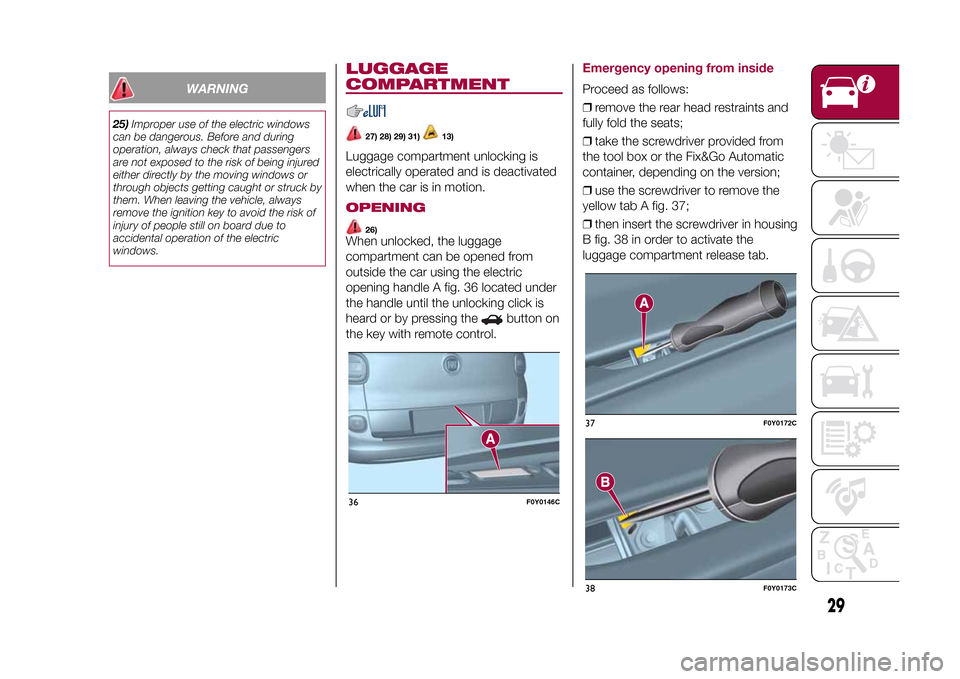
opening handle A fig. 36 located under
the handle until the unlocking click is
heard or by pressing the
button on
the key with remote control.
Emergency opening from insideProceed as follows:
❒remove the rear head restraints and
fully fold the seats;
❒take the screwdriver provided from
the tool box or the Fix&Go Automatic
container, depending on the version;
❒use the screwdriver to remove the
yellow tab A fig. 37;
❒then insert the screwdriver in housing
B fig. 38 in order to activate the
luggage compartment release tab.
36
F0Y0146C
37
F0Y0172C
38
F0Y0173C
29
9-1-2015 12:9 Pagina 29
Page 113 of 224

❒fit the space-saver wheel by inserting
the first stud bolt for two threads into
the hole closest to the valve; then,
tighten the stud bolt by some threads
and proceed in the same way for the
others;
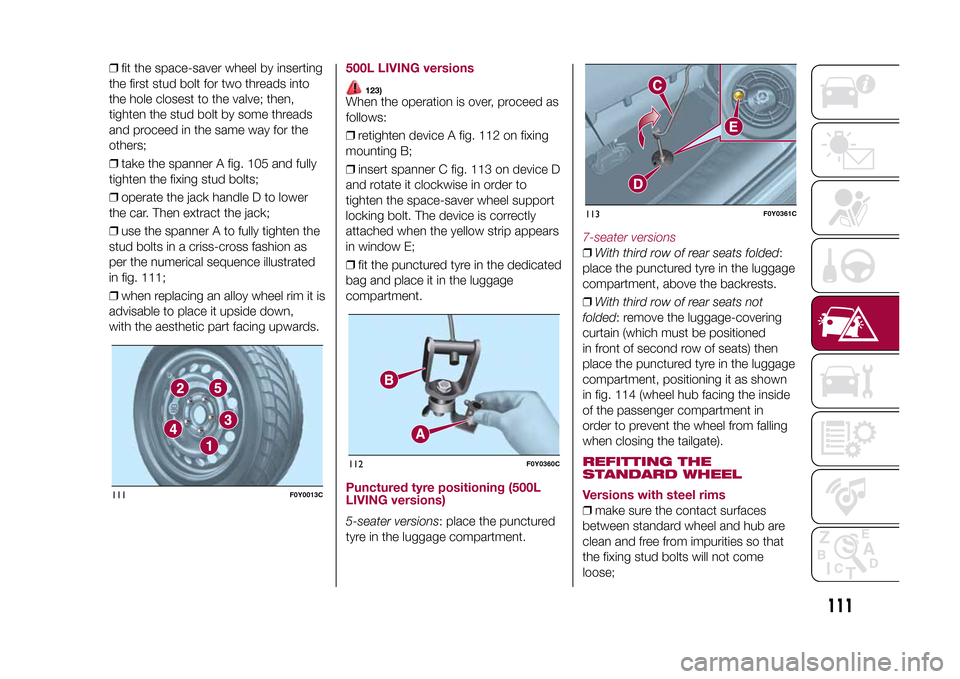
❒take the spanner A fig. 105 and fully
tighten the fixing stud bolts;
❒operate the jack handle D to lower
the car. Then extract the jack;
❒use the spanner A to fully tighten the
stud bolts in a criss-cross fashion as
per the numerical sequence illustrated
in fig. 111;
❒when replacing an alloy wheel rim it is
advisable to place it upside down,
with the aesthetic part facing upwards.
500L LIVING versions
123)
When the operation is over, proceed as
follows:
❒retighten device A fig. 112 on fixing
mounting B;
❒insert spanner C fig. 113 on device D
and rotate it clockwise in order to
tighten the space-saver wheel support
locking bolt. The device is correctly
attached when the yellow strip appears
in window E;
❒fit the punctured tyre in the dedicated
bag and place it in the luggage
compartment.Punctured tyre positioning (500L
LIVING versions)5-seater versions: place the punctured
tyre in the luggage compartment.
7-seater versions❒With third row of rear seats folded:
place the punctured tyre in the luggage
compartment, above the backrests.
❒With third row of rear seats not
folded: remove the luggage-covering
curtain (which must be positioned
in front of second row of seats) then
place the punctured tyre in the luggage
compartment, positioning it as shown
in fig. 114 (wheel hub facing the inside
of the passenger compartment in
order to prevent the wheel from falling
when closing the tailgate).REFITTING THE
STANDARD WHEEL
Versions with steel rims❒make sure the contact surfaces
between standard wheel and hub are
clean and free from impurities so that
the fixing stud bolts will not come
loose;
111
F0Y0013C
112
F0Y0360C
113
F0Y0361C
111
9-1-2015 12:9 Pagina 111