Page 561 of 703
WHAT TO DO IN EMERGENCIES
CONTENTS
!HAZARD WARNING FLASHERS...........561
!IF YOUR ENGINE OVERHEATS............561
!TIRE SERVICE KIT — IF EQUIPPED.........562
▫Tire Service Kit Storage.................563
▫Tire Service Kit Components And Operation . .564
▫Tire Service Kit Usage Precautions..........565
▫Sealing A Tire With Tire Service Kit.........567
!WHEEL AND TIRE TORQUE
SPECIFICATIONS......................573
▫Torque Specifications...................573
!JACKING AND TIRE CHANGING — IF
EQUIPPED...........................575
▫Jack Location........................576
▫Spare Tire Removal....................576
▫To Access Spare Tire Winch Drive Nut.......577
▫Spare Tire Tools.......................579
▫Spare Tire Removal Instructions...........580
▫Preparations For Jacking................582
▫Jacking Instructions...................583
▫Securing The Compact Spare Tire..........590
6
Page 568 of 703
from the vehicle or tire and wheel components. Once
the sealant dries, it can easily be peeled off and
properly discarded.
•For optimum performance, make sure the valve stem
on the wheel is free of debris before connecting the Tire
Service Kit.
•You can use the Tire Service Kit air pump to inflate
bicycle tires. The kit also comes with two needles,
located in the Accessory Storage Compartment (on the
bottom of the air pump) for inflating sport balls, rafts,
or similar inflatable items. However, use only the Air
Pump Hose (7) and make sure the Mode Select Knob
(5) is in the Air Mode when inflating such items to
avoid injecting sealant into them. The Tire Service Kit
Sealant is only intended to seal punctures less than¼”
(6 mm) diameter in the tread of your vehicle.
•Do not lift or carry the Tire Service Kit by the hoses.
WARNING!
•Do not attempt to seal a tire on the side of the
vehicle closest to traffic. Pull far enough off the
road to avoid the danger of being hit when using
the Tire Service Kit.
•Do not use Tire Service Kit or drive the vehicle
under the following circumstances:
– If the puncture in the tire tread is approximately
1/4” (6 mm) or larger.
– If the tire has any sidewall damage.
– If the tire has any damage from driving with
extremely low tire pressure.
– If the tire has any damage from driving on a flat
tire.
– If the wheel has any damage.
– If you are unsure of the condition of the tire or
the wheel.
(Continued)
566 WHAT TO DO IN EMERGENCIES
Page 569 of 703
WARNING!(Continued)
•Keep Tire Service Kit away from open flames or
heat source.
•A loose Tire Service Kit thrown forward in a
collision or hard stop could endanger the occupants
of the vehicle. Always stow the Tire Service Kit in
the place provided. Failure to follow these warn-
ings can result in injuries that are serious or fatal to
you, your passengers, and others around you.
•Take care not to allow the contents of Tire Service
Kit to come in contact with hair, eyes, or clothing.
Tire Service Kit is harmful if inhaled, swallowed,
or absorbed through the skin. It causes skin, eye,
and respiratory irritation. Flush immediately with
plenty of water if there is any contact with eyes or
skin. Change clothing as soon as possible, if there
is any contact with clothing.
(Continued)
WARNING!(Continued)
•Tire Service Kit Sealant solution contains latex. In
case of an allergic reaction or rash, consult a phy-
sician immediately. Keep Tire Service Kit out of
reach of children. If swallowed, rinse mouth imme-
diately with plenty of water and drink plenty of
water. Do not induce vomiting! Consult a physician
immediately.
Sealing A Tire With Tire Service Kit
(A) Whenever You Stop To Use Tire Service Kit:
1. Pull over to a safe location and turn on the vehicle’s
Hazard Warning flashers.
2. Verify that the valve stem (on the wheel with the
deflated tire) is in a position that is near to the ground.
This will allow the Tire Service Kit Hoses (6) and (7) to
reach the valve stem and keep the Tire Service Kit flat
6
WHAT TO DO IN EMERGENCIES 567
Page 575 of 703
4. Clean any remaining sealant from the Tire Service Kit
housing.
5. Position the new Sealant Bottle (1) in the housing so
that the Sealant Hose (6) aligns with the hose slot in
the front of the housing. Press the bottle into the
housing. An audible click will be heard indicating the
bottle is locked into place.
6. Verify that the cap is installed on the fitting at the end
of the Sealant Hose (6) and return the hose to its
storage area (located on the bottom of the air pump).
7. Return the Tire Service Kit to its storage location in the
vehicle.
WHEEL AND TIRE TORQUE SPECIFICATIONS
Proper lug nut/bolt torque is very important to ensure
that the wheel is properly mounted to the vehicle. Any
time a wheel has been removed and reinstalled on the
vehicle the lug nuts/bolts should be torqued using a
properly calibrated torque wrench.
Torque Specifications
Lug Nut/Bolt Torque **Lug Nut/
Bolt Size
Lug Nut/
Bolt
Socket
Size
100 Ft-Lbs (135 N·m) M12 x 1.25 19 mm
**Use only Chrysler recommended lug nuts/bolts and
clean or remove any dirt or oil before tightening.
6
WHAT TO DO IN EMERGENCIES 573
Page 576 of 703
Inspect the wheel mounting surface prior to mounting
the tire and remove any corrosion or loose particles.
Tighten the lug nuts/bolts in a star pattern until each
nut/bolt has been tightened twice.
After 25 miles (40 km) check the lug nut/bolt torque to be
sure that all the lug nuts/bolts are properly seated
against the wheel.
Wheel Mounting Surface
Torque Patterns
574 WHAT TO DO IN EMERGENCIES
Page 577 of 703
WARNING!
To avoid the risk of forcing the vehicle off the jack,
do not tighten the lug nuts fully until the vehicle has
been lowered. Failure to follow this warning may
result in personal injury.
JACKING AND TIRE CHANGING — IF EQUIPPED
WARNING!
•Do not attempt to change a tire on the side of the
vehicle close to moving traffic. Pull far enough off
the road to avoid the danger of being hit when
operating the jack or changing the wheel.
(Continued)
WARNING!(Continued)
•Being under a jacked-up vehicle is dangerous. The
vehicle could slip off the jack and fall on you. You
could be crushed. Never put any part of your body
under a vehicle that is on a jack. If you need to get
under a raised vehicle, take it to a service center
where it can be raised on a lift.
•Never start or run the engine while the vehicle is
on a jack.
•The jack is designed to be used as a tool for
changing tires only. The jack should not be used to
lift the vehicle for service purposes. The vehicle
should be jacked on a firm level surface only.
Avoid ice or slippery areas.
6
WHAT TO DO IN EMERGENCIES 575
Page 584 of 703
4. Stand the tire/cover assembly upright and remove the
wheel spacer by squeezing the winch retaining tabs
together. Push the retainer through the spare tire to
release it from the wheel.
Preparations For Jacking
1. Park the vehicle on a firm, level surface. Avoid ice or
slippery areas.
WARNING!
Do not attempt to change a tire on the side of the
vehicle close to moving traffic, pull far enough off
the road to avoid being hit when operating the jack
or changing the wheel.
2. Turn on the Hazard Warning flasher.
3. Set the parking brake.
4. Place the shift lever into PARK.
5. Turn OFF the ignition.Removing Wheel Spacer
582 WHAT TO DO IN EMERGENCIES
Page 585 of 703
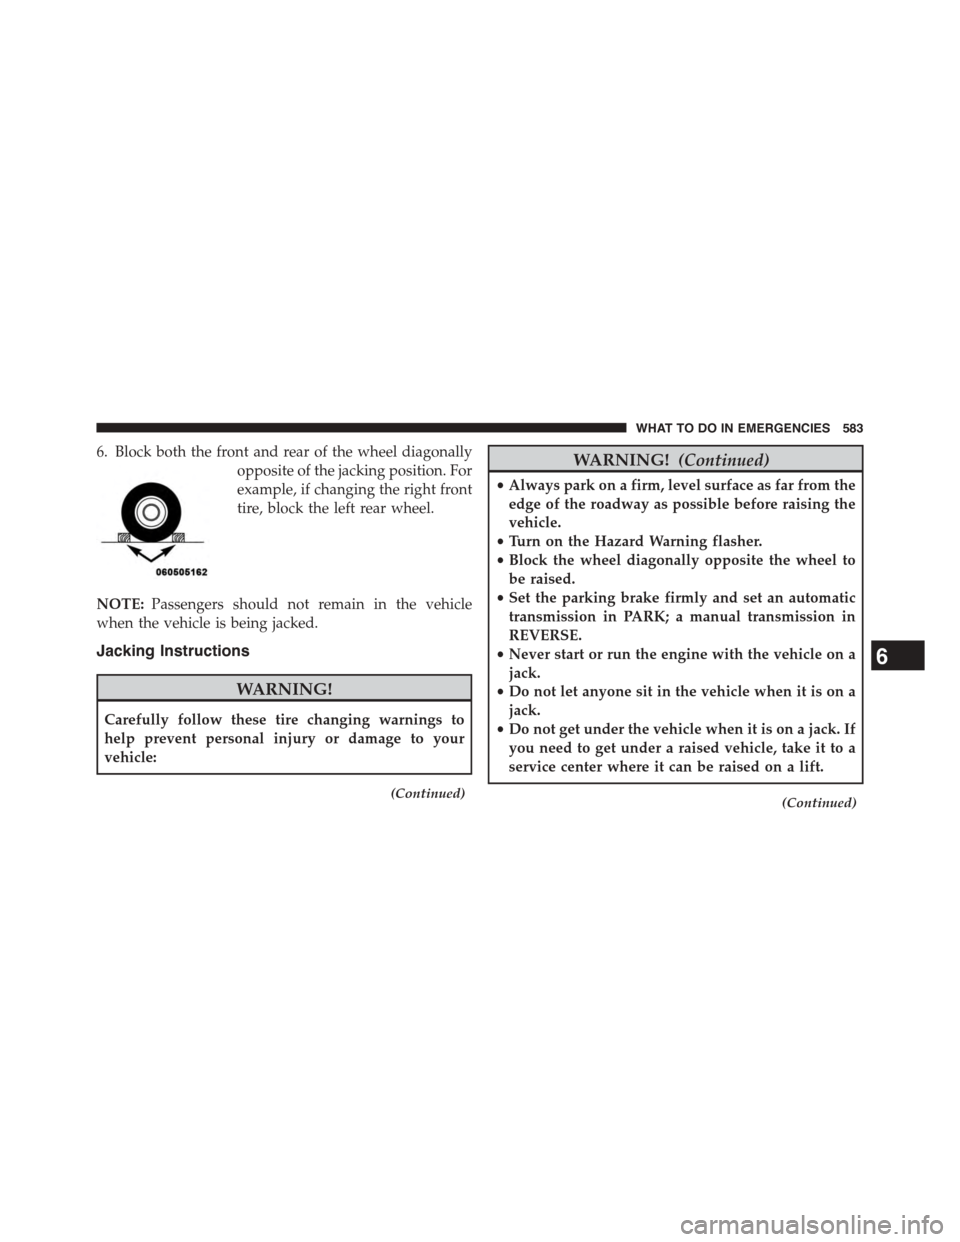
6. Block both the front and rear of the wheel diagonally
opposite of the jacking position. For
example, if changing the right front
tire, block the left rear wheel.
NOTE:Passengers should not remain in the vehicle
when the vehicle is being jacked.
Jacking Instructions
WARNING!
Carefully follow these tire changing warnings to
help prevent personal injury or damage to your
vehicle:
(Continued)
WARNING!(Continued)
•Always park on a firm, level surface as far from the
edge of the roadway as possible before raising the
vehicle.
•Turn on the Hazard Warning flasher.
•Block the wheel diagonally opposite the wheel to
be raised.
•Set the parking brake firmly and set an automatic
transmission in PARK; a manual transmission in
REVERSE.
•Never start or run the engine with the vehicle on a
jack.
•Do not let anyone sit in the vehicle when it is on a
jack.
•Do not get under the vehicle when it is on a jack. If
you need to get under a raised vehicle, take it to a
service center where it can be raised on a lift.
(Continued)
6
WHAT TO DO IN EMERGENCIES 583