Page 216 of 703
5. Pull release strap marked “4” and tumble the seat
rearward into the storage bin.
To Unfold Third Row Seats
1. Pull up on the assist strap to lift the seat out of the
storage bin and push the seat forward until the
anchors latch.
2. Pull release strap marked “2” to unlock the recliner.
Release Strap “4”
Stowed Third Row Seat
214 UNDERSTANDING THE FEATURES OF YOUR VEHICLE
Page 230 of 703

The multifunction lever controls the:
•Turn Signals
•Headlight Beams Low/High
•Flash-To-Pass
•Front and Rear Wipers — Washer Functions
Turn Signals
Move the multifunction lever up or down and the arrows
on each side of the instrument cluster flash to show
proper operation of the front and rear turn signal lights.
NOTE:If either light remains on and does not flash, or
there is a very fast flash rate, check for a defective outside
light bulb. If an indicator fails to light when the lever is
moved, it would suggest that the indicator bulb is
defective.
Turn Signal Warning
If the vehicle electronics sense that the vehicle has
traveled at over 18 mph (29 km/h) for about 1 mile
(1.6 km) with the turn signals on, a chime will sound to
alert the driver.
Lane Change Assist
Tap the lever up or down once, without moving beyond
the detent, and the turn signal (right or left) will flash
three times then automatically turn off.
High/Low Beam Switch
When the headlights are turned on, pushing the multi-
function lever toward the instrument panel will switch
from low beams to high beams. Pulling back to the
neutral position returns the headlights to the low beam
operation.
228 UNDERSTANDING THE FEATURES OF YOUR VEHICLE
Page 231 of 703

Flash-To-Pass
You can signal another vehicle with your headlights by
lightly pulling the multifunction lever toward you. This
will cause the headlights to turn on at high beam and
remain on until the lever is released.
Battery Protection
This feature provides battery protection to avoid wearing
down the battery if the headlights, parking lights, or
front fog lights are left on for extended periods of time
when the ignition switch is in the LOCK position. After
eight minutes of the ignition switch being in the LOCK
position and the headlight switch in any position other
than OFF or AUTO, the lights will turn off automatically
until the next cycle of the ignition switch or headlight
switch.
The battery protection feature will be disabled if the
ignition switch is turned to any other position other than
LOCK during the eight minute delay.
WINDSHIELD WIPER AND WASHERS
The wipers and washers are operated by a switch within
the multifunction lever. Rotate the end of the multifunc-
tion lever to select the desired wiper speed.
Washer And Wiper Controls
3
UNDERSTANDING THE FEATURES OF YOUR VEHICLE 229
Page 233 of 703

Windshield Washers
To use the Washer, push on the end of the lever to the
second detent and hold while spray is desired. If the lever
is pushed while on the intermittent setting, the wipers
will turn on and operate for several wipe cycles after the
lever is released, and then resume the intermittent inter-
val previously selected. If the lever is pushed while the
wipers are in the off position, the wipers will operate
several wipe cycles, then turn off.
Mist Feature
Press the end of the multifunction lever inward (toward
the steering column) to the first detent and release for a
single wiping cycle.
NOTE:The mist feature does not activate the washer
pump; therefore, no washer fluid will be sprayed on the
windshield. The wash function must be used in order to
spray the windshield with washer fluid.
Rear Wiper And Washer
Rotating the rotary ring to the first detent activates the
rear intermittent wipers. To activate the washers, rotate
the rotary ring fully forward and the washers will spray
until the ring is released, and then resume the intermit-
tent interval.
NOTE:Rear window wipers function in the intermittent
wiper speed only.
Rain Sensing Wipers — If Equipped
This feature senses moisture on the windshield and
automatically activates the wipers for the driver. This
feature is especially useful for road splash or overspray
from the windshield washers of the vehicle ahead. Rotate
the end of the multifunction lever to one of the five
intermittent wiper sensitivity settings to activate this
feature.
3
UNDERSTANDING THE FEATURES OF YOUR VEHICLE 231
Page 236 of 703

To unlock the steering column, push the lever downward
(toward the floor). To tilt the steering column, move the
steering wheel upward or downward as desired. To
lengthen or shorten the steering column, pull the steering
wheel outward or push it inward as desired. To lock the
steering column in position, push the lever upward until
fully engaged.
WARNING!
Do not adjust the steering column while driving.
Adjusting the steering column while driving or driv-
ing with the steering column unlocked, could cause
the driver to lose control of the vehicle. Failure to
follow this warning may result in serious injury or
death.
HEATED STEERING WHEEL — IF EQUIPPED
The steering wheel contains a heating element that helps
warm your hands in cold weather. The heated steering
wheel has only one temperature setting. Once the heated
steering wheel has been turned on it will operate for
approximately 30 to 80 minutes before automatically
shutting off. The heated steering wheel can shut off early
or may not turn on when the steering wheel is already
warm.
The heated steering wheel control button is located on
the center of the instrument panel below the climate
controls.
•Press the heated steering wheel buttononce to
turn the heating element ON.
234 UNDERSTANDING THE FEATURES OF YOUR VEHICLE
Page 251 of 703

WARNING!(Continued)
•Before using ParkSense®, it is strongly recom-
mended that the ball mount and hitch ball assem-
bly is disconnected from the vehicle when the
vehicle is not used for towing. Failure to do so can
result in injury or damage to vehicles or obstacles
because the hitch ball will be much closer to the
obstacle than the rear fascia when the loudspeaker
sounds the continuous tone. Also, the sensors
could detect the ball mount and hitch ball assem-
bly, depending on its size and shape, giving a false
indication that an obstacle is behind the vehicle.
PARKVIEW® REAR BACK UP CAMERA — IF
EQUIPPED
Your vehicle may be equipped with the ParkView® Rear
Back Up Camera that allows you to see an on-screen
image of the rear surroundings of your vehicle whenever
the shift lever is put into REVERSE. The image will be
displayed on the touchscreen along with a caution note to
“check entire surroundings” across the top of the screen.
After five seconds this note will disappear. The
ParkView® camera is located on the rear of the vehicle
above the rear license plate.
When the vehicle is shifted out of REVERSE, the rear
camera mode is exited and the last selected touchscreen
appears again.
If your vehicle is equipped with the Camera Delay
feature and it is turned On, the rear camera image will be
displayed for up to 10 seconds when the vehicle is shifted
out of REVERSE unless the forward vehicle speed ex-
ceeds 8 mph (13 km/h), the transmission is shifted into
#PARK#or the vehicles ignition is cycled to the OFF
position.
3
UNDERSTANDING THE FEATURES OF YOUR VEHICLE 249
Page 272 of 703

CAUTION!
•Do not exceed the maximum power of 160 Watts (13
Amps) at 12 Volts. If the 160 Watt (13 Amp) power
rating is exceeded the fuse protecting the system
will need to be replaced.
•Power outlets are designed for accessory plugs
only. Do not insert any other object in the power
outlets as this will damage the outlet and blow the
fuse. Improper use of the power outlet can cause
damage not covered by your New Vehicle Limited
Warranty.
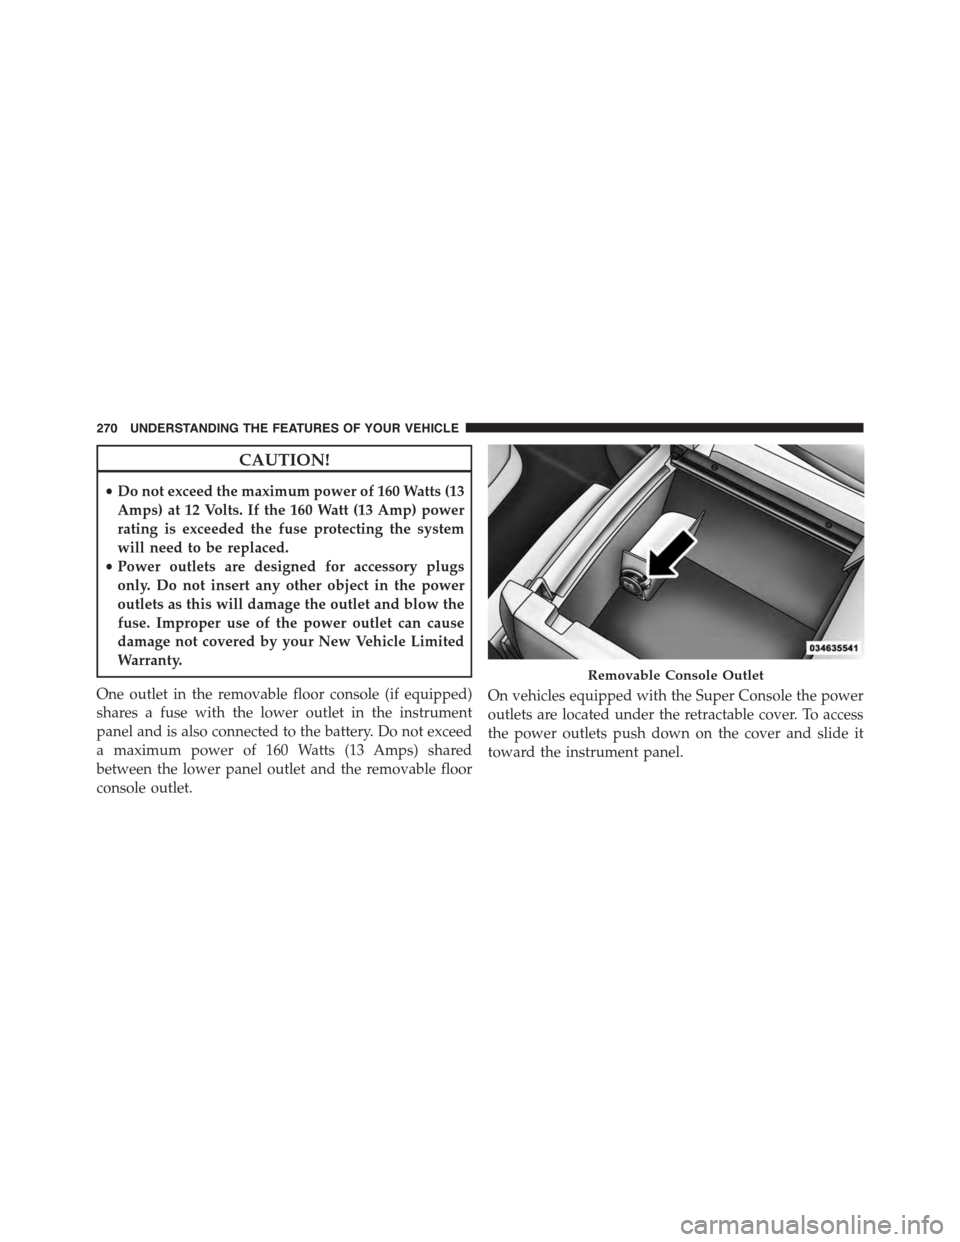
One outlet in the removable floor console (if equipped)
shares a fuse with the lower outlet in the instrument
panel and is also connected to the battery. Do not exceed
a maximum power of 160 Watts (13 Amps) shared
between the lower panel outlet and the removable floor
console outlet.
On vehicles equipped with the Super Console the power
outlets are located under the retractable cover. To access
the power outlets push down on the cover and slide it
toward the instrument panel.
Removable Console Outlet
270 UNDERSTANDING THE FEATURES OF YOUR VEHICLE
Page 287 of 703
Coat Hooks
Coat hooks are located along the headliner for the second
and third row seating positions. The coat hook load limit
is 10 lbs (4.5 kg). Exceeding the recommended load limit
can cause the coat hooks to break or disengage from the
vehicle.
Cargo Area Storage
The liftgate sill plate has a raised line with the statement
“Load To This Line”. This line indicates how far rearward
cargo can be placed without interfering with liftgate
closing.
NOTE:With all rear seats stowed or removed,4x8foot
sheets of building material will fit on the vehicle floor
with the liftgate closed. The front seats must be moved
slightly forward of the rearmost position.
Rear Cargo Area Loading Limit
3
UNDERSTANDING THE FEATURES OF YOUR VEHICLE 285