Page 341 of 689

buttons on the touchscreen to adjust the hours up or
down. Press the back arrow button on the touchscreen to
return to the previous menu.
•Set Time Minutes
This feature will allow you to adjust the minutes. The
“Sync time with GPS” button on the touchscreen must be
unchecked. To make your selection, press the “+” or “–”
buttons on the touchscreen to adjust the minutes up or
down. Press the back arrow button on the touchscreen to
return to the previous menu.
•Time Format
This feature will allow you to select the time format
display setting. Press the “Time Format” button on the
touchscreen until a check-mark appears next to the
“12hrs” or “24hrs” setting, showing that setting has been
selected. Press the back arrow button on the touchscreen
to return to the previous menu.
•Show Time In Status Bar — If Equipped
This feature will allow you to turn on or shut off the
digital clock in the status bar. To change the Show Time
Status setting press the “Show Time in Status Bar” button
on the touchscreen until a check-mark appears next to
setting, indicating that the setting has been selected. Press
the back arrow button on the touchscreen to return to the
previous menu.
Safety & Driving Assistance
After pressing the “Safety & Driving Assistance” button
on the touchscreen the following settings will be avail-
able:
•Forward Collision Warning — If Equipped
The Front Collision Warning (FCW) feature provides an
audible and/or visual warning to potential forward
collisions. The feature can be can be set to Far, or set to
Near. The default status of FCW is the Far setting. This
4
UNDERSTANDING YOUR INSTRUMENT PANEL 339
Page 355 of 689

Restore Settings
After pressing the “Restore Settings” button on the
touchscreen the following settings will be available:
•Restore Settings
When this feature is selected it will reset the Display,
Clock, Audio, and Radio Settings to their default settings.
To restore the settings to their default setting, press the
“Restore Settings” button on the touchscreen and pop-up
will appear asking#Are you sure you want to reset your
settings to default?” select “OK” to restore, or “Cancel” to
exit. Once the settings are restored, a pop-up appears
stating#settings reset to default.#
Clear Personal Data
After pressing the “Clear Personal Data Settings” button on
the touchscreen the following settings will be available:
•Clear Personal Data
When this feature is selected it will remove personal data
including Bluetooth® devices and presets. To remove
personal information, press the “Clear Personal Data”
button and a pop-up will appear asking#Are you sure
you want to clear all personal data?” select “OK” to
Clear, or “Cancel” to exit. Once the data has been cleared,
a pop up appears stating#Personal data cleared.”
System Information
After pressing the “System Information” button on the
touchscreen the following information will be available:
•System Information
When System Information is selected, a System Information
screen will appear displaying the system software version.
4
UNDERSTANDING YOUR INSTRUMENT PANEL 353
Page 388 of 689

automatic mode to switch to manual operation. The
speeds can be selected using either the blower control
knob on the faceplate or buttons on the touchscreen as
follows:
Blower Control Knob On The Faceplate
The blower speed increases as you turn the blower
control knob clockwise from the lowest blower setting.
The blower speed decreases as you turn the blower
control knob counterclockwise.
Buttons On The Touchscreen
Use the small blower icon to reduce the blower setting
and the large blower icon to increase the blower setting.
Blower can also be selected by pressing the blower bar
area between the icons.
12. Modes
The airflow distribution mode can be adjusted so air
comes from the instrument panel outlets, floor outlets,
demist outlets and defrost outlets. The Mode settings are
as follows:
•Panel Mode
Air comes from the outlets in the instrument
panel. Each of these outlets can be individually
adjusted to direct the flow of air. The air vanes of the
center outlets and outboard outlets can be moved up and
down or side to side to regulate airflow direction. There
is a shut off wheel located below the air vanes to shut off
or adjust the amount of airflow from these outlets.
•Bi-Level Mode
Air comes from the instrument panel outlets and
floor outlets. A slight amount of air is directed
through the defrost and side window demister outlets.
386 UNDERSTANDING YOUR INSTRUMENT PANEL
Page 396 of 689

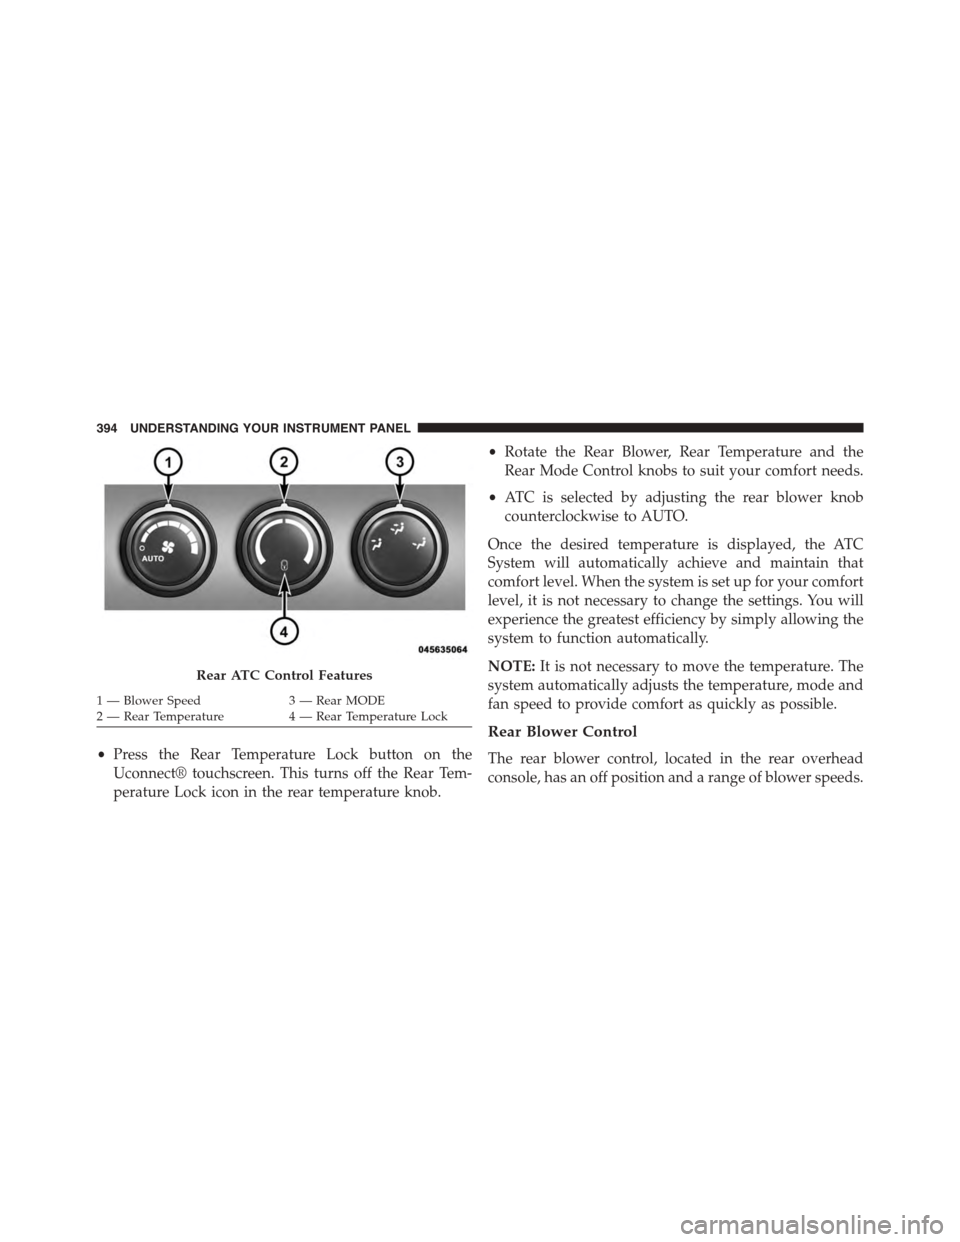
•Press the Rear Temperature Lock button on the
Uconnect® touchscreen. This turns off the Rear Tem-
perature Lock icon in the rear temperature knob.
•Rotate the Rear Blower, Rear Temperature and the
Rear Mode Control knobs to suit your comfort needs.
•ATC is selected by adjusting the rear blower knob
counterclockwise to AUTO.
Once the desired temperature is displayed, the ATC
System will automatically achieve and maintain that
comfort level. When the system is set up for your comfort
level, it is not necessary to change the settings. You will
experience the greatest efficiency by simply allowing the
system to function automatically.
NOTE:It is not necessary to move the temperature. The
system automatically adjusts the temperature, mode and
fan speed to provide comfort as quickly as possible.
Rear Blower Control
The rear blower control, located in the rear overhead
console, has an off position and a range of blower speeds.
Rear ATC Control Features
1—BlowerSpeed3—RearMODE2—RearTemperature4—RearTemperatureLock
394 UNDERSTANDING YOUR INSTRUMENT PANEL