Page 182 of 664
To Remove A Favorite
1. To remove a Favorite, select phonebook from the
Phone main screen.
2. Next select Favorites on the left side of the screen and
then press the “+” Options button on the touchscreen.
3. Press the “+” next to the Favorite you would like to
remove.
4. The Options pop-up will display, press “Remove from
Favs.”
Remove From Favorites
180 UNDERSTANDING THE FEATURES OF YOUR VEHICLE
Page 185 of 664
3. The Uconnect® Phone will dial the number associated
with John Doe, or if there are multiple numbers it will
ask which number you want to call for John Doe.
Call Controls
The touchscreen allows you to control the following call
features:
•Answer
•End
•Ignore
•Hold/unhold
•Mute/unmute
•Transfer the call to/from the phone
•Swap two active calls
•Join two active calls together
Touch-Tone Number Entry
1. Press the “Phone” button on the touchscreen.
2. Press the “Dial” button on the touchscreen.
3. The Touch-Tone screen will be displayed.
4. Use the numbered buttons on the touchscreens to
enter the number and press “Call.”
To send a touch-tone using Voice Recognition (VR), push
the “VR”button on your steering wheel while in
a call and say “Send 1234#” or you can say “Send
Voicemail Password” if Voicemail password is stored
in your mobile phonebook.
3
UNDERSTANDING THE FEATURES OF YOUR VEHICLE 183
Page 186 of 664
Recent Calls
You may browse up to 34 of the most recent of each of the
following call types:
•Incoming Calls
•Outgoing Calls
•Missed Calls
•All Calls
These can be accessed by pressing the “recent calls”
button on the touchscreen on the Phone main screen.
You can also push the Phonebutton and say “Show
my incoming calls” from any screen and the Incoming
calls will be displayed.
You can also push the Phonebutton and say “Show
my recent calls” from any screen and the All calls
screen will be displayed.
NOTE:Incoming can also be replaced with “Outgoing,”
“Recent” or “Missed.”
Recent Calls
184 UNDERSTANDING THE FEATURES OF YOUR VEHICLE
Page 192 of 664

Barge In — Overriding Prompts
The Voice Commandbutton can be used when
you wish to skip part of a prompt and issue your voice
command immediately. For example, if a prompt is
asking “There are two numbers with the name John.
Say the full name” you could push the Voice Com-
mandbutton and say, “John Smith” to select that
option without having to listen to the rest of the voice
prompt.
Voice Response Length
It is possible for you to choose between Brief and
Detailed Voice Response Length.
1. Press the “More” button on the touchscreen (where
available), then press the “Settings” button on the
touchscreen.
2. Press the “Display” button on the touchscreen, then
scroll down to Voice Response Length.
3. Select either “Brief” or “Detailed” by pressing the box
next to the selection. A check-mark will appear to
indicate your selection.
Phone And Network Status Indicators
Uconnect® Phone will provide notification to inform you
of your phone and network status when you are attempt-
ing to make a phone call using Uconnect® Phone. The
status is given for network signal strength and phone
battery strength.
190 UNDERSTANDING THE FEATURES OF YOUR VEHICLE
Page 215 of 664

At any point, if the system does not recognize one of your
commands, you will be prompted to repeat it.
To hear available commands, push the Uconnect® Voice
Commandbutton and say “Help.” You will hear
available commands for the screen displayed.
Uconnect® Voice Commands
The Uconnect® Voice Command system understands
two types of commands. Universal commands are avail-
able at all times. Local commands are available if the
supported radio mode is active.
Start a dialogue by pushing the Uconnect® Voice Com-
mandbutton.
Changing The Volume
1. Start a dialogue by pushing the Voice Command
button.
2. Say a command (e.g., “Help”).
3. Use the ON/OFF VOLUME rotary knob to adjust the
volume to a comfortable level while the Voice Com-
mand system is speaking. Please note the volume
setting for Voice Command is different than the audio
system.
Starting Voice Recognition (VR) Session In
Radio/Player Modes
In this mode, you can say the following commands:
NOTE:The commands can be said on any screen when
a call is not active after pushing the Uconnect® Voice
Commandbutton.
Source
To switch to the audio source, say “Change source to
Disc” for example. This command can be given in any
mode or screen:
•“Track” (#) (to change the track)
3
UNDERSTANDING THE FEATURES OF YOUR VEHICLE 213
Page 230 of 664

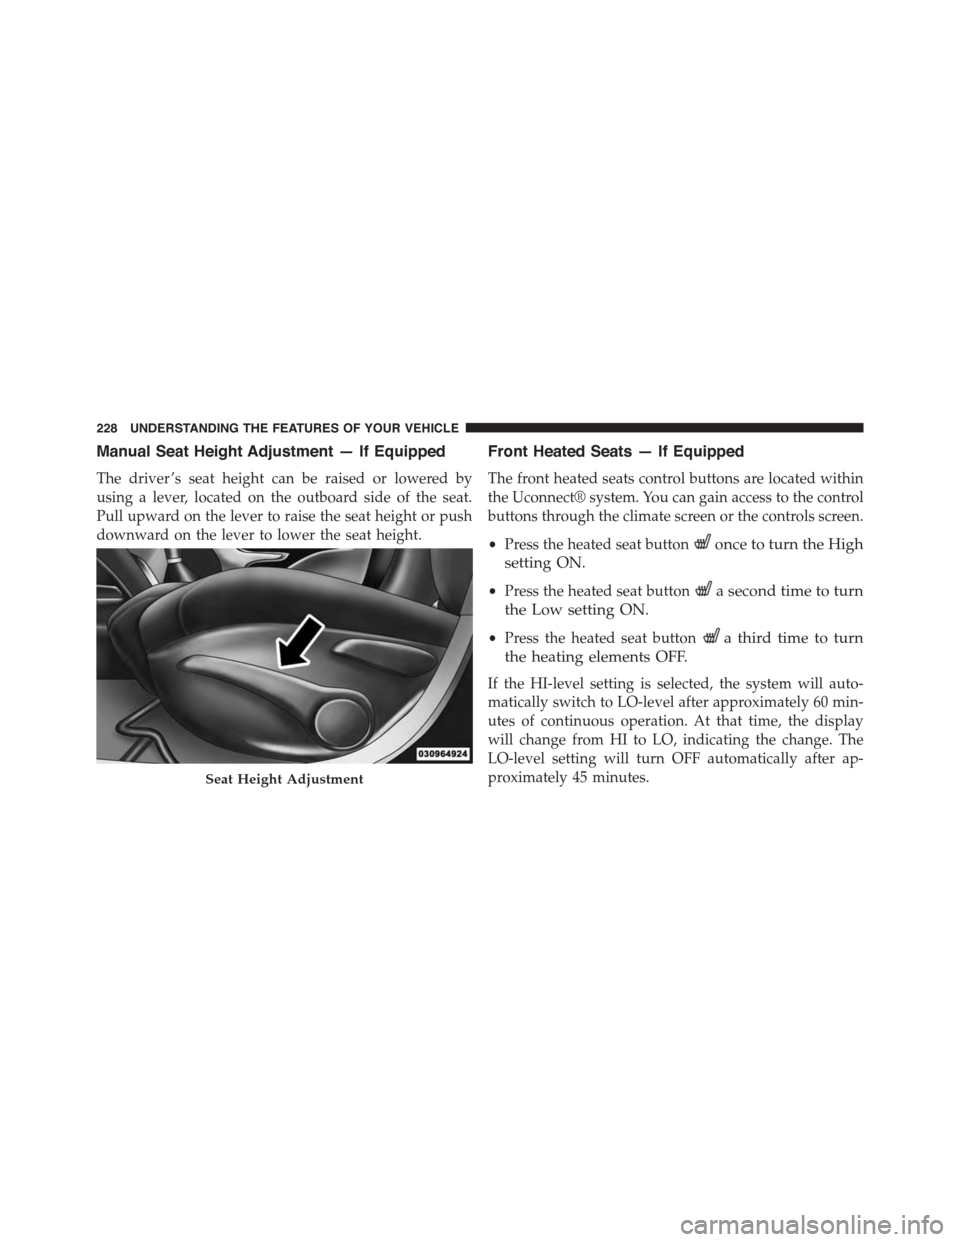
Manual Seat Height Adjustment — If Equipped
The driver ’s seat height can be raised or lowered by
using a lever, located on the outboard side of the seat.
Pull upward on the lever to raise the seat height or push
downward on the lever to lower the seat height.
Front Heated Seats — If Equipped
The front heated seats control buttons are located within
the Uconnect® system. You can gain access to the control
buttons through the climate screen or the controls screen.
•Press the heated seat buttononce to turn the High
setting ON.
•Press the heated seat buttona second time to turn
the Low setting ON.
•Press the heated seat buttona third time to turn
the heating elements OFF.
If the HI-level setting is selected, the system will auto-
matically switch to LO-level after approximately 60 min-
utes of continuous operation. At that time, the display
will change from HI to LO, indicating the change. The
LO-level setting will turn OFF automatically after ap-
proximately 45 minutes.Seat Height Adjustment
228 UNDERSTANDING THE FEATURES OF YOUR VEHICLE
Page 244 of 664
Multifunction Lever
The multifunction lever controls the operation of the turn
signals, headlight beam selection and passing lights. The
multifunction lever is located on the left side of the
steering column.
Turn Signals
Move the multifunction lever up or down and the arrows
on each side of the instrument cluster flash to show
proper operation of the front and rear turn signal lights.
NOTE:
•If either light remains on and does not flash, or there is
a very fast flash rate, check for a defective outside light
bulb. If an indicator fails to light when the lever is
moved, it would suggest that the indicator bulb is
defective.
•A “Turn Signal On” message will appear in the Elec-
tronic Vehicle Information Center (EVIC) or Driver
Information Display (DID) and a continuous chime
will sound if the vehicle is driven more than 1 mile
(1.6 km) with either turn signal on.
Multifunction Lever
242 UNDERSTANDING THE FEATURES OF YOUR VEHICLE
Page 248 of 664
Dome Light Position
Rotate the left dimmer control completely upward to the
second detent to turn on the interior lights. The interior
lights will remain on when the dimmer control is in this
position.
Interior Light Defeat (OFF)
Rotate the left dimmer control to the extreme bottom
“OFF” position. The interior lights will remain off when
the doors are open.
Parade Mode (Daytime Brightness Feature)
Rotate the instrument panel dimmer control upward to
the first detent. This feature brightens all text displays
such as the odometer, Electronic Vehicle Information
Center (EVIC) or Driver Information Display (DID), and
radio when the position lights or headlights are on.
WINDSHIELD WIPERS AND WASHERS
The multifunction lever operates the windshield wipers
and washer when the ignition is placed in the ON/RUN
or ACC position. The multifunction lever is located on
the left side of the steering column.
Windshield Wiper/Washer Control
246 UNDERSTANDING THE FEATURES OF YOUR VEHICLE