Page 104 of 638
Periodic Safety Checks You Should Make Outside
The Vehicle
Tires
Examine tires for excessive tread wear and uneven wear
patterns. Check for stones, nails, glass, or other objects
lodged in the tread or sidewall. Inspect the tread for cuts
and cracks. Inspect sidewalls for cuts, cracks, and bulges.
Check the wheel nuts for tightness. Check the tires
(including spare) for proper cold inflation pressure.
Lights
Have someone observe the operation of brake lights and
exterior lights while you work the controls. Check turn
signal and high beam indicator lights on the instrument
panel.
Door Latches
Check for proper closing, latching, and locking.
Fluid Leaks
Check area under vehicle after overnight parking for fuel,
engine coolant, oil, or other fluid leaks. Also, if gasoline
fumes are detected or if fuel, power steering fluid (if
equipped), or brake fluid leaks are suspected, the cause
should be located and corrected immediately.
102 THINGS TO KNOW BEFORE STARTING YOUR VEHICLE
Page 107 of 638

▫Multifunction Lever...................157
▫Turn Signals.........................158
▫Lane Change Assist...................158
▫High/Low Beam Switch................158
▫Flash-To-Pass........................158
▫Front Map/Reading Lights — If Equipped . . .159
▫Courtesy Lights.......................160
▫Ambient Light — If Equipped............160
▫Interior Lights.......................161
!WINDSHIELD WIPERS AND WASHERS......163
▫Intermittent Wiper System...............163
▫Wiper Operation......................163
▫Windshield Washers...................164
▫Heated Windshield Washer Nozzles........165
▫Mist Feature.........................165
▫Headlights On With Wipers (Available With
Automatic Headlights Only).............166
▫Rain Sensing Wipers — If Equipped........166
!TILT/TELESCOPING STEERING COLUMN . . .168
!POWER TILT/TELESCOPING STEERING
COLUMN — IF EQUIPPED...............169
!HEATED STEERING WHEEL — IF EQUIPPED . .170
!ADJUSTABLE PEDALS — IF EQUIPPED......172
!ELECTRONIC SPEED CONTROL —
IF EQUIPPED.........................174
▫To Activate..........................175
▫To Set A Desired Speed.................175
3
UNDERSTANDING THE FEATURES OF YOUR VEHICLE 105
Page 149 of 638
The memory seat switch is located on the driver ’s door
trim panel. The switch consists of three buttons: The (S)
button, which is used to activate the memory save
function and the (1) and (2) buttons which are used to
recall either of two pre-programmed memory profiles.
Programming The Memory Feature
NOTE:Saving a new memory profile will erase an
existing profile from memory.
To create a new memory profile, perform the following:
1. Place the vehicles ignition to the ON/RUN position.
2. Adjust all memory profile settings to desired prefer-
ences (i.e., seat, side mirror, adjustable pedals [if
equipped], power tilt and telescopic steering column
[if equipped], and radio station presets).
3. Push and release the SET (S) button on the memory
switch.
4. Within five seconds, push and release the MEMORY
button 1 or 2. The Drivers Information Display (DID)
will display which memory position has been set.
Memory Seat Switches
3
UNDERSTANDING THE FEATURES OF YOUR VEHICLE 147
Page 159 of 638
An indicator light in the instrument cluster illuminates
when the fog lights are turned on.
NOTE:The fog lights will operate with the low beam
headlights or parking lights on. However, selecting the
high beam headlights will turn off the fog lights.
Multifunction Lever
The multifunction lever controls the operation of the turn
signals, headlight beam selection and passing lights. The
multifunction lever is located on the left side of the
steering column.
Multifunction Lever
3
UNDERSTANDING THE FEATURES OF YOUR VEHICLE 157
Page 165 of 638

WINDSHIELD WIPERS AND WASHERS
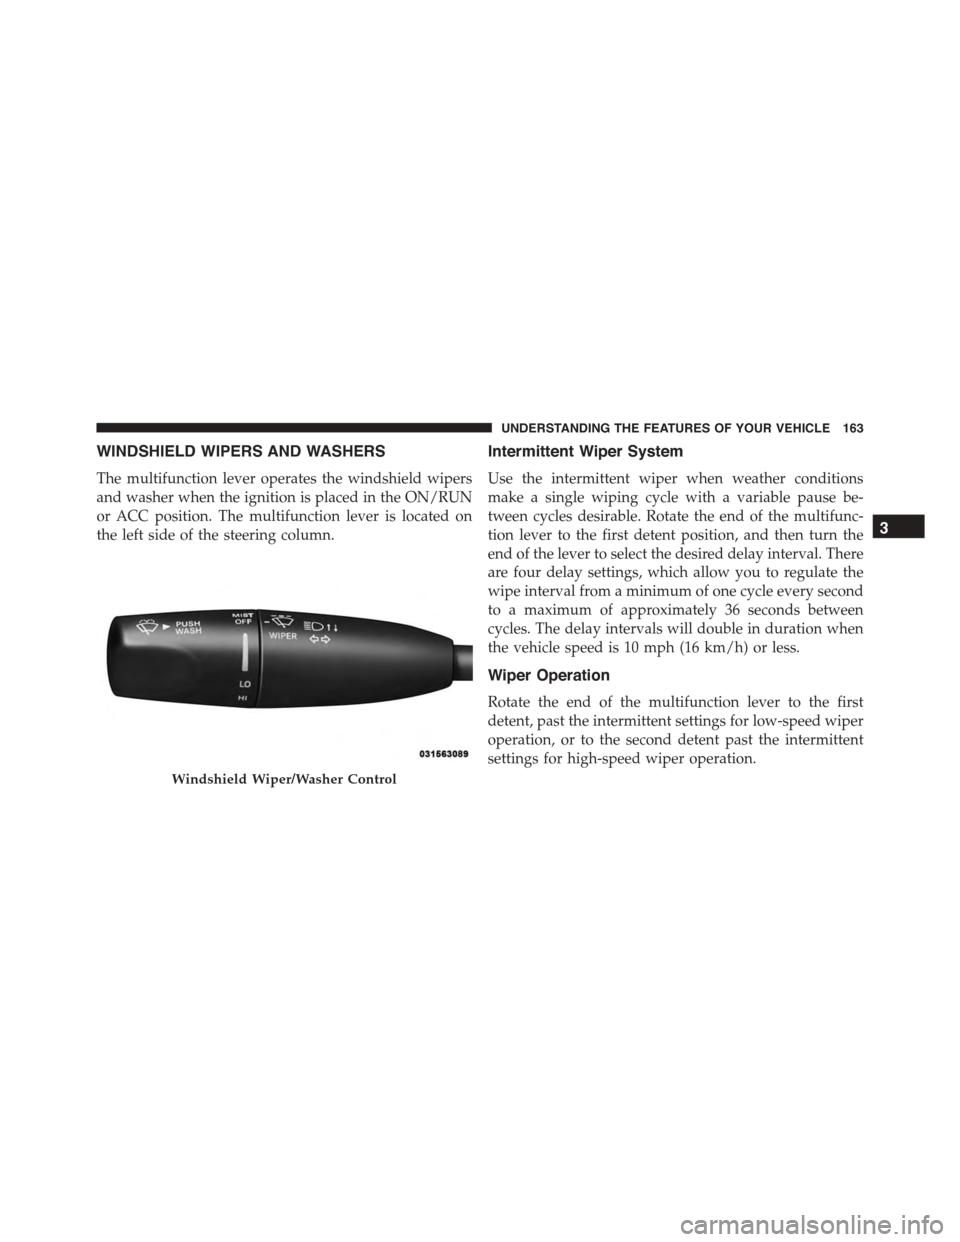
The multifunction lever operates the windshield wipers
and washer when the ignition is placed in the ON/RUN
or ACC position. The multifunction lever is located on
the left side of the steering column.
Intermittent Wiper System
Use the intermittent wiper when weather conditions
make a single wiping cycle with a variable pause be-
tween cycles desirable. Rotate the end of the multifunc-
tion lever to the first detent position, and then turn the
end of the lever to select the desired delay interval. There
are four delay settings, which allow you to regulate the
wipe interval from a minimum of one cycle every second
to a maximum of approximately 36 seconds between
cycles. The delay intervals will double in duration when
the vehicle speed is 10 mph (16 km/h) or less.
Wiper Operation
Rotate the end of the multifunction lever to the first
detent, past the intermittent settings for low-speed wiper
operation, or to the second detent past the intermittent
settings for high-speed wiper operation.
Windshield Wiper/Washer Control
3
UNDERSTANDING THE FEATURES OF YOUR VEHICLE 163
Page 166 of 638

CAUTION!
•Turn the windshield wipers off when driving
through an automatic car wash. Damage to the
windshield wipers may result if the wiper control
is left in any position other than off.
•In cold weather, always turn off the wiper switch
and allow the wipers to return to the “Park” posi-
tion before turning off the engine. If the wiper
switch is left on and the wipers freeze to the
windshield, damage to the wiper motor may occur
when the vehicle is restarted.
•Always remove any buildup of snow that prevents
the windshield wiper blades from returning to the
off position. If the windshield wiper control is
turned off and the blades cannot return to the off
position, damage to the wiper motor may occur.
Windshield Washers
To use the washer, push the multifunction lever inward
(toward the steering column) and hold it for as long as
washer spray is desired.
If you activate the washer while the windshield wiper
control is in the delay range, the wipers will operate for
two wipe cycles after releasing the lever and then resume
the intermittent interval previously selected.
If you activate the washer while the windshield wiper is
turned off, the wipers will operate for three wipe cycles
and then turn off.
164 UNDERSTANDING THE FEATURES OF YOUR VEHICLE
Page 170 of 638
TILT/TELESCOPING STEERING COLUMN
This feature allows you to tilt the steering column
upward or downward. It also allows you to lengthen or
shorten the steering column. The tilt/telescoping lever is
located below the steering wheel at the end of the
steering column.
To unlock the steering column, pull the lever downward.
To tilt the steering column, move the steering wheel
upward or downward as desired. To lengthen or shorten
the steering column, pull the steering wheel outward or
push it inward as desired. To lock the steering column in
position, push the lever upward until fully engaged.
WARNING!
Do not adjust the steering column while driving.
Adjusting the steering column while driving or driv-
ing with the steering column unlocked, could cause
the driver to lose control of the vehicle. Failure to
follow this warning may result in serious injury or
death.
Tilt/Telescoping Control Handle
168 UNDERSTANDING THE FEATURES OF YOUR VEHICLE
Page 171 of 638
POWER TILT/TELESCOPING STEERING COLUMN
— IF EQUIPPED
This feature allows you to tilt the steering column
upward or downward. It also allows you to lengthen or
shorten the steering column. The power tilt/telescoping
steering column lever is located below the multifunction
lever on the steering column.
To tilt the steering column, move the lever up or down as
desired. To lengthen or shorten the steering column, pull
the lever toward you or push the lever away from you as
desired.
Power Tilt/Telescoping Switch
3
UNDERSTANDING THE FEATURES OF YOUR VEHICLE 169