Page 12 of 638

▫Transmitter Battery Replacement...........24
▫General Information....................25
!REMOTE STARTING SYSTEM — IF EQUIPPED . .26
▫How To Use Remote Start................26
!DOOR LOCKS.........................29
▫Manual Door Locks.....................29
▫Power Door Locks.....................31
▫Child-Protection Door Lock System —
Rear Doors..........................32
!KEYLESS ENTER-N-GO™.................34
!WINDOWS...........................39
▫Power Windows.......................39
▫Wind Buffeting.......................43
!TRUNK LOCK AND RELEASE.............43
!TRUNK SAFETY WARNING................44
▫Trunk Emergency Release................45
!OCCUPANT RESTRAINT SYSTEMS..........46
▫Important Safety Precautions..............46
▫Seat Belt Systems......................47
▫Supplemental Restraint System (SRS)........59
▫Child Restraints.......................75
▫Transporting Pets......................96
!ENGINE BREAK-IN RECOMMENDATIONS....96
!SAFETY TIPS..........................97
▫Transporting Passengers..................97
▫Exhaust Gas.........................98
10 THINGS TO KNOW BEFORE STARTING YOUR VEHICLE
Page 25 of 638

If the vehicle is equipped with Passive Entry, refer to
“Keyless Enter-N-Go™” under “Things To Know Before
Starting Your Vehicle” for further information.
Sound Horn With Lock
This feature will cause the horn to chirp when the doors
are locked with the RKE transmitter. This feature can be
turned on or turned off. To change the current setting,
refer to “Uconnect® Settings” in “Understanding Your
Instrument Panel” for further information.
To Unlatch The Trunk
Push the TRUNK button on the RKE transmitter two
times within five seconds to unlatch the trunk.
If the vehicle is equipped with Passive Entry, refer to
“Keyless Enter-N-Go™” under “Things To Know Before
Starting Your Vehicle” for further information.
Using The Panic Alarm
To turn the Panic Alarm feature on or off, push and hold
the PANIC button on the RKE transmitter for at least one
second and release. When the Panic Alarm is activated,
the turn signals will flash, the horn will pulse on and off,
and the interior lights will turn on.
The Panic Alarm will stay on for three minutes unless
you turn it off by either pushing the PANIC button a
second time or drive the vehicle at a speed of 15 MPH
(24 km/h) or greater.
NOTE:
•The interior lights will turn off if you place the ignition
in the ACC or ON/RUN position while the Panic
Alarm is activated. However, the exterior lights and
horn will remain on.
2
THINGS TO KNOW BEFORE STARTING YOUR VEHICLE 23
Page 45 of 638

Wind Buffeting
Wind buffeting can be described as the perception of
pressure on the ears or a helicopter-type sound in the
ears. Your vehicle may exhibit wind buffeting with the
windows down, or the sunroof (if equipped) in certain
open or partially open positions. This is a normal occur-
rence and can be minimized. If the buffeting occurs with
the rear windows open, then open the front and rear
windows together to minimize the buffeting. If the
buffeting occurs with the sunroof open, adjust the sun-
roof opening to minimize the buffeting.
TRUNK LOCK AND RELEASE
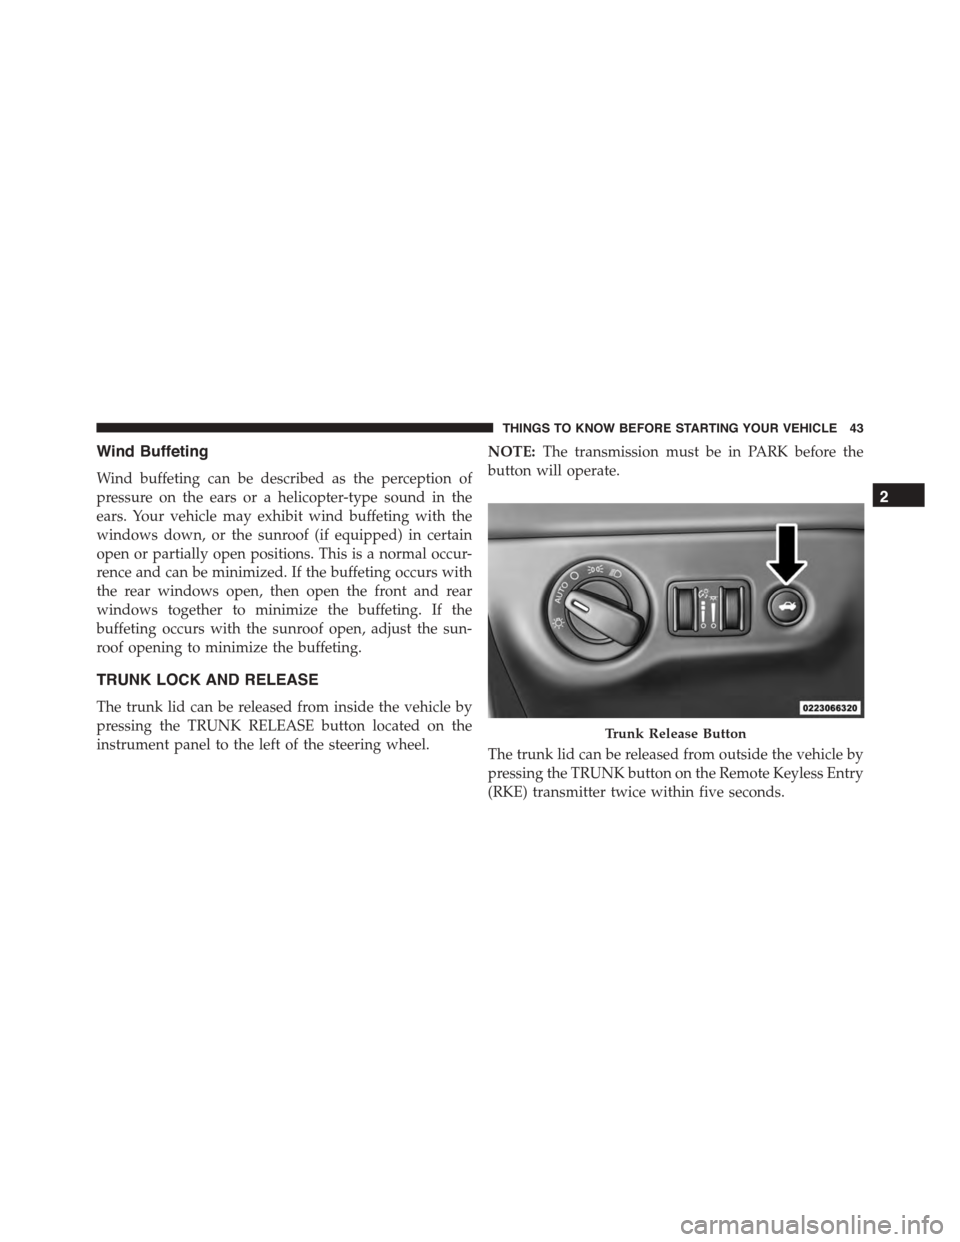
The trunk lid can be released from inside the vehicle by
pressing the TRUNK RELEASE button located on the
instrument panel to the left of the steering wheel.
NOTE:The transmission must be in PARK before the
button will operate.
The trunk lid can be released from outside the vehicle by
pressing the TRUNK button on the Remote Keyless Entry
(RKE) transmitter twice within five seconds.
Trunk Release Button
2
THINGS TO KNOW BEFORE STARTING YOUR VEHICLE 43
Page 47 of 638
Trunk Emergency Release
As a security measure, a Trunk Internal Emergency
Release lever is built into the trunk latching mechanism.
In the event of an individual being locked inside the
trunk, the trunk can be simply opened by pulling on the
glow-in-the-dark handle attached to the trunk latching
mechanism.
Trunk Emergency Internal Release
2
THINGS TO KNOW BEFORE STARTING YOUR VEHICLE 45
Page 262 of 638
INSTRUMENT PANEL FEATURES
1—AirOutlet6—GloveBox2 — Instrument Cluster7 — Power Outlet3—RadioControls—IfEquipped8—IgnitionStart/StopButton4 — Uconnect® System9 — Trunk Release Button5 — Climate Control Hard Controls10 — Headlight Switch
260 UNDERSTANDING YOUR INSTRUMENT PANEL
Page 476 of 638
2. Open the fuel filler door.
NOTE:In certain cold conditions, ice may prevent the
fuel door from opening. If this occurs, lightly push on the
fuel door to break the ice buildup and re-release the fuel
door using the inside release button. Do not pry on the
door.
3. There is no fuel filler cap. A flapper door inside the
pipe seals the system.
4. Insert the fuel nozzle fully into the filler pipe – the
nozzle opens and holds the flapper door while refuel-
ing.
NOTE:Only the correct size nozzle opens the latches
allowing the flapper door to open.
5. Fill the vehicle with fuel – when the fuel nozzle
“clicks” or shuts off the fuel tank is full.
6. Maintain nozzle in filler for 5 seconds to allow nozzle
to drain.
7. Remove the fuel nozzle and close the fuel door.
NOTE:A funnel is provided (located in the trunk in the
spare tire area) to open the flapper door to allow for
emergency refueling with a gas can.
Fuel Filler Door
474 STARTING AND OPERATING
Page 478 of 638
Emergency Fuel Filler Door Release
If you are unable to open the fuel filler door, use the fuel
filler door emergency release.
1. Open the trunk.
2. Remove the access cover (located on the left side inner
trim panel).
Access Cover
476 STARTING AND OPERATING
Page 621 of 638

Brake Assist System.....................424
Traction Control System...................423
Electronic Power Distribution Center (Fuses)......572
Electronic Speed Control (Cruise Control)........174
Electronic Stability Control (ESC)..............425
Emergency Deck Lid Release..................45
Emergency, In Case of
Freeing Vehicle When Stuck................521
Jacking...............................498
Jump Starting..........................517
Overheating...........................495
Towing..............................526
Emergency Trunk Release....................45
Emission Control System Maintenance..........535
Engine.................................534
Air Cleaner...........................543
Block Heater..........................398
Break-In Recommendations.................96
Checking Oil Level......................538
Compartment..........................533
Compartment Identification................533
Coolant (Antifreeze).....................553
Cooling..............................552
Exhaust Gas Caution.....................98
Fails to Start...........................396
Flooded, Starting.......................396
Fuel Requirements......................464
Jump Starting..........................517
Oil . . . . . . . . . . . . . . . . . . . . . . . . . . . . . . . . ..538
Oil Filler Cap..........................541
Oil Selection...........................540
Oil Synthetic..........................542
Overheating...........................495
Starting..............................393
Temperature Gauge......................263
Engine Oil Viscosity.......................541
Engine Oil Viscosity Chart...................541
EnhancedAccident Response Feature............70
10
INDEX 619