2015 DODGE CHALLENGER radio controls
[x] Cancel search: radio controlsPage 3 of 220

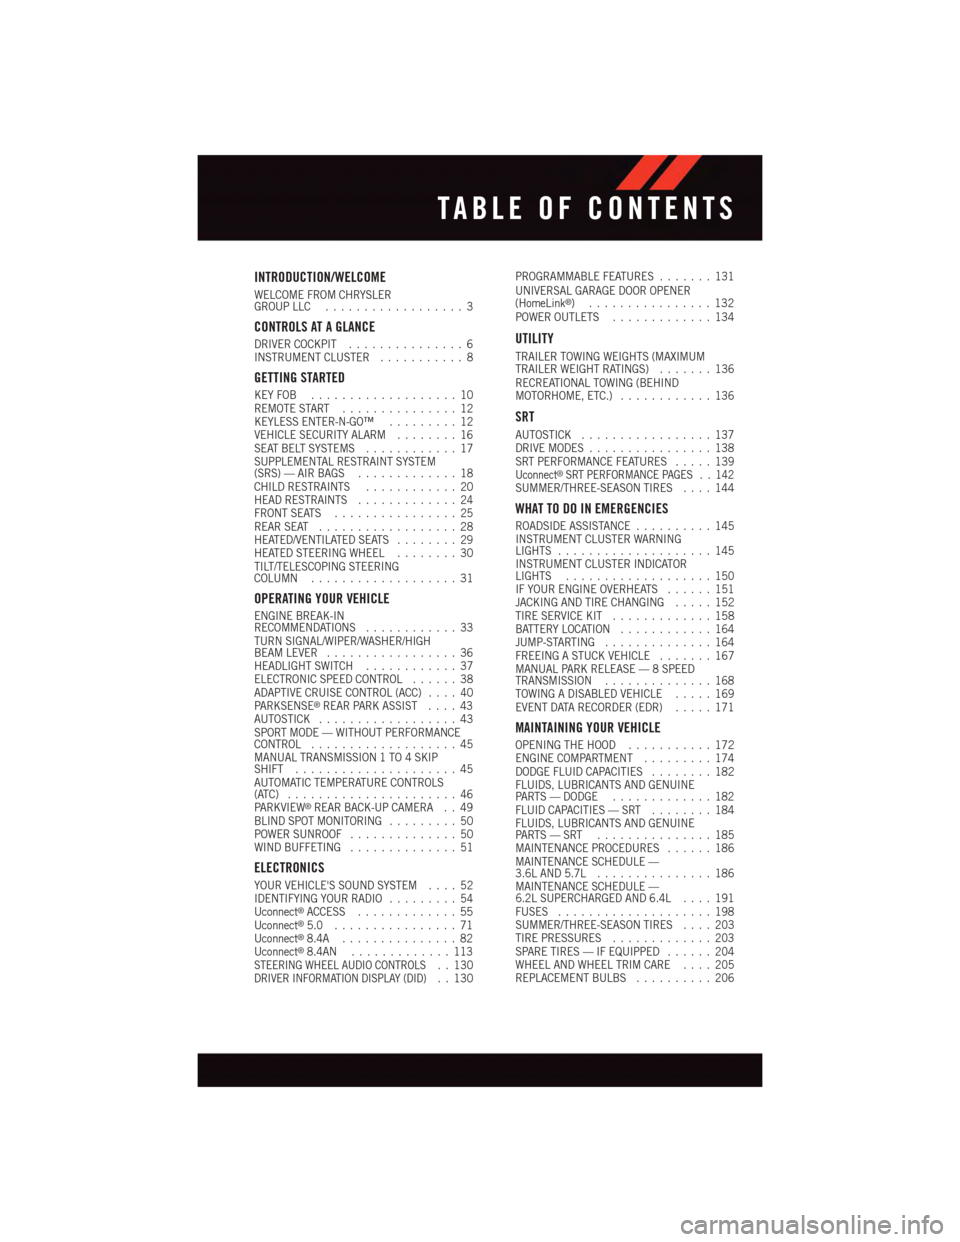
INTRODUCTION/WELCOME
WELCOME FROM CHRYSLERGROUP LLC..................3
CONTROLS AT A GLANCE
DRIVER COCKPIT...............6INSTRUMENT CLUSTER...........8
GETTING STARTED
KEY FOB . . . . . . . . . . . . . . . . . . . 10REMOTE START . . . . . . . . . . . . . . . 12KEYLESS ENTER-N-GO™.........12VEHICLE SECURITY ALARM........16SEAT BELT SYSTEMS............17SUPPLEMENTAL RESTRAINT SYSTEM(SRS) — AIR BAGS.............18CHILD RESTRAINTS............20HEAD RESTRAINTS.............24FRONT SEATS................25REAR SEAT..................28HEATED/VENTILATED SEATS........29HEATED STEERING WHEEL........30TILT/TELESCOPING STEERINGCOLUMN...................31
OPERATING YOUR VEHICLE
ENGINE BREAK-INRECOMMENDATIONS............33TURN SIGNAL/WIPER/WASHER/HIGHBEAM LEVER.................36HEADLIGHT SWITCH............37ELECTRONIC SPEED CONTROL......38ADAPTIVE CRUISE CONTROL (ACC)....40PA R K S E N S E®REAR PARK ASSIST....43AUTOSTICK..................43SPORT MODE — WITHOUT PERFORMANCECONTROL...................45MANUAL TRANSMISSION 1 TO 4 SKIPSHIFT.....................45AUTOMATIC TEMPERATURE CONTROLS(ATC) . . . . . . . . . . . . . . . . . . . . . . 46PA R K V I E W®REAR BACK-UP CAMERA . . 49BLIND SPOT MONITORING.........50POWER SUNROOF..............50WIND BUFFETING..............51
ELECTRONICS
YOUR VEHICLE'S SOUND SYSTEM....52IDENTIFYING YOUR RADIO.........54Uconnect®ACCESS.............55Uconnect®5.0 . . . . . . . . . . . . . . . . 71Uconnect®8.4A...............82Uconnect®8.4AN.............113STEERING WHEEL AUDIO CONTROLS..130DRIVER INFORMATION DISPLAY (DID)..130
PROGRAMMABLE FEATURES.......131UNIVERSAL GARAGE DOOR OPENER(HomeLink®)................132POWER OUTLETS.............134
UTILITY
TRAILER TOWING WEIGHTS (MAXIMUMTRAILER WEIGHT RATINGS).......136RECREATIONAL TOWING (BEHINDMOTORHOME, ETC.)............136
SRT
AUTOSTICK.................137DRIVE MODES................138SRT PERFORMANCE FEATURES.....139Uconnect®SRT PERFORMANCE PAGES . . 142SUMMER/THREE-SEASON TIRES....144
WHAT TO DO IN EMERGENCIES
ROADSIDE ASSISTANCE..........145INSTRUMENT CLUSTER WARNINGLIGHTS....................145INSTRUMENT CLUSTER INDICATORLIGHTS...................150IF YOUR ENGINE OVERHEATS......151JACKING AND TIRE CHANGING.....152TIRE SERVICE KIT.............158BATTERY LOCATION............164JUMP-STARTING..............164FREEING A STUCK VEHICLE.......167MANUAL PARK RELEASE — 8 SPEEDTRANSMISSION..............168TOWING A DISABLED VEHICLE.....169EVENT DATA RECORDER (EDR).....171
MAINTAINING YOUR VEHICLE
OPENING THE HOOD...........172ENGINE COMPARTMENT.........174DODGE FLUID CAPACITIES........182FLUIDS, LUBRICANTS AND GENUINEPA RT S — D O D G E.............182FLUID CAPACITIES — SRT........184FLUIDS, LUBRICANTS AND GENUINEPA RT S — S RT . . . . . . . . . . . . . . . 1 8 5MAINTENANCE PROCEDURES......186MAINTENANCE SCHEDULE —3.6L AND 5.7L...............186MAINTENANCE SCHEDULE —6.2L SUPERCHARGED AND 6.4L....191FUSES....................198SUMMER/THREE-SEASON TIRES....203TIRE PRESSURES.............203SPARE TIRES — IF EQUIPPED......204WHEEL AND WHEEL TRIM CARE....205REPLACEMENT BULBS..........206
TABLE OF CONTENTS
Page 8 of 220

DRIVER COCKPIT
1. Headlight Switch pg. 37
2. Driver Information Display (DID) Controls pg. 130
3. Instrument Cluster pg. 8
4. Speed Control pg. 38
5. Adaptive Cruise Control pg. 40
6. Engine Start/Stop Button pg. 14
7. Identify Your Uconnect®Radio pg. 54
8. Glove Compartment
9. Power Outlet pg. 134
CONTROLS AT A GLANCE
6
Page 84 of 220

Uconnect® 8.4A
Uconnect® 8.4A — If Equipped
At A Glance
Displaying The Time
•Ifthetimeisnotcurrentlydisplayedontheradioorplayermainpage,pressthe
“Controls” button on the touchscreen or the “Apps” button on the touchscreen, then
the “Settings” button on the touchscreen. In the Settings list, press the “Clock” button
on the touchscreen.
Setting The Time
Model 8.4AN synchronizes time automatically via GPS, so it should not require any time
adjustment. If you do need to set the time manually, follow the instructions below for
Model 8.4A.
1. Turn the unit on, then press the “Time Display” at the top of the screen. Press “Yes.”
Uconnect® 8.4A
1—StatusBar2—MenuBar3—Uconnect®Apps Button4—Uconnect®Phone Button
5—ClimateButton6—ControlsButton7—MediaButton8—RadioButton
ELECTRONICS
82
Page 85 of 220

NOTE:
If the time is not displayed at the top of the screen, press the “Controls” or the “Apps”
button on the touchscreen, then the “Settings” button on the touchscreen. In the Settings
screen, press the “Clock” button on the touchscreen.
2. Press “+” or “–” next to Set Time Hours and Set Time Minutes to adjust the time.
3. If these features are not available, uncheck the Sync with GPS box.
4. Press “X” to save your settings and exit out of the Clock Setting screen.
Audio Settings
1. Press the “Media” or “Radio” button on the touchscreen.
2. Press the “Audio” button on the touchscreen to activate the Audio settings screen to
adjust Balance/Fade, Equalizer and Speed Adjusted Volume.
3. You can return to the Radio screen by pressing the “X” located at the top right.
Balance/Fade
1. Press the “Media” or “Radio” button on the touchscreen.
2. Press the “Audio” button on the touchscreen to activate the Audio settings screen to
adjust Balance/Fade, Equalizer and Speed Adjusted Volume.
3. Press the “Balance/Fade” button on the touchscreen to Balance audio between the
front speakers or fade the audio between the rear and front speakers.
4. Pressing the “Front,” “Rear,” “Left” or “Right” button on the touchscreens or press
and drag the Speaker Icon to adjust the Balance/Fade.
Equalizer
1. Press the “Media” or “Radio” button on the touchscreen.
2. Press the “Audio” button on the touchscreen to activate the Audio settings screen to
adjust Balance/Fade, Equalizer and Speed Adjusted Volume.
3. Press the “Equalizer” button on the touchscreen to activate the Equalizer screen.
4. Press the “+” or “–” button on the touchscreens, or by pressing and dragging over the
“level bar” for each of the equalizer bands. The level value, which spans between plus
or minus 9, is displayed at the bottom of each of the Bands.
Speed Adjusted Volume
1. Press the “Media” or “Radio” button on the touchscreen.
2. Press the “Audio” button on the touchscreen to activate the Audio settings screen to
adjust Balance/Fade, Equalizer and Speed Adjusted Volume.
3. Press the “Speed Adjusted Volume” button on the touchscreen to activate the Speed
Adjusted Volume screen. The Speed Adjusted Volume is adjusted by pressing the
“volume level” indicator. This alters the automatic adjustment of the audio volume
with variation to vehicle speed.
ELECTRONICS
83
Page 88 of 220

Jump
Automatically tells you when Traffic & Weather for a favorite city is available, and gives you
the option to switch to that channel.
•Press“Jump”toactivatethefeature.AfterlisteningtoTrafficandWeather,press
“Jump” again to return to the previous channel.
Fav
Activates the favorites menu. You can add up to 50 favorite artists or songs.
•JustpressAddFavArtistorAddFavSongwhilethesongisplaying.Youwillthenbe
alerted any time one of these songs, or works by these artists, is playing on other
SiriusXM channels.
SiriusXM Parental Controls
Yo u c a n s k i p o r h i d e c e r t a i n c h a n n e l s f r o m v i e w i f y o u d o n o t w a n t a c c e s s t o t h e m .
•Pressthe“More”buttononthetouchscreen,thenthe“Settings”buttononthe
touchscreen, next press the “Sirius Setup” button on the touchscreen, then select
“Channel Skip”. Press the box, check-mark, next to the channel you want skipped.
They will not show up in normal usage.
SiriusXM also offers the option to permanently block selected channels. Call
(1-888-601-6297 for U.S. customers, 1-877-438-9677 for Canadian customers) and
request the Family-Friendly Package.
Browse
Lets you browse the SiriusXM channel listing or Genre listing. Favorites, Game Zone,
Weather and Jump settings also provide a way to browse the SiriusXM channel list.
Browse Sub-Menu Sub-Menu Description
AllShows the channel listing.
GenreProvides a list of all genres, and lets you jump to a channel within theselected genre.
PresetsLets you scroll the list of Preset satellite channels. Press the channel, orpress Enter on the Tune knob, to go to that channel. Press the trash canicon to delete a preset. Your presets are also shown at the top of the mainSatellite Radio screen.
Favorites Lets you manage artists and songs in the Favorites list and configureAlert Settings to let you know when favorite songs or artists are playing onother channels. Also, view a list of channels airing any of your Favorites.
Game Zone Provides alerts when your favorite sports teams are starting a game whichis being aired on other SiriusXM channels, or when their game score isannounced. You can select and manage your Teams list here, andconfigure alerts.
JumpLets you select your favorite cities for Traffic & Weather information,which is used by the Jump feature on the main satellite radio screen.
ELECTRONICS
86
Page 89 of 220

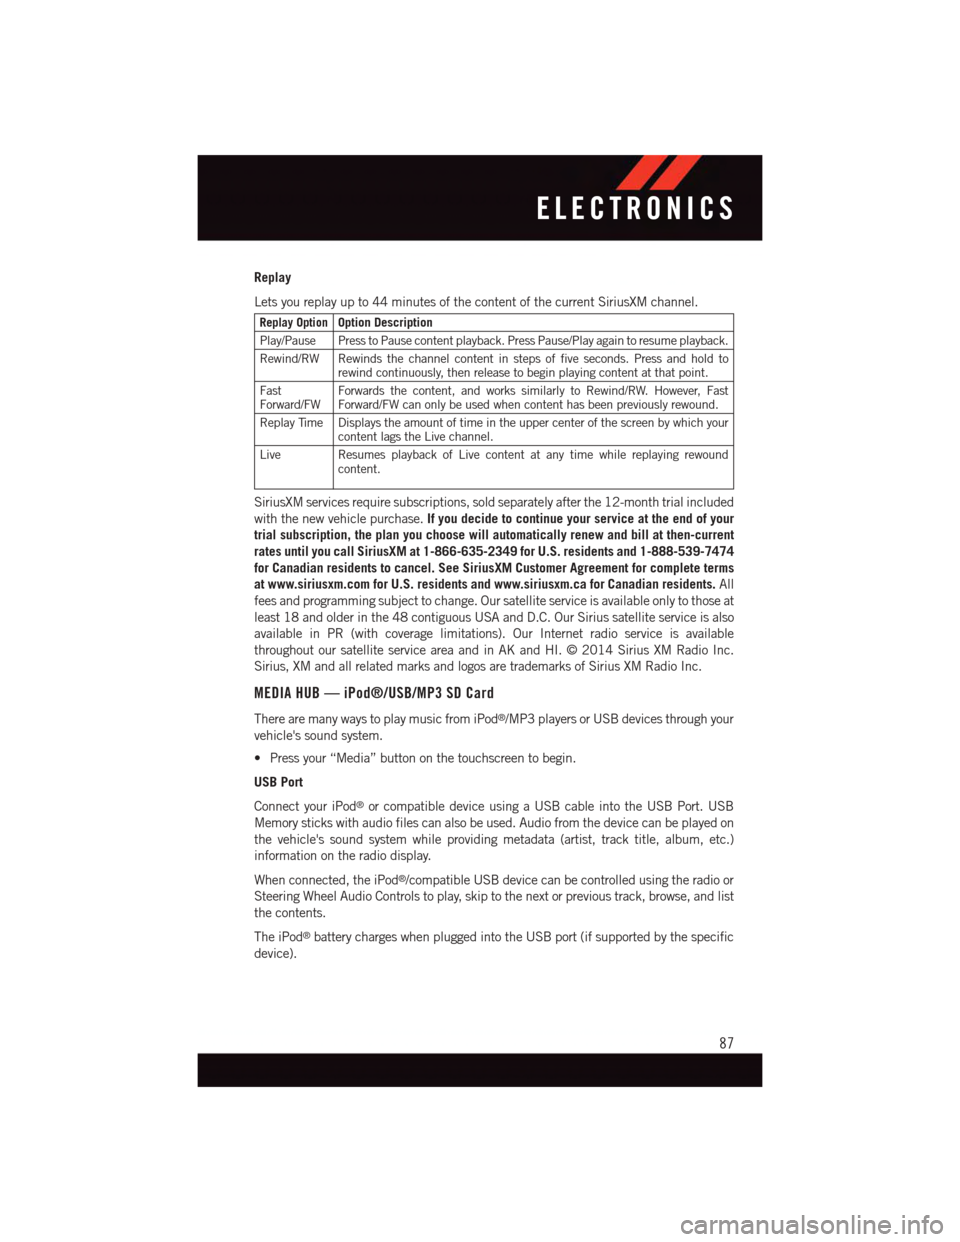
Replay
Lets you replay up to 44 minutes of the content of the current SiriusXM channel.
Replay OptionOption Description
Play/Pause Press to Pause content playback. Press Pause/Play again to resume playback.
Rewind/RW Rewinds the channel content in steps of five seconds. Press and hold torewind continuously, then release to begin playing content at that point.
FastForward/FWForwards the content, and works similarly to Rewind/RW. However, FastForward/FW can only be used when content has been previously rewound.
Replay Time Displays the amount of time in the upper center of the screen by which yourcontent lags the Live channel.
Live Resumes playback of Live content at any time while replaying rewoundcontent.
SiriusXM services require subscriptions, sold separately after the 12-month trial included
with the new vehicle purchase.If you decide to continue your service at the end of your
trial subscription, the plan you choose will automatically renew and bill at then-current
rates until you call SiriusXM at 1-866-635-2349 for U.S. residents and 1-888-539-7474
for Canadian residents to cancel. See SiriusXM Customer Agreement for complete terms
at www.siriusxm.com for U.S. residents and www.siriusxm.ca for Canadian residents.All
fees and programming subject to change. Our satellite service is available only to those at
least 18 and older in the 48 contiguous USA and D.C. Our Sirius satellite service is also
available in PR (with coverage limitations). Our Internet radio service is available
throughout our satellite service area and in AK and HI. © 2014 Sirius XM Radio Inc.
Sirius, XM and all related marks and logos are trademarks of Sirius XM Radio Inc.
MEDIA HUB — iPod®/USB/MP3 SD Card
There are many ways to play music from iPod®/MP3 players or USB devices through your
vehicle's sound system.
•Pressyour“Media”buttononthetouchscreentobegin.
USB Port
Connect your iPod®or compatible device using a USB cable into the USB Port. USB
Memory sticks with audio files can also be used. Audio from the device can be played on
the vehicle's sound system while providing metadata (artist, track title, album, etc.)
information on the radio display.
When connected, the iPod®/compatible USB device can be controlled using the radio or
Steering Wheel Audio Controls to play, skip to the next or previous track, browse, and list
the contents.
The iPod®battery charges when plugged into the USB port (if supported by the specific
device).
ELECTRONICS
87
Page 115 of 220

Uconnect® 8.4AN
Uconnect® 8.4AN — If Equipped
At A Glance
Displaying The Time
•If the time is not currently displayed on the radio or player main page, press the “Controls”
button on the touchscreen or the “Apps” button on the touchscreen, then the “Settings”
button on the touchscreen. In the Settings list, press the “Clock” button on the touchscreen.
Uconnect® 8.4AN
1—StatusBar2—ViewSmallNavigationMap3—HDRadioAvailable4—Uconnect®Apps Button5—Uconnect®Phone Button
6—Uconnect®Navigation Button7—ClimateButton8—ControlsButton9—MediaButton10 — Radio Button
ELECTRONICS
113
Page 116 of 220

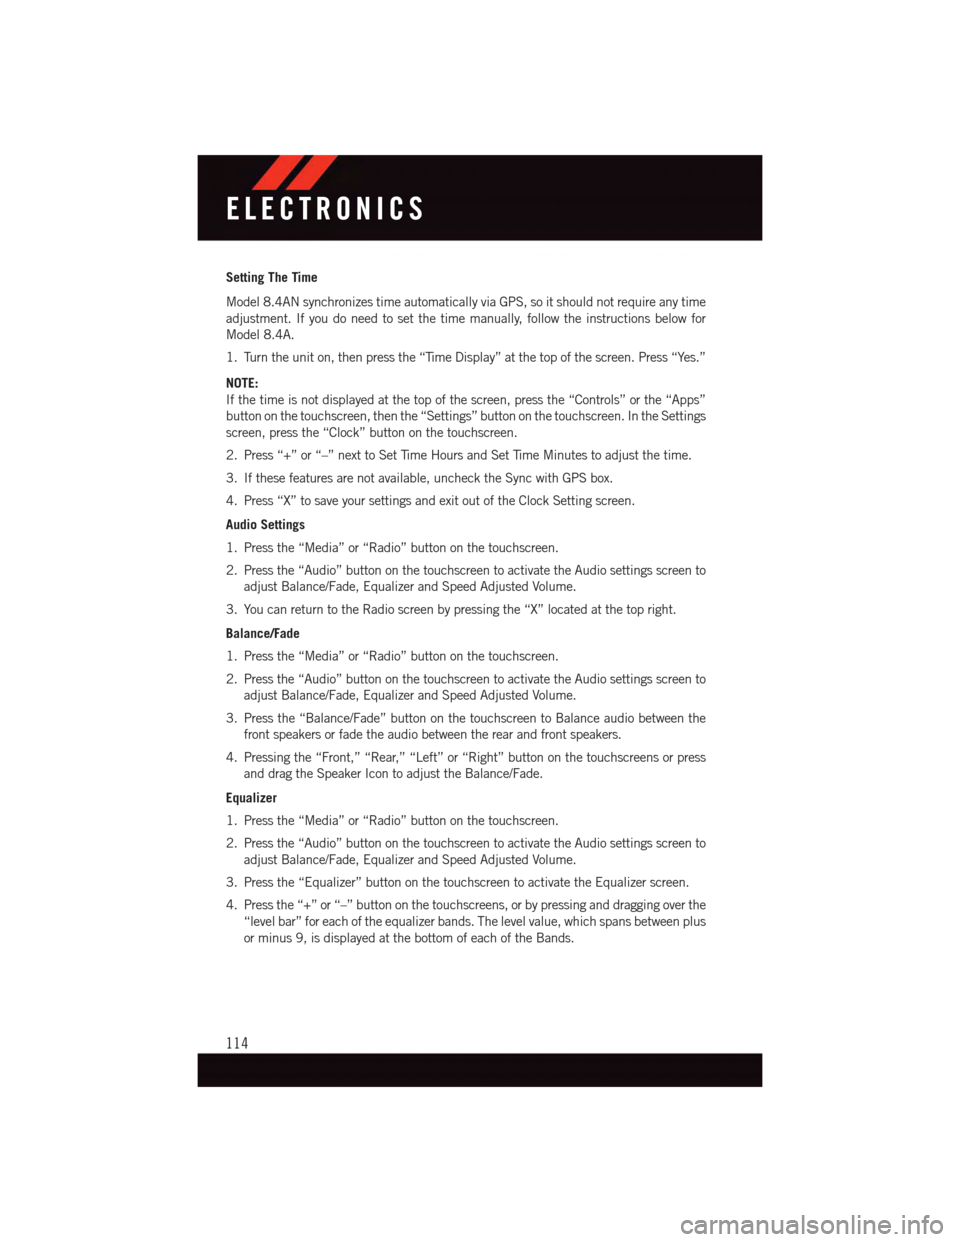
Setting The Time
Model 8.4AN synchronizes time automatically via GPS, so it should not require any time
adjustment. If you do need to set the time manually, follow the instructions below for
Model 8.4A.
1. Turn the unit on, then press the “Time Display” at the top of the screen. Press “Yes.”
NOTE:
If the time is not displayed at the top of the screen, press the “Controls” or the “Apps”
button on the touchscreen, then the “Settings” button on the touchscreen. In the Settings
screen, press the “Clock” button on the touchscreen.
2. Press “+” or “–” next to Set Time Hours and Set Time Minutes to adjust the time.
3. If these features are not available, uncheck the Sync with GPS box.
4. Press “X” to save your settings and exit out of the Clock Setting screen.
Audio Settings
1. Press the “Media” or “Radio” button on the touchscreen.
2. Press the “Audio” button on the touchscreen to activate the Audio settings screen to
adjust Balance/Fade, Equalizer and Speed Adjusted Volume.
3. You can return to the Radio screen by pressing the “X” located at the top right.
Balance/Fade
1. Press the “Media” or “Radio” button on the touchscreen.
2. Press the “Audio” button on the touchscreen to activate the Audio settings screen to
adjust Balance/Fade, Equalizer and Speed Adjusted Volume.
3. Press the “Balance/Fade” button on the touchscreen to Balance audio between the
front speakers or fade the audio between the rear and front speakers.
4. Pressing the “Front,” “Rear,” “Left” or “Right” button on the touchscreens or press
and drag the Speaker Icon to adjust the Balance/Fade.
Equalizer
1. Press the “Media” or “Radio” button on the touchscreen.
2. Press the “Audio” button on the touchscreen to activate the Audio settings screen to
adjust Balance/Fade, Equalizer and Speed Adjusted Volume.
3. Press the “Equalizer” button on the touchscreen to activate the Equalizer screen.
4. Press the “+” or “–” button on the touchscreens, or by pressing and dragging over the
“level bar” for each of the equalizer bands. The level value, which spans between plus
or minus 9, is displayed at the bottom of each of the Bands.
ELECTRONICS
114