2015 DODGE CHALLENGER radio
[x] Cancel search: radioPage 129 of 220
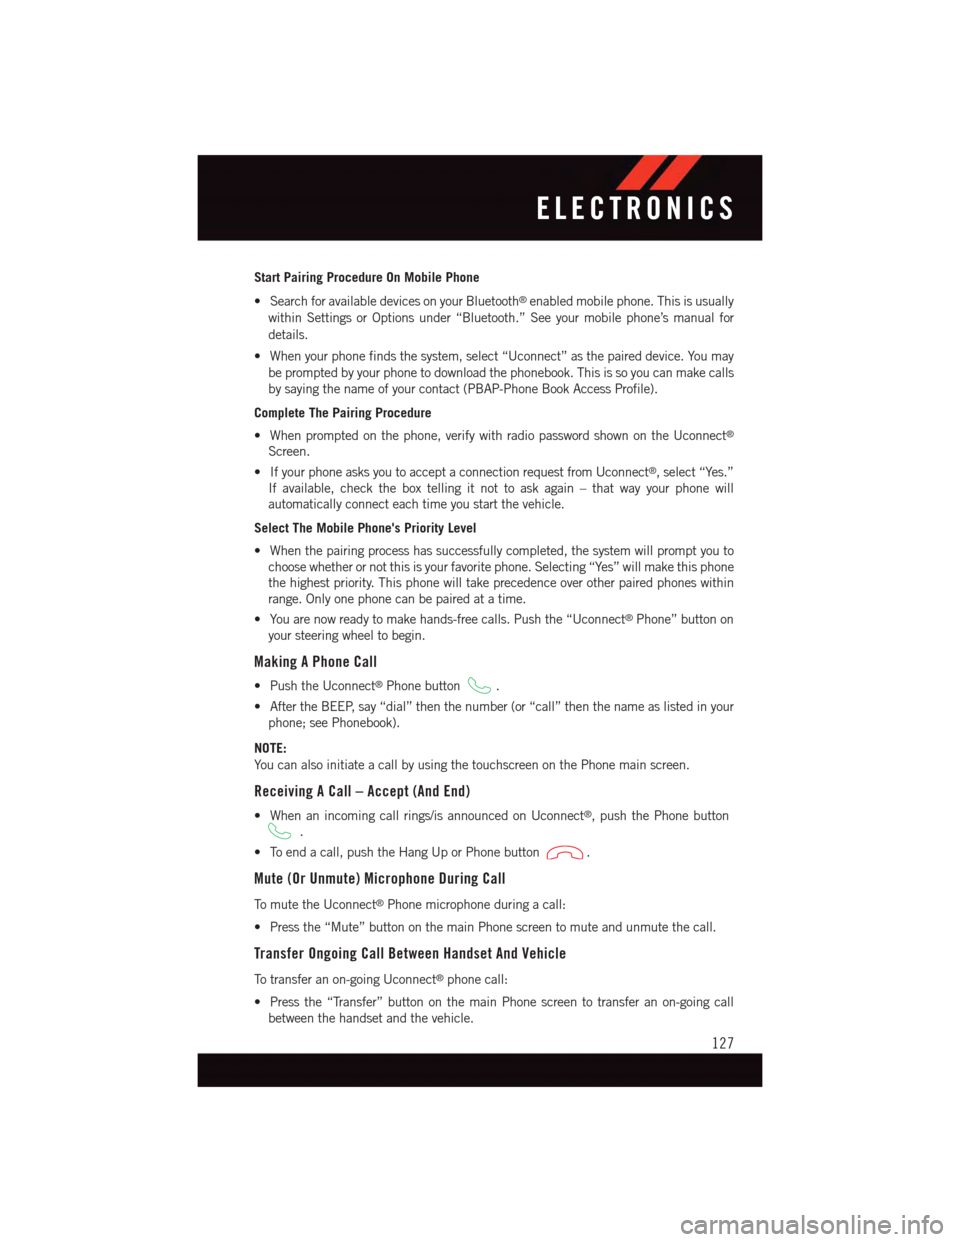
Start Pairing Procedure On Mobile Phone
•SearchforavailabledevicesonyourBluetooth®enabled mobile phone. This is usually
within Settings or Options under “Bluetooth.” See your mobile phone’s manual for
details.
•Whenyourphonefindsthesystem,select“Uconnect”asthepaireddevice.Youmay
be prompted by your phone to download the phonebook. This is so you can make calls
by saying the name of your contact (PBAP-Phone Book Access Profile).
Complete The Pairing Procedure
•Whenpromptedonthephone,verifywithradiopasswordshownontheUconnect®
Screen.
•IfyourphoneasksyoutoacceptaconnectionrequestfromUconnect®,select“Yes.”
If available, check the box telling it not to ask again – that way your phone will
automatically connect each time you start the vehicle.
Select The Mobile Phone's Priority Level
•Whenthepairingprocesshassuccessfullycompleted,thesystemwillpromptyouto
choose whether or not this is your favorite phone. Selecting “Yes” will make this phone
the highest priority. This phone will take precedence over other paired phones within
range. Only one phone can be paired at a time.
•Youarenowreadytomakehands-freecalls.Pushthe“Uconnect®Phone” button on
your steering wheel to begin.
Making A Phone Call
•PushtheUconnect®Phone button.
•AftertheBEEP,say“dial”thenthenumber(or“call”thenthenameaslistedinyour
phone; see Phonebook).
NOTE:
Yo u c a n a l s o i n i t i a t e a c a l l b y u s i n g t h e t o u c h s c r e e n o n t h e P h o n e m a i n s c r e e n .
Receiving A Call – Accept (And End)
•Whenanincomingcallrings/isannouncedonUconnect®,pushthePhonebutton
.
•Toendacall,pushtheHangUporPhonebutton.
Mute (Or Unmute) Microphone During Call
To m u t e t h e U c o n n e c t®Phone microphone during a call:
•Pressthe“Mute”buttononthemainPhonescreentomuteandunmutethecall.
Transfer Ongoing Call Between Handset And Vehicle
To t r a n s f e r a n o n - g o i n g U c o n n e c t®phone call:
•Pressthe“Transfer”buttononthemainPhonescreentotransferanon-goingcall
between the handset and the vehicle.
ELECTRONICS
127
Page 130 of 220
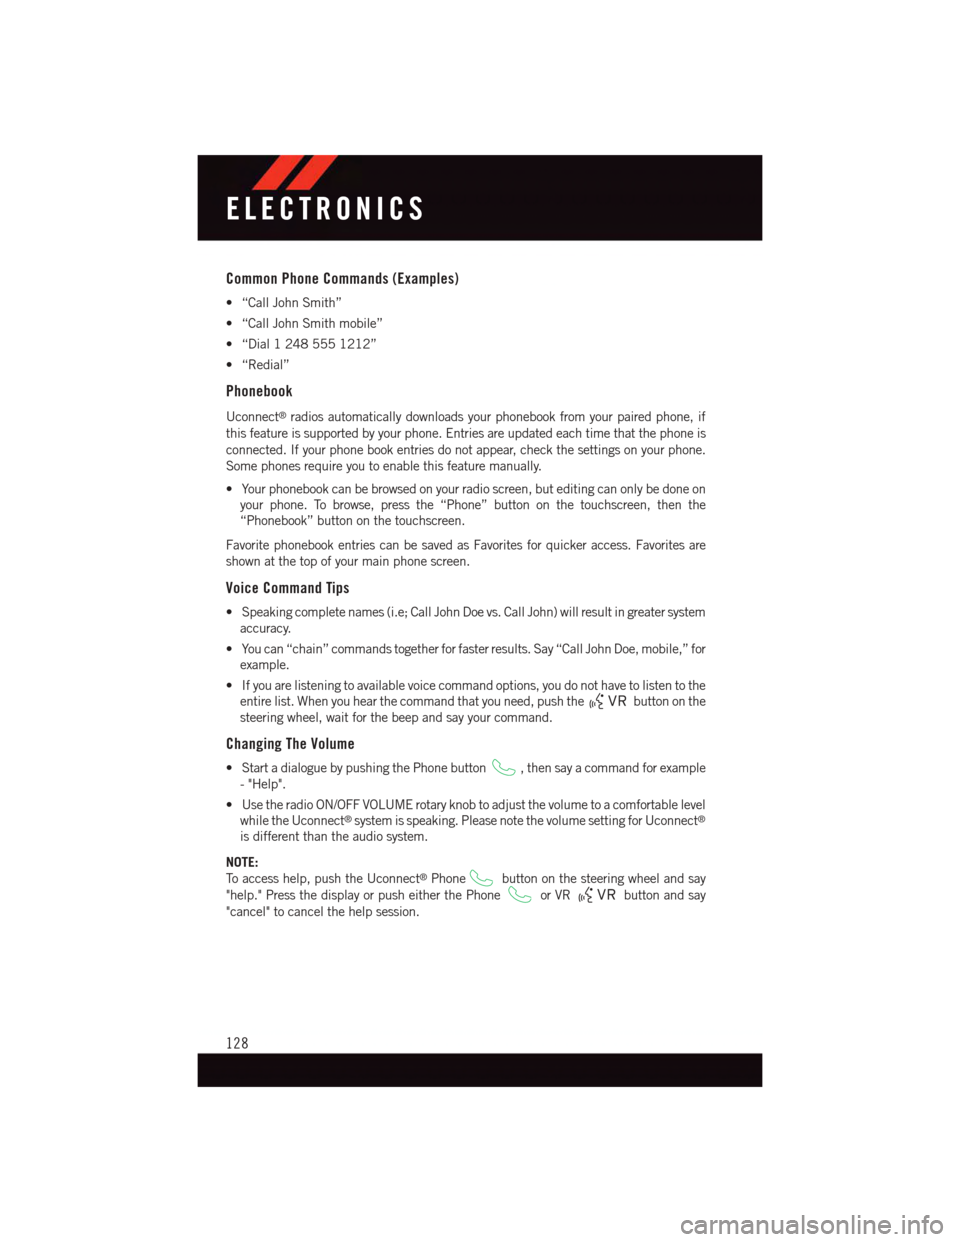
Common Phone Commands (Examples)
•“CallJohnSmith”
•“CallJohnSmithmobile”
•“Dial12485551212”
•“Redial”
Phonebook
Uconnect®radios automatically downloads your phonebook from your paired phone, if
this feature is supported by your phone. Entries are updated each time that the phone is
connected. If your phone book entries do not appear, check the settings on your phone.
Some phones require you to enable this feature manually.
•Yourphonebookcanbebrowsedonyourradioscreen,buteditingcanonlybedoneon
your phone. To browse, press the “Phone” button on the touchscreen, then the
“Phonebook” button on the touchscreen.
Favorite phonebook entries can be saved as Favorites for quicker access. Favorites are
shown at the top of your main phone screen.
Voice Command Tips
•Speakingcompletenames(i.e;CallJohnDoevs.CallJohn)willresultingreatersystem
accuracy.
•Youcan“chain”commandstogetherforfasterresults.Say“CallJohnDoe,mobile,”for
example.
•Ifyouarelisteningtoavailablevoicecommandoptions,youdonothavetolistentothe
entire list. When you hear the command that you need, push thebutton on the
steering wheel, wait for the beep and say your command.
Changing The Volume
•StartadialoguebypushingthePhonebutton,thensayacommandforexample
-"Help".
•UsetheradioON/OFFVOLUMErotaryknobtoadjustthevolumetoacomfortablelevel
while the Uconnect®system is speaking. Please note the volume setting for Uconnect®
is different than the audio system.
NOTE:
To a c c e s s h e l p , p u s h t h e U c o n n e c t®Phonebutton on the steering wheel and say
"help." Press the display or push either the Phoneor VRbutton and say
"cancel" to cancel the help session.
ELECTRONICS
128
Page 132 of 220
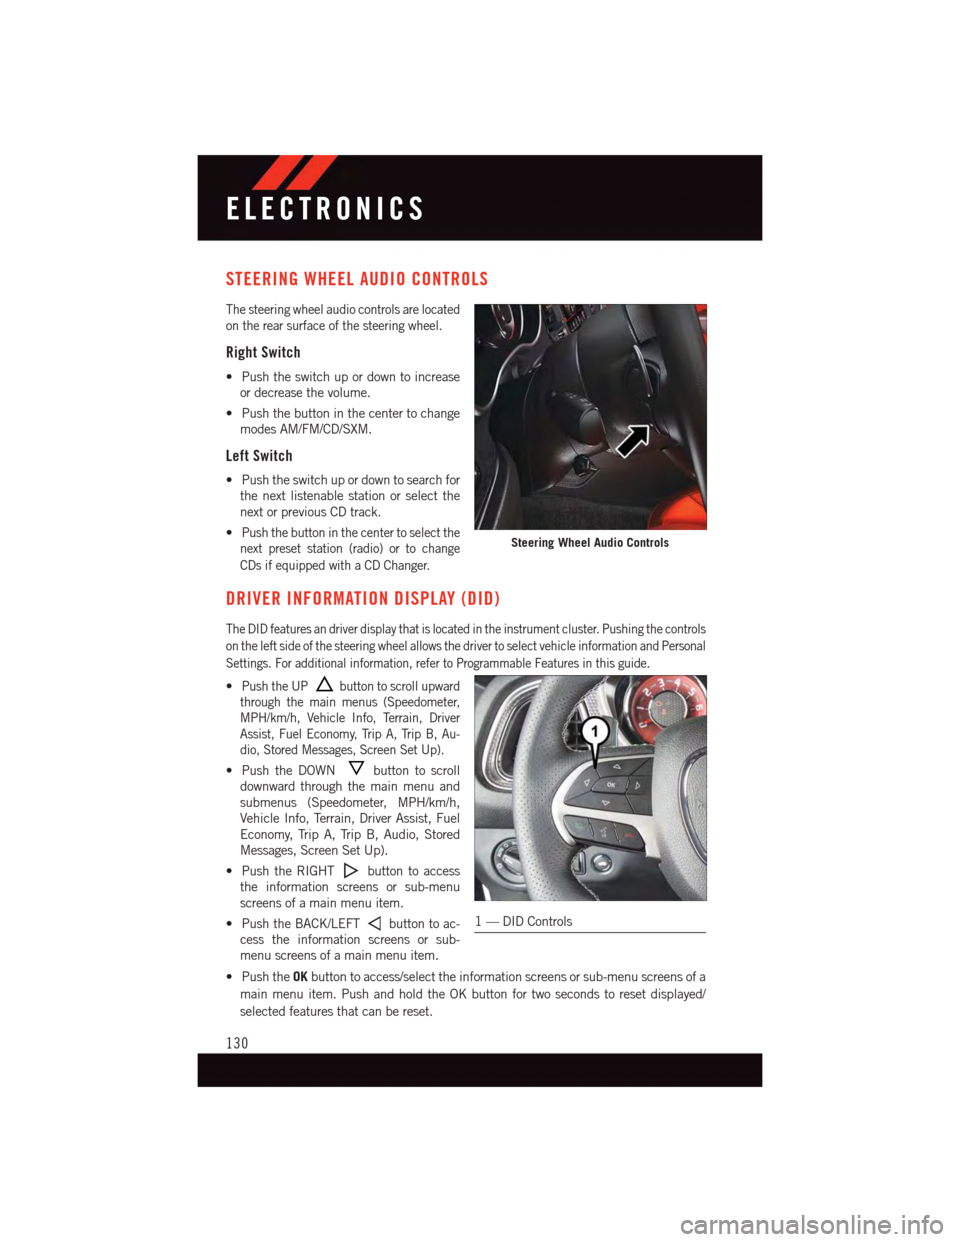
STEERING WHEEL AUDIO CONTROLS
The steering wheel audio controls are located
on the rear surface of the steering wheel.
Right Switch
•Pushtheswitchupordowntoincrease
or decrease the volume.
•Pushthebuttoninthecentertochange
modes AM/FM/CD/SXM.
Left Switch
•Pushtheswitchupordowntosearchfor
the next listenable station or select the
next or previous CD track.
•Push the button in the center to select the
next preset station (radio) or to change
CDs if equipped with a CD Changer.
DRIVER INFORMATION DISPLAY (DID)
The DID features an driver display that is located in the instrument cluster. Pushing the controls
on the left side of the steering wheel allows the driver to select vehicle information and Personal
Settings. For additional information, refer to Programmable Features in this guide.
•Push the UPbutton to scroll upward
through the main menus (Speedometer,
MPH/km/h, Vehicle Info, Terrain, Driver
Assist, Fuel Economy, Trip A, Trip B, Au-
dio, Stored Messages, Screen Set Up).
•PushtheDOWNbutton to scroll
downward through the main menu and
submenus (Speedometer, MPH/km/h,
Vehicle Info, Terrain, Driver Assist, Fuel
Economy, Trip A, Trip B, Audio, Stored
Messages, Screen Set Up).
•PushtheRIGHTbutton to access
the information screens or sub-menu
screens of a main menu item.
•PushtheBACK/LEFTbutton to ac-
cess the information screens or sub-
menu screens of a main menu item.
•PushtheOKbutton to access/select the information screens or sub-menu screens of a
main menu item. Push and hold the OK button for two seconds to reset displayed/
selected features that can be reset.
Steering Wheel Audio Controls
1—DIDControls
ELECTRONICS
130
Page 133 of 220
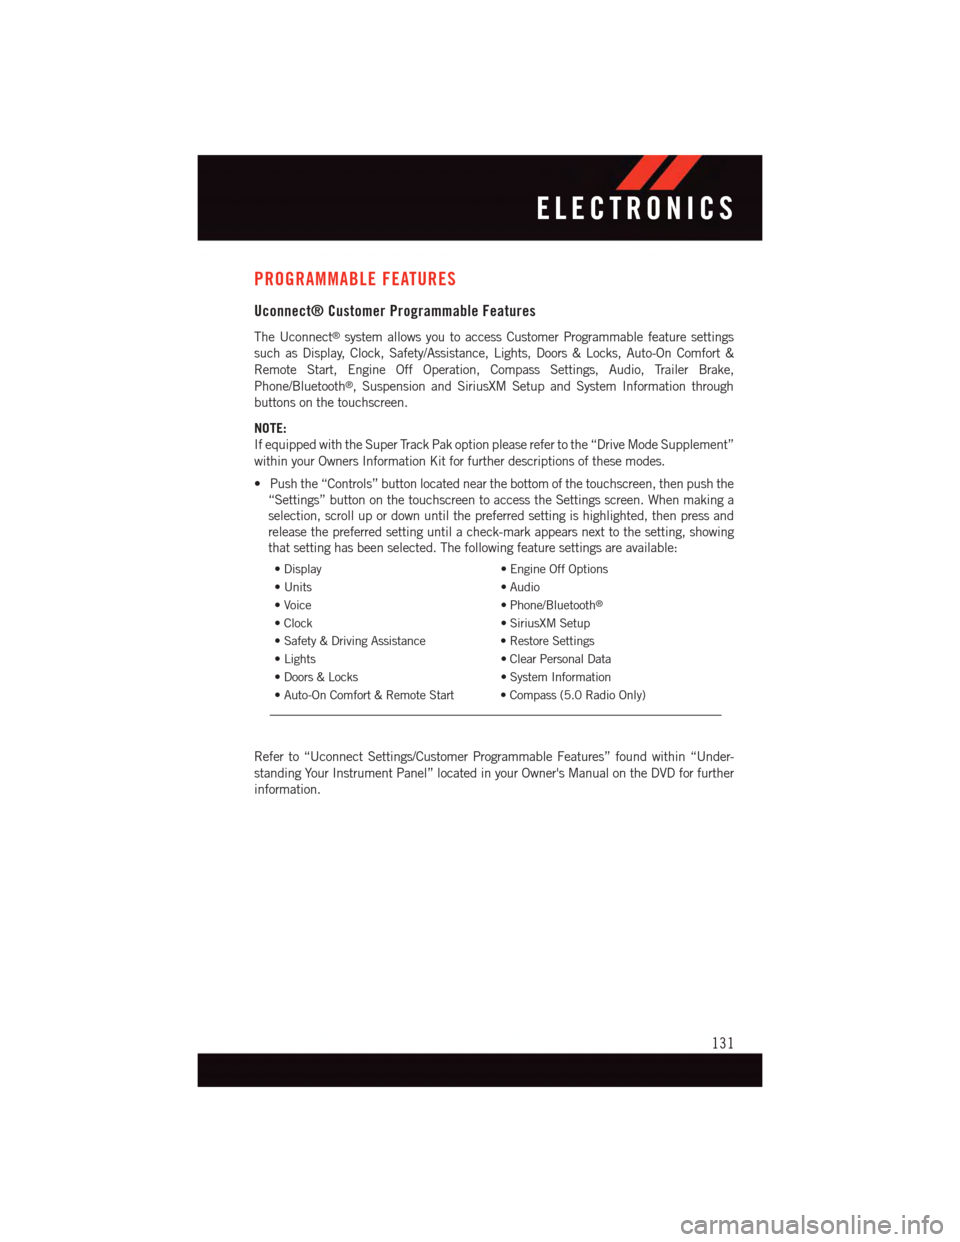
PROGRAMMABLE FEATURES
Uconnect® Customer Programmable Features
The Uconnect®system allows you to access Customer Programmable feature settings
such as Display, Clock, Safety/Assistance, Lights, Doors & Locks, Auto-On Comfort &
Remote Start, Engine Off Operation, Compass Settings, Audio, Trailer Brake,
Phone/Bluetooth®,SuspensionandSiriusXMSetupandSystemInformationthrough
buttons on the touchscreen.
NOTE:
If equipped with the Super Track Pak option please refer to the “Drive Mode Supplement”
within your Owners Information Kit for further descriptions of these modes.
•Pushthe“Controls”buttonlocatednearthebottomofthetouchscreen,thenpushthe
“Settings” button on the touchscreen to access the Settings screen. When making a
selection, scroll up or down until the preferred setting is highlighted, then press and
release the preferred setting until a check-mark appears next to the setting, showing
that setting has been selected. The following feature settings are available:
•Display•EngineOffOptions
•Units•Audio
•Voice•Phone/Bluetooth®
•Clock•SiriusXMSetup
•Safety&DrivingAssistance•RestoreSettings
•Lights•ClearPersonalData
•Doors&Locks•SystemInformation
•Auto-OnComfort&RemoteStart •Compass(5.0RadioOnly)
Refer to “Uconnect Settings/Customer Programmable Features” found within “Under-
standing Your Instrument Panel” located in your Owner's Manual on the DVD for further
information.
ELECTRONICS
131
Page 134 of 220
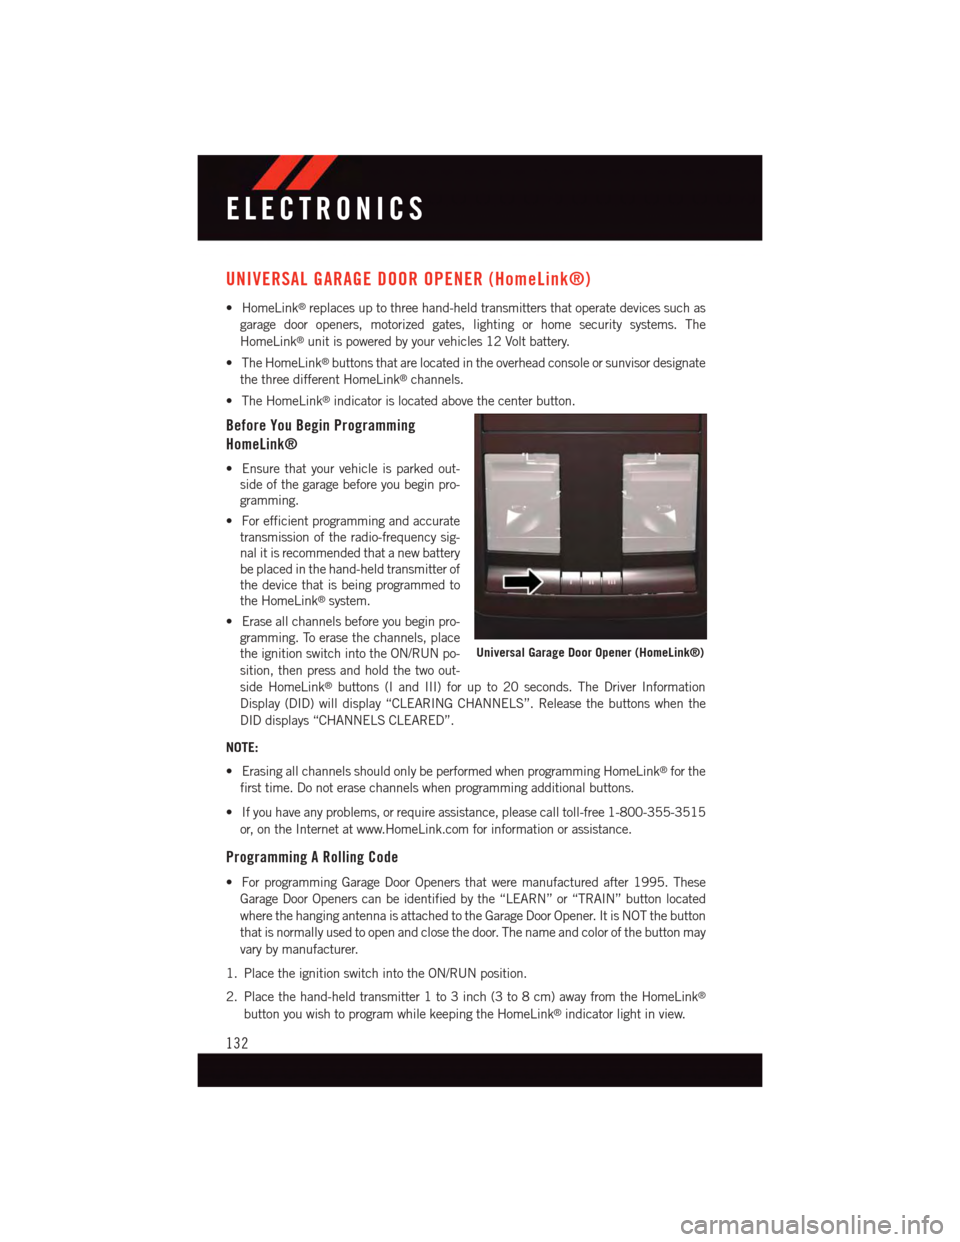
UNIVERSAL GARAGE DOOR OPENER (HomeLink®)
•HomeLink®replaces up to three hand-held transmitters that operate devices such as
garage door openers, motorized gates, lighting or home security systems. The
HomeLink®unit is powered by your vehicles 12 Volt battery.
•TheHomeLink®buttons that are located in the overhead console or sunvisor designate
the three different HomeLink®channels.
•TheHomeLink®indicator is located above the center button.
Before You Begin Programming
HomeLink®
•Ensurethatyourvehicleisparkedout-
side of the garage before you begin pro-
gramming.
•Forefficientprogrammingandaccurate
transmission of the radio-frequency sig-
nal it is recommended that a new battery
be placed in the hand-held transmitter of
the device that is being programmed to
the HomeLink®system.
•Eraseallchannelsbeforeyoubeginpro-
gramming. To erase the channels, place
the ignition switch into the ON/RUN po-
sition, then press and hold the two out-
side HomeLink®buttons (I and III) for up to 20 seconds. The Driver Information
Display (DID) will display “CLEARING CHANNELS”. Release the buttons when the
DID displays “CHANNELS CLEARED”.
NOTE:
•ErasingallchannelsshouldonlybeperformedwhenprogrammingHomeLink®for the
first time. Do not erase channels when programming additional buttons.
•Ifyouhaveanyproblems,orrequireassistance,pleasecalltoll-free1-800-355-3515
or, on the Internet at www.HomeLink.com for information or assistance.
Programming A Rolling Code
•ForprogrammingGarageDoorOpenersthatweremanufacturedafter1995.These
Garage Door Openers can be identified by the “LEARN” or “TRAIN” button located
where the hanging antenna is attached to the Garage Door Opener. It is NOT the button
that is normally used to open and close the door. The name and color of the button may
vary by manufacturer.
1. Place the ignition switch into the ON/RUN position.
2. Place the hand-held transmitter 1 to 3 inch (3 to 8 cm) away from the HomeLink®
button you wish to program while keeping the HomeLink®indicator light in view.
Universal Garage Door Opener (HomeLink®)
ELECTRONICS
132
Page 166 of 220

BATTERY LOCATION
The battery is stored under an access cover in the trunk. Remote battery posts are located
on the right side of the engine compartment for jump-starting.
JUMP-STARTING
•Ifyourvehiclehasadischargedbatteryit
can be jumpstarted using a set of jumper
cables and a battery in another vehicle or
by using a portable battery booster pack.
•Jump-startingcanbedangerousifdone
improperly so please follow the proce-
dures in this section carefully.
NOTE:
When using a portable battery booster pack
follow the manufacturer’s operating instruc-
tions and precautions.
Preparations For Jump-Start
•Thebatteryisstoredunderanaccess
cover in the trunk. Remote battery posts
are located on the right side of the engine
compartment for jump-starting.
NOTE:
The remote battery posts are viewed by standing on the right side of the vehicle looking
over the fender.
•Settheparkingbrake,shifttheautomatictransmissionintoPARKandturntheignition
to LOCK.
•Turnofftheheater,radio,andallunnecessaryelectricalaccessories.
•Ifusinganothervehicletojump-startthebattery,parkthevehiclewithinthejumper
cables reach, set the parking brake and make sure the ignition is OFF.
Jump-Starting Procedure
1. Connect the positive (+) end of the jumper cable to the remote positive (+) post of the
discharged vehicle.
2. Connect the opposite end of the positive (+) jumper cable to the positive (+) post of the
booster battery.
Jump Starting Locations
1—PositiveTerminal2—NegativeTerminal
WHAT TO DO IN EMERGENCIES
164
Page 203 of 220

Cavity Cartridge FuseMini-FuseDescription
23—10 Amp Red Fuel Door/DiagnosticPort
24—15 Amp Blue Integrated Center Stack–LD/LX
25—10 Amp Red Tire Pressure Monitor
26
—15 Amp Blue – LD/LX25 Amp Clear – LA30 Amp Green – LA6.2L Supercharged
Tr a n s m i s s i o n / E l e c -tronic Shift Module(LD/LX)Fuel Pump (LA)Fuel Pump (LA 6.2LSupercharged)
27—25 Amp Clear Amplifier / Spare – IfEquipped
31—25 Amp Breaker Power Seats
32—15 Amp Blue HVAC Module/Cluster
33
—15 Amp Blue Ignition Switch/RF hubModule/Steering Col-umn Lock-LX IfEquipped
34—10 Amp Red Steering ColumnModule/Clock/Spare –Police
35—5AmpTan BatterySensor
36—15 Amp Blue Electronic ExhaustValve – If Equipped
37—20 Amp Yellow Radio
38
—10 Amp Red – LD/LX20 Amp Yellow – LADual USB Port(LD/LX)Power Outlet InsideArm Rest (LA)
40——Fuse — Spare
41——Fuse — Spare
4230 Amp Pink—Rear Defrost
43—20 Amp Yellow Rear Heated Seats/Steering Wheel
44—10 Amp Red Park Assist / Blind Spot/RearViewCamera
45—15 Amp Blue Cluster / Rearview Mir-ror / Compass (LDLX)/Humidity Sensor
46——Fuse — Spare
47
—10 Amp Red Adaptive Front Lighting/AutoHighBEAM/DayTi m e R u n n i n g L a m p s -If Equipped
MAINTAINING YOUR VEHICLE
201
Page 209 of 220

CHRYSLER GROUP LLC CUSTOMER CENTER
P. O . B o x 2 1 – 8 0 0 4 A u b u r n H i l l s , M I 4 8 3 2 1 – 8 0 0 4 P h o n e : 1 – 8 0 0 – 4 2 3 – 6 3 4 3
CHRYSLER CANADA INC. CUSTOMER CENTER
P. O . B o x 1 6 2 1 W i n d s o r , O n t a r i o N 9 A 4 H 6 P h o n e : 1 – 8 0 0 – 4 6 5 – 2 0 0 1 ( E n g l i s h ) P h o n e :
1–800–387–9983 (French)
ASSISTANCE FOR THE HEARING IMPAIRED
To a s s i s t c u s t o m e r s w h o h a v e h e a r i n g d i f f i c u l t i e s , t h e m a n u f a c t u r e r h a s i n s t a l l e d s p e c i a l
TDD (Telecommunication Devices for the Deaf) equipment at its customer center. Any
hearing or speech impaired customer, who has access to a TDD or a conventional
teletypewriter (TTY) in the United States, can communicate with the manufacturer by
dialing 1–800–380–CHRY. Canadian residents with hearing difficulties that require
assistance can use the special needs relay service offered by Bell Canada. For TTY
teletypewriter users, dial 711 and for Voice callers, dial 1–800–855–0511 to connect
with a Bell Relay Service operator.
WARNING!
Engine exhaust, some of its constituents, and certain vehicle components contain, or
emit, chemicals known to the State of California to cause cancer and birth defects, or
other reproductive harm. In addition, certain fluids contained in vehicles and certain
products of component wear contain, or emit, chemicals known to the State of
California to cause cancer and birth defects, or other reproductive harm.
PUBLICATIONS ORDERING
•If you are the first registered retail owner of your vehicle, you may obtain a complimentary
printed copy of the Owner's Manual, Navigation/Uconnect®Manuals or Warranty Booklet.
United States customers may visit the Dodge Contact Us page atwww.dodge.com scroll
to the bottom of the page and select the “Contact Us” link, then select the “Owner’s
Manual and Glove Box Material” from the left menu. You may also obtain a compli-
mentary copy by calling 1–800–423–6343 (U.S.) or 1–800–387–1143 (Canada).
•ReplacementUserGuidekitsorDVDsor,ifyouprefer,additionalprintedcopiesofthe
Owner's Manual, Warranty Booklet or Radio Manuals may be purchased by visiting
www.techauthority.com or by calling 1–800–890–4038 (U.S.) or 1–800–387–1143
(Canada). Visa, Master Card, American Express and Discover orders are accepted. If
you prefer mailing your order, please call the above numbers for an order form.
NOTE:
•Astreetaddressisrequiredwhenorderingmanuals(noP.O.Boxes).
•TheOwner'sManualandUserGuideelectronicfilesarealsoavailableontheChrysler,
Jeep, Ram Truck, Dodge and SRT websites.
CONSUMER ASSISTANCE
207