Page 433 of 575
CAUTION!
•Damage to the fuel system or emissions control
system could result from using an improper fuel
tank filler tube cap.
• A poorly fitting fuel filler cap could let impurities
into the fuel system.
• A poorly fitting fuel filler cap may cause the
“Malfunction Indicator Light (MIL)” to turn on.
• To avoid fuel spillage and overfilling, do not “top
off” the fuel tank after filling. When the fuel
nozzle “clicks” or shuts off, the fuel tank is full.
WARNING!
• Never have any smoking materials lit in or near the
vehicle when the gas cap is removed or the tank is
being filled.
(Continued)
WARNING! (Continued)
•Never add fuel to the vehicle when the engine is
running.
• A fire may result if gasoline is pumped into a
portable container that is inside of a vehicle. You
could be burned. Always place gas containers on
the ground while filling.
NOTE:
• Tighten the gas cap until you hear a “clicking” sound.
This is an indication that the gas cap is tightened
properly. The MIL in the instrument cluster may turn
on if the gas cap is not secured properly. Make sure
that the gas cap is tightened each time the vehicle is
refueled.
• When the fuel nozzle “clicks” or shuts off, the fuel tank
is full.
5
STARTING AND OPERATING 431
Page 436 of 575
Figure out the weight on the front and rear of the vehicle
separately. It is important that you distribute the load
evenly over the front and rear axles.
Overloading can cause potential safety hazards and
shorten useful service life. Heavier axles or suspension
components do not necessarily increase the vehicle’s
GVWR.
Loading
To load your vehicle properly, first figure out its empty
weight, axle-by-axle and side-by-side. Store heavier items
down low and be sure you distribute their weight as
evenly as possible. Stow all loose items securely before
driving. If weighing the loaded vehicle shows that you
have exceeded either GAWR, but the total load is within
the specified GVWR, you must redistribute the weight.
Improper weight distribution can have an adverse effect
on the way your vehicle steers and handles and the way
the brakes operate.NOTE:
Refer to the “Vehicle Certification Label” affixed
to the rear of the driver’s door for your vehicle’s GVWR
and GAWRs.
TRAILER TOWING
Trailer towing with this vehicle is not recommended.
434 STARTING AND OPERATING
Page 459 of 575
WARNING!
Fast spinning tires can be dangerous. Forces gener-
ated by excessive wheel speeds may cause damage, or
even failure, of the axle and tires. A tire could
explode and injure someone. Do not spin your vehi-
cle’s wheels faster than 30 mph (48 km/h) or for
longer than 30 seconds continuously without stop-
ping when you are stuck and do not let anyone near
a spinning wheel, no matter what the speed.
MANUAL PARK RELEASE — 8 SPEED
TRANSMISSION
WARNING!
Always secure your vehicle by fully applying the
parking brake, before activating the Manual Park
(Continued)
WARNING!(Continued)
Release. Activating the Manual Park Release will
allow your vehicle to roll away if it is not secured by
the parking brake or by proper connection to a tow
vehicle. Activating the Manual Park Release on an
unsecured vehicle could lead to serious injury or
death for those in or around the vehicle.
In order to push or tow the vehicle in cases where the
transmission will not shift out of PARK (such as a dead
battery), a Manual Park Release is available.
Follow these steps to use the Manual Park Release:
1. Firmly apply the parking brake.
2. Remove the console storage bin to access the Manual Park Release lever.
6
WHAT TO DO IN EMERGENCIES 457
Page 461 of 575
5. While holding the locking tab in the disengagedposition, pull the tether strap to rotate the lever up and
rearward until it locks in place in the vertical position.
The vehicle is now out of PARK and can be towed.
Release the parking brake only when the vehicle is
securely connected to a tow vehicle. To Reset The Manual Park Release:
1. Push the latch (at the base of the lever, on the rear side)
rearward (away from the lever) to unlatch the lever.
2. Rotate the Manual Park Release lever forward and down, to its original position, until the locking tab
snaps into place to secure the lever.
3. Pull up gently on the tether strap to confirm that the lever is locked in its stowed position.
4. Tuck the tether strap into the base of the console. Reinstall the console storage bin.
TOWING A DISABLED VEHICLE
This section describes procedures for towing a disabled
vehicle using a commercial towing service.
Tether Strap
6
WHAT TO DO IN EMERGENCIES 459
Page 463 of 575
If you must use the accessories (wipers, defrosters, etc.)
while being towed, the ignition must be in the ON/RUN
position, not the ACC position.
CAUTION!
•Do not use sling type equipment when towing.
Vehicle damage may occur.
• When securing the vehicle to a flatbed truck, do not
attach to front or rear suspension components.
Damage to your vehicle may occur from improper
towing.
• The manufacturer does not recommend towing this
vehicle using a tow dolly. Vehicle damage may
occur.
Automatic Transmission
The manufacturer recommends towing your vehicle with
all four wheels OFF the ground using a flatbed.
If flatbed equipment is not available, and the transmission is
operable, the vehicle may be flat towed (with all four wheels
on the ground) under the following conditions:
• The transmission must be in NEUTRAL.
• The towing distance must not exceed 30 miles (48 km).
• The towing speed must not exceed 30 mph (48 km/h).
If the transmission is not operable, or the vehicle must
be towed faster than 30 mph (48 km/h) or farther than 30
miles (48 km), then the only acceptable method of
towing is with a flatbed truck.
CAUTION!
Towing this vehicle in violation of the above require-
ments can cause severe transmission damage. Dam-
age from improper towing is not covered under the
New Vehicle Limited Warranty.
6
WHAT TO DO IN EMERGENCIES 461
Page 495 of 575

WARNING!(Continued)
cylinder reservoir cap secured at all times. Brake
fluid in a open container absorbs moisture from the
air resulting in a lower boiling point. This may
cause it to boil unexpectedly during hard or pro-
longed braking, resulting in sudden brake failure.
This could result in a collision.
• Overfilling the brake fluid reservoir can result in
spilling brake fluid on hot engine parts, causing
the brake fluid to catch fire. Brake fluid can also
damage painted and vinyl surfaces, care should be
taken to avoid its contact with these surfaces.
• Do not allow petroleum based fluid to contaminate
the brake fluid. Brake seal components could be
damaged, causing partial or complete brake failure.
This could result in a collision. Use only brake fluid that has been in a tightly closed
container to avoid contamination from foreign matter or
moisture.
Clutch Hydraulic System (Manual Transmission)
— If Equipped
The clutch hydraulic system is fed by a segregated
volume of fluid within the brake system master cylinder
reservoir. In the event of leakage or wear, use only the
manufacturer’s recommended brake fluid. Refer to “Flu-
ids, Lubricants, And Genuine Parts” in “Maintaining
Your Vehicle” for further information.
Manual Transmission — If Equipped
Fluid Level Check
Check the fluid level by removing the fill plug on the left
side of the transmission. The fluid level should be 1/4
inch (6.4mm) below the bottom of the fill hole. Add fluid,
7
MAINTAINING YOUR VEHICLE 493
Page 507 of 575
CavityCartridge Fuse Mini-Fuse Description
7 –– Fuse – Spare
8 20 Amp Blue –Police Ignition Run / ACC # 2
9 –20 Amp Yellow All-Wheel Drive Module – If Equipped
10 –10 Amp Red Security – If Equipped / Under hood
Lamp – Police
11 –20 Amp Yellow Horns
12 –10 Amp Red Air Conditioning Clutch
13 –– Fuse – Spare
14 –– Fuse – Spare
15 –20 Amp Yellow Left HID – If Equipped
16 –20 Amp Yellow Right HID – If Equipped
18 50 Amp Red –Radiator Fan #2 – If Equipped
19 50 Amp Red –Power Steering #2 / Radiator Fan (6.2L
Supercharged)
20 30 Amp Pink –Wiper Motor
7
MAINTAINING YOUR VEHICLE 505
Page 554 of 575
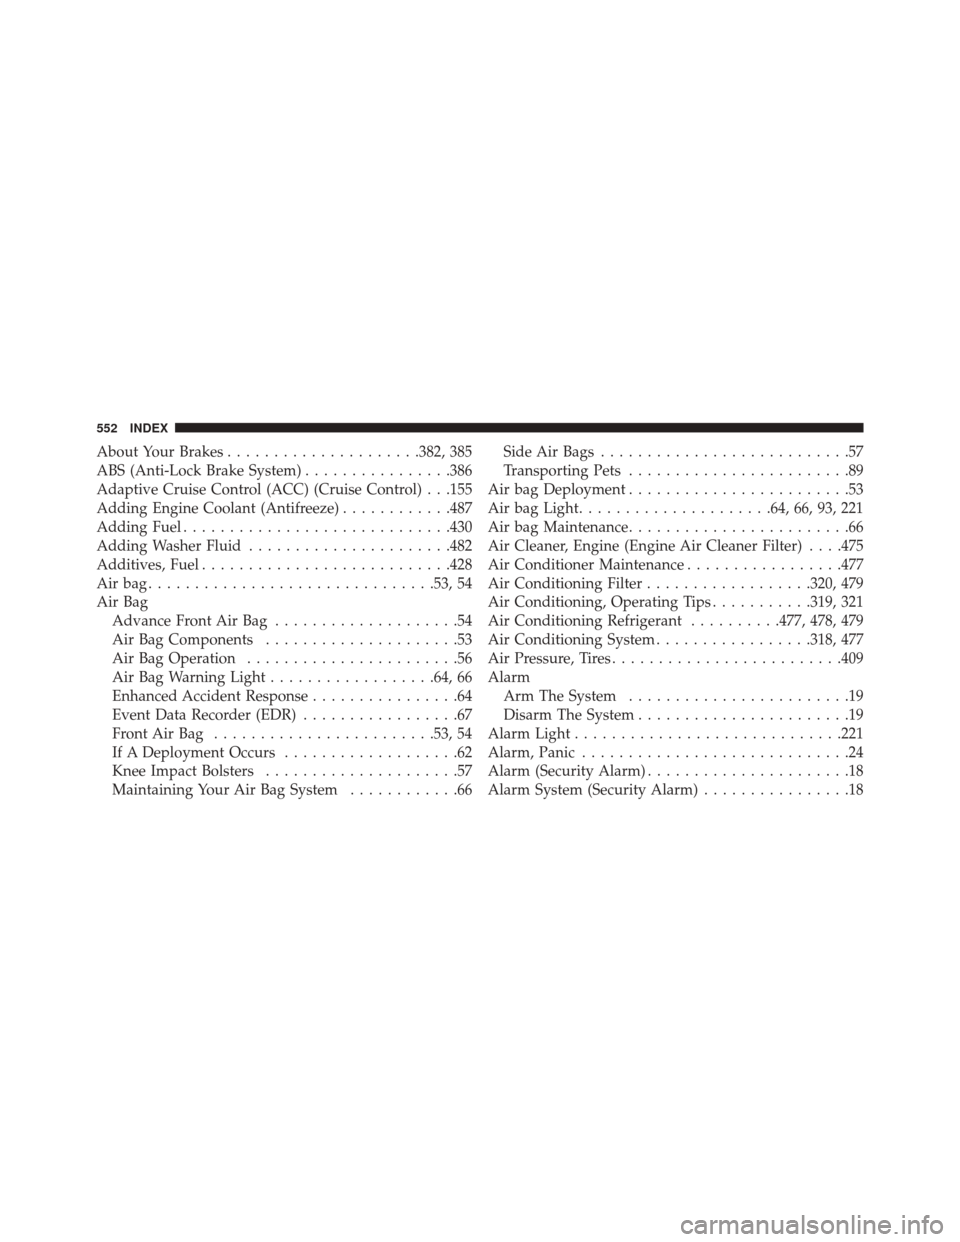
About Your Brakes.....................382, 385
ABS (Anti-Lock Brake System) ................386
Adaptive Cruise Control (ACC) (Cruise Control) . . .155
Adding Engine Coolant (Antifreeze) ............487
Adding Fuel ............................ .430
Adding Washer Fluid ..................... .482
Additives, Fuel .......................... .428
Airbag.............................. .53, 54
Air Bag Advance Front Air Bag ....................54
Air Bag Components .....................53
Air Bag Operation .......................56
Air Bag Warning Light ..................64, 66
Enhanced Accident Response ................64
Event Data Recorder (EDR) .................67
FrontAirBag ........................53, 54
If A Deployment Occurs ...................62
Knee Impact Bolsters .....................57
Maintaining Your Air Bag System ............66Side Air Bags
...........................57
Transporting Pets ........................89
Air bag Deployment ........................53
Air bag Light .....................64, 66, 93, 221
Air bag Maintenance ........................66
Air Cleaner, Engine (Engine Air Cleaner Filter) . . . .475
Air Conditioner Maintenance .................477
Air Conditioning Filter ..................320, 479
Air Conditioning, Operating Tips ...........319, 321
Air Conditioning Refrigerant ..........477, 478, 479
Air Conditioning System .................318, 477
Air Pressure, Tires ........................ .409
Alarm Arm The System ........................19
Disarm The System .......................19
Alarm Light ............................ .221
Alarm, Panic .............................24
Alarm (Security Alarm) ......................18
Alarm System (Security Alarm) ................18
552 INDEX