Page 251 of 575

•If the menu is exited before the end of codes is reached
- when the driver re-enters the list will be restarted
from the beginning.
• When no codes are present or the last code is reached
= (P0000) and this message is displayed:
• “No Further or End of Diagnostic Codes.”
Performance Shift Indicator (PSI) – If Equipped
The Performance Shift Indicator (PSI) is enabled on
vehicles with manual transmission, or when a vehicle
with automatic transmission is in manual shift mode. The
PSI provides the driver with a visual indication within
the DID display when the driver configured gear shift
point has been reached and the driver is still accelerating.
This indication notifies the driver to change gear corre-
sponding to the configured RPMs in the head unit. When
the shift up indicator is shown on the display, the PSI is
advising the driver to engage a higher gear. The PSI indicator in the DID display remains illuminated
until the driver changes gear, or the driving conditions
return to a situation where changing gear is not required,
corresponding to the configured RPMs in the head unit.
Uconnect® SETTINGS
The Uconnect® system uses a combination of buttons on
the touchscreen and buttons on the faceplate located on
the center of the instrument panel that allows you to
access and change the customer programmable features.4
UNDERSTANDING YOUR INSTRUMENT PANEL 249
Page 255 of 575

NOTE:To make changes to the �Display Brightness with
Headlights OFF� setting, the headlights must be off and
the interior dimmer switch must not be in the �party�or
�parade� positions.
• Set Theme — If Equipped
This feature will allow you to choose a theme for the
display screen. The theme will change the background
color, highlight color, and button color of the display
screen.
• Set Language
When in this display, you may select one of multiple
languages (English / Français / Español) for all display
nomenclature, including the trip functions and the navi-
gation system (if equipped). Press the Set Language
button on the touchscreen, then press the desired lan-
guage button on the touchscreen until a check-mark appears next to the language, showing that setting has
been selected. Press the back arrow button on the touch-
screen to return to the previous menu.
•
Touchscreen Beep
When in this display, you may turn on or shut off the
sound heard when a touchscreen button (button on the
touchscreen) is pressed. Press the “Touchscreen Beep”
button on the touchscreen until a check-mark appears
next to the setting, showing that setting has been se-
lected. Press the back arrow button on the touchscreen to
return to the previous menu.
• Control Screen Time-Out — If Equipped
When this feature is selected, the Controls Screen will
stay open for five seconds before the screen times out.
With the feature deselected, the screen will stay open
until it is manually closed. Press the Control Screen
Time-Out button on the touchscreen until a check-mark
4
UNDERSTANDING YOUR INSTRUMENT PANEL 253
Page 257 of 575

•Torque
Select from: “lb-ft” or “Nm.”
After the desired setting has been selected, press the back
arrow/Done button on the touchscreen to return to the
previous menu.
Voice
After pressing the “Voice” button on the touchscreen the
following settings will be available:
• Voice Response Length
When in this display, you may change the Voice Re-
sponse Length settings. To change the Voice Response
Length, press the “Brief” or “Detailed” button on the
touchscreen until a check-mark appears next to the
setting, showing that setting has been selected. Press the
back arrow button on the touchscreen to return to the
previous menu. •
Show Command List
When in this display, you may change the Show Com-
mand List settings. To change the Show Command List
settings, press the “Always,” “With Help” or “Never”
button on the touchscreen until a check-mark appears
next to the setting, showing that setting has been se-
lected. Press the back arrow button on the touchscreen to
return to the previous menu.
Clock
After pressing the “Clock” button on the touchscreen the
following settings will be available:
• Sync Time With GPS
This feature will allow you to automatically have the
radio set the time. To change the Sync Time setting, press
the “Sync time with GPS” button on the touchscreen until
a check-mark appears next to the setting, showing that
4
UNDERSTANDING YOUR INSTRUMENT PANEL 255
Page 330 of 575

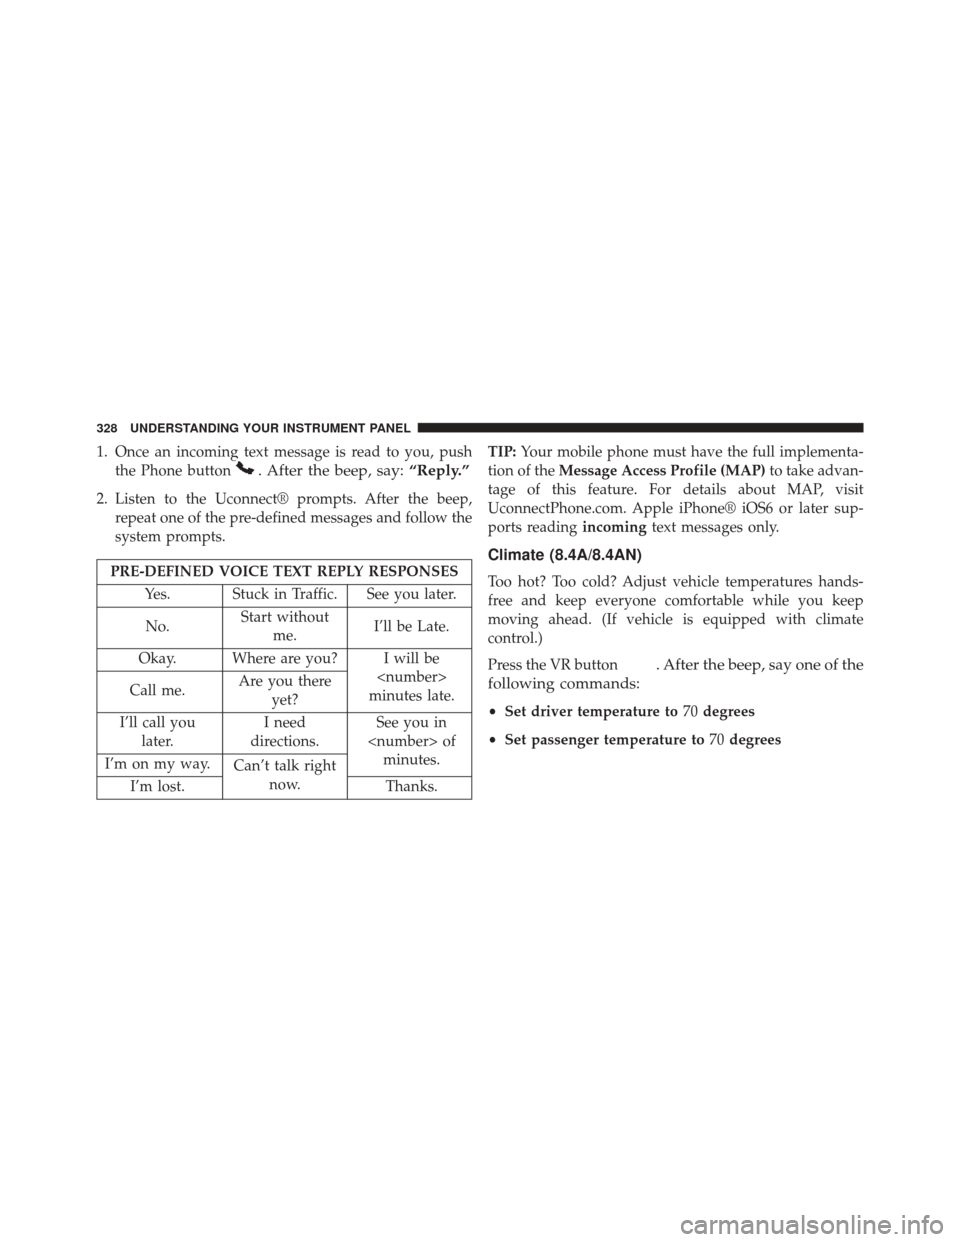
1. Once an incoming text message is read to you, pushthe Phone button
. After the beep, say: “Reply.”
2. Listen to the Uconnect® prompts. After the beep,
repeat one of the pre-defined messages and follow the
system prompts.
PRE-DEFINED VOICE TEXT REPLY RESPONSES
Yes. Stuck in Traffic. See you later.
No. Start without
me. I’ll be Late.
Okay. Where are you? I will be
minutes late.
Call me. Are you there
yet?
I’ll call you later. I need
directions. See you in
of minutes.
I’m on my way. Can’t talk right
now.
I’m lost. Thanks.TIP:
Your mobile phone must have the full implementa-
tion of the Message Access Profile (MAP) to take advan-
tage of this feature. For details about MAP, visit
UconnectPhone.com. Apple iPhone® iOS6 or later sup-
ports reading incomingtext messages only.
Climate (8.4A/8.4AN)
Too hot? Too cold? Adjust vehicle temperatures hands-
free and keep everyone comfortable while you keep
moving ahead. (If vehicle is equipped with climate
control.)
Press the VR button
. After the beep, say one of the
following commands:
• Set driver temperature to 70degrees
• Set passenger temperature to 70degrees
328 UNDERSTANDING YOUR INSTRUMENT PANEL
Page 350 of 575

After Starting
The idle speed is controlled automatically and it will
decrease as the engine warms up.
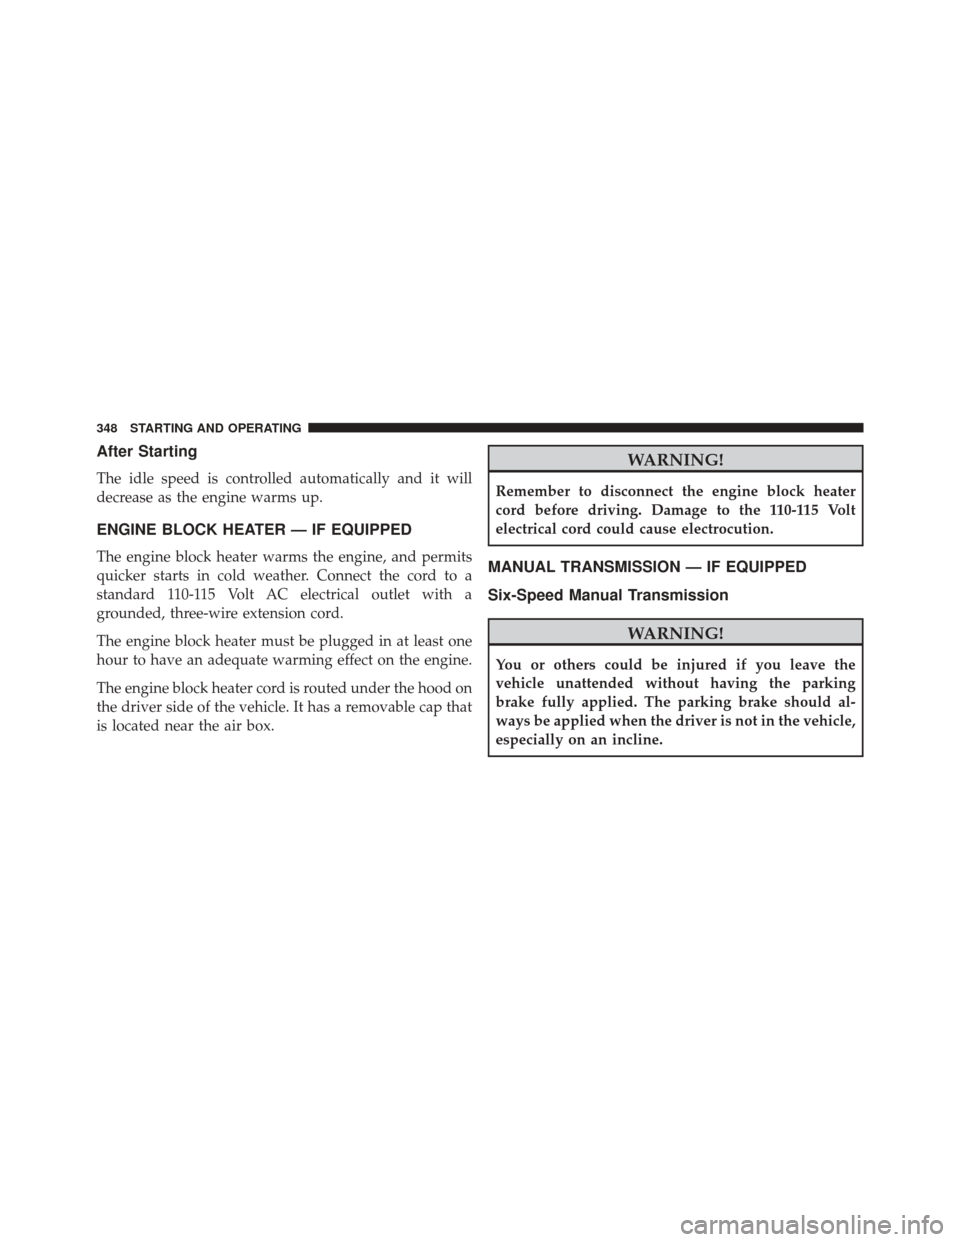
ENGINE BLOCK HEATER — IF EQUIPPED
The engine block heater warms the engine, and permits
quicker starts in cold weather. Connect the cord to a
standard 110-115 Volt AC electrical outlet with a
grounded, three-wire extension cord.
The engine block heater must be plugged in at least one
hour to have an adequate warming effect on the engine.
The engine block heater cord is routed under the hood on
the driver side of the vehicle. It has a removable cap that
is located near the air box.
WARNING!
Remember to disconnect the engine block heater
cord before driving. Damage to the 110-115 Volt
electrical cord could cause electrocution.
MANUAL TRANSMISSION — IF EQUIPPED
Six-Speed Manual Transmission
WARNING!
You or others could be injured if you leave the
vehicle unattended without having the parking
brake fully applied. The parking brake should al-
ways be applied when the driver is not in the vehicle,
especially on an incline.
348 STARTING AND OPERATING
Page 358 of 575

Only shift from DRIVE to PARK or REVERSE when the
accelerator pedal is released and the vehicle is stopped.
Be sure to keep your foot on the brake pedal when
shifting between these gears.
The transmission shift lever has PARK, REVERSE, NEU-
TRAL, DRIVE, and MANUAL (Autostick) shift positions.
Manual shifts can be made using the Autostick shift
control (refer to “AutoStick” in this section for further
information). Toggling the shift lever forward (-) or
rearward (+) while in the MANUAL (AutoStick) position
(beside the DRIVE position) will manually select the
transmission gear, and will display the current gear in the
instrument cluster as M1, M2, M3, etc.NOTE:
If the shift lever cannot be moved to the PARK,
REVERSE, or NEUTRAL position (when pushed for-
ward) it is probably in the MANUAL (AutoStick, +/-)
position (beside the DRIVE position). In MANUAL
(AutoStick) mode, the transmission gear is displayed in
the instrument cluster (as M1, M2, M3, etc.). Move the
shift lever to the right (into the DRIVE [D] position) for
access to PARK, REVERSE, and NEUTRAL.
Gear Ranges
DO NOT race the engine when shifting from PARK or
NEUTRAL into another gear range.
NOTE: After selecting any gear range, wait a moment to
allow the selected gear to engage before accelerating.
This is especially important when the engine is cold.
PARK (P)
This range supplements the parking brake by locking the
transmission. The engine can be started in this range.
356 STARTING AND OPERATING
Page 361 of 575

The following indicators should be used to ensure that
you have engaged the transmission into the PARK posi-
tion:
•When shifting into PARK, press the lock button on the
shift lever and firmly move the lever all the way
forward until it stops and is fully seated.
• Look at the transmission gear position display and
verify that it indicates the PARK position (P).
• With brake pedal released, verify that the shift lever
will not move out of PARK.
REVERSE (R)
This range is for moving the vehicle backward. Shift into
REVERSE only after the vehicle has come to a complete
stop. NEUTRAL (N)
Use this range when the vehicle is standing for prolonged
periods with the engine running. Apply the parking
brake and shift the transmission into PARK if you must
leave the vehicle.
WARNING!
Do not coast in NEUTRAL and never turn off the
ignition to coast down a hill. These are unsafe
practices that limit your response to changing traffic
or road conditions. You might lose control of the
vehicle and have a collision.
CAUTION!
Towing the vehicle, coasting, or driving for any other
reason with the transmission in NEUTRAL can cause
(Continued)
5
STARTING AND OPERATING 359
Page 382 of 575

CAUTION!(Continued)
damage is not covered by the New Vehicle Limited
Warranty.
• Getting water inside your vehicle’s engine can
cause it to lock up and stall out, and cause serious
internal damage to the engine. Such damage is not
covered by the New Vehicle Limited Warranty.
POWER STEERING — 6.4L ENGINE
The electric power steering system will give you good
vehicle response and increased ease of maneuverability
in tight spaces. The system will vary its assist to provide
light efforts while parking and good feel while driving. If
the electric steering system experiences a fault that
prevents it from providing assist, you will still have the
ability to steer the vehicle manually. Alternate electric power steering efforts can be selected
through the Uconnect® System. Refer to the “Drive
Modes” in this section for further information.
WARNING!
Continued operation with reduced assist could pose
a safety risk to yourself and others. Service should be
obtained as soon as possible.
If the Steering icon is displayed and the “SER-
VICE POWER STEERING” or the “POWER
STEERING ASSIST OFF – SERVICE SYSTEM”
message is displayed within the Driver Infor-
mation Display (DID), this indicates the vehicle needs to
be taken to the dealer for service. Refer to “Driver
Information Display (DID)” in “Understanding Your
Instrument Panel” for further information.
380 STARTING AND OPERATING