2015 DODGE CHALLENGER turn signal
[x] Cancel search: turn signalPage 145 of 603

An indicator light in the instrument cluster illuminates
when the fog lights are turned on.
NOTE:The fog lights will operate with the low beam
headlights or parking lights on. However, selecting the
high beam headlights will turn off the fog lights.
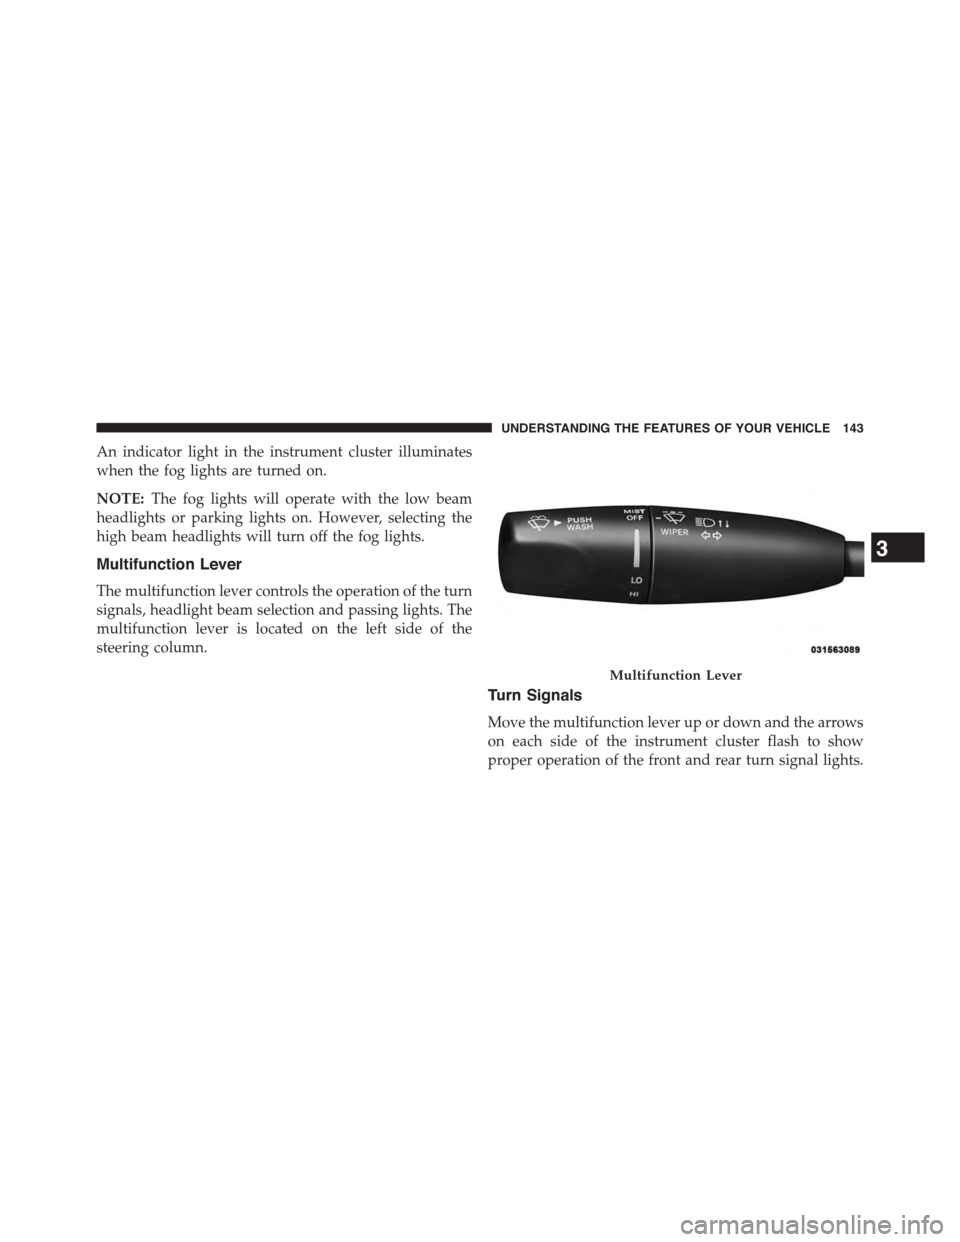
Multifunction Lever
The multifunction lever controls the operation of the turn
signals, headlight beam selection and passing lights. The
multifunction lever is located on the left side of the
steering column.
Turn Signals
Move the multifunction lever up or down and the arrows
on each side of the instrument cluster flash to show
proper operation of the front and rear turn signal lights.
Multifunction Lever
3
UNDERSTANDING THE FEATURES OF YOUR VEHICLE 143
Page 146 of 603

NOTE:
•If either light remains on and does not flash, or there is
a very fast flash rate, check for a defective outside light
bulb. If an indicator fails to light when the lever is
moved, it would suggest that the indicator bulb is
defective.
•A “Turn Signal On” message will appear in the Drivers
Information Display (DID) and a continuous chime
will sound if the vehicle is driven more than 1 mi
(1.6 km) with either turn signal on.
Lane Change Assist
Tap the lever up or down once, without moving beyond
the detent, and the turn signal (right or left) will flash
three times then automatically turn off.
High/Low Beam Switch
Push the multifunction lever away from you to switch
the headlights to high beam. Pull the multifunction lever
toward you to switch the headlights back to low beam.
Flash-To-Pass
You can signal another vehicle with your headlights by
lightly pulling the multifunction lever toward you. This
will turn on the high beam headlights until the lever is
released.
NOTE:If the multifunction lever is held in the flash-to
pass position for more than 20 seconds, the high beams
will shut off.
Map/Reading Lights
These lights are mounted between the sun visors on the
overhead console. Each light is turned on by pressing the
lens. Press the lens a second time to turn off the light.
These lights also turn on when a door is opened, or when
144 UNDERSTANDING THE FEATURES OF YOUR VEHICLE
Page 173 of 603

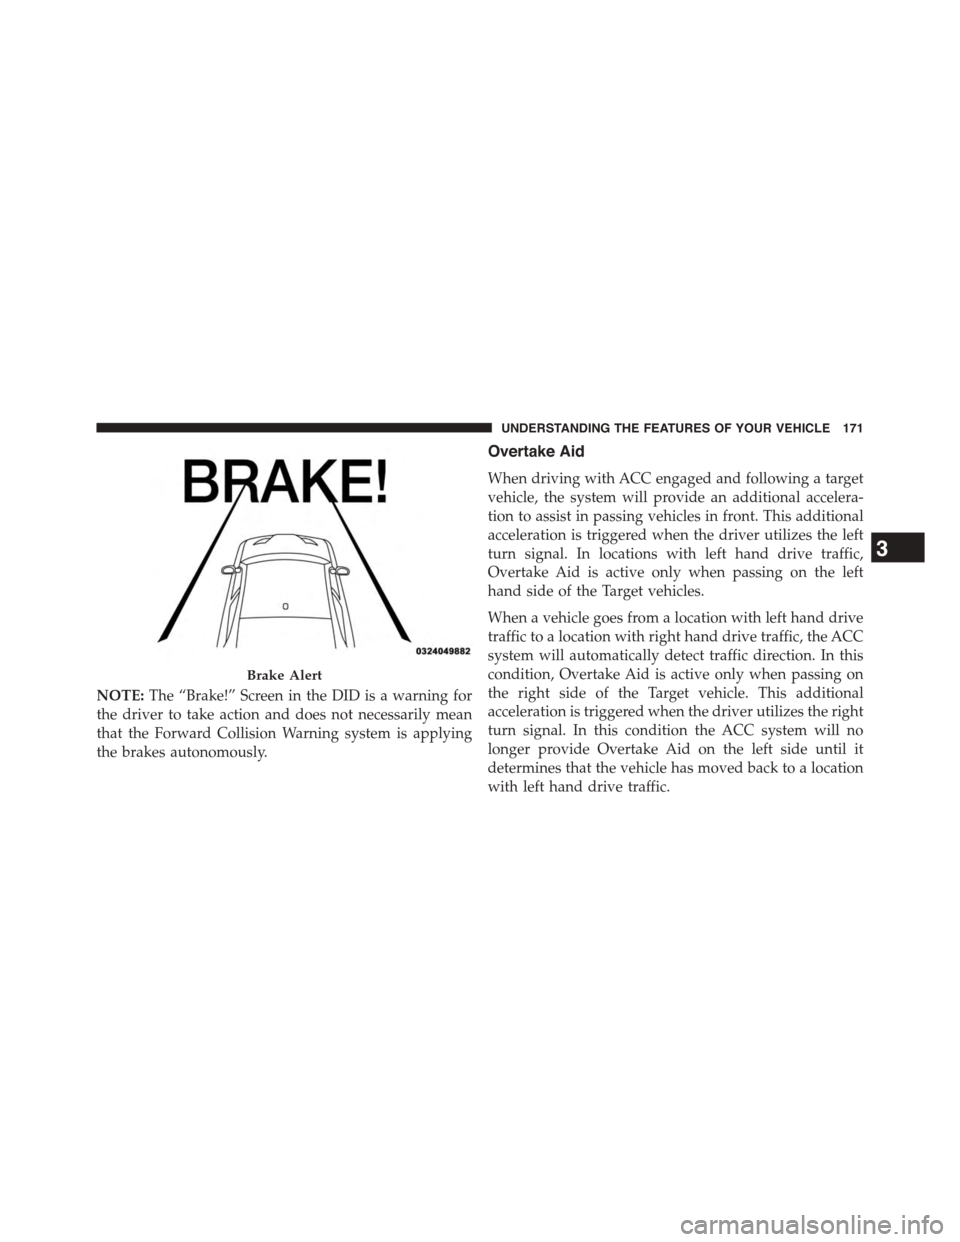
NOTE:The “Brake!” Screen in the DID is a warning for
the driver to take action and does not necessarily mean
that the Forward Collision Warning system is applying
the brakes autonomously.
Overtake Aid
When driving with ACC engaged and following a target
vehicle, the system will provide an additional accelera-
tion to assist in passing vehicles in front. This additional
acceleration is triggered when the driver utilizes the left
turn signal. In locations with left hand drive traffic,
Overtake Aid is active only when passing on the left
hand side of the Target vehicles.
When a vehicle goes from a location with left hand drive
traffic to a location with right hand drive traffic, the ACC
system will automatically detect traffic direction. In this
condition, Overtake Aid is active only when passing on
the right side of the Target vehicle. This additional
acceleration is triggered when the driver utilizes the right
turn signal. In this condition the ACC system will no
longer provide Overtake Aid on the left side until it
determines that the vehicle has moved back to a location
with left hand drive traffic.
Brake Alert
3
UNDERSTANDING THE FEATURES OF YOUR VEHICLE 171
Page 227 of 603

WARNING!(Continued)
operating conditions. This can cause a fire if you
drive slowly or park over flammable substances such
as dry plants, wood, cardboard, etc. This could result
in death or serious injury to the driver, occupants or
others.
3. Vehicle Security Light — If Equipped
This light will flash at a fast rate for approxi-
mately 15 seconds, when the vehicle security
alarm is arming, and then will flash slowly
until the vehicle is disarmed.
4. Turn Signal Indicators
The arrow will flash with the exterior turn
signal when the turn signal lever is operated.
NOTE:
•A continuous chime will sound if the vehicle is
driven more than 1 mile (1.6 km) with either turn
signal on.
•Check for an inoperative outside light bulb if either
indicator flashes at a rapid rate.
5. Anti-Lock Brake (ABS) Light
This light monitors the Anti-Lock Brake System
(ABS). The light will turn on when the ignition
switch is placed in the ON/RUN position and may stay
on for as long as four seconds.
If the ABS light remains on or turns on while driving,
then the Anti-Lock portion of the brake system is not
functioning and service is required. However, the con-
ventional brake system will continue to operate normally
if the BRAKE warning light is not on.
4
UNDERSTANDING YOUR INSTRUMENT PANEL 225
Page 259 of 603

•ParkSense®
The ParkSense® system will scan for objects behind the
vehicle when the transmission shift lever/gear selector is
in REVERSE and the vehicle speed is less than 11 mph (18
km/h). It will provide an alert (audible and/or visual) to
indicate the proximity to other objects. The system can be
enabled with Sound Only, or Sound and Display. To
change the ParkSense® status, press and release the
“Sound Only” or “Sound and Display” button. Then
press the back arrow/Done button on the touchscreen.
Refer to “ParkSense®” in “Understanding The Features
Of Your Vehicle” for system function and operating
information.
•Rear ParkSense® Chime Volume
The Rear ParkSense® Chime Volume settings can be
selected from the DID or Uconnect® System — if
equipped. The chime volume settings include LOW,
MEDIUM, and HIGH. The factory default volume setting
is MEDIUM. To make your selection, press the “Rear
ParkSense® Volume” button on the touchscreen, then
select from “Low,” “Med,” or “High.” Press the back
arrow/Done button on the touchscreen to return to the
previous menu. ParkSense® will retain its last known
configuration state through ignition cycles.
•Blind Spot Alert
When this feature is selected, the Blind Spot Alert feature
Provides alerts, visual and/or audible, to indicate objects
in your blind spot. The Blind Spot Alert feature can be
activated in Lights mode. When this mode is selected, the
Blind Spot Monitor (BSM) system is activated and will
only show a visual alert in the exterior mirrors. When
Lights & Chime mode is activated, the Blind Spot Moni-
tor (BSM) will show a visual alert in the exterior mirrors
as well as an audible alert when the turn signal is on.
When Off is selected, the Blind Spot Monitor (BSM)
system is deactivated. To change the Blind Spot Alert
4
UNDERSTANDING YOUR INSTRUMENT PANEL 257
Page 277 of 603

•ParkSense®
The ParkSense® system will scan for objects behind the
vehicle when the transmission shift lever is in REVERSE
and the vehicle speed is less than 11 mph (18 km/h). It
will provide an alert (audible and/or visual) to indicate
the proximity to other objects. The system can be enabled
with Sound Only, or Sound and Display. To change the
ParkSense® status, press and release the “Sound Only”
or “Sound and Display” button. Then press the back
arrow button on the touchscreen. Refer to “ParkSense®”
in “Understanding The Features Of Your Vehicle” for
system function and operating information.
•Rear ParkSense® Chime Volume
The Rear ParkSense® Chime Volume settings can be
selected from the DID or Uconnect® System — if
equipped. The chime volume settings include LOW,
MEDIUM, and HIGH. The factory default volume setting
is MEDIUM. To make your selection, press the
“ParkSense® Rear Chime Volume” button on the touch-
screen, until a check-mark appears next to setting, indi-
cating that the setting had been selected. Press the back
arrow button on the touchscreen to return to the previous
menu. ParkSense® will retain its last known configura-
tion state through ignition cycles.
•Blind Spot Alert
When this feature is selected, the Blind Spot Alert feature
Provides alerts, visual and/or audible, to indicate objects
in your blind spot. The Blind Spot Alert feature can be
activated in “Lights” mode. When this mode is selected,
the Blind Spot Monitor (BSM) system is activated and
will only show a visual alert in the exterior mirrors.
When “Lights & Chime” mode is activated, the Blind
Spot Monitor (BSM) will show a visual alert in the
exterior mirrors as well as an audible alert when the turn
signal is on. When “Off” is selected, the Blind Spot
Monitor (BSM) system is deactivated. To change the
4
UNDERSTANDING YOUR INSTRUMENT PANEL 275
Page 385 of 603

WARNING!
•The Anti-Lock Brake System (ABS) contains so-
phisticated electronic equipment that may be sus-
ceptible to interference caused by improperly in-
stalled or high output radio transmitting
equipment. This interference can cause possible
loss of anti-lock braking capability. Installation of
such equipment should be performed by qualified
professionals.
•Pumping of the Anti-Lock Brakes will diminish
their effectiveness and may lead to a collision.
Pumping makes the stopping distance longer. Just
press firmly on your brake pedal when you need to
slow down or stop.
(Continued)
WARNING!(Continued)
•The Anti-Lock Brake System (ABS) cannot prevent
the natural laws of physics from acting on the
vehicle, nor can it increase braking or steering
efficiency beyond that afforded by the condition of
the vehicle brakes and tires or the traction afforded.
•The Anti-Lock Brake System (ABS) cannot prevent
collisions, including those resulting from excessive
speed in turns, following another vehicle too
closely, or hydroplaning.
•The capabilities of an Anti-Lock Brake System
(ABS) equipped vehicle must never be exploited in
a reckless or dangerous manner, that could jeopar-
dize the user’s safety or the safety of others.
All vehicle wheels and tires must be the same size and
type and tires must be properly inflated to produce
accurate signals for the computer.
5
STARTING AND OPERATING 383
Page 424 of 603

each tire with the low tire pressure values shown in a
different color. An#Inflate Tire to XX#message will also
be displayed in the DID display.
Should this occur, you should stop as soon as possible
and inflate all of the tires with a low pressure condition
(those shown in a different color in the DID graphic) to
the vehicle’s recommended cold placard pressure infla-
tion value as shown in the#Inflate Tire to XX#message.
Once the system receives the updated tire pressures, the
system will automatically update, the graphic display in
the DID will return the pressure values to shown their
original color, and the pressure values shown in the
“TPM Telltale Light” will turn off. The vehicle may need
to be driven for up to 20 minutes above 15 mph
(24 km/h) in order for the TPMS to receive this informa-
tion.
Service TPMS Warning
If a system fault is detected, the “TPM Telltale Light” will
flash on and off for 75 seconds and then remain on solid.
The system fault will also sound a chime. In addition, the
DID will display a#SERVICE TPM SYSTEM#message for
a minimum of five seconds and then display dashes (- -)
in place of the pressure value to indicate which sensor is
not being received.
If the ignition switch is cycled, this sequence will repeat,
providing the system fault still exists. If the system fault
no longer exists, the “TPM Telltale Light” will no longer
flash, and the#SERVICE TPM SYSTEM#message will no
longer display, and a pressure value will display in place
of the dashes. A system fault can occur due to any of the
following:
1. Signal interference due to electronic devices or driving
next to facilities emitting the same radio frequencies as
the TPM sensors.
422 STARTING AND OPERATING