2015 DODGE CHALLENGER check engine
[x] Cancel search: check enginePage 231 of 603

10. Air Bag Warning Light
This light will turn on for four to eight seconds
as a bulb check when the ignition switch is first
turned to the ON/RUN position. If the light is
either not on during starting, stays on, or turns
on while driving, have the system inspected at an autho-
rized dealer as soon as possible. Refer to “Occupant
Restraints” in “Things To Know Before Starting Your
Vehicle” for further information.
11. Speedometer
Indicates vehicle speed.
12. Front Fog Light Indicator — If Equipped
This indicator will illuminate when the front fog
lights are on.
13. High Beam Indicator
This indicator will turn on when the high beam
headlights are on. Push the multifunction lever
away from the steering wheel to switch the headlights to
high beam.
14. Park/Headlight ON Indicator
This indicator will illuminate when the park
lights or headlights are turned on.
15. Fuel Gauge
The pointer shows the level of fuel in the fuel tank when
the ignition switch is placed in the ON/RUN position.
16. Temperature Gauge
The temperature gauge shows engine coolant tempera-
ture. Any reading within the normal range for a fully
warm vehicle should be 200 F - 230 F which indicates that
the engine cooling system is operating satisfactorily.
4
UNDERSTANDING YOUR INSTRUMENT PANEL 229
Page 232 of 603

The gauge pointer will likely indicate a higher tempera-
ture when driving in hot weather, up mountain grades,
or when towing a trailer. It should not be allowed to
exceed the upper limits of the normal operating range.
CAUTION!
Driving with a hot engine cooling system could
damage your vehicle. If the temperature gauge reads
“H,” pull over and stop the vehicle. Idle the vehicle
with the air conditioner turned off until the pointer
drops back into the normal range. If the pointer
remains on the “H,” and you hear a chime, turn the
engine OFF immediately and call for service.
WARNING!
A hot engine cooling system is dangerous. You or
others could be badly burned by steam or boiling
(Continued)
WARNING!(Continued)
coolant. You may want to call a service center if your
vehicle overheats. If you decide to look under the
hood yourself, refer to “Maintaining Your Vehicle”
and follow the warnings under the Cooling System
Pressure Cap paragraph.
17. Tire Pressure Monitoring Telltale Light
Each tire, including the spare (if provided),
should be checked monthly when cold and
inflated to the inflation pressure recommended
by the vehicle manufacturer on the vehicle
placard or tire inflation pressure label. (If your vehicle
has tires of a different size than the size indicated on the
vehicle placard or tire inflation pressure label, you should
determine the proper tire inflation pressure for those
tires.)
230 UNDERSTANDING YOUR INSTRUMENT PANEL
Page 270 of 603

Clear Personal Data
After pressing the “Clear Personal Data Settings” button
on the touchscreen the following settings will be avail-
able:
•Clear Personal Data
When this feature is selected it will remove all personal
data including Bluetooth® devices and presets. To re-
move all personal information, press the “Clear Personal
Data” button and select from “Yes” or “No.” If “Yes” is
selected a pop-up will appear asking#Are you sure you
want to clear all personal data?” select “Yes” to Clear, or
“Cancel” to exit. Press the back arrow/Done button on
the touchscreen to return to the previous menu.
Customer Programmable Features — Uconnect®
8.4 Settings
Press the “Apps,” or the “Controls,” button on the
touchscreen, then press the “Settings” button on the
touchscreen to display the menu setting screen. In this
mode the Uconnect® system allows you to access pro-
grammable features that may be equipped such as Dis-
play, Clock, Safety & Driving Assistance, Lights, Doors &
Locks, Auto-On Comfort & Remote Start, Engine Off
Options, Compass Settings, Audio, Phone/Bluetooth®,
SiriusXM Setup, Restore Settings, Clear Personal Data,
and System Information.
NOTE:
•Only one touchscreen area may be selected at a time.
•Depending on the vehicles options, feature settings
may vary.
When making a selection, press the button on the touch-
screen to enter the desired mode. Once in the desired
mode, press and release the preferred setting until a
check-mark appears next to the setting, showing that
setting has been selected. Once the setting is complete,
268 UNDERSTANDING YOUR INSTRUMENT PANEL
Page 279 of 603

Assistance” button on the touchscreen. Press the
“Parkview Backup camera Delay” button on the touch-
screen to turn the ParkView® Delay ON or OFF.
•Rain Sensing Auto Wipers
When this feature is selected, the system will automati-
cally activate the windshield wipers if it senses moisture
on the windshield. To make your selection, press the
“Rain Sensing” button on the touchscreen, until a check-
mark appears next to setting, indicating that the setting
had been selected. Press the back arrow button on the
touchscreen to return to the previous menu.
•Hill Start Assist — If Equipped
When this feature is selected, the Hill Start Assist (HSA)
system is active. Refer to “Electronic Brake Control
System” in “Starting And Operating” for system function
and operating information. To make your selection, press
the “Hill Start Assist” button on the touchscreen, until a
check-mark appears next to setting, indicating that the
setting had been selected. Press the back arrow button on
the touchscreen to return to the previous menu.
Lights
After pressing the “Lights” button on the touchscreen the
following settings will be available.
•Headlight Off Delay
When this feature is selected, it allows adjustment of the
amount of time the headlights remain on after the engine
is shut off. To change the Headlights Off Delay setting,
press the “+” or “-” button on the touchscreen to select
your desired time interval, and choose either 0 sec, 30 sec,
60 sec or 90 seconds. Press the back arrow button on the
touchscreen to return to the previous menu, or push the
back button on the faceplate.
•Headlight Illumination On Approach
When this feature is selected, the headlights will activate
and remain on for 0, 30, 60, or 90 seconds when the doors
4
UNDERSTANDING YOUR INSTRUMENT PANEL 277
Page 280 of 603

are unlocked with the Remote Keyless Entry (RKE)
transmitter. To change the Illuminated Approach status,
press the “+” or “-” button on the touchscreen to select
your desired time interval. Press the back arrow button
on the touchscreen to return to the previous menu, or
push the back button on the faceplate.
•Headlights With Wipers — If Equipped
When this feature is selected, and the headlight switch is
in the AUTO position, the headlights will turn on ap-
proximately 10 seconds after the wipers are turned on.
The headlights will also turn off when the wipers are
turned off if they were turned on by this feature. To make
your selection, press the “Headlights With Wipers” but-
ton on the touchscreen, until a check-mark appears next
to setting, indicating that the setting has been selected.
Press the back arrow button on the touchscreen to return
to the previous menu, or push the back button on the
faceplate.
•Auto Dim High Beams — If Equipped
When this feature is selected, the high beam headlights
will activate/deactivate automatically under certain con-
ditions. To make your selection, press the “Auto High
Beams” button on the touchscreen, until a check-mark
appears next to setting, indicating that the setting has
been selected. Press the back arrow button on the touch-
screen to return to the previous menu, or push the back
button on the faceplate. Refer to “Lights — If Equipped”
in “Understanding The Features Of Your Vehicle” for
further information.
•Daytime Running Lights — If Equipped
When this feature is selected, the headlights will turn on
whenever the engine is running. To make your selection,
press the “Daytime Running Lights” button on the touch-
screen, until a check-mark appears next to setting, indi-
cating that the setting has been selected. Press the back
278 UNDERSTANDING YOUR INSTRUMENT PANEL
Page 284 of 603

“Remote Start” or “All Starts” until a check-mark ap-
pears next to setting, showing that setting has been
selected. Press the back arrow button on the touchscreen
to return to the previous menu.
Engine Off Options
After pressing the “Engine Off Options” button on the
touchscreen the following settings will be available:
•Easy Exit Seats — If Equipped
When this feature is selected, the Driver ’s seat will
automatically move rearward once the engine is shut off.
To make your selection, press the “Easy Exit Seats”
button on the touchscreen, until a check-mark appears
next to setting, showing that setting has been selected.
Press the back arrow button on the touchscreen to return
to the previous menu.
•Engine Off Power Delay
When this feature is selected, the power window
switches, radio, Uconnect® Phone system (if equipped),
DVD video system (if equipped), power sunroof (if
equipped), and power outlets will remain active for up to
10 minutes after the ignition is cycled to OFF. Opening
either front door will cancel this feature. To change the
Engine Off Power Delay setting, press the “+” or “-”
button on the touchscreen to select your desired time
interval, and choose from “0 seconds,” “45 seconds,” “5
minutes” or “10 minutes.” Press the back arrow button
on the touchscreen to return to the previous menu.
Audio
After pressing the “Audio” button on the touchscreen the
following settings will be available.
282 UNDERSTANDING YOUR INSTRUMENT PANEL
Page 300 of 603

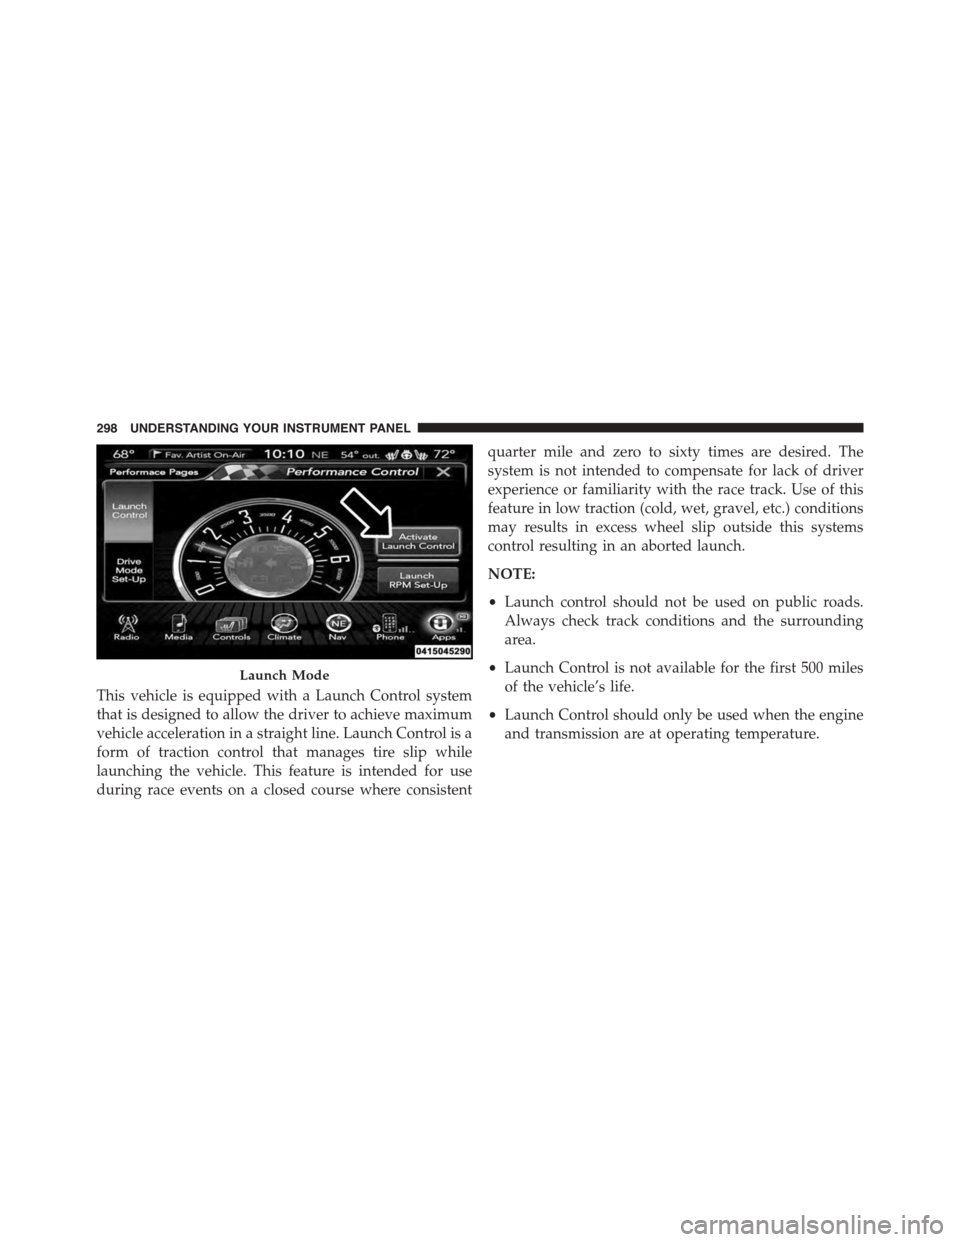
This vehicle is equipped with a Launch Control system
that is designed to allow the driver to achieve maximum
vehicle acceleration in a straight line. Launch Control is a
form of traction control that manages tire slip while
launching the vehicle. This feature is intended for use
during race events on a closed course where consistent
quarter mile and zero to sixty times are desired. The
system is not intended to compensate for lack of driver
experience or familiarity with the race track. Use of this
feature in low traction (cold, wet, gravel, etc.) conditions
may results in excess wheel slip outside this systems
control resulting in an aborted launch.
NOTE:
•Launch control should not be used on public roads.
Always check track conditions and the surrounding
area.
•Launch Control is not available for the first 500 miles
of the vehicle’s life.
•Launch Control should only be used when the engine
and transmission are at operating temperature.
Launch Mode
298 UNDERSTANDING YOUR INSTRUMENT PANEL
Page 366 of 603

Never attempt to use PARK while the vehicle is in
motion. Apply the parking brake when leaving the
vehicle in this range.
When parking on a level surface, you may shift the
transmission into PARK first, and then apply the parking
brake.
When parking on a hill, apply the parking brake before
shifting the transmission to PARK. As an added precau-
tion, turn the front wheels toward the curb on a downhill
grade and away from the curb on an uphill grade.
WARNING!
•Never use the PARK position as a substitute for the
parking brake. Always apply the parking brake
fully when parked to guard against vehicle move-
ment and possible injury or damage.
(Continued)
WARNING!(Continued)
•Your vehicle could move and injure you and others
if it is not in PARK. Check by trying to move the
shift lever out of PARK with the brake pedal
released. Make sure the transmission is in PARK
before leaving the vehicle.
•It is dangerous to shift out of PARK or NEUTRAL
if the engine speed is higher than idle speed. If
your foot is not firmly pressing the brake pedal, the
vehicle could accelerate quickly forward or in re-
verse. You could lose control of the vehicle and hit
someone or something. Only shift into gear when
the engine is idling normally and your foot is
firmly pressing the brake pedal.
(Continued)
364 STARTING AND OPERATING