Page 127 of 401

125
To engage reverse, the vehicle must be
immobilised with your foot on the brake.
F
Sel
ect position R .
At low speed, if reverse gear is requested,
the N warning lamp flashes and the gearbox
goes into neutral automatically.
To engage reverse, put the gear selector into
position N , then to position R .
There is an audible signal on
engagement of reverse.
You can change mode at any time by
moving the gear selector from A to M or
the other way round. Before switching off the engine:
-
c hange to position N to be in neutral,
or
-
l
eave the vehicle in gear; in this case the
vehicle cannot be moved.
For all parking situations, you must
apply the parking brake to immobilise
the vehicle.
Never select neutral (position N ) when
moving.
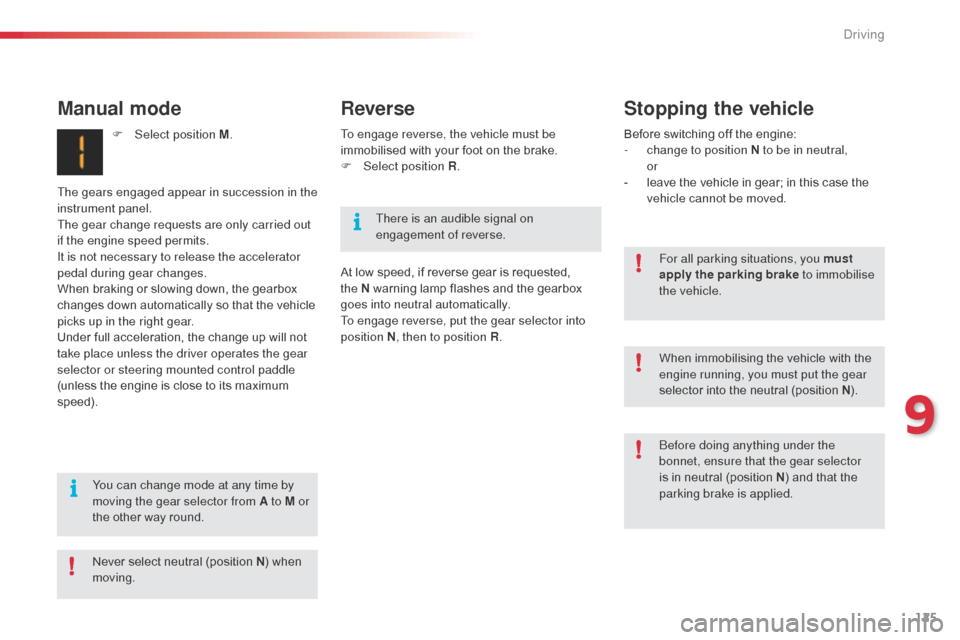
Manual mode
F Select position M .
The gears engaged appear in succession in the
instrument panel.
The gear change requests are only carried out
if the engine speed permits.
It is not necessary to release the accelerator
pedal during gear changes.
When braking or slowing down, the gearbox
changes down automatically so that the vehicle
picks up in the right gear.
Under full acceleration, the change up will not
take place unless the driver operates the gear
selector or steering mounted control paddle
(unless the engine is close to its maximum
speed).
Reverse Stopping the vehicle
before doing anything under the
bonnet, ensure that the gear selector
is in neutral (position N) and that the
parking brake is applied. When immobilising the vehicle with the
engine running, you must put the gear
selector into the neutral (position N ).
9
driving
Page 134 of 401

132
The Stop & Start system puts the engine temporarily into standby - STOP mode - during stops in the traffic (red lights, traffic jams, or other...). The
e ngine restarts automatically - START mode - as soon as you want to move off. The restart takes place instantly, quickly and silently.
Per fect for urban use, the Stop & Start system reduces fuel consumption and exhaust emissions as well as the noise level when stationary.
Operation
- with a manual gearbox , at speeds below
12 mph (20 km/h), when you put the gear
lever into neutral, and you release the
clutch pedal.
-
w
ith a 5 or 6-speed electronic gearbox ,
when stationary or at speeds below 5 mph
(8 km/h) (depending on version), when
you press the brake pedal or put the gear
selector in position N .
Going into engine STOP
mode
The "ECO" warning lamp comes
on in the instrument panel and the
engine goes into standby:
a
time counter calculates the sum
of the periods in ST
oP m
ode
during a journey. It rests itself
to zero every time the ignition is
switched on with the key.
Special cases: STOP mode not
available
STOP mode is not invoked when:
- t he driver's door is open,
-
t
he driver's seat belt is not fastened,
-
t
he vehicle has not exceeded 6 mph
(10 km/h) since the last engine start using
t h e key,
-
t
he engine is needed to maintain a
comfortable temperature in the passenger
compartment,
-
d
emisting is active,
-
s
ome special conditions (battery charge,
engine temperature, braking assistance,
ambient temperature...) where the engine is
needed to assure control of a system.
The "ECO" warning lamp flashes for
a few seconds then goes off.
This operation is perfectly normal.
Stop & Start
Never refuel with the engine in STOP
mode; you must switch off the ignition
with the key. For your comfort, during parking
manoeuvres, ST
oP m
ode is not
available for a few seconds after
coming out of reverse gear.
ST
oP m
ode does not affect the
functionality of the vehicle, such as for
example, braking, power steering...
Driving
Page 138 of 401

136
System which prevents the vehicle from
exceeding the speed programmed by the driver.
When the programmed speed limit is reached,
pressing the accelerator pedal in the normal
manner no longer has any effect.Steering mounted controls
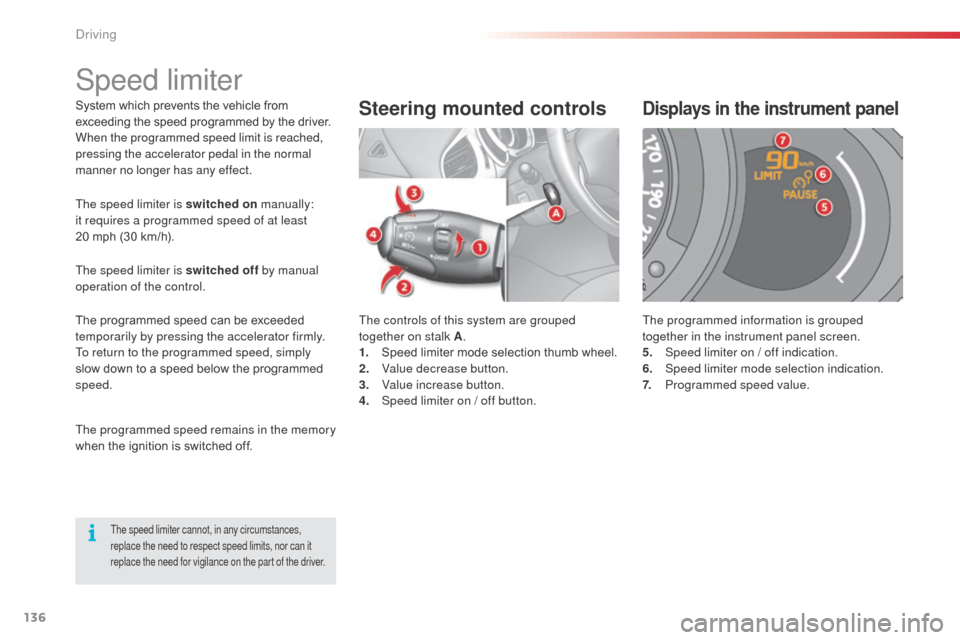
The controls of this system are grouped
together on stalk A.
1.
S
peed limiter mode selection thumb wheel.
2.
V
alue decrease button.
3.
V
alue increase button.
4.
S
peed limiter on / off button.
Displays in the instrument panel
The programmed information is grouped
together in the instrument panel screen.
5.
S
peed limiter on / off indication.
6.
Spe
ed limiter mode selection indication.
7.
P
rogrammed speed value.
The speed limiter cannot, in any circumstances,
replace the need to respect speed limits, nor can it
replace the need for vigilance on the part of the driver.
Speed limiter
The speed limiter is switched on manually:
it requires a programmed speed of at least
20 mph (30 km/h).
The speed limiter is switched off by manual
operation of the control.
The programmed speed can be exceeded
temporarily by pressing the accelerator firmly.
To return to the programmed speed, simply
slow down to a speed below the programmed
speed.
The programmed speed remains in the memory
when the ignition is switched off.
driving
Page 140 of 401

138
System which automatically maintains the
speed of the vehicle at the value programmed
by the driver, without any action on the
accelerator pedal.The controls of this system are grouped
together on stalk A.
1.
C
ruise control mode selection thumb
wheel.
2.
V
alue decrease button.
3.
V
alue increase button.
4.
C
ruise control off/resume button.Steering mounted controlsDisplays in the instrument panel
The programmed information is grouped
together in the instrument panel screen.
5.
C
ruise control off/resume indication.
6.
C
ruise control mode selection indication.
7.
P
rogrammed speed value.
The cruise control cannot, in any circumstances,
replace the need to respect speed limits, nor can it
replace the need for vigilance on the part of the driver.
Cruise control
The cruise control is switched on manually: it
requires a minimum vehicle speed of 25 mph
(40 km/h), as well as the engagement of:
-
f
ourth gear on a manual gearbox,
-
s
econd gear on a or automatic or electronic
gearbox, in sequential mode,
-
position A on an electronic gearbox or
position D on an automatic gearbox.
The cruise control is switched off manually
or by pressing the brake or clutch pedal or on
triggering of the trajectory control systems for
safety reasons.
It is possible to exceed the programmed speed
temporarily by pressing the accelerator pedal.
To return to the programmed speed, simply
release the accelerator pedal.
Switching off the ignition cancels any
programmed speed value.
driving
Page 189 of 401

187
Fuse N°Rating Functions
F8 20 AMultifunction screen, audio system, navigation and audio
system, instrument panel with clock, alarm control unit, alarm
siren, audio system (after-market), 12 V socket, portable
navigation carrier power supply.
F9 30 AMultifunction screen, audio system, navigation and audio
system, instrument panel with clock, alarm control unit, alarm
siren, audio system (after-market), 12 V socket, portable
navigation carrier power supply, locking.
F10 15 ASteering mounted controls.
F11 15 AIgnition, diagnostic socket, automatic gearbox control unit.
F12 15 ARain / sunshine sensor, trailer relay unit, driving school module.
F13 5 AMain stop switch, engine relay unit, gear lever for electronic
gearbox.
F14 15 AParking sensors control unit, airbag control unit, instrument
panel, digital air conditioning, USB Box, HiFi amplifier,
reversing camera.
F15 30 ALocking.
F16 -
no
t used.
F17 40 ARear screen and door mirrors demisting/defrosting.
SH -Transit and storage shunt.
11
Practical information
Page 191 of 401
189
Fuse table
Fuse N°Rating Functions
F1 20 AEngine control unit supply, cooling fan unit control relay,
multifunction engine control main relay, injection pump (Diesel).
F2 15 AHorn.
F3 10 AFront / rear wash-wipe.
F4 20 A
da
ytime running lamps, LE
d d
aytime running lamps.
F5 15 ADiesel heater (Diesel), particle filter additive pump (Diesel), air
flow sensor (Diesel), fuel pump (1.1i and 1.4i), blow-by heater
and electrovalves (VTi).
F6 10 AABS/ESP control unit, secondary brake lamp switch.
F7 10 AElectric power steering, automatic gearbox.
F8 25 AStarter motor control.
F9 10 ASwitching and protection unit (Diesel).
F10 30 AFuel heater (Diesel), blow-by heater (1.1i, 1.4i and Diesel),
fuel pump (VTi), injectors and ignition coils (petrol), electronic
thermostat and canister purge electrovalve (1.1i and 1.4i).
F11 40 AHeater blower.
11
Practical information
Page 200 of 401

198
Towing the vehicle
Access to the tools
The towing eye is installed in the boot under
t h e f l o o r.
To gain access to it:
F
o
pen the boot,
F
r
aise the floor,
F
r
emove the polystyrene storage box,
F
r
emove the towing eye from the holder.
Procedure for having your vehicle towed or for towing another vehicle using a removable towing eye.
General recommendations
observe the legislation in force in your country.
Ensure that the weight of the towing vehicle is higher than that of the towed vehicle.
The driver must remain at the wheel of the towed vehicle and must have a valid driving licence.
When towing a vehicle with all four wheels on the ground, always use an approved towing
arm; rope and straps are prohibited.
The towing vehicle must move off gently.
When towing a vehicle with the engine off, there is no longer any power assistance for
braking or steering.
In the following cases, you must always call on a professional recovery service:
-
v
ehicle broken down on a motor way or fast road,
-
f
our-wheel drive vehicle,
-
w
hen it is not possible to put the gearbox into neutral, unlock the steering, or release
the parking brake,
-
t
owing with only two wheels on the ground,
-
w
here there is no approved towing arm available...
Practical information
Page 201 of 401
199
Towing your vehicle
F on the front bumper, unclip the cover by pressing at the bottom.
F
S
crew the towing eye in fully.
F
I
nstall the towing arm.
F
P
lace the gear lever in neutral (position N
for an electronic or automatic gearbox). F
on t he rear bumper, unclip the cover by
pressing at the bottom.
F
S
crew the towing eye in fully.
F
I
nstall the towing arm.
F
S
witch on the hazard warning lamps on
both vehicles.
F
M
ove off gently and drive for a short
distance only.
Towing another vehicle
Failure to observe this special condition
could result in damage to certain
components (braking, transmission..)
and the absence of braking assistance
the next time the engine is started. F
U
nlock the steering by turning the key one
notch in the ignition switch and release the
parking brake.
F
S
witch on the hazard warning lamps on
both vehicles.
F
M
ove off gently and drive for a short
distance only.
11
Practical information