Page 172 of 726

Roadside Assistance/Towing Assistance
If you need roadside assistance:
•Push the Phonebutton to begin.
•After the “Ready” prompt and the following beep, say
“Towing Assistance.”
NOTE:You should program the desired Towing Assis-
tance phone number using the Voice Command system.
To do this, push the Phonebutton and say “Setup,”
followed by “Towing Assistance.” When prompted
say 1-800-521-2779 for U.S./Canada, say 55-14-3454
for Mexico City and 1-800-712-3040 for outside Mexico
City in Mexico.
Paging
To learn how to page, refer to “Working with Automated
Systems.” Paging works properly except for pagers of
certain companies, which time out a little too soon to
work properly with the Uconnect® Phone.
Voice Mail Calling
To learn how to access your voice mail, refer to “Working
with Automated Systems.”
Working With Automated Systems
This method is used in instances where one generally has
to push numbers on the mobile phone keypad while
navigating through an automated telephone system.
You can use your Uconnect® Phone to access a voice mail
system or an automated service, such as a paging service
or automated customer service line. Some services re-
quire immediate response selection. In some instances,
that may be too quick for use of the Uconnect® Phone.
When calling a number with your Uconnect® Phone that
normally requires you to enter in a touch-tone sequence
on your mobile phone keypad, you can push the Voice
Commandbutton and say the sequence you wish
to enter, followed by the word “Send.” For example, if
170 UNDERSTANDING THE FEATURES OF YOUR VEHICLE
Page 187 of 726
PrimaryAlternate (s)
home
language
list names
list phones
mobile
mute
mute off
new entry
no
other
pair a phone
phone pairingpairing
phonebookphone book
previous
record again
PrimaryAlternate (s)
redial
return to main menu return or main menu
select phoneselect
send
set upphone settings or phone
set up
towing assistance
transfer call
Uconnect® Tutorial
voice training
work
yes
3
UNDERSTANDING THE FEATURES OF YOUR VEHICLE 185
Page 208 of 726
Head Restraints — Third Row
The head restraint in the center position can be raised and
lowered for tether routing. Refer to “Occupant Re-
straints” in “Things To Know Before Starting Your Ve-
hicle” for further information.
Stow ’n Go® Seating — If Equipped
On vehicles equipped with Stow ’n Go® seating, the
second and third row seats can be folded into the floor for
convenient storage.
Second Row Stow ’n Go®
On vehicles equipped with Stow ’n Go® seats, the seats
will fold and tumble in one motion.
1. Move the front seat fully forward.
2. Recline the front seatback fully forward.
3. Raise the armrests on the second row seat.
NOTE:Seat will not stow in the storage bin unless the
armrests are raised.
4. Slide the storage bin locking mechanism to the
“LOCK” position and then pull up on the storage bin
latch to open the cover.
Storage Bin Cover Lock Release
206 UNDERSTANDING THE FEATURES OF YOUR VEHICLE
Page 212 of 726
To Unstow Second Row Seats
1. Pull up on the storage bin latch to open the cover.
2. Pull up on the strap to lift the seat out of the storage
bin and push the seat rearward to latch the seat
anchors.
3. Lift the seatback to the full upright position.
4. Return the head restraint to its upright position, close
the storage bin cover and slide the storage bin locking
mechanism to the “Unlocked” position.
WARNING!
•In a collision, you or others in your vehicle could
be injured if seats are not properly latched to their
floor attachments. Always be sure the seats are
fully latched.
•Sitting in a seat with the head restraint in its
lowered position could result in serious injury or
death in a collision. Always make sure the head
restraints are in their upright positions when the
seat is to be occupied.
210 UNDERSTANDING THE FEATURES OF YOUR VEHICLE
Page 213 of 726
Stow ’n Go® Seat — Folded And Latched Position
To tumble or stow the seat from the folded and latched
position: return the seatback and head restraint to the
upright position. Then pull up on the seatback recliner
lever on the outboard side of the seat to fold head rest
and seatback and tumble seat forward.
1. Return the seatback to the upright position.
2. Return the head restraint to the upright position.
Raising The Seatback
3
UNDERSTANDING THE FEATURES OF YOUR VEHICLE 211
Page 214 of 726
3. Pull up on the seatback recliner lever on the outboard
side of the seat to fold head rest and seatback and
tumble seat forward.
Easy Entry Second Row
The second row Stow ’n Go® seats allow easy entry to the
third row seat or rear cargo area.
Pull up on the seatback recliner lever on the outboard
side of the seat.
Raising The Head Restraint
Seatback Recliner Lever, Seat Tumble, And Head
Restraint Fold Lever
212 UNDERSTANDING THE FEATURES OF YOUR VEHICLE
Page 219 of 726
Second Row Bench Seat — If Equipped
While the bench seat does not stow in the floor, it is
removable for added cargo space.
Release levers are located on the rear leg assemblies, near
the floor. To remove the seat, squeeze each release handle
and rotate downwards to deploy the wheels. A lock
indicator button pops up when the seat is unlocked. The
seat assembly can now be removed from the vehicle and
moved on its Easy Out® Rollers.
Second Row Bench Seat
Release Handles
3
UNDERSTANDING THE FEATURES OF YOUR VEHICLE 217
Page 222 of 726

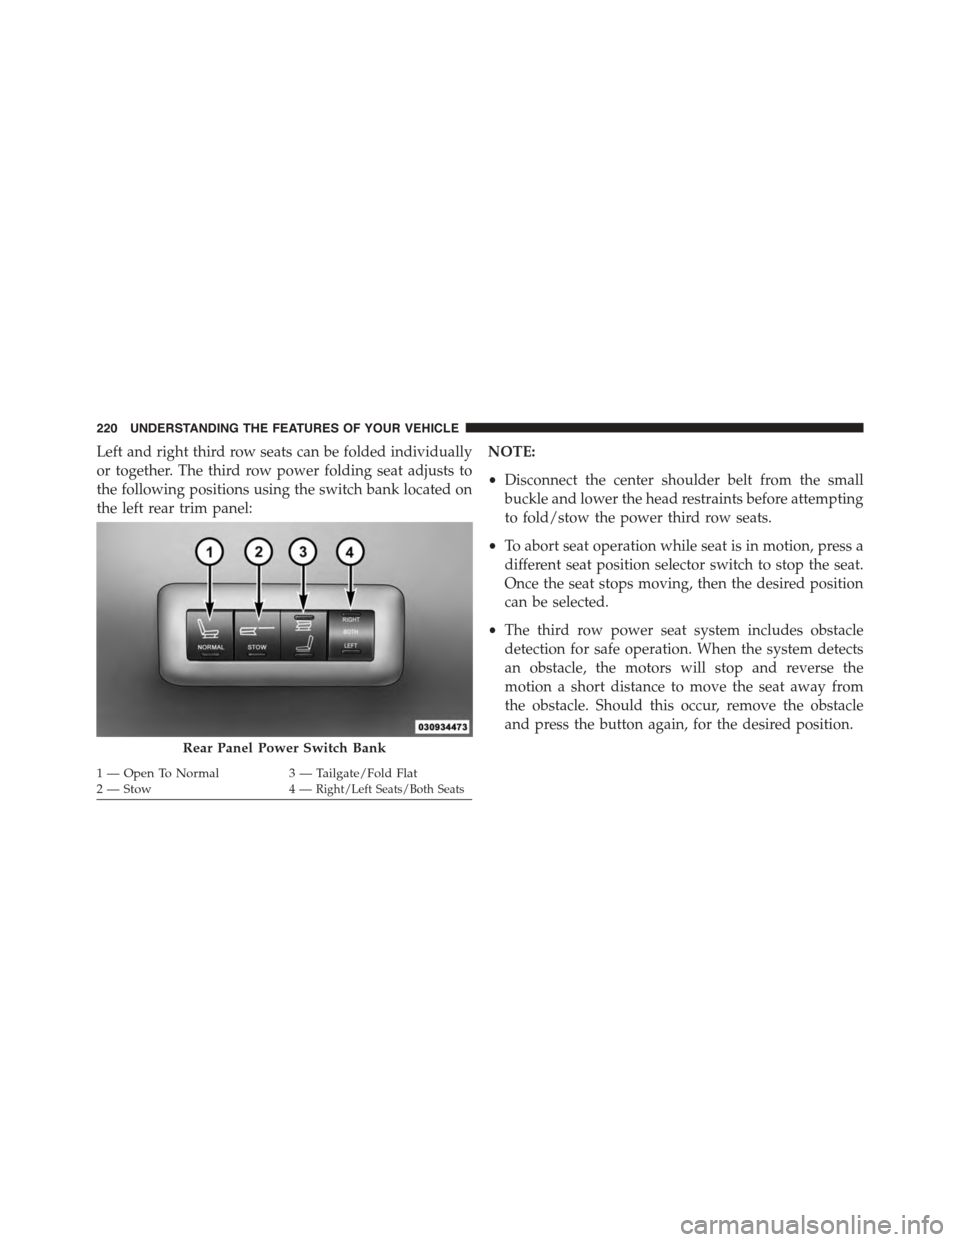
Left and right third row seats can be folded individually
or together. The third row power folding seat adjusts to
the following positions using the switch bank located on
the left rear trim panel:
NOTE:
•Disconnect the center shoulder belt from the small
buckle and lower the head restraints before attempting
to fold/stow the power third row seats.
•To abort seat operation while seat is in motion, press a
different seat position selector switch to stop the seat.
Once the seat stops moving, then the desired position
can be selected.
•The third row power seat system includes obstacle
detection for safe operation. When the system detects
an obstacle, the motors will stop and reverse the
motion a short distance to move the seat away from
the obstacle. Should this occur, remove the obstacle
and press the button again, for the desired position.
Rear Panel Power Switch Bank
1 — Open To Normal3 — Tailgate/Fold Flat2—Stow4—Right/Left Seats/Both Seats
220 UNDERSTANDING THE FEATURES OF YOUR VEHICLE