2015 CHRYSLER 200 instrument cluster
[x] Cancel search: instrument clusterPage 3 of 220

INTRODUCTION/WELCOME
WELCOME FROM CHRYSLER
GROUPLLC ..................3
CONTROLS AT A GLANCE
DRIVER COCKPIT...............6
INSTRUMENT CLUSTER ...........8
GETTING STARTED
KEYFOB ....................10
REMOTE START...............11
KEYLESS ENTER-N-GO™ ..........12
TRUNK LOCK AND RELEASE ........16
VEHICLE SECURITY ALARM ........17
SEAT BELT SYSTEMS .............18
SUPPLEMENTAL RESTRAINT SYSTEM
(SRS)—AIRBAGS ..............19
CHILD RESTRAINTS .............25
HEAD RESTRAINTS .............28
FRONTSEATS .................29
REAR SEAT ...................31
HEATED/VENTILATED SEATS .......32
HEATED STEERING WHEEL ........33
TILT/TELESCOPING STEERING
COLUMN ...................34
OPERATING YOUR VEHICLE
ENGINE BREAK-IN
RECOMMENDATIONS ............35
TURN SIGNAL/HIGH BEAM LEVER ....35
HEADLIGHT SWITCH ............36
WIPER/WASHER LEVER ...........37
ELECTRONIC SPEED CONTROL .....38
ADAPTIVE CRUISE CONTROL (ACC) . . 40
FORWARD COLLISION WARNING (FCW)
WITHMITIGATION .............43
MANUAL CLIMATE CONTROLS WITHOUT
TOUCHSCREEN ...............45
MANUAL CLIMATE CONTROLS WITH
TOUCHSCREEN ...............46
AUTOMATIC TEMPERATURE CONTROLS
(ATC) .....................48
NINE-SPEED AUTOMATIC
TRANSMISSION ................51
PADDLE SHIFT MODE ............53
STOP/START SYSTEM — 2.4L ENGINE . . . 54
ELECTRIC PARKING BRAKE (EPB) .....55
PARKSENSE® ..................57
LANESENSE . .................59
PARKVIEW® REAR BACK-UP CAMERA . . 60
BLIND SPOT MONITORING ........60
POWER SUNROOF ..............61
WIND BUFFETING . . ............63
ELECTRONICS
YOUR VEHICLE'S SOUND SYSTEM . . . . 64
IDENTIFYING YOUR RADIO ........66
Uconnect® ACCESS . . . ...........67
Uconnect® 3.0 . . ................84
Uconnect® 5.0 ..................86
Uconnect® 8.4A ................98
Uconnect® 8.4AN . . .............129
STEERING WHEEL AUDIO CONTROLS. . 145
ELECTRONIC VEHICLE INFORMATION
CENTER (EVIC) AND DRIVER
INFORMATION DISPLAY (DID) ......146
PROGRAMMABLE FEATURES .......148
UNIVERSAL GARAGE DOOR OPENER
(HomeLink®) ..................148
POWER INVERTER .............151
POWER OUTLET ..............152
UTILITY
TRAILER TOWING WEIGHTS (MAXIMUM
TRAILER WEIGHT RATINGS) .......153
RECREATIONAL TOWING (BEHIND
MOTORHOME, ETC.) ...........153
WHAT TO DO IN EMERGENCIES
ROADSIDE ASSISTANCE ..........155
INSTRUMENT CLUSTER WARNING
LIGHTS ....................155
INSTRUMENT CLUSTER INDICATOR
LIGHTS ....................160
IF YOUR ENGINE OVERHEATS ......161
TIRESERVICEKIT ..............161
JACKING AND TIRE CHANGING ....168
JUMP-STARTING ..............176
FREEING A STUCK VEHICLE .......178
MANUAL PARK RELEASE ..........179
TOWING A DISABLED VEHICLE .....181
EVENT DATA RECORDER (EDR) .....181
MAINTAINING YOUR VEHICLE
OPENING THE HOOD...........182
ENGINE COMPARTMENT .........184
FLUIDCAPACITIES .............188
FLUIDS, LUBRICANTS AND
GENUINE PARTS ..............188
MAINTENANCE PROCEDURES ......189
MAINTENANCE SCHEDULE .......190
FUSES .....................193
TIRE PRESSURES ...............198
SPARE TIRES — IF EQUIPPED .......199
WHEEL AND WHEEL TRIM CARE . . . . 200
REPLACEMENT BULBS ...........201
TABLE OF CONTENTS
Page 10 of 220

INSTRUMENT CLUSTER
1. Tachometer
2. Electronic Vehicle Information Center (EVIC) / Driver Information Display (DID)
(See page 155 for Instrument Cluster Warning Lights.)
CONTROLS AT A GLANCE
8
Page 11 of 220

3. Fuel Gauge
4. Speedometer
(See page 160 for Instrument Cluster Indicator Lights.)
CONTROLS AT A GLANCE
9
Page 19 of 220

VEHICLE SECURITY ALARM
This Vehicle Security Alarm monitors the doors, liftgate, and ignition switch for unauthorized
operation.
When the alarm is activated, the interior switches for door locks are disabled. The Vehicle
Security Alarm provides both audio and visual signals repeatedly for three minutes. If the
disturbance is still present (driver's door, passenger door, other doors, ignition) after three
minutes, the parking lights and tail lights will flash for an additional 15 minutes.
To Arm:
• Lock the door using either the power door lock switch (one door must be open) or the LOCKbutton on the Remote Keyless Entry (RKE) transmitter (doors can be open or closed), and
close all doors.
NOTE:
The Vehicle Security Alarm will not arm if you lock the doors with the manual door lock rocker
button.
The Vehicle Security Light in the instrument cluster will flash for 16 seconds. This shows that the
Vehicle Security Alarm is arming. During this period, if a door is opened, the ignition is cycled to
ON/RUN, or the power door locks are unlocked in any manner, the Vehicle Security Alarm will
automatically disarm.
NOTE:
Once armed, the Vehicle Security Alarm disables the unlock switch on the driver door trim panel
and passenger door trim panel.
To Disarm The System:
• Push the Key Fob UNLOCK button or cycle the ignition to the ON/RUN position.
The Vehicle Security Alarm is designed to protect your vehicle; however, you can create
conditions where the Vehicle Security Alarm will give you a false alarm. If one of the previously
described arming sequences has occurred, the Vehicle Security Alarm will arm regardless of
whether you are in the vehicle or not. If you remain in the vehicle and open a door, the alarm will
sound. If this occurs, disarm the Vehicle Security Alarm.
If the Vehicle Security Alarm is armed and the battery becomes disconnected the Vehicle
Security Alarm will remain armed when the battery is reconnected. The exterior lights will flash,
and the horn will sound. If this occurs, disarm the Vehicle Security Alarm.
GETTING STARTED
17
Page 55 of 220

PADDLE SHIFT MODE
• When the transmission is in DRIVE orSPORT mode, it will operate automatically,
shifting between the nine available gears.
• To activate Paddle Shift mode, simply tap one of the steering wheel-mounted shift
paddles (+/-) while in DRIVE or SPORT
mode. Tapping (-) to enter Paddle Shift
mode will downshift the transmission to the
next lower gear, while using (+) to enter
Paddle Shift mode will retain the current
gear. When Paddle Shift is active, the cur-
rent transmission gear is displayed in the
instrument cluster.
• In Paddle Shift mode, the transmission will shift up or down when (+/-) is manually se-
lected by the driver, unless an engine lug-
ging or overspeed condition would result. It
will remain in the selected gear until another
upshift or downshift is chosen, except as
explained below.
• If Paddle Shift is engaged while in DRIVE mode, the transmission will automatically shift up when maximum engine speed is reached. Lack of accelerator pedal activity will cause the
transmission to revert to automatic operation.
• If Paddle Shift is engaged while in SPORT mode, the transmission will remain in the selected gear even when maximum engine speed is reached (except the transmission will upshift
automatically from 1st to 2nd gear at wide open throttle, if necessary). Otherwise, the
transmission will upshift only when commanded by the driver.
• In either DRIVE or SPORT mode, the transmission will automatically downshift as the vehicle slows to a stop (to prevent engine lugging) and will display the current gear. Tapping the (+)
paddle (at a stop) will allow starting in second gear. After a stop, the driver should manually
upshift (+) the transmission as the vehicle accelerates.
• Holding the (-) paddle depressed will downshift the transmission to the lowest gear possible at the current speed.
To disengage Paddle Shift mode, press and hold the (+) shift paddle until “D” or “S” is once again
indicated in the instrument cluster. You can shift in or out of Paddle Shift mode at any time
without taking your foot off the accelerator pedal.
WARNING!
Do not downshift for additional engine braking on a slippery surface. The drive wheels could
lose their grip and the vehicle could skid, causing a collision or personal injury.
Shift Paddles
1 — (-) Paddle Shift
2 — (+) Paddle Shift
OPERATING YOUR VEHICLE
53
Page 57 of 220

To Manually Turn On The Stop/Start System
Press the STOP/START Off switch (located on the switch bank). The light on the switch will turn off.
For complete details on the Stop/Start System refer to the “Stop/Start System” in the “Starting
and Operating” section located in your owners manual on the DVD for further information.
ELECTRIC PARKING BRAKE (EPB)
Your vehicle is equipped with an Electric Parking Brake System (EPB) that offers simple
operation, and some additional features that make the parking brake more convenient and useful.
The parking brake switch is located in the center console.
To engage the parking brake manually, pull up
on the switch momentarily.
To release the parking brake manually, the igni-
tion switch must be in the ON/RUN position.
Push on the brake pedal, then push the parking
brake switch down momentarily.
The parking brake will disengage automatically
when the ignition switch in the RUN position,
the transmission is in DRIVE or REVERSE, the
driver seat belt is buckled, and an attempt is
made to drive away by pressing the accelerator
pedal.
NOTE:
• You may hear a slight whirring sound fromthe back of the vehicle while the parking brake engages or disengages.
• Once the parking brake is fully engaged, the BRAKE warning lamp in the instrument cluster and the LED indicator on the switch will illuminate. Once the parking brake is fully disengaged,
the BRAKE warning lamp in the instrument cluster and the LED indicator on the switch will
extinguish.
• If your foot is on the brake pedal while you are engaging or disengaging the parking brake, you may notice a small amount of brake pedal movement.
• The parking brake can be engaged even when the ignition switch is OFF, however, it can only be disengaged when the ignition switch is in the ON/RUN position.
• The EPB fault lamp will illuminate if the EPB switch is held for longer than 20 seconds in either the released or applied position. The light will extinguish upon releasing the switch.
• Refer to the Starting and Operating section of your vehicle’s Owner’s Manual on the DVD for further details.
Parking Brake Switch
OPERATING YOUR VEHICLE
55
Page 148 of 220

ELECTRONIC VEHICLE INFORMATION
CENTER (EVIC) AND DRIVER INFORMATION
DISPLAY (DID)
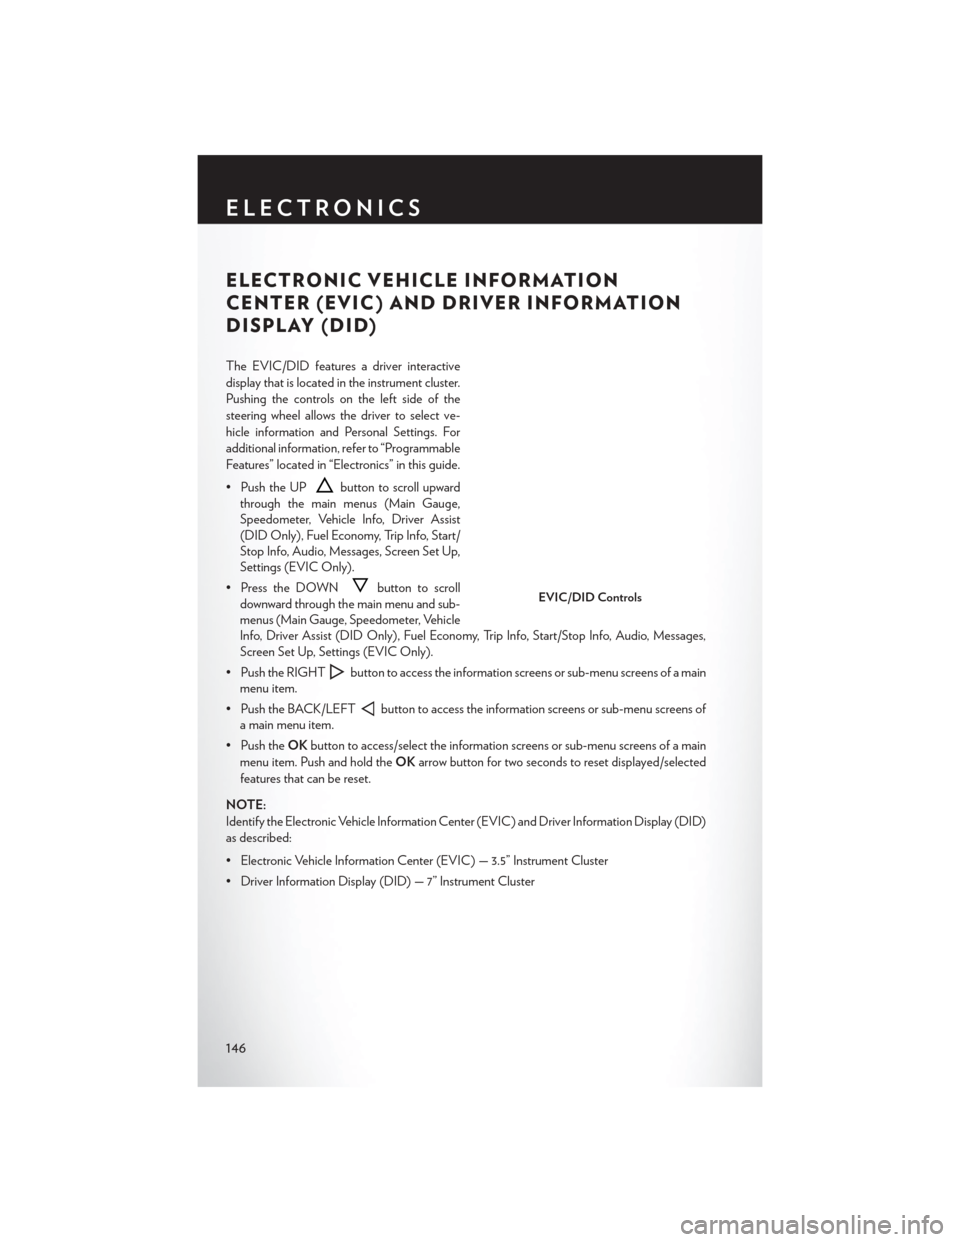
The EVIC/DID features a driver interactive
display that is located in the instrument cluster.
Pushing the controls on the left side of the
steering wheel allows the driver to select ve-
hicle information and Personal Settings. For
additional information, refer to “Programmable
Features” located in “Electronics” in this guide.
• Push the UP
button to scroll upward
through the main menus (Main Gauge,
Speedometer, Vehicle Info, Driver Assist
(DID Only), Fuel Economy, Trip Info, Start/
Stop Info, Audio, Messages, Screen Set Up,
Settings (EVIC Only).
• Press the DOWN
button to scroll
downward through the main menu and sub-
menus (Main Gauge, Speedometer, Vehicle
Info, Driver Assist (DID Only), Fuel Economy, Trip Info, Start/Stop Info, Audio, Messages,
Screen Set Up, Settings (EVIC Only).
• Push the RIGHT
button to access the information screens or sub-menu screens of a main
menu item.
• Push the BACK/LEFT
button to access the information screens or sub-menu screens of
a main menu item.
• Push the OKbutton to access/select the information screens or sub-menu screens of a main
menu item. Push and hold the OKarrow button for two seconds to reset displayed/selected
features that can be reset.
NOTE:
Identify the Electronic Vehicle Information Center (EVIC) and Driver Information Display (DID)
as described:
• Electronic Vehicle Information Center (EVIC) — 3.5” Instrument Cluster
• Driver Information Display (DID) — 7” Instrument Cluster
EVIC/DID Controls
ELECTRONICS
146
Page 149 of 220

EVIC/DID Main Menu Selectable Items
The EVIC/DID can be used to view the following main menu items:
• Speedometer• Stop/Start Info – If Equipped
• Vehicle Info • Audio
• Driver Assist ** • Messages
• Fuel Economy • Screen Setup
• Trip Info • Settings *
NOTE:
• Electronic Vehicle Information Center (EVIC) — 3.5” Instrument Cluster — *
• Driver Information Display (DID) — 7” Instrument Cluster — **
Refer to your Owner's Manual on the DVD for further information.
EVIC/DID Screen Setup
Push the UP or DOWN arrow button to scroll through the Menu Items till Screen Setup displays
in the EVIC/DID. Push the OK button to enter Screen Setup. The Screen Setup feature allows
you to change what information is displayed in the instrument cluster as well as the location that
information is displayed.
Configurable Screen Setup Menu Titles
• Compass • Trip A Distance
• Outside Temp • Trip B Distance
• Time • Audio Info
• Range to Empty • Menu Title
• Average MPG • Speedometer (Digital Speedo)
• Current MPG • Current Gear (ON/OFF)
• Defaults (defaults: Compass UR, Outside Temp
UL, Center Menu Title, Gear Display Off )
ELECTRONICS
147