2015 CHEVROLET SONIC window
[x] Cancel search: windowPage 240 of 403
Black plate (27,1)Chevrolet Sonic Owner Manual (GMNA-Localizing-U.S./Canada-7707487) -
2015 - crc - 10/31/14
Driving and Operating 9-27
{Caution
Driving with the parking brake on
can overheat the brake system
and cause premature wear or
damage to brake system parts.
Make sure that the parking brake
is fully released and the brake
warning light is off before driving.
Brake Assist
The Brake Assist feature is
designed to assist the driver in
stopping or decreasing vehicle
speed in emergency driving
conditions. This feature uses the
stability system hydraulic brake
control module to supplement the
power brake system under
conditions where the driver has
quickly and forcefully applied the
brake pedal in an attempt to quickly
stop or slow down the vehicle. The
stability system hydraulic brake
control module increases brake
pressure at each corner of thevehicle until the ABS activates.
Minor brake pedal pulsation or
pedal movement during this time is
normal and the driver should
continue to apply the brake pedal as
the driving situation dictates. The
Brake Assist feature will
automatically disengage when the
brake pedal is released or brake
pedal pressure is quickly
decreased.
Hill Start Assist (HSA)
This vehicle has an HSA feature,
which may be useful when the
vehicle is stopped on a grade
sufficient enough to activate HSA.
This feature is designed to prevent
the vehicle from rolling, either
forward or rearward, during vehicle
drive off. After the driver completely
stops and holds the vehicle in a
complete standstill on a grade, HSA
will be automatically activated.
During the transition period between
when the driver releases the brake
pedal and starts to accelerate to
drive off on a grade, HSA holds thebraking pressure for a maximum of
two seconds to ensure that there is
no rolling. The brakes will
automatically release when the
accelerator pedal is applied within
the two-second window. It will not
activate if the vehicle is in a drive
gear and facing downhill, or if the
vehicle is facing uphill and in
R (Reverse).
Page 276 of 403

Black plate (21,1)Chevrolet Sonic Owner Manual (GMNA-Localizing-U.S./Canada-7707487) -
2015 - crc - 10/31/14
Vehicle Care 10-21
2. Turn the heater on to the highesttemperature and to the highest
fan speed. Open the windows as
necessary.
3. When it is safe to do so, pull off the road, shift to P (Park) or
N (Neutral) for an automatic
transmission or Neutral for a
manual transmission, and let the
engine idle.
If the overheat warning no longer
displays, the vehicle can be driven.
Continue to drive the vehicle slowly
for about 10 minutes. Keep a safe
vehicle distance from the vehicle in
front. If the warning does not come
back on, continue to drive normally
and have the cooling system
checked for proper fill and function.
If the warning continues, pull over,
stop, and park the vehicle
right away.
If there is no sign of steam, idle the
engine for three minutes while
parked. If the warning is still
displayed, turn off the engine until it
cools down.Washer Fluid
What to Use
When the vehicle needs windshield
washer fluid, be sure to read the
manufacturer's instructions before
use. If operating the vehicle in an
area where the temperature may fall
below freezing, use a fluid that has
sufficient protection against
freezing.
Adding Washer Fluid
Open the cap with the washer
symbol on it. Add washer fluid until
the tank is full. See Engine
Compartment Overview on
page 10-6 for reservoir location.
{Caution
.Do not use engine coolant
(antifreeze) in the windshield
washer. It can damage the
windshield washer system
and paint.
.Do not mix water with
ready-to-use washer fluid.
Water can cause the solution
to freeze and damage the
washer fluid tank and other
parts of the washer system.
.When using concentrated
washer fluid, follow the
manufacturer instructions for
adding water.
.Fill the washer fluid tank only
three-quarters full when it is
very cold. This allows for fluid
expansion if freezing occurs,
which could damage the tank
if it is completely full.
Page 290 of 403

Black plate (35,1)Chevrolet Sonic Owner Manual (GMNA-Localizing-U.S./Canada-7707487) -
2015 - crc - 10/31/14
Vehicle Care 10-35
Mini Fuses Usage1 Antilock Brake System Valve
2 Sunroof
4 Rear Wiper
5 Regulated Voltage Control
6 Antilock Brake System Fluid
7 Automatic Occupant
Sensing/ROS
8 Outside Rearview Mirror
10 Rear Window Defogger
12 Heated Outside Rearview Mirror
13 Heated Front Seat
14 Fuel System Control Module 1
15 Flex Fuel Mini Fuses Usage
16 Washer
17 Fuel Pump (1.8L)
18 Engine Control Module 5
19 Fuel System Control Module 2/
Leveling
20 Transmission Control Module 1
21 Engine Control Module 1
22 Coil
23 Engine Control Module 4
24 Engine Control Module 3
25 Engine Control Module 2
26 Injector/ Ignition Coil Mini Fuses Usage
27 Engine Control Module
28 Air Conditioning Compressor Clutch
29 Transmission Control Module
30 Horn
31 Front Fog Lamps
32 Left High Beam
33 Right High Beam
SPARE Spare
J-Case Fuses Usage
1 Antilock Brake System Pump
2 Front Wiper
3 Blower
4 Run/Crank IEC
6 Cooling Fan K5
Page 291 of 403
Black plate (36,1)Chevrolet Sonic Owner Manual (GMNA-Localizing-U.S./Canada-7707487) -
2015 - crc - 10/31/14
10-36 Vehicle Care
J-CaseFuses Usage
7 Cooling Fan K4
8 EVP
9 Start
Relays Usage RLY 1 Front Wiper Control Relay
RLY 2 Front Wiper Speed Relay
RLY 3 Rear Window Defogger Relay
RLY 4 Run/Crank Relay
RLY 6 Fuel Pump Relay (1.8L)
RLY 7 Cooling Fan K2 Relay (1.4L)
RLY 8 Cooling Fan K3 Relay (1.8L),
Cooling Fan K3
High Current
Relay (1.4L) Relays
Usage
RLY 9 Powertrain Relay
RLY 10 Start High Current Relay
RLY 11 Air Conditioning Compressor Clutch
Relay
RLY 12 High-Beam Relay
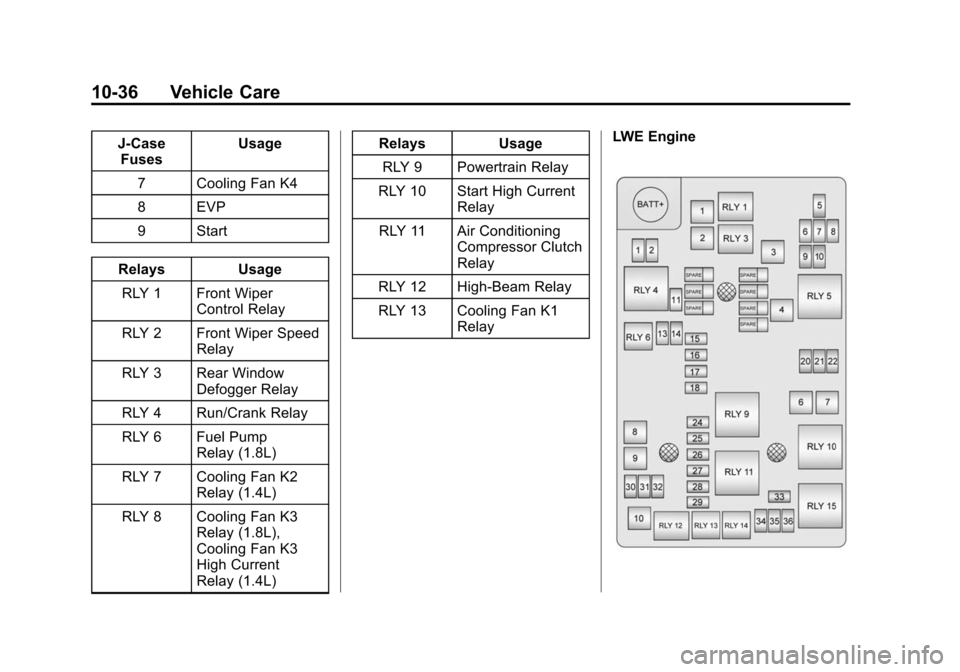
RLY 13 Cooling Fan K1 Relay LWE Engine
Page 292 of 403

Black plate (37,1)Chevrolet Sonic Owner Manual (GMNA-Localizing-U.S./Canada-7707487) -
2015 - crc - 10/31/14
Vehicle Care 10-37
The vehicle may not be equipped
with all of the fuses, relays, and
features shown.Mini Fuses Usage
1 Antilock Brake System Valve
2 Sunroof
5 Outside Rearview Mirror
6 AOS/ROS
7 ABS Oil
8 Regulated Voltage Control
9 Rear Wiper
10 Not Used/IBS* 11 Rear Window Defogger
13 Not Used/SAI Valve*
14 Heated Outside Rearview Mirror
15 Heated Seat Front Mini Fuses Usage
16 Fuel System Control Module 1
17 Canister Vent
18 Washer
20 Engine Control Module 5
21 Fuel System Control Module 2/
Leveling
22 Transmission Control Module 1/
DC-DC Converter
24 Engine Control Module 1
25 Coil
26 Engine Control Module 4
27 Engine Control Module 3
28 Engine Control Module 2 Mini Fuses Usage
29 Injector/ Ignition Coil
30 Engine Control Module
31 Air Conditioning Compressor Clutch
32 Transmission Control Module
33 Horn
34 Front Fog Lamps
35 Left High Beam
36 Right High Beam
J-Case Fuses Usage
1 Front Wiper
2 Antilock Brake System Pump
3 Blower
4 Run/Crank IEC
Page 295 of 403
Black plate (40,1)Chevrolet Sonic Owner Manual (GMNA-Localizing-U.S./Canada-7707487) -
2015 - crc - 10/31/14
10-40 Vehicle Care
Number Usage26 Airbag Run/Crank
27 Run Relay
28 Liftgate Release
29 Trailer Run/Crank
30 Clock Spring
31 Heating, Ventilation, and Air
Conditioning
32 Spare
33 Sunroof
34 Cigarette Lighter
35 Spare
36 Rear Power Windows
37 Front Power Windows
38 RAP/ACCY
39 DC/DC Converter Number Usage
40 Driver Power Window Express
Up/Down
41 PTC2
42 PTC1
43 Battery ConnectorWheels and Tires
Tires
Every new GM vehicle has
high-quality tires made by a
leading tire manufacturer. See
the warranty manual for
information regarding the tire
warranty and where to get
service. For additional
information refer to the tire
manufacturer.
{Warning
.Poorly maintained and
improperly used tires are
dangerous.
.Overloading the tires can
cause overheating as a
result of too much flexing.
There could be a blowout
(Continued)
Page 300 of 403
Black plate (45,1)Chevrolet Sonic Owner Manual (GMNA-Localizing-U.S./Canada-7707487) -
2015 - crc - 10/31/14
Vehicle Care 10-45
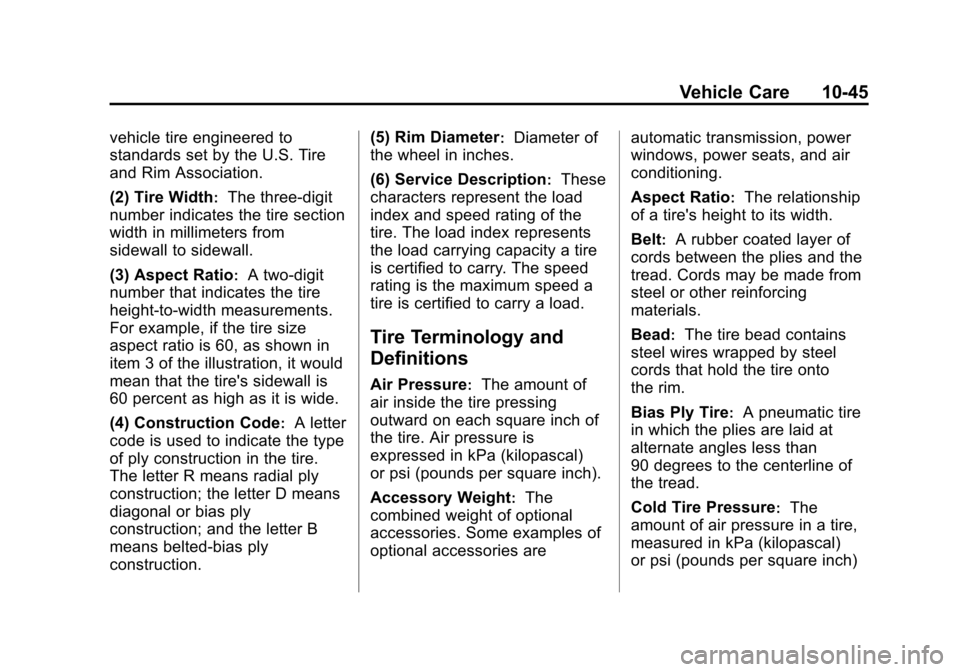
vehicle tire engineered to
standards set by the U.S. Tire
and Rim Association.
(2) Tire Width
:The three-digit
number indicates the tire section
width in millimeters from
sidewall to sidewall.
(3) Aspect Ratio
:A two-digit
number that indicates the tire
height-to-width measurements.
For example, if the tire size
aspect ratio is 60, as shown in
item 3 of the illustration, it would
mean that the tire's sidewall is
60 percent as high as it is wide.
(4) Construction Code
:A letter
code is used to indicate the type
of ply construction in the tire.
The letter R means radial ply
construction; the letter D means
diagonal or bias ply
construction; and the letter B
means belted-bias ply
construction. (5) Rim Diameter
:Diameter of
the wheel in inches.
(6) Service Description
:These
characters represent the load
index and speed rating of the
tire. The load index represents
the load carrying capacity a tire
is certified to carry. The speed
rating is the maximum speed a
tire is certified to carry a load.
Tire Terminology and
Definitions
Air Pressure:The amount of
air inside the tire pressing
outward on each square inch of
the tire. Air pressure is
expressed in kPa (kilopascal)
or psi (pounds per square inch).
Accessory Weight
:The
combined weight of optional
accessories. Some examples of
optional accessories are automatic transmission, power
windows, power seats, and air
conditioning.
Aspect Ratio
:The relationship
of a tire's height to its width.
Belt
:A rubber coated layer of
cords between the plies and the
tread. Cords may be made from
steel or other reinforcing
materials.
Bead
:The tire bead contains
steel wires wrapped by steel
cords that hold the tire onto
the rim.
Bias Ply Tire
:A pneumatic tire
in which the plies are laid at
alternate angles less than
90 degrees to the centerline of
the tread.
Cold Tire Pressure
:The
amount of air pressure in a tire,
measured in kPa (kilopascal)
or psi (pounds per square inch)
Page 320 of 403
Black plate (65,1)Chevrolet Sonic Owner Manual (GMNA-Localizing-U.S./Canada-7707487) -
2015 - crc - 10/31/14
Vehicle Care 10-65
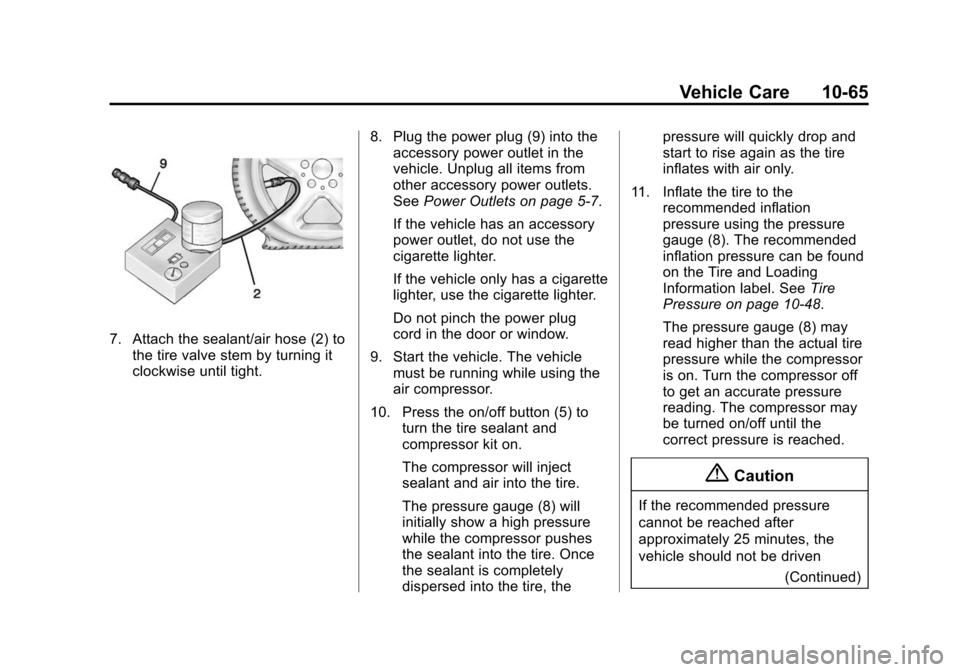
7. Attach the sealant/air hose (2) tothe tire valve stem by turning it
clockwise until tight. 8. Plug the power plug (9) into the
accessory power outlet in the
vehicle. Unplug all items from
other accessory power outlets.
See Power Outlets on page 5-7.
If the vehicle has an accessory
power outlet, do not use the
cigarette lighter.
If the vehicle only has a cigarette
lighter, use the cigarette lighter.
Do not pinch the power plug
cord in the door or window.
9. Start the vehicle. The vehicle must be running while using the
air compressor.
10. Press the on/off button (5) to turn the tire sealant and
compressor kit on.
The compressor will inject
sealant and air into the tire.
The pressure gauge (8) will
initially show a high pressure
while the compressor pushes
the sealant into the tire. Once
the sealant is completely
dispersed into the tire, the pressure will quickly drop and
start to rise again as the tire
inflates with air only.
11. Inflate the tire to the recommended inflation
pressure using the pressure
gauge (8). The recommended
inflation pressure can be found
on the Tire and Loading
Information label. See Tire
Pressure on page 10-48.
The pressure gauge (8) may
read higher than the actual tire
pressure while the compressor
is on. Turn the compressor off
to get an accurate pressure
reading. The compressor may
be turned on/off until the
correct pressure is reached.
{Caution
If the recommended pressure
cannot be reached after
approximately 25 minutes, the
vehicle should not be driven
(Continued)