2015 CHEVROLET SILVERADO 1500 change time
[x] Cancel search: change timePage 338 of 551
Black plate (65,1)Chevrolet 2015i Silverado Owner Manual (GMNA-Localizing-U.S./Canada/
Mexico-8425172) - 2015 - CRC - 6/20/14
Driving and Operating 9-65
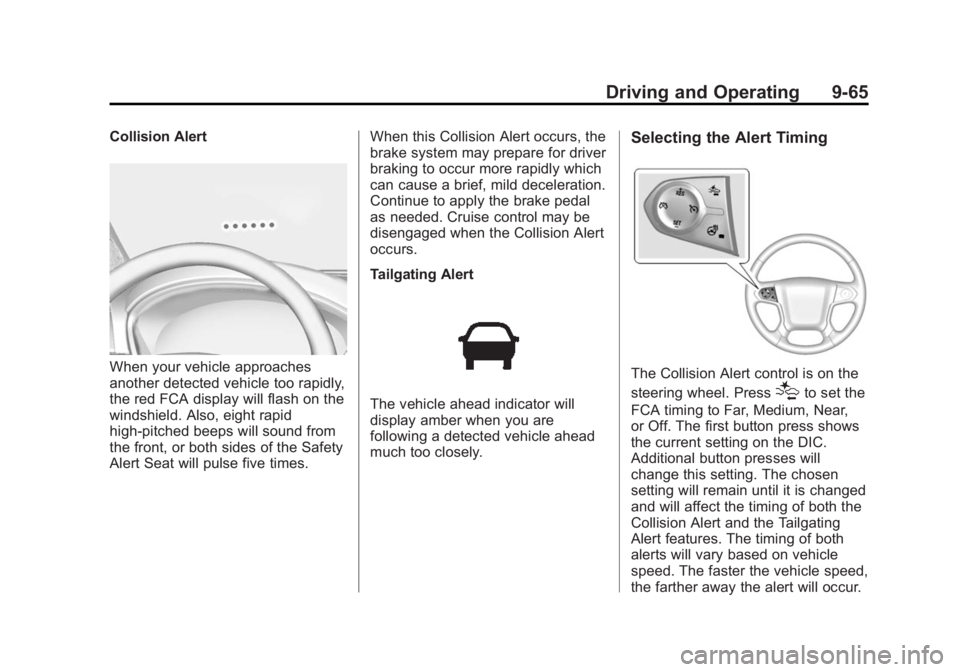
Collision Alert
When your vehicle approaches
another detected vehicle too rapidly,
the red FCA display will flash on the
windshield. Also, eight rapid
high-pitched beeps will sound from
the front, or both sides of the Safety
Alert Seat will pulse five times.When this Collision Alert occurs, the
brake system may prepare for driver
braking to occur more rapidly which
can cause a brief, mild deceleration.
Continue to apply the brake pedal
as needed. Cruise control may be
disengaged when the Collision Alert
occurs.
Tailgating Alert
The vehicle ahead indicator will
display amber when you are
following a detected vehicle ahead
much too closely.
Selecting the Alert Timing
The Collision Alert control is on the
steering wheel. Press
[to set the
FCA timing to Far, Medium, Near,
or Off. The first button press shows
the current setting on the DIC.
Additional button presses will
change this setting. The chosen
setting will remain until it is changed
and will affect the timing of both the
Collision Alert and the Tailgating
Alert features. The timing of both
alerts will vary based on vehicle
speed. The faster the vehicle speed,
the farther away the alert will occur.
Page 340 of 551
Black plate (67,1)Chevrolet 2015i Silverado Owner Manual (GMNA-Localizing-U.S./Canada/
Mexico-8425172) - 2015 - CRC - 6/20/14
Driving and Operating 9-67
How the System Works
The LDW camera sensor is on the
windshield ahead of the rearview
mirror.
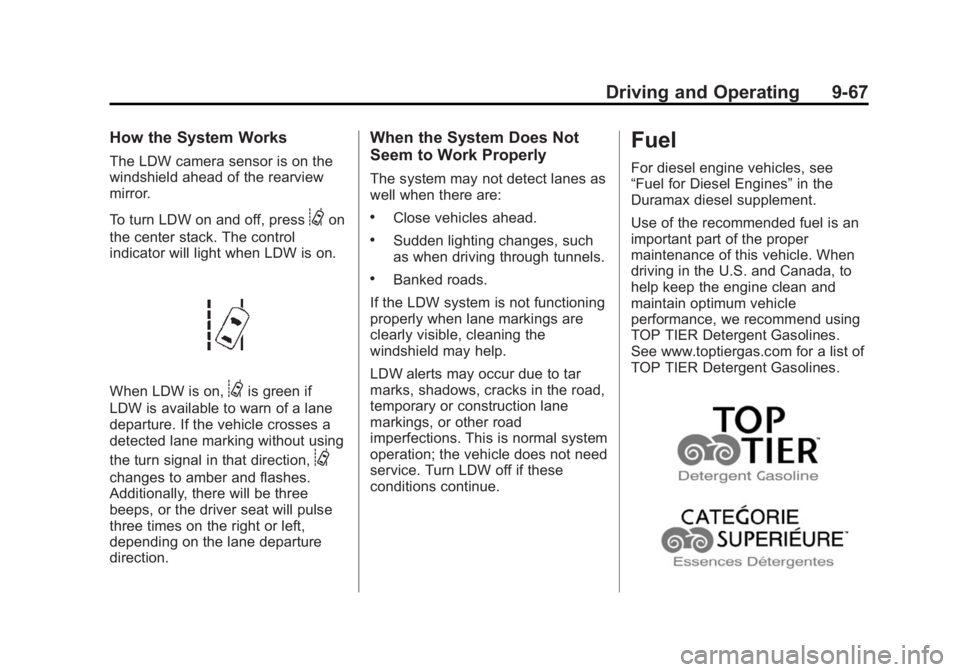
To turn LDW on and off, press
@on
the center stack. The control
indicator will light when LDW is on.
When LDW is on,@is green if
LDW is available to warn of a lane
departure. If the vehicle crosses a
detected lane marking without using
the turn signal in that direction,
@
changes to amber and flashes.
Additionally, there will be three
beeps, or the driver seat will pulse
three times on the right or left,
depending on the lane departure
direction.
When the System Does Not
Seem to Work Properly
The system may not detect lanes as
well when there are:
.Close vehicles ahead.
.Sudden lighting changes, such
as when driving through tunnels.
.Banked roads.
If the LDW system is not functioning
properly when lane markings are
clearly visible, cleaning the
windshield may help.
LDW alerts may occur due to tar
marks, shadows, cracks in the road,
temporary or construction lane
markings, or other road
imperfections. This is normal system
operation; the vehicle does not need
service. Turn LDW off if these
conditions continue.
Fuel
For diesel engine vehicles, see
“Fuel for Diesel Engines” in the
Duramax diesel supplement.
Use of the recommended fuel is an
important part of the proper
maintenance of this vehicle. When
driving in the U.S. and Canada, to
help keep the engine clean and
maintain optimum vehicle
performance, we recommend using
TOP TIER Detergent Gasolines.
See www.toptiergas.com for a list of
TOP TIER Detergent Gasolines.
Page 370 of 551
Black plate (97,1)Chevrolet 2015i Silverado Owner Manual (GMNA-Localizing-U.S./Canada/
Mexico-8425172) - 2015 - CRC - 6/20/14
Driving and Operating 9-97
The Trailer Brake Control Panel is
used along with the Trailer Brake
Display Page on the Driver
Information Center (DIC) to adjust
and display power output to the
trailer brakes.
Trailer Brake DIC Display Page
The ITBC system displays
messages in the DIC.
The display page indicates Trailer
Gain setting, power output to the
trailer brakes, trailer connection, and
system operational status.
To display the Trailer Brake Display
Page, do any of the following:
.Scroll through the DIC menu
pages.
.Press a Trailer Gain button.
If the Trailer Brake Display Page
is not currently displayed, press
a Trailer Gain button to recall the
current Trailer Gain setting.
Each press and release of the
gain buttons will then change the
Trailer Gain setting.
.Activate the Manual Trailer
Brake Apply Lever.
TRAILER GAIN: This setting can be
adjusted from 0.0 to 10.0 with either
a trailer connected or disconnected.
To adjust the Trailer Gain, press one
of the Trailer Gain Adjustment
buttons. Press and hold a gain
button to continuously adjust the
Trailer Gain. To turn the output to
the trailer off, adjust the Trailer Gain
setting to 0.0 (zero).
TRAILER OUTPUT: This displays
anytime a trailer with electric brakes
is connected. Output to the trailer
brakes is based on the amount of
vehicle braking present and relative
to the Trailer Gain setting. Output is
displayed from 0 to 100% for each
gain setting.
The Trailer Output will indicate
“- - - - - -” on the Trailer Brake
Display Page whenever the
following occur:
.No trailer is connected.
.A trailer without electric brakes
is connected (no DIC message
will display).
.A trailer with electric brakes has
become disconnected (a
CHECK TRAILER WIRING
message will also display on
the DIC).
.There is a fault present in the
wiring to the trailer brakes (a
CHECK TRAILER WIRING
message will also display on
the DIC).
.The ITBC system is not working
due to a fault (a SERVICE
TRAILER BRAKE SYSTEM
message will also display in
the DIC).
Manual Trailer Brake Apply
The Manual Trailer Brake Apply
Lever is used to apply the trailer ’s
electric brakes independent of the
vehicle’s brakes. Sliding the lever to
the left will apply only the trailer
brakes. Use this lever to adjust
Trailer Gain to properly adjust the
power output to the trailer brakes.
Page 371 of 551
Black plate (98,1)Chevrolet 2015i Silverado Owner Manual (GMNA-Localizing-U.S./Canada/
Mexico-8425172) - 2015 - CRC - 6/20/14
9-98 Driving and Operating
The trailer's and the vehicle's brake
lamps will come on when either
vehicle brakes or manual trailer
brakes are applied.
Trailer Gain Adjustment Procedure
Trailer Gain should be set for a
specific trailering condition and must
be adjusted anytime vehicle loading,
trailer loading, or road surface
conditions change.
{Warning
Trailer brakes that are
over-gained or under-gained may
not stop the vehicle and the trailer
as intended and can result in a
crash. Always follow the
instructions to set the Trailer Gain
for the proper trailer stopping
performance.Use the following to adjust Trailer
Gain for each towing condition:
1. Drive the vehicle with the trailer
attached on a level road surface
representative of the towing
condition and free of traffic at
about 32 to 40 km/h (20 to
25 mph) and fully apply the
Manual Trailer Brake Apply
Lever.
Adjusting Trailer Gain at speeds
lower than 32 to 40 km/h (20 to
25 mph) may result in an
incorrect gain setting.
2. Adjust the Trailer Gain, using the Trailer Gain Adjustment Buttons,
to just below the point of trailer
wheel lock-up, indicated by
trailer wheel squeal or tire
smoke when a trailer wheel
locks.
Trailer wheel lock-up may not
occur if towing a heavily loaded
trailer. In this case, adjust the
Trailer Gain to the highest
allowable setting for the towing
condition. 3. Readjust Trailer Gain anytime
vehicle loading, trailer loading,
or road surface conditions
change or if trailer wheel lock-up
is noticed at any time while
towing.
Other ITBC-Related DIC Messages
In addition to displaying TRAILER
GAIN and OUTPUT through the
DIC, trailer connection and ITBC
system status are displayed on
the DIC.
TRAILER CONNECTED: This
message will briefly display when a
trailer with electric brakes is first
connected to the vehicle. This
message will automatically turn off
in about 10 seconds. This message
can be acknowledged before it
automatically turns off.
Page 388 of 551
Black plate (11,1)Chevrolet 2015i Silverado Owner Manual (GMNA-Localizing-U.S./Canada/
Mexico-8425172) - 2015 - CRC - 6/20/14
Vehicle Care 10-11
1. Positive (+) Terminal. SeeJump
Starting on page 10-91.
2. Battery on page 10-32.
3. Coolant Surge Tank and Pressure Cap. See Cooling
System on page 10-21.
4. Engine Air Cleaner/Filter on
page 10-19.
5. Automatic Transmission Dipstick (If Equipped). See “How to
Check Automatic Transmission
Fluid” under Automatic
Transmission Fluid (6 Speed
Transmission) on page 10-15 or
Automatic Transmission Fluid (8
Speed Transmission) on
page 10-18.
6. Engine Oil Dipstick. See “Checking Engine Oil” under
Engine Oil on page 10-11.
7. Engine Oil Fill Cap. See “When
to Add Engine Oil” underEngine
Oil on page 10-11.
8. Engine Cooling Fan (Out of View). See Cooling System on
page 10-21. 9. Remote Negative (–) Location.
See Jump Starting on
page 10-91.
10. Power Steering Fluid Reservoir. See Power Steering
Fluid (1500 Series) on
page 10-28 orPower Steering
Fluid (2500/3500 Series) on
page 10-28.
11. Windshield Washer Fluid Reservoir. See “Adding Washer
Fluid” under Washer Fluid on
page 10-29.
12. Brake Fluid Reservoir. See Brake Fluid on page 10-31.
13. Auxiliary Battery (If Equipped). SeeBattery on page 10-32.
14. Engine Compartment Fuse
Block on page 10-45.
If the vehicle has a diesel engine
and/or an Allison Transmission, see
the Duramax diesel supplement.Engine Oil
For diesel engine vehicles, see
“Engine Oil” in the Duramax diesel
supplement.
To ensure proper engine
performance and long life, careful
attention must be paid to engine oil.
Following these simple, but
important steps will help protect
your investment:
.Always use engine oil approved
to the proper specification and of
the proper viscosity grade. See
“Selecting the Right Engine Oil”
in this section.
.Check the engine oil level
regularly and maintain the
proper oil level. See “Checking
Engine Oil” and“When to Add
Engine Oil” in this section.
.Change the engine oil at the
appropriate time. See Engine Oil
Life System on page 10-14.
.Always dispose of engine oil
properly. See “What to Do with
Used Oil” in this section.
Page 391 of 551
Black plate (14,1)Chevrolet 2015i Silverado Owner Manual (GMNA-Localizing-U.S./Canada/
Mexico-8425172) - 2015 - CRC - 6/20/14
10-14 Vehicle Care
What to Do with Used Oil
Used engine oil contains certain
elements that can be unhealthy for
your skin and could even cause
cancer. Do not let used oil stay on
your skin for very long. Clean your
skin and nails with soap and water,
or a good hand cleaner. Wash or
properly dispose of clothing or rags
containing used engine oil. See the
manufacturer's warnings about the
use and disposal of oil products.
Used oil can be a threat to the
environment. If you change your
own oil, be sure to drain all the oil
from the filter before disposal. Never
dispose of oil by putting it in the
trash or pouring it on the ground,
into sewers, or into streams or
bodies of water. Recycle it by taking
it to a place that collects used oil.
Engine Oil Life System
When to Change Engine Oil
This vehicle has a computer system
that indicates when to change the
engine oil and filter. This is based
on a combination of factors which
include engine revolutions, engine
temperature, and miles driven.
Based on driving conditions, the
mileage at which an oil change is
indicated can vary considerably. For
the oil life system to work properly,
the system must be reset every time
the oil is changed.
On some vehicles, when the system
has calculated that oil life has been
diminished, a CHANGE ENGINE
OIL SOON message comes on to
indicate that an oil change is
necessary. SeeEngine Oil
Messages on page 5-38. Change
the oil as soon as possible within
the next 1 000 km (600 mi). It is
possible that, if driving under the
best conditions, the oil life system
might indicate that an oil change is
not necessary for up to a year. The engine oil and filter must be
changed at least once a year and,
at this time, the system must be
reset. For vehicles without the
CHANGE ENGINE OIL SOON
message, an oil change is needed
when the OIL LIFE REMAINING
percentage is near 0%. Your dealer
has trained service people who will
perform this work and reset the
system. It is also important to check
the oil regularly over the course of
an oil drain interval and keep it at
the proper level.
If the system is ever reset
accidentally, the oil must be
changed at 5 000 km (3,000 mi)
since the last oil change.
Remember to reset the oil life
system whenever the oil is changed.
Page 392 of 551
Black plate (15,1)Chevrolet 2015i Silverado Owner Manual (GMNA-Localizing-U.S./Canada/
Mexico-8425172) - 2015 - CRC - 6/20/14
Vehicle Care 10-15
How to Reset the Engine Oil
Life System
Reset the system whenever the
engine oil is changed so that the
system can calculate the next
engine oil change. Always reset the
engine oil life to 100% after every oil
change. It will not reset itself. To
reset the engine oil life system:
1. Display the OIL LIFEREMAINING on the DIC. If the
vehicle does not have DIC
buttons, the vehicle must be in
P (Park) to access this display.
See Driver Information Center
(DIC) (Base Level) on page 5-30
or Driver Information Center
(DIC) (Uplevel) on page 5-32.
2. Press and hold
V, or the trip
odometer reset stem if the
vehicle does not have DIC
buttons, for several seconds.
The oil life will change to 100%. The oil life system can also be reset
as follows:
1. Turn the ignition to ON/RUN with
the engine off.
2. Fully press the accelerator pedal slowly three times within
five seconds.
3. Display the OIL LIFE REMAINING on the DIC. If the
display shows 100%, the system
is reset.
If the vehicle has a CHANGE
ENGINE OIL SOON message and it
comes back on when the vehicle is
started and/or the OIL LIFE
REMAINING is near 0%, the engine
oil life system has not been reset.
Repeat the procedure.
Automatic Transmission
Fluid (6 Speed
Transmission)
When to Check and Change
Automatic Transmission Fluid
It is usually not necessary to check
the transmission fluid level. The only
reason for fluid loss is a
transmission leak or overheated
transmission. If a small leak is
suspected, then use the following
checking procedures to check the
fluid level. However, if there is a
large leak, then it may be necessary
to have the vehicle towed to a
dealer service department and have
it repaired before driving the vehicle
further.
Page 448 of 551
Black plate (71,1)Chevrolet 2015i Silverado Owner Manual (GMNA-Localizing-U.S./Canada/
Mexico-8425172) - 2015 - CRC - 6/20/14
Vehicle Care 10-71
Adjust the front and rear tires to
the recommended inflation
pressure on the Tire and
Loading Information label after
the tires have been rotated. See
Tire Pressure on page 10-62
andVehicle Load Limits on
page 9-15.
Check that all wheel nuts are
properly tightened. See “Wheel
Nut Torque” underCapacities
and Specifications on
page 12-2.
{Warning
Rust or dirt on a wheel, or on the
parts to which it is fastened, can
make wheel nuts become loose
after time. The wheel could come
off and cause an accident. When
changing a wheel, remove any
rust or dirt from places where the
wheel attaches to the vehicle. In
an emergency, a cloth or a paper
(Continued)
Warning (Continued)
towel can be used; however, use
a scraper or wire brush later to
remove all rust or dirt.
Lightly coat the center of the
wheel hub with wheel bearing
grease after a wheel change or
tire rotation to prevent corrosion
or rust build-up. Do not get
grease on the flat wheel
mounting surface or on the
wheel nuts or bolts.
Reset the Tire Pressure Monitor
System (TPMS), if the vehicle
has one. SeeTire Pressure
Monitor Operation on
page 10-65.
Check that the spare tire, if the
vehicle has one, is stored
properly. Push, pull, and then try
to rotate or turn the tire. If it
moves, tighten the cable. See “Storing a Flat or Spare Tire and
Tools”
underTire Changing on
page 10-80.
Dual Tire Rotation
When the vehicle is new,
or whenever a wheel, wheel bolt,
or wheel nut is replaced, check the
wheel nut torque after
160, 1 600, and 10 000 km (100,
1,000, and 6,000 mi) of driving. For
proper torque and wheel nut
tightening information, see
“Removing the Flat Tire and
Installing the Spare Tire” underTire
Changing on page 10-80.
The outer tire on a dual wheel setup
generally wears faster than the
inner tire. Tires last longer and wear
more evenly if they are rotated. See
Tire Inspection on page 10-69 and
Tire Rotation on page 10-69. Also
see Maintenance Schedule on
page 11-3.