2015 CHEVROLET ORLANDO key
[x] Cancel search: keyPage 41 of 372
Black plate (13,1)Chevrolet Orlando Owner Manual - 2013 - CRC - 6/5/12
Keys, Doors, and Windows 2-13
Automatic Dimming
Rearview Mirror
The vehicle may have an automatic
dimming inside rearview mirror.
Automatic dimming reduces the
glare from the headlamps of the
vehicle behind you. The dimming
feature and indicator light come on
each time the vehicle is started.
Vehicles with OnStar have three
control buttons at the bottom of the
mirror. See your dealer for more
information about OnStar and how
to subscribe to it. SeeOnStar
Overview on page 14‑1.
Cleaning the Mirror
Do not spray glass cleaner directly
on the mirror. Use a soft towel
dampened with water.
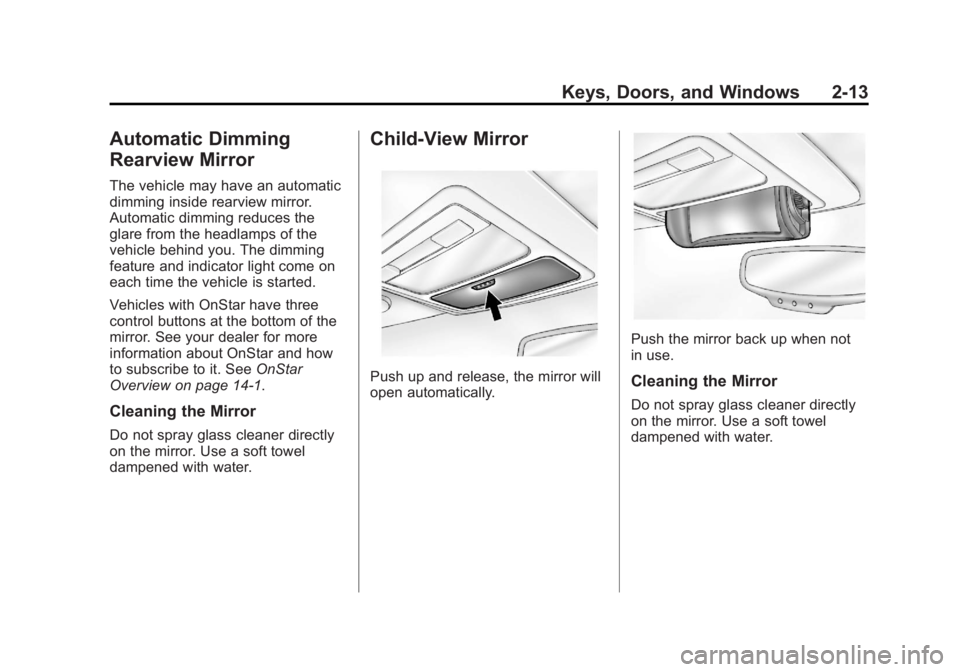
Child-View Mirror
Push up and release, the mirror will
open automatically.
Push the mirror back up when not
in use.
Cleaning the Mirror
Do not spray glass cleaner directly
on the mirror. Use a soft towel
dampened with water.
Page 42 of 372
Black plate (14,1)Chevrolet Orlando Owner Manual - 2013 - CRC - 6/5/12
2-14 Keys, Doors, and Windows
Windows
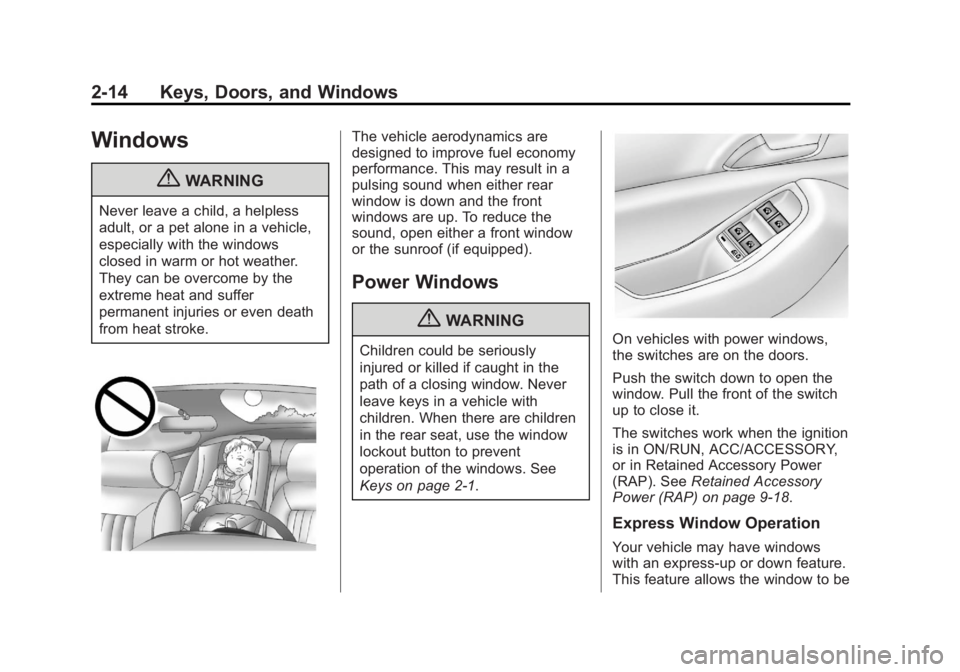
{WARNING
Never leave a child, a helpless
adult, or a pet alone in a vehicle,
especially with the windows
closed in warm or hot weather.
They can be overcome by the
extreme heat and suffer
permanent injuries or even death
from heat stroke.
The vehicle aerodynamics are
designed to improve fuel economy
performance. This may result in a
pulsing sound when either rear
window is down and the front
windows are up. To reduce the
sound, open either a front window
or the sunroof (if equipped).
Power Windows
{WARNING
Children could be seriously
injured or killed if caught in the
path of a closing window. Never
leave keys in a vehicle with
children. When there are children
in the rear seat, use the window
lockout button to prevent
operation of the windows. See
Keys on page 2‑1.On vehicles with power windows,
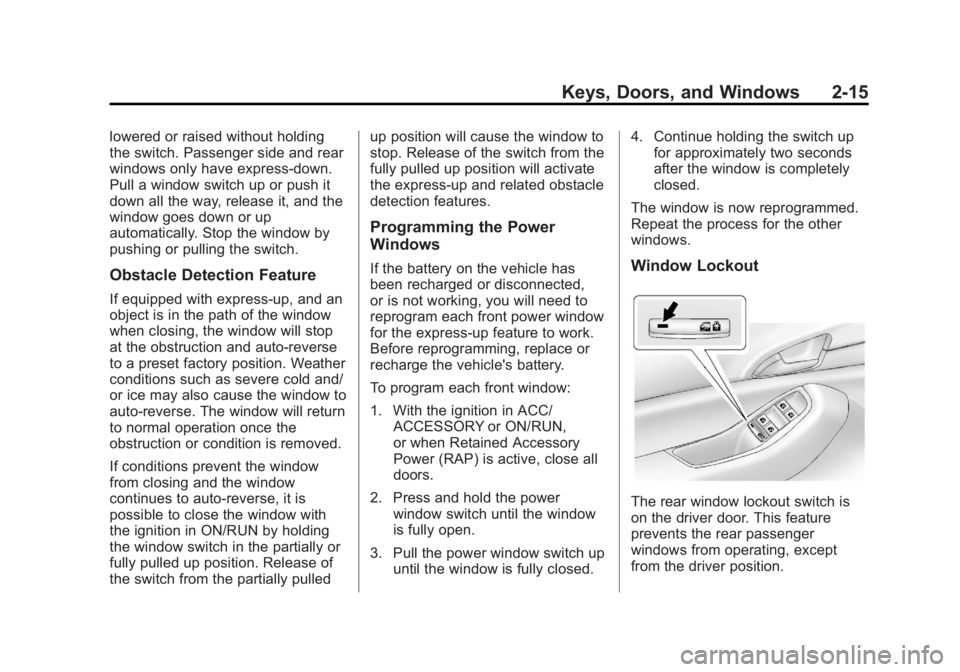
the switches are on the doors.
Push the switch down to open the
window. Pull the front of the switch
up to close it.
The switches work when the ignition
is in ON/RUN, ACC/ACCESSORY,
or in Retained Accessory Power
(RAP). SeeRetained Accessory
Power (RAP) on page 9‑18.
Express Window Operation
Your vehicle may have windows
with an express-up or down feature.
This feature allows the window to be
Page 43 of 372
Black plate (15,1)Chevrolet Orlando Owner Manual - 2013 - CRC - 6/5/12
Keys, Doors, and Windows 2-15
lowered or raised without holding
the switch. Passenger side and rear
windows only have express-down.
Pull a window switch up or push it
down all the way, release it, and the
window goes down or up
automatically. Stop the window by
pushing or pulling the switch.
Obstacle Detection Feature
If equipped with express-up, and an
object is in the path of the window
when closing, the window will stop
at the obstruction and auto-reverse
to a preset factory position. Weather
conditions such as severe cold and/
or ice may also cause the window to
auto-reverse. The window will return
to normal operation once the
obstruction or condition is removed.
If conditions prevent the window
from closing and the window
continues to auto-reverse, it is
possible to close the window with
the ignition in ON/RUN by holding
the window switch in the partially or
fully pulled up position. Release of
the switch from the partially pulledup position will cause the window to
stop. Release of the switch from the
fully pulled up position will activate
the express-up and related obstacle
detection features.
Programming the Power
Windows
If the battery on the vehicle has
been recharged or disconnected,
or is not working, you will need to
reprogram each front power window
for the express-up feature to work.
Before reprogramming, replace or
recharge the vehicle's battery.
To program each front window:
1. With the ignition in ACC/
ACCESSORY or ON/RUN,
or when Retained Accessory
Power (RAP) is active, close all
doors.
2. Press and hold the power window switch until the window
is fully open.
3. Pull the power window switch up until the window is fully closed. 4. Continue holding the switch up
for approximately two seconds
after the window is completely
closed.
The window is now reprogrammed.
Repeat the process for the other
windows.Window Lockout
The rear window lockout switch is
on the driver door. This feature
prevents the rear passenger
windows from operating, except
from the driver position.
Page 44 of 372
Black plate (16,1)Chevrolet Orlando Owner Manual - 2013 - CRC - 6/5/12
2-16 Keys, Doors, and Windows
Presso{to activate the rear
window lockout switch. The
indicator light comes on when
activated.
The rear door locks are also
disabled.
Press
o {again to deactivate the
lockout switch.
If the indicator light flashes, the
feature may not be working properly.
Overload Feature
If the windows are operated
repeatedly in short intervals, the
window operation is disabled for a
short time.
Sun Visors
Pull the sun visor down to block
glare. Detach the sun visor from the
center mount to pivot to the side
window, or to extend along the rod,
if available.
Lighted Visor Vanity Mirror
Pull the visor down and lift the cover
to access the mirror. A light comes
on when the cover is lifted and goes
out when it is closed.
Roof
Sunroof
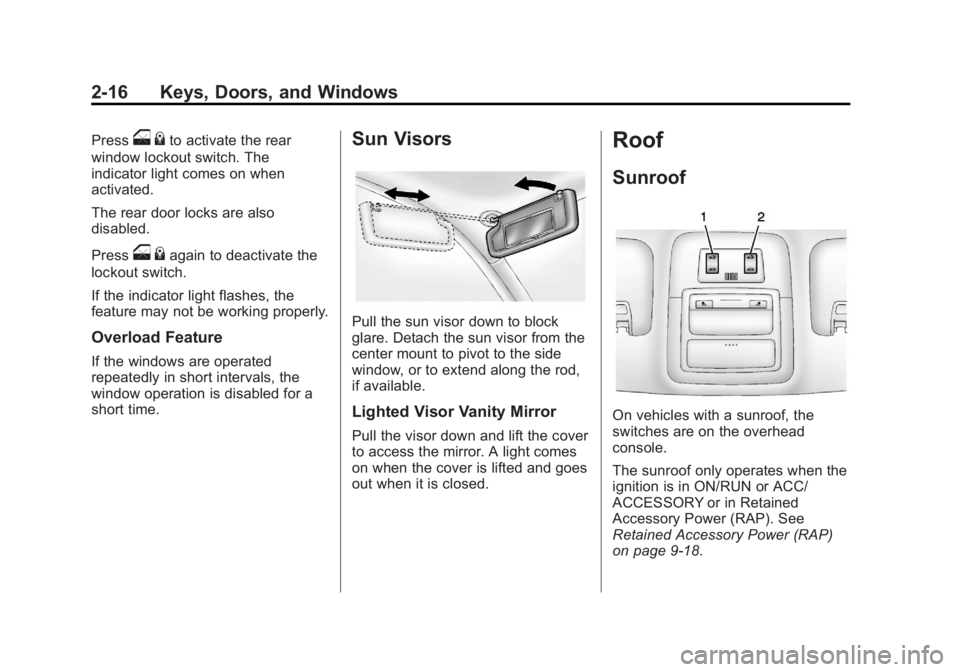
On vehicles with a sunroof, the
switches are on the overhead
console.
The sunroof only operates when the
ignition is in ON/RUN or ACC/
ACCESSORY or in Retained
Accessory Power (RAP). See
Retained Accessory Power (RAP)
on page 9‑18.
Page 45 of 372
Black plate (17,1)Chevrolet Orlando Owner Manual - 2013 - CRC - 6/5/12
Keys, Doors, and Windows 2-17
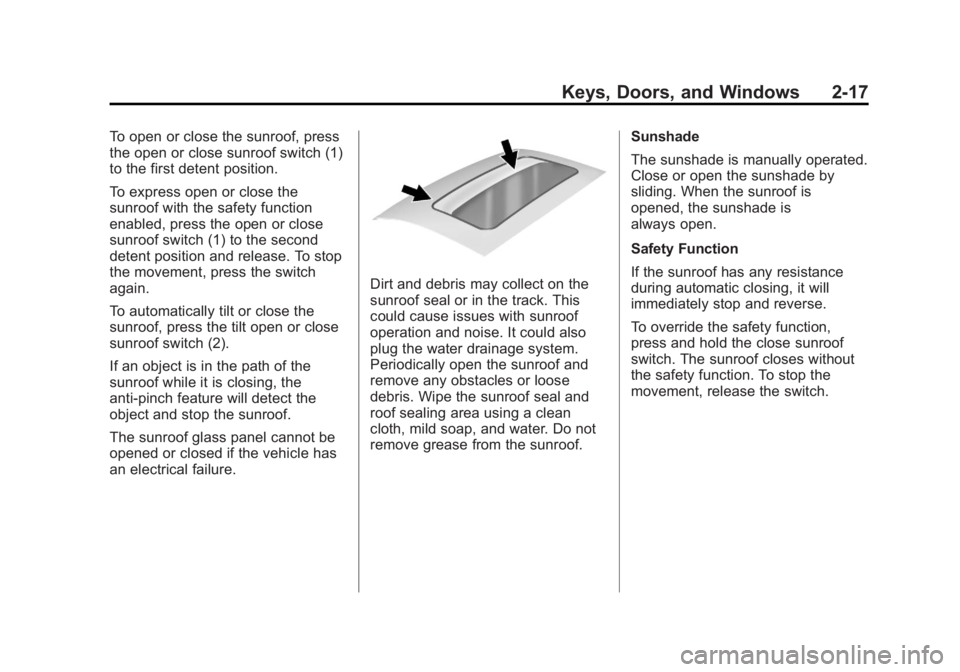
To open or close the sunroof, press
the open or close sunroof switch (1)
to the first detent position.
To express open or close the
sunroof with the safety function
enabled, press the open or close
sunroof switch (1) to the second
detent position and release. To stop
the movement, press the switch
again.
To automatically tilt or close the
sunroof, press the tilt open or close
sunroof switch (2).
If an object is in the path of the
sunroof while it is closing, the
anti-pinch feature will detect the
object and stop the sunroof.
The sunroof glass panel cannot be
opened or closed if the vehicle has
an electrical failure.
Dirt and debris may collect on the
sunroof seal or in the track. This
could cause issues with sunroof
operation and noise. It could also
plug the water drainage system.
Periodically open the sunroof and
remove any obstacles or loose
debris. Wipe the sunroof seal and
roof sealing area using a clean
cloth, mild soap, and water. Do not
remove grease from the sunroof.Sunshade
The sunshade is manually operated.
Close or open the sunshade by
sliding. When the sunroof is
opened, the sunshade is
always open.
Safety Function
If the sunroof has any resistance
during automatic closing, it will
immediately stop and reverse.
To override the safety function,
press and hold the close sunroof
switch. The sunroof closes without
the safety function. To stop the
movement, release the switch.
Page 46 of 372

Black plate (18,1)Chevrolet Orlando Owner Manual - 2013 - CRC - 6/5/12
2-18 Keys, Doors, and Windows
2NOTES
Page 68 of 372
Black plate (22,1)Chevrolet Orlando Owner Manual - 2013 - CRC - 6/5/12
3-22 Seats and Restraints
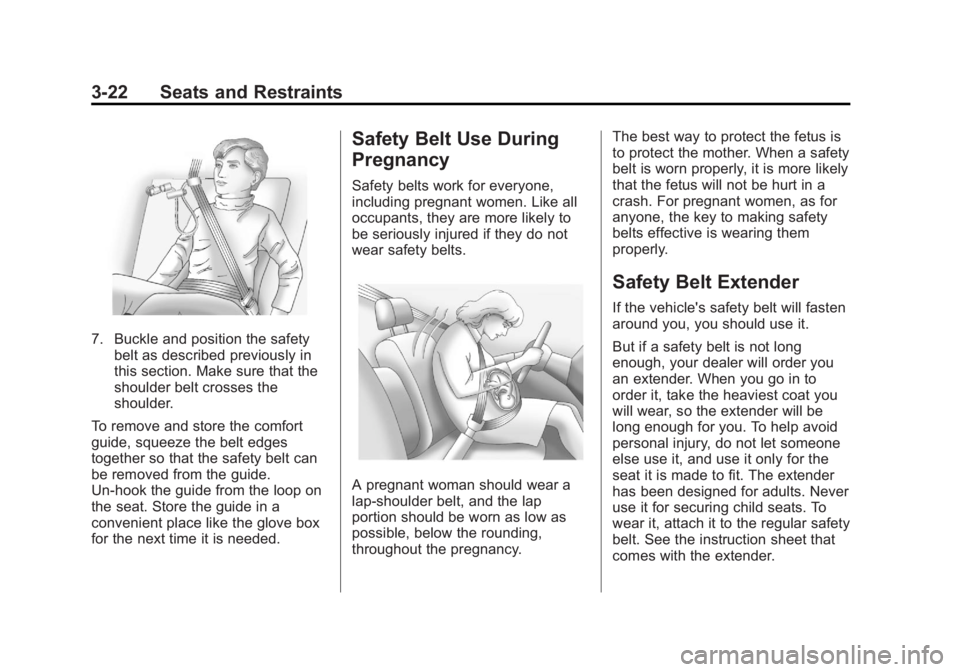
7. Buckle and position the safetybelt as described previously in
this section. Make sure that the
shoulder belt crosses the
shoulder.
To remove and store the comfort
guide, squeeze the belt edges
together so that the safety belt can
be removed from the guide.
Un-hook the guide from the loop on
the seat. Store the guide in a
convenient place like the glove box
for the next time it is needed.
Safety Belt Use During
Pregnancy
Safety belts work for everyone,
including pregnant women. Like all
occupants, they are more likely to
be seriously injured if they do not
wear safety belts.
A pregnant woman should wear a
lap-shoulder belt, and the lap
portion should be worn as low as
possible, below the rounding,
throughout the pregnancy. The best way to protect the fetus is
to protect the mother. When a safety
belt is worn properly, it is more likely
that the fetus will not be hurt in a
crash. For pregnant women, as for
anyone, the key to making safety
belts effective is wearing them
properly.
Safety Belt Extender
If the vehicle's safety belt will fasten
around you, you should use it.
But if a safety belt is not long
enough, your dealer will order you
an extender. When you go in to
order it, take the heaviest coat you
will wear, so the extender will be
long enough for you. To help avoid
personal injury, do not let someone
else use it, and use it only for the
seat it is made to fit. The extender
has been designed for adults. Never
use it for securing child seats. To
wear it, attach it to the regular safety
belt. See the instruction sheet that
comes with the extender.
Page 101 of 372
Black plate (1,1)Chevrolet Orlando Owner Manual - 2013 - CRC - 6/5/12
Instruments and Controls 5-1
Instruments and
Controls
Controls
Steering Wheel Adjustment . . . 5-2
Steering Wheel Controls . . . . . . 5-3
Horn . . . . . . . . . . . . . . . . . . . . . . . . . . 5-3
Windshield Wiper/Washer . . . . . 5-3
Rear Window Wiper/Washer . . . . . . . . . . . . . . . . . . . . . . 5-4
Compass . . . . . . . . . . . . . . . . . . . . . 5-5
Clock . . . . . . . . . . . . . . . . . . . . . . . . . 5-5
Power Outlets . . . . . . . . . . . . . . . . . 5-6
Cigarette Lighter . . . . . . . . . . . . . . 5-6
Ashtrays . . . . . . . . . . . . . . . . . . . . . . 5-7
Warning Lights, Gauges, and
Indicators
Warning Lights, Gauges, and Indicators . . . . . . . . . . . . . . . . . . . . 5-7
Instrument Cluster . . . . . . . . . . . . 5-8
Speedometer . . . . . . . . . . . . . . . . . 5-9
Odometer . . . . . . . . . . . . . . . . . . . . . 5-9
Tachometer . . . . . . . . . . . . . . . . . . . 5-9
Fuel Gauge . . . . . . . . . . . . . . . . . . . 5-9
Engine Coolant Temperature
Gauge . . . . . . . . . . . . . . . . . . . . . . 5-10 Safety Belt Reminders . . . . . . . 5-10
Airbag Readiness Light . . . . . . 5-11
Charging System Light . . . . . . . 5-11
Malfunction
Indicator Lamp . . . . . . . . . . . . . 5-12
Service Vehicle Soon Light . . . . . . . . . . . . . . . . . . . . . . . 5-14
Brake System Warning Light . . . . . . . . . . . . . . . . . . . . . . . 5-14
Antilock Brake System (ABS) Warning Light . . . . . . . . . . . . . . 5-15
Up-Shift Light . . . . . . . . . . . . . . . . 5-16
Power Steering Warning Light . . . . . . . . . . . . . . . . . . . . . . . 5-16
Traction Off Light . . . . . . . . . . . . 5-16
StabiliTrak
®OFF Light . . . . . . . 5-17
Traction Control System (TCS)/StabiliTrak
®Light . . . . 5-17
Tire Pressure Light . . . . . . . . . . 5-17
Engine Oil Pressure Light . . . . 5-18
Low Fuel Warning Light . . . . . . 5-18
Security Light . . . . . . . . . . . . . . . . 5-19
Reduced Engine Power Light . . . . . . . . . . . . . . . . . . . . . . . 5-19
High-Beam On Light . . . . . . . . . 5-19
Daytime Running Lamps (DRL) Indicator Light . . . . . . . 5-20
Front Fog Lamp Light . . . . . . . . 5-20 Lamps On Reminder . . . . . . . . . 5-20
Cruise Control Light . . . . . . . . . 5-20
Door Ajar Light . . . . . . . . . . . . . . 5-21
Information Displays
Driver Information
Center (DIC) . . . . . . . . . . . . . . . 5-21
Vehicle Messages
Vehicle Messages . . . . . . . . . . . 5-24
Battery Voltage and ChargingMessages . . . . . . . . . . . . . . . . . . 5-25
Brake System Messages . . . . 5-25
Compass Messages . . . . . . . . . 5-25
Cruise Control Messages . . . . 5-25
Door Ajar Messages . . . . . . . . . 5-25
Engine Cooling System Messages . . . . . . . . . . . . . . . . . . 5-26
Engine Oil Messages . . . . . . . . 5-26
Engine Power Messages . . . . 5-27
Fuel System Messages . . . . . . 5-27
Key and Lock Messages . . . . . 5-27
Lamp Messages . . . . . . . . . . . . . 5-27
Object Detection System Messages . . . . . . . . . . . . . . . . . . 5-28
Ride Control System Messages . . . . . . . . . . . . . . . . . . 5-28
Airbag System Messages . . . . 5-28
Security Messages . . . . . . . . . . 5-28