2015 CHEVROLET ORLANDO seats
[x] Cancel search: seatsPage 33 of 372
Black plate (5,1)Chevrolet Orlando Owner Manual - 2013 - CRC - 6/5/12
Keys, Doors, and Windows 2-5
3. Insert the new battery, positiveside facing up. Push the battery
down until it is held in place.
Replace with a CR2032 or
equivalent battery.
4. Snap the battery cover back on to the transmitter.
Remote Vehicle Start
The vehicle may have this feature
that allows you to start the engine
from outside the vehicle.
/(Remote Vehicle Start): This
button will be on the RKE
transmitter if the vehicle has remote
start.
The climate control system will use
the previous settings during a
remote start. The rear defog may
come on during remote start based
on cold ambient conditions. The
rear fog indicator light does not
come on during remote start. If the
vehicle has heated seats, they may
come on during a remote start. See
Heated Front Seats on page 3‑6. Laws in some local communities
may restrict the use of remote
starters. For example, some laws
require a person using remote start
to have the vehicle in view. Check
local regulations for any
requirements.
Other conditions can affect the
performance of the transmitter. See
Remote Keyless Entry (RKE)
System on page 2‑2.
Starting the Vehicle
To start the engine using the remote
start feature:
1. Aim the RKE transmitter at the
vehicle.
2. Press and release
Q.
3. Immediately after completing Step 2, press and hold
/for at
least two seconds or until the
turn signal lamps flash. The turn
signal lamps flashing confirms
the request to remote start the
vehicle has been received. When the engine starts, the parking
lamps will turn on and remain on as
long as the engine is running. The
doors will be locked and the climate
control system may come on.
The engine will continue to run for
10 minutes. Repeat the steps for a
10-minute time extension. Remote
start can be extended only once.
Start the vehicle before driving.
Extending Engine Run Time
For a 10-minute extension, repeat
Steps 1–3 while the engine is still
running. The remote start can be
extended once.
When the remote start is extended,
the second 10 minutes will start
immediately.
For example, if the engine has
been running for five minutes, and
10 minutes are added, the engine
will run for a total of 15 minutes.
Page 47 of 372
Black plate (1,1)Chevrolet Orlando Owner Manual - 2013 - CRC - 6/5/12
Seats and Restraints 3-1
Seats and
Restraints
Head Restraints
Head Restraints . . . . . . . . . . . . . . . 3-2
Front Seats
Seat Adjustment . . . . . . . . . . . . . . 3-3
Power Seat Adjustment . . . . . . . 3-4
Reclining Seatbacks . . . . . . . . . . 3-4
Front Seat Armrest . . . . . . . . . . . . 3-6
Heated Front Seats . . . . . . . . . . . 3-6
Folding Seatback . . . . . . . . . . . . . 3-7
Rear Seats
Second Row Seats . . . . . . . . . . . 3-8
Third Row Seats . . . . . . . . . . . . . 3-12
Safety Belts
Safety Belts . . . . . . . . . . . . . . . . . . 3-15
How to Wear Safety BeltsProperly . . . . . . . . . . . . . . . . . . . . 3-16 Lap-Shoulder Belt . . . . . . . . . . . 3-17
Safety Belt Use During
Pregnancy . . . . . . . . . . . . . . . . . . 3-22
Safety Belt Extender . . . . . . . . . 3-22
Safety System Check . . . . . . . . 3-23
Safety Belt Care . . . . . . . . . . . . . 3-23
Replacing Safety Belt System Parts after a Crash . . . . . . . . . 3-23
Airbag System
Airbag System . . . . . . . . . . . . . . . 3-24
Where Are the Airbags? . . . . . 3-26
When Should an AirbagInflate? . . . . . . . . . . . . . . . . . . . . . 3-27
What Makes an Airbag Inflate? . . . . . . . . . . . . . . . . . . . . . 3-28
How Does an Airbag
Restrain? . . . . . . . . . . . . . . . . . . . 3-28
What Will You See after an Airbag Inflates? . . . . . . . . . . . . 3-29
Servicing the Airbag-Equipped Vehicle . . . . . . . . . . . . . . . . . . . . . 3-30 Adding Equipment to the
Airbag-Equipped Vehicle . . . 3-30
Airbag System Check . . . . . . . . 3-31
Replacing Airbag System Parts after a Crash . . . . . . . . . 3-31
Child Restraints
Older Children . . . . . . . . . . . . . . . 3-32
Infants and Young
Children . . . . . . . . . . . . . . . . . . . . 3-34
Child Restraint Systems . . . . . 3-36
Where to Put the Restraint . . . 3-38
Lower Anchors and Tethers for Children (LATCH
System) . . . . . . . . . . . . . . . . . . . . 3-39
Replacing LATCH System Parts After a Crash . . . . . . . . . 3-44
Securing Child Restraints (Rear Seat) . . . . . . . . . . . . . . . . . 3-44
Securing Child Restraints (Front Passenger Seat) . . . . 3-46
Page 48 of 372
Black plate (2,1)Chevrolet Orlando Owner Manual - 2013 - CRC - 6/5/12
3-2 Seats and Restraints
Head Restraints
{WARNING
With head restraints that are not
installed and adjusted properly,
there is a greater chance that
occupants will suffer a neck/
spinal injury in a crash. Do not
drive until the head restraints for
all occupants are installed and
adjusted properly.
Front Seats
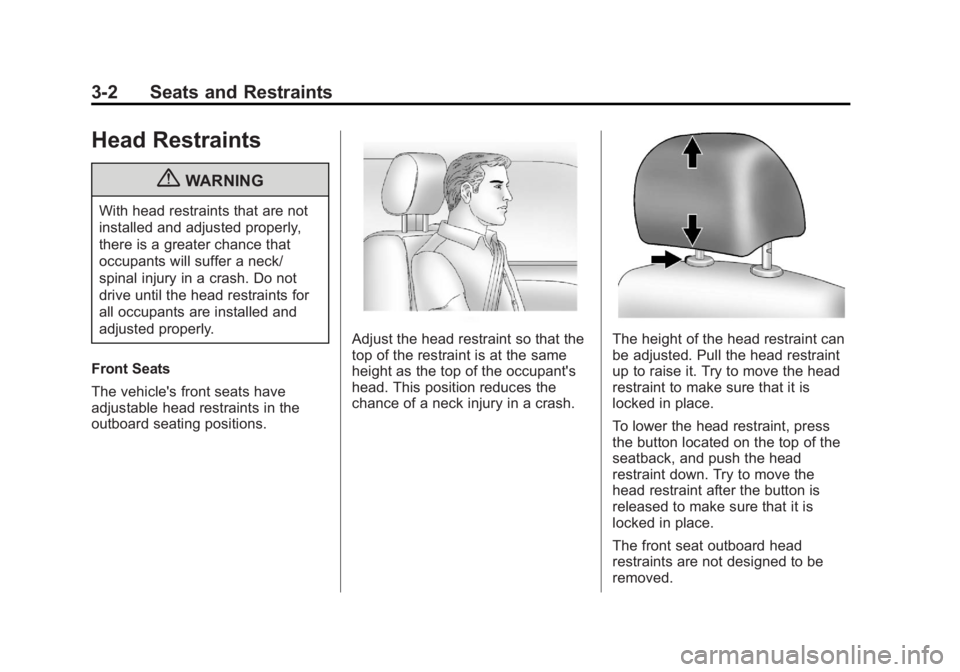
The vehicle's front seats have
adjustable head restraints in the
outboard seating positions.
Adjust the head restraint so that the
top of the restraint is at the same
height as the top of the occupant's
head. This position reduces the
chance of a neck injury in a crash.The height of the head restraint can
be adjusted. Pull the head restraint
up to raise it. Try to move the head
restraint to make sure that it is
locked in place.
To lower the head restraint, press
the button located on the top of the
seatback, and push the head
restraint down. Try to move the
head restraint after the button is
released to make sure that it is
locked in place.
The front seat outboard head
restraints are not designed to be
removed.
Page 49 of 372
Black plate (3,1)Chevrolet Orlando Owner Manual - 2013 - CRC - 6/5/12
Seats and Restraints 3-3
Rear Seats
The vehicle's second row seats
have adjustable head restraints in
the outboard seating positions. The
vehicle's third row seats have head
restraints in the outboard seating
positions that cannot be adjusted.
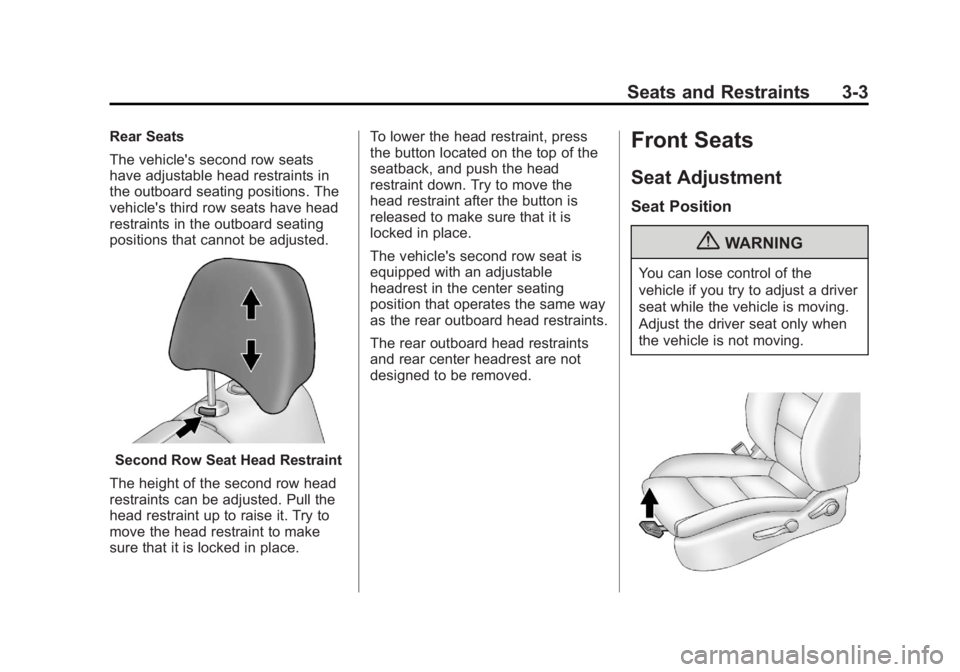
Second Row Seat Head Restraint
The height of the second row head
restraints can be adjusted. Pull the
head restraint up to raise it. Try to
move the head restraint to make
sure that it is locked in place. To lower the head restraint, press
the button located on the top of the
seatback, and push the head
restraint down. Try to move the
head restraint after the button is
released to make sure that it is
locked in place.
The vehicle's second row seat is
equipped with an adjustable
headrest in the center seating
position that operates the same way
as the rear outboard head restraints.
The rear outboard head restraints
and rear center headrest are not
designed to be removed.
Front Seats
Seat Adjustment
Seat Position
{WARNING
You can lose control of the
vehicle if you try to adjust a driver
seat while the vehicle is moving.
Adjust the driver seat only when
the vehicle is not moving.
Page 50 of 372
Black plate (4,1)Chevrolet Orlando Owner Manual - 2013 - CRC - 6/5/12
3-4 Seats and Restraints
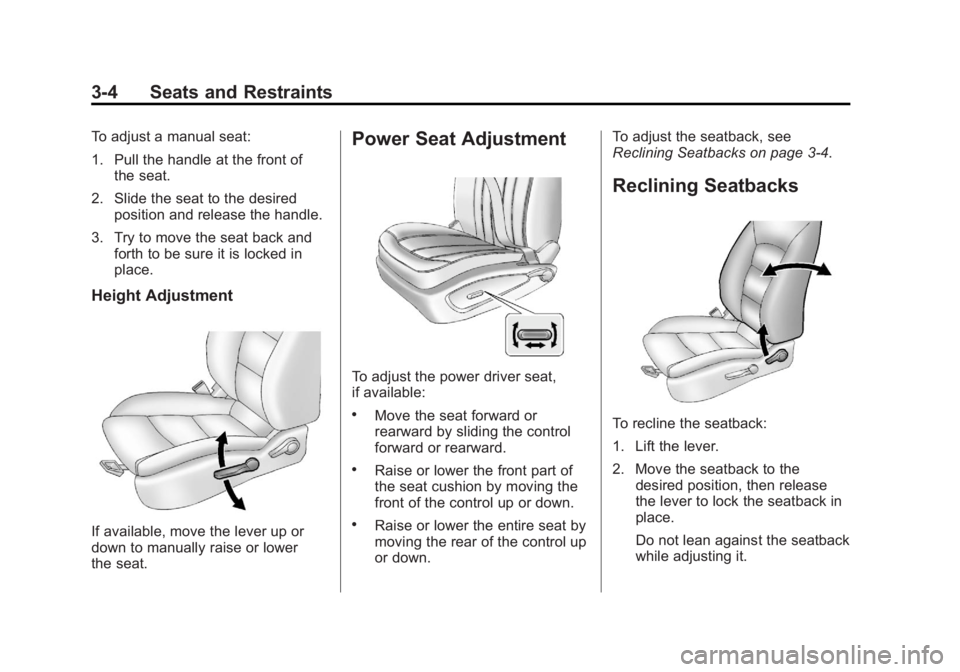
To adjust a manual seat:
1. Pull the handle at the front ofthe seat.
2. Slide the seat to the desired position and release the handle.
3. Try to move the seat back and forth to be sure it is locked in
place.
Height Adjustment
If available, move the lever up or
down to manually raise or lower
the seat.
Power Seat Adjustment
To adjust the power driver seat,
if available:
.Move the seat forward or
rearward by sliding the control
forward or rearward.
.Raise or lower the front part of
the seat cushion by moving the
front of the control up or down.
.Raise or lower the entire seat by
moving the rear of the control up
or down. To adjust the seatback, see
Reclining Seatbacks on page 3‑4.
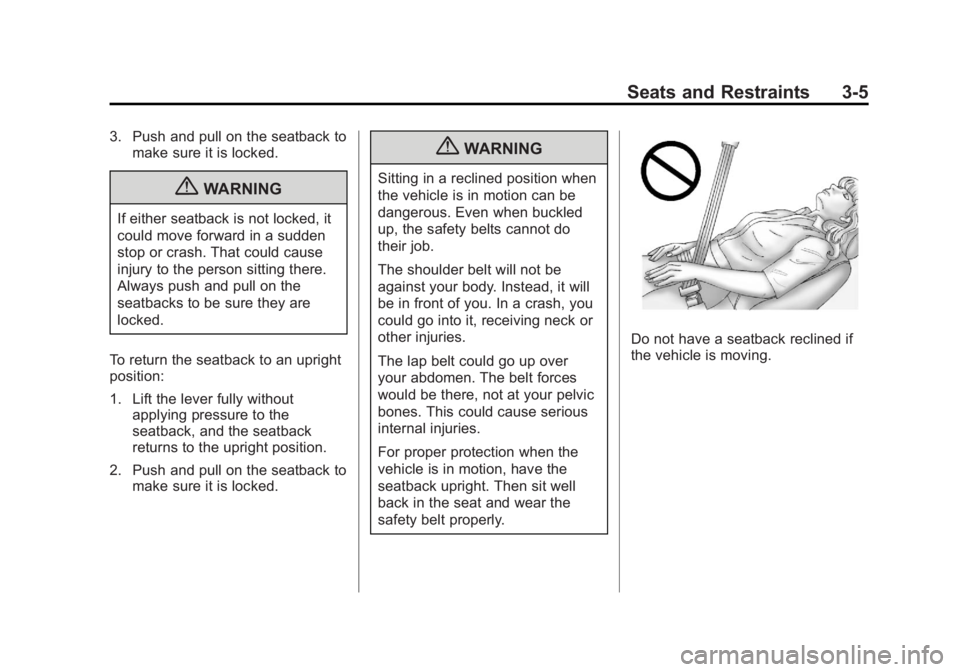
Reclining Seatbacks
To recline the seatback:
1. Lift the lever.
2. Move the seatback to the
desired position, then release
the lever to lock the seatback in
place.
Do not lean against the seatback
while adjusting it.
Page 51 of 372
Black plate (5,1)Chevrolet Orlando Owner Manual - 2013 - CRC - 6/5/12
Seats and Restraints 3-5
3. Push and pull on the seatback tomake sure it is locked.
{WARNING
If either seatback is not locked, it
could move forward in a sudden
stop or crash. That could cause
injury to the person sitting there.
Always push and pull on the
seatbacks to be sure they are
locked.
To return the seatback to an upright
position:
1. Lift the lever fully without applying pressure to the
seatback, and the seatback
returns to the upright position.
2. Push and pull on the seatback to make sure it is locked.
{WARNING
Sitting in a reclined position when
the vehicle is in motion can be
dangerous. Even when buckled
up, the safety belts cannot do
their job.
The shoulder belt will not be
against your body. Instead, it will
be in front of you. In a crash, you
could go into it, receiving neck or
other injuries.
The lap belt could go up over
your abdomen. The belt forces
would be there, not at your pelvic
bones. This could cause serious
internal injuries.
For proper protection when the
vehicle is in motion, have the
seatback upright. Then sit well
back in the seat and wear the
safety belt properly.
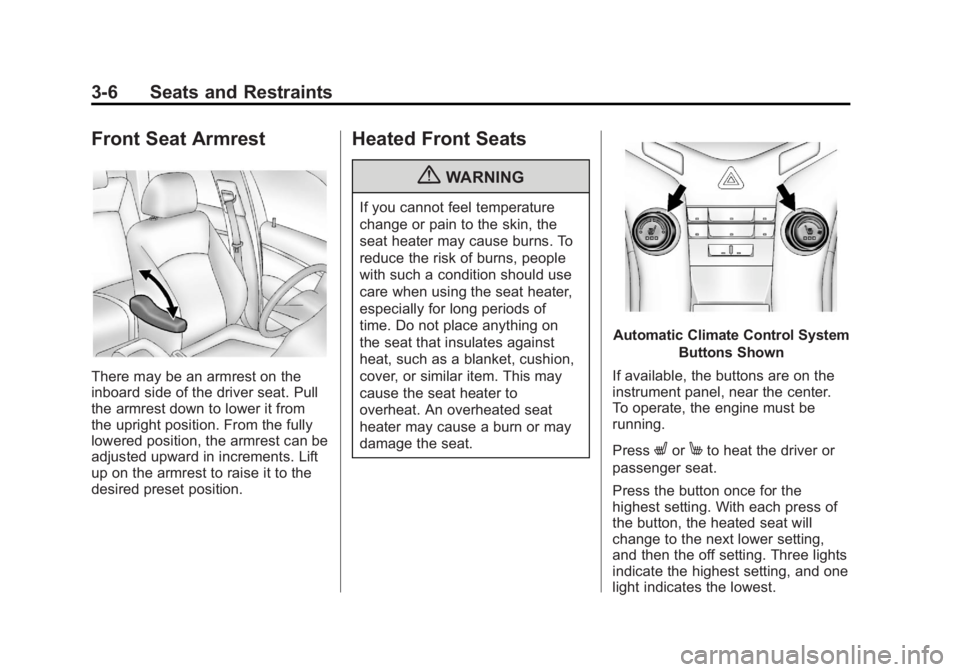
Do not have a seatback reclined if
the vehicle is moving.
Page 52 of 372
Black plate (6,1)Chevrolet Orlando Owner Manual - 2013 - CRC - 6/5/12
3-6 Seats and Restraints
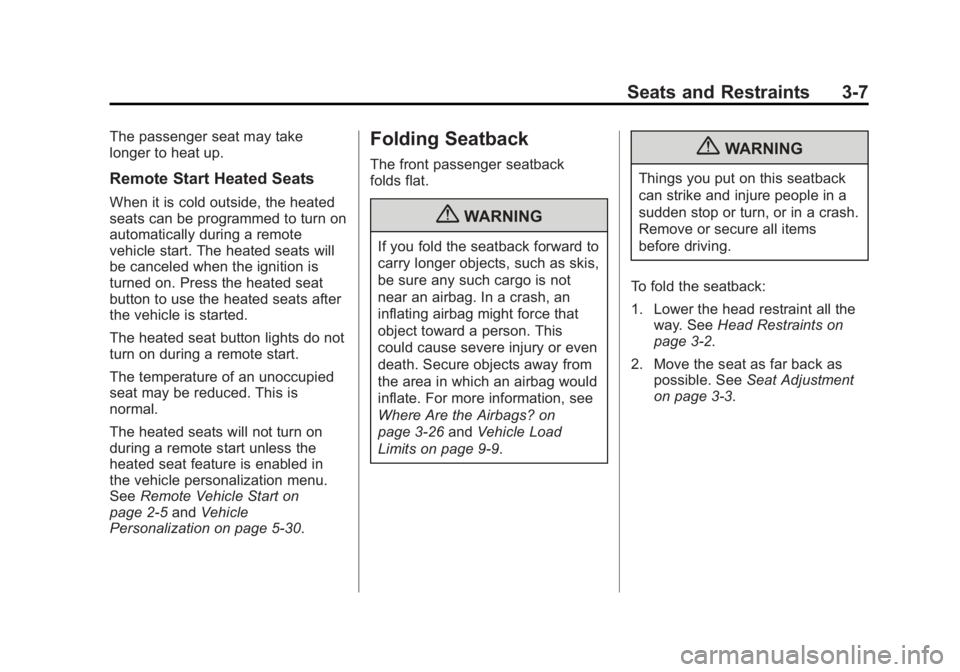
Front Seat Armrest
There may be an armrest on the
inboard side of the driver seat. Pull
the armrest down to lower it from
the upright position. From the fully
lowered position, the armrest can be
adjusted upward in increments. Lift
up on the armrest to raise it to the
desired preset position.
Heated Front Seats
{WARNING
If you cannot feel temperature
change or pain to the skin, the
seat heater may cause burns. To
reduce the risk of burns, people
with such a condition should use
care when using the seat heater,
especially for long periods of
time. Do not place anything on
the seat that insulates against
heat, such as a blanket, cushion,
cover, or similar item. This may
cause the seat heater to
overheat. An overheated seat
heater may cause a burn or may
damage the seat.
Automatic Climate Control SystemButtons Shown
If available, the buttons are on the
instrument panel, near the center.
To operate, the engine must be
running.
Press
LorMto heat the driver or
passenger seat.
Press the button once for the
highest setting. With each press of
the button, the heated seat will
change to the next lower setting,
and then the off setting. Three lights
indicate the highest setting, and one
light indicates the lowest.
Page 53 of 372
Black plate (7,1)Chevrolet Orlando Owner Manual - 2013 - CRC - 6/5/12
Seats and Restraints 3-7
The passenger seat may take
longer to heat up.
Remote Start Heated Seats
When it is cold outside, the heated
seats can be programmed to turn on
automatically during a remote
vehicle start. The heated seats will
be canceled when the ignition is
turned on. Press the heated seat
button to use the heated seats after
the vehicle is started.
The heated seat button lights do not
turn on during a remote start.
The temperature of an unoccupied
seat may be reduced. This is
normal.
The heated seats will not turn on
during a remote start unless the
heated seat feature is enabled in
the vehicle personalization menu.
SeeRemote Vehicle Start on
page 2‑5 andVehicle
Personalization on page 5‑30.
Folding Seatback
The front passenger seatback
folds flat.
{WARNING
If you fold the seatback forward to
carry longer objects, such as skis,
be sure any such cargo is not
near an airbag. In a crash, an
inflating airbag might force that
object toward a person. This
could cause severe injury or even
death. Secure objects away from
the area in which an airbag would
inflate. For more information, see
Where Are the Airbags? on
page 3‑26 andVehicle Load
Limits on page 9‑9.
{WARNING
Things you put on this seatback
can strike and injure people in a
sudden stop or turn, or in a crash.
Remove or secure all items
before driving.
To fold the seatback:
1. Lower the head restraint all the way. See Head Restraints on
page 3‑2.
2. Move the seat as far back as possible. See Seat Adjustment
on page 3‑3.