2015 CHEVROLET MALIBU brake light
[x] Cancel search: brake lightPage 231 of 399
Black plate (34,1)Chevrolet Malibu Owner Manual (GMNA-Localizing-U.S./Canada/Mexico-
7575972) - 2015 - crc - 4/1/14
9-34 Driving and Operating
Ending Cruise Control
There are four ways to end cruise
control:
.Step lightly on the brake pedal.
.Press*.
.Shift the transmission to
N (Neutral).
.To turn off the cruise control,
press
1.
Erasing Speed Memory
The cruise control set speed is
erased from memory if
1is pressed
or if the vehicle is turned off.
Driver Assistance
Systems
Forward Collision Alert
(FCA) System
If equipped, the FCA system may
help to avoid or reduce the harm
caused by front-end crashes. When
approaching a vehicle ahead too
quickly, FCA provides a flashing red
alert on the windshield, and rapidly
beeps. FCA also lights an amber
visual alert if following another
vehicle much too closely.
FCA detects vehicles within a
distance of approximately 60 m
(197 ft) and operates at speeds
above 40 km/h (25 mph).
{Warning
FCA is a warning system and
does not apply the brakes. When
approaching a slower-moving or
(Continued)
Warning (Continued)
stopped vehicle ahead too rapidly,
or when following a vehicle too
closely, FCA may not provide a
warning with enough time to help
avoid a crash. FCA does not warn
of pedestrians, animals, signs,
guardrails, bridges, construction
barrels, or other objects. Be ready
to take action and apply the
brakes. For more information, see
Defensive Driving on page 9-3.
FCA can be disabled with the FCA
steering wheel control.
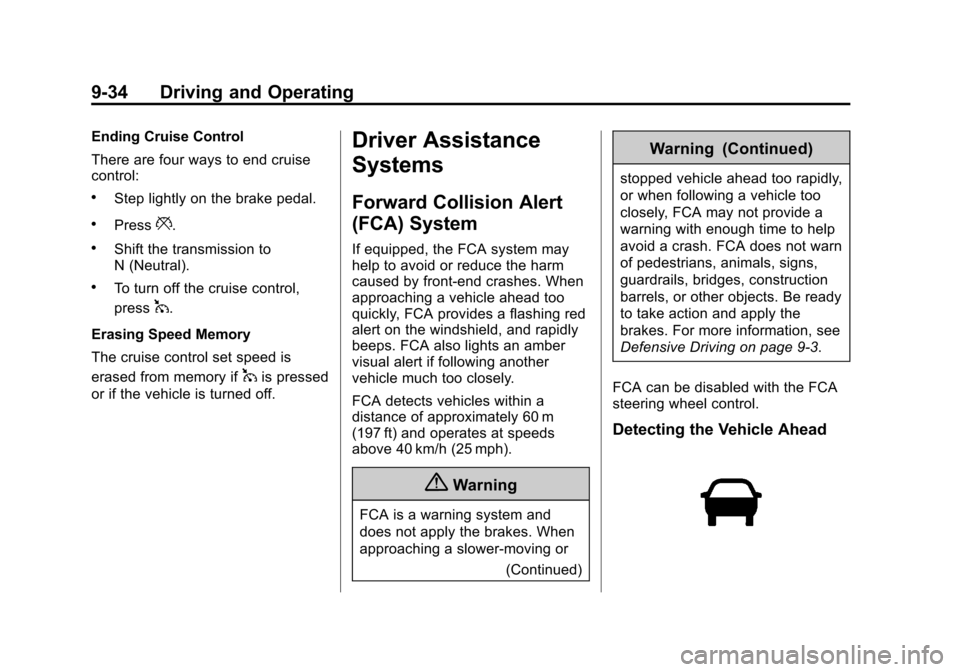
Detecting the Vehicle Ahead
Page 234 of 399
Black plate (37,1)Chevrolet Malibu Owner Manual (GMNA-Localizing-U.S./Canada/Mexico-
7575972) - 2015 - crc - 4/1/14
Driving and Operating 9-37
When the System Does Not
Seem to Work Properly
The following messages may be
displayed on the DIC:
SERVICE PARKING ASSIST:If
this message occurs, check the
following conditions:
.The sensors are not clean. Keep
the vehicle's rear bumper free of
mud, dirt, snow, ice, and slush.
For cleaning instructions, see
Exterior Care on page 10-82.
.The park assist sensors are
covered by frost or ice. Frost or
ice can form around and behind
the sensors and may not always
be seen; this can occur after
washing the vehicle in cold
weather. The message may not
clear until the frost or ice has
melted.
If the above conditions do not exist,
take the vehicle to your dealer to
repair the system. PARK ASSIST OFF:
If the RPA
system does not activate due to a
temporary condition, the message
displays on the DIC. This can occur
under the following conditions:
.The driver has disabled the
system.
.An object was hanging out of the
trunk during the last drive cycle.
Once the object is removed,
RPA will return to normal
operation.
.The bumper is damaged. Take
the vehicle to your dealer to
repair the system.
.Other conditions, such as
vibrations from a jackhammer or
the compression of air brakes on
a very large truck, are affecting
system performance.
Side Blind Zone
Alert (SBZA)
If equipped, the SBZA system is a
lane-changing aid that assists
drivers with avoiding crashes that occur with vehicles in the side blind
zone (or spot) areas. The SBZA
warning display will light up in the
corresponding outside side mirror
and will flash if the turn signal is on.
{Warning
SBZA does not alert the driver to
vehicles rapidly approaching
outside of the side blind zones,
pedestrians, bicyclists,
or animals. It may not provide
alerts when changing lanes under
all driving conditions. Failure to
use proper care when changing
lanes may result in injury, death,
or vehicle damage. Before
making a lane change, always
check mirrors, glance over your
shoulder, and use the turn
signals.
Page 252 of 399
Black plate (1,1)Chevrolet Malibu Owner Manual (GMNA-Localizing-U.S./Canada/Mexico-
7575972) - 2015 - crc - 4/1/14
Vehicle Care 10-1
Vehicle Care
General Information
General Information . . . . . . . . . . 10-2
California Proposition65 Warning . . . . . . . . . . . . . . . . . 10-2
California Perchlorate Materials Requirements . . . . 10-3
Accessories and Modifications . . . . . . . . . . . . . . . 10-3
Vehicle Checks
Doing Your OwnService Work . . . . . . . . . . . . . . . 10-3
Hood . . . . . . . . . . . . . . . . . . . . . . . . 10-4
Engine Compartment Overview . . . . . . . . . . . . . . . . . . . 10-5
Engine Oil . . . . . . . . . . . . . . . . . . . 10-8
Engine Oil Life System . . . . . 10-10
Automatic Transmission Fluid . . . . . . . . . . . . . . . . . . . . . . 10-11
Engine Air Cleaner/Filter . . . . 10-11
Cooling System . . . . . . . . . . . . 10-13
Engine Coolant . . . . . . . . . . . . . 10-14
Engine Overheating . . . . . . . . 10-17
Washer Fluid . . . . . . . . . . . . . . . 10-18
Brakes . . . . . . . . . . . . . . . . . . . . . 10-19
Brake Fluid . . . . . . . . . . . . . . . . . 10-20 Battery . . . . . . . . . . . . . . . . . . . . . 10-21
Starter Switch Check . . . . . . . 10-22
Automatic Transmission Shift
Lock Control Function
Check . . . . . . . . . . . . . . . . . . . . . 10-23
Ignition Transmission Lock Check . . . . . . . . . . . . . . . . . . . . . 10-23
Park Brake and P (Park) Mechanism Check . . . . . . . . 10-23
Wiper Blade Replacement . . . . . . . . . . . . . . 10-24
Headlamp Aiming
Headlamp Aiming . . . . . . . . . . 10-25
Bulb Replacement
Bulb Replacement . . . . . . . . . . 10-25
Halogen Bulbs . . . . . . . . . . . . . . 10-25
High Intensity Discharge(HID) Lighting . . . . . . . . . . . . . 10-25
LED Lighting . . . . . . . . . . . . . . . 10-25
Headlamps, Front Turn Signal, Sidemarker, and
Parking Lamps . . . . . . . . . . . . 10-26
Fog Lamps . . . . . . . . . . . . . . . . . 10-29
Taillamps, Turn Signal, Stoplamps, and Back-Up
Lamps (LS and LT) . . . . . . . . 10-29 Taillamps, Turn Signal,
Stoplamps, and Back-Up
Lamps (LTZ) . . . . . . . . . . . . . . 10-30
License Plate Lamp . . . . . . . . 10-32
Replacement Bulbs . . . . . . . . . 10-32
Electrical System
High Voltage Devices and Wiring . . . . . . . . . . . . . . . . . . . . . 10-33
Electrical System Overload . . . . . . . . . . . . . . . . . . 10-33
Fuses . . . . . . . . . . . . . . . . . . . . . . 10-34
Engine Compartment Fuse Block . . . . . . . . . . . . . . . . . . . . . 10-34
Instrument Panel Fuse Block . . . . . . . . . . . . . . . . . . . . . 10-38
Wheels and Tires
Tires . . . . . . . . . . . . . . . . . . . . . . . . 10-40
All-Season Tires . . . . . . . . . . . . 10-41
Winter Tires . . . . . . . . . . . . . . . . 10-42
Summer Tires . . . . . . . . . . . . . . 10-42
Tire Sidewall Labeling . . . . . . 10-42
Tire Designations . . . . . . . . . . . 10-44
Tire Terminology andDefinitions . . . . . . . . . . . . . . . . 10-45
Tire Pressure . . . . . . . . . . . . . . . 10-48
Tire Pressure for High-Speed Operation . . . . . . . . . . . . . . . . . 10-49
Page 270 of 399

Black plate (19,1)Chevrolet Malibu Owner Manual (GMNA-Localizing-U.S./Canada/Mexico-
7575972) - 2015 - crc - 4/1/14
Vehicle Care 10-19
Caution (Continued)
to freeze and damage the
washer fluid tank and other
parts of the washer system.
.When using concentrated
washer fluid, follow the
manufacturer instructions for
adding water.
.Fill the washer fluid tank only
three-quarters full when it is
very cold. This allows for fluid
expansion if freezing occurs,
which could damage the tank
if it is completely full.
Brakes
This vehicle has disc brakes. Disc
brake pads have built-in wear
indicators that make a high-pitched
warning sound when the brake pads
are worn and new pads are needed.
The sound can come and go or be
heard all the time when the vehicle
is moving, except when applying the
brake pedal firmly.
{Warning
The brake wear warning sound
means that soon the brakes will
not work well. That could lead to
a crash. When the brake wear
warning sound is heard, have the
vehicle serviced.
{Caution
Continuing to drive with worn-out
brake pads could result in costly
brake repair.
Some driving conditions or climates
can cause a brake squeal when the
brakes are first applied or lightly
applied. This does not mean
something is wrong with the brakes.
Properly torqued wheel nuts are
necessary to help prevent brake
pulsation. When tires are rotated,
inspect brake pads for wear and
evenly tighten wheel nuts in the proper sequence to torque
specifications. See
Capacities and
Specifications on page 12-2.
Brake pads should be replaced as
complete sets.
Brake Pedal Travel
See your dealer if the brake pedal
does not return to normal height,
or if there is a rapid increase in
pedal travel. This could be a sign
that brake service might be
required.
Brake Adjustment
Every time the brakes are applied,
with or without the vehicle moving,
the brakes adjust for wear.
Replacing Brake System Parts
The braking system on a vehicle is
complex. Its many parts have to be
of top quality and work well together
if the vehicle is to have really good
braking. The vehicle was designed
and tested with top-quality brake
parts. When parts of the braking
system are replaced, be sure to get
Page 271 of 399

Black plate (20,1)Chevrolet Malibu Owner Manual (GMNA-Localizing-U.S./Canada/Mexico-
7575972) - 2015 - crc - 4/1/14
10-20 Vehicle Care
new, approved replacement parts.
If this is not done, the brakes might
not work properly. For example,
installing disc brake pads that are
wrong for the vehicle, can change
the balance between the front and
rear brakes—for the worse. The
braking performance expected can
change in many other ways if the
wrong replacement brake parts are
installed.
Brake Fluid
The brake master cylinder reservoir
is filled with DOT 3 brake fluid as
indicated on the reservoir cap. See
Engine Compartment Overview on
page 10-5 for the location of the
reservoir. There are only two reasons why the
brake fluid level in the reservoir
might go down:
.The brake fluid level goes down
because of normal brake lining
wear. When new linings are
installed, the fluid level goes
back up.
.A fluid leak in the brake
hydraulic system can also cause
a low fluid level. Have the brake
hydraulic system fixed, since a
leak means that sooner or later
the brakes will not work well.
Do not top off the brake fluid.
Adding fluid does not correct a leak.
If fluid is added when the linings are
worn, there will be too much fluid
when new brake linings are
installed. Add or remove brake fluid,
as necessary, only when work is
done on the brake hydraulic system.
{Warning
If too much brake fluid is added, it
can spill on the engine and burn,
if the engine is hot enough. You
or others could be burned, and
the vehicle could be damaged.
Add brake fluid only when work is
done on the brake hydraulic
system.
When the brake fluid falls to a low
level, the brake warning light comes
on. See Brake System Warning
Light on page 5-15.
What to Add
Use only new DOT 3 brake fluid
from a sealed container. See
Recommended Fluids and
Lubricants on page 11-11.
Always clean the brake fluid
reservoir cap and the area around
the cap before removing it. This
helps keep dirt from entering the
reservoir.
Page 304 of 399
Black plate (53,1)Chevrolet Malibu Owner Manual (GMNA-Localizing-U.S./Canada/Mexico-
7575972) - 2015 - crc - 4/1/14
Vehicle Care 10-53
.Operating electronic devices or
being near facilities using radio
wave frequencies similar to the
TPMS could cause the TPMS
sensors to malfunction.
If the TPMS is not functioning
properly it cannot detect or signal a
low tire condition. See your dealer
for service if the TPMS malfunction
light and DIC message comes on
and stays on.
TPMS Sensor Matching
Process
Each TPMS sensor has a unique
identification code. The identification
code needs to be matched to a new
tire/wheel position after rotating the
vehicle’s tires or replacing one or
more of the TPMS sensors. The
TPMS sensor matching process
should also be performed after
replacing a spare tire with a road
tire containing the TPMS sensor.
The malfunction light and the DIC
message should go off at the next
ignition cycle. The sensors are
matched to the tire/wheel positions, using a TPMS relearn tool, in the
following order: driver side front tire,
passenger side front tire, passenger
side rear tire, and driver side rear.
See your dealer for service or to
purchase a relearn tool. A TPMS
relearn tool can also be purchased.
See Tire Pressure Monitor Sensor
Activation Tool at
www.gmtoolsandequipment.com or
call 1-800-GM TOOLS
(1-800-468-6657).
There are two minutes to match the
first tire/wheel position, and
five minutes overall to match all four
tire/wheel positions. If it takes
longer, the matching process stops
and must be restarted.
The TPMS sensor matching
process is:
1. Set the parking brake.
2. Turn the ignition to ON/RUN with
the engine off or place the
vehicle power mode in ON/RUN/
START. See Ignition Positions
(Keyless Access) on page 9-14
or Ignition Positions (Key
Access) on page 9-16.
3. Use the MENU button to select the Vehicle Information Menu in
the Driver Information
Center (DIC).
4. Use the thumbwheel to scroll to the Tire Pressure Menu Item
screen.
5. Press the SET/CLR button to begin the sensor matching
process.
A message asking if the process
should begin should appear.
6. Press the SET/CLR button again to confirm the selection.
The horn sounds twice to signal
the receiver is in relearn mode
and the TIRE LEARNING
ACTIVE message displays on
the DIC screen.
Page 311 of 399
Black plate (60,1)Chevrolet Malibu Owner Manual (GMNA-Localizing-U.S./Canada/Mexico-
7575972) - 2015 - crc - 4/1/14
10-60 Vehicle Care
performance on the laboratory
test wheel than the minimum
required by law. Warning: The
temperature grade for this tire is
established for a tire that is
properly inflated and not
overloaded. Excessive speed,
underinflation, or excessive
loading, either separately or in
combination, can cause heat
buildup and possible tire failure.
Wheel Alignment and Tire
Balance
The tires and wheels were aligned
and balanced at the factory to
provide the longest tire life and best
overall performance. Adjustments to
wheel alignment and tire balancing
are not necessary on a regular
basis. Consider an alignment check
if there is unusual tire wear or the
vehicle is significantly pulling to one
side or the other. Some slight pull to
the left or right, depending on the
crown of the road and/or other roadsurface variations such as troughs
or ruts, is normal. If the vehicle is
vibrating when driving on a smooth
road, the tires and wheels may need
to be rebalanced. See your dealer
for proper diagnosis.
Wheel Replacement
Replace any wheel that is bent,
cracked, or badly rusted or
corroded. If wheel nuts keep coming
loose, the wheel, wheel bolts, and
wheel nuts should be replaced.
If the wheel leaks air, replace it.
Some aluminum wheels can be
repaired. See your dealer if any of
these conditions exist.
Your dealer will know the kind of
wheel that is needed.
Each new wheel should have the
same load-carrying capacity,
diameter, width, offset, and be
mounted the same way as the one it
replaces.
Replace wheels, wheel bolts, wheel
nuts, or Tire Pressure Monitor
System (TPMS) sensors with new
GM original equipment parts.
{Warning
Using the wrong replacement
wheels, wheel bolts, or wheel
nuts can be dangerous. It could
affect the braking and handling of
the vehicle. Tires can lose air,
and cause loss of control, causing
a crash. Always use the correct
wheel, wheel bolts, and wheel
nuts for replacement.
{Caution
The wrong wheel can also cause
problems with bearing life, brake
cooling, speedometer or
odometer calibration, headlamp
aim, bumper height, vehicle
(Continued)
Page 329 of 399

Black plate (78,1)Chevrolet Malibu Owner Manual (GMNA-Localizing-U.S./Canada/Mexico-
7575972) - 2015 - crc - 4/1/14
10-78 Vehicle Care
transmission in P (Park) or a
manual transmission in Neutral
before setting the parking brake.
3. Set the parking brake firmly on both vehicles. Put an automatic
transmission in P (Park) or a
manual transmission in Neutral
before setting the parking brake.
{Caution
If any accessories are left on or
plugged in during the jump
starting procedure, they could be
damaged. The repairs would not
be covered by the vehicle
warranty. Whenever possible, turn
off or unplug all accessories on
either vehicle when jump starting.
4. Turn the ignition to LOCK/OFF and switch off all lights and
accessories in both vehicles,
except the hazard warning
flashers if needed.
{Warning
An electric fan can start up even
when the engine is not running
and can injure you. Keep hands,
clothing and tools away from any
underhood electric fan.
{Warning
Using a match near a battery can
cause battery gas to explode.
People have been hurt doing this,
and some have been blinded.
Use a flashlight if you need more
light.
Be sure the battery has enough
water. You do not need to add
water to the battery installed in
your new vehicle. But if a battery
has filler caps, be sure the right
amount of fluid is there. If it is low,
(Continued)
Warning (Continued)
add water to take care of that
first. If you do not, explosive gas
could be present.
Battery fluid contains acid that
can burn you. Do not get it on
you. If you accidentally get it in
your eyes or on your skin, flush
the place with water and get
medical help immediately.
{Warning
Fans or other moving engine
parts can injure you badly. Keep
your hands away from moving
parts once the engine is running.
6. Connect the red positive (+) cable to the remote positive (+)
terminal of the discharged
battery.