2015 CHEVROLET MALIBU remote start
[x] Cancel search: remote startPage 36 of 399
Black plate (7,1)Chevrolet Malibu Owner Manual (GMNA-Localizing-U.S./Canada/Mexico-
7575972) - 2015 - crc - 4/1/14
Keys, Doors, and Windows 2-7
2. Insert the vehicle key of the newtransmitter into the key lock
cylinder on the outside of the
driver door and turn the key to
the unlock position five times
within 10 seconds.
The Driver Information Center
(DIC) displays READY FOR
REMOTE #2, 3, 4 or 5.
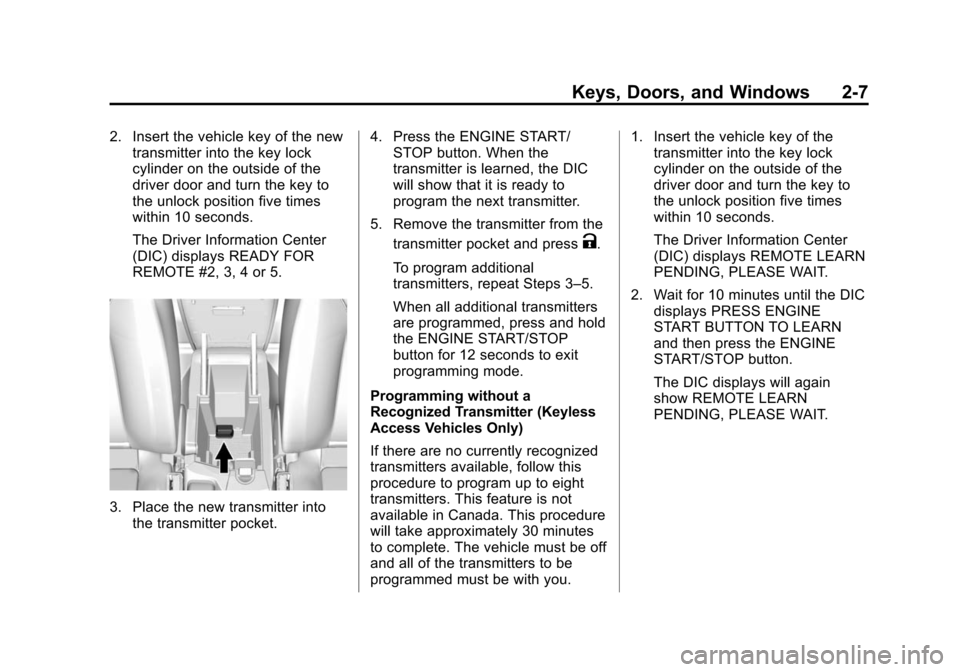
3. Place the new transmitter into
the transmitter pocket. 4. Press the ENGINE START/
STOP button. When the
transmitter is learned, the DIC
will show that it is ready to
program the next transmitter.
5. Remove the transmitter from the transmitter pocket and press
K.
To program additional
transmitters, repeat Steps 3–5.
When all additional transmitters
are programmed, press and hold
the ENGINE START/STOP
button for 12 seconds to exit
programming mode.
Programming without a
Recognized Transmitter (Keyless
Access Vehicles Only)
If there are no currently recognized
transmitters available, follow this
procedure to program up to eight
transmitters. This feature is not
available in Canada. This procedure
will take approximately 30 minutes
to complete. The vehicle must be off
and all of the transmitters to be
programmed must be with you. 1. Insert the vehicle key of the
transmitter into the key lock
cylinder on the outside of the
driver door and turn the key to
the unlock position five times
within 10 seconds.
The Driver Information Center
(DIC) displays REMOTE LEARN
PENDING, PLEASE WAIT.
2. Wait for 10 minutes until the DIC displays PRESS ENGINE
START BUTTON TO LEARN
and then press the ENGINE
START/STOP button.
The DIC displays will again
show REMOTE LEARN
PENDING, PLEASE WAIT.
Page 37 of 399
Black plate (8,1)Chevrolet Malibu Owner Manual (GMNA-Localizing-U.S./Canada/Mexico-
7575972) - 2015 - crc - 4/1/14
2-8 Keys, Doors, and Windows
3. Repeat Step 2 two additionaltimes. After the third time, all
previously known transmitters
will no longer work with the
vehicle. Remaining transmitters
can be relearned during the next
steps.
The DIC display should now
show READY FOR REMOTE
# 1.
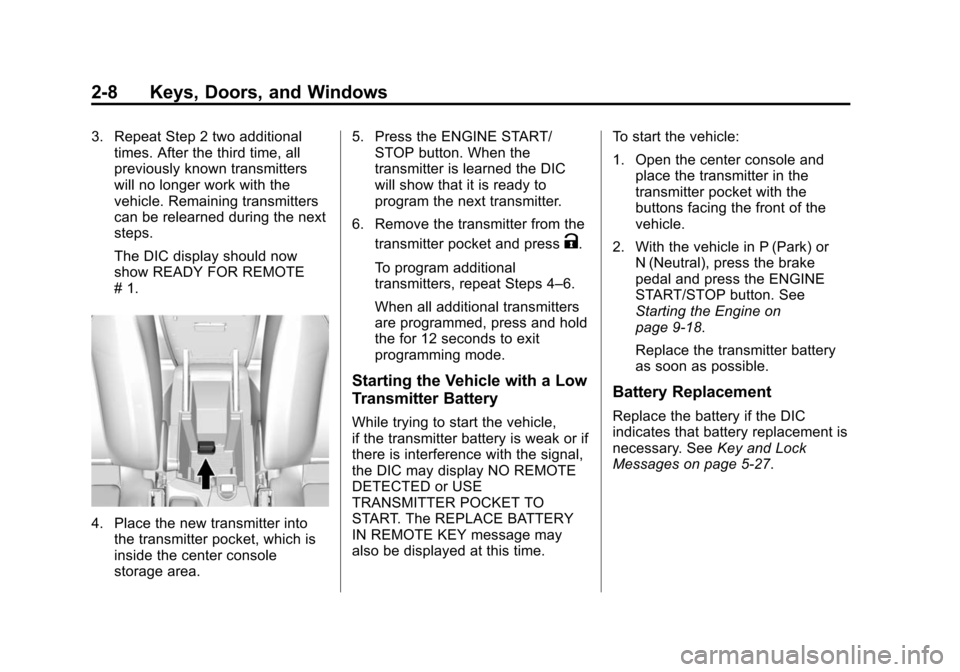
4. Place the new transmitter intothe transmitter pocket, which is
inside the center console
storage area. 5. Press the ENGINE START/
STOP button. When the
transmitter is learned the DIC
will show that it is ready to
program the next transmitter.
6. Remove the transmitter from the transmitter pocket and press
K.
To program additional
transmitters, repeat Steps 4–6.
When all additional transmitters
are programmed, press and hold
the for 12 seconds to exit
programming mode.
Starting the Vehicle with a Low
Transmitter Battery
While trying to start the vehicle,
if the transmitter battery is weak or if
there is interference with the signal,
the DIC may display NO REMOTE
DETECTED or USE
TRANSMITTER POCKET TO
START. The REPLACE BATTERY
IN REMOTE KEY message may
also be displayed at this time. To start the vehicle:
1. Open the center console and
place the transmitter in the
transmitter pocket with the
buttons facing the front of the
vehicle.
2. With the vehicle in P (Park) or N (Neutral), press the brake
pedal and press the ENGINE
START/STOP button. See
Starting the Engine on
page 9-18.
Replace the transmitter battery
as soon as possible.
Battery Replacement
Replace the battery if the DIC
indicates that battery replacement is
necessary. See Key and Lock
Messages on page 5-27.
Page 38 of 399
Black plate (9,1)Chevrolet Malibu Owner Manual (GMNA-Localizing-U.S./Canada/Mexico-
7575972) - 2015 - crc - 4/1/14
Keys, Doors, and Windows 2-9
{Caution
When replacing the battery, do
not touch any of the circuitry on
the transmitter. Static from your
body could damage the
transmitter.
The battery is not rechargeable. To
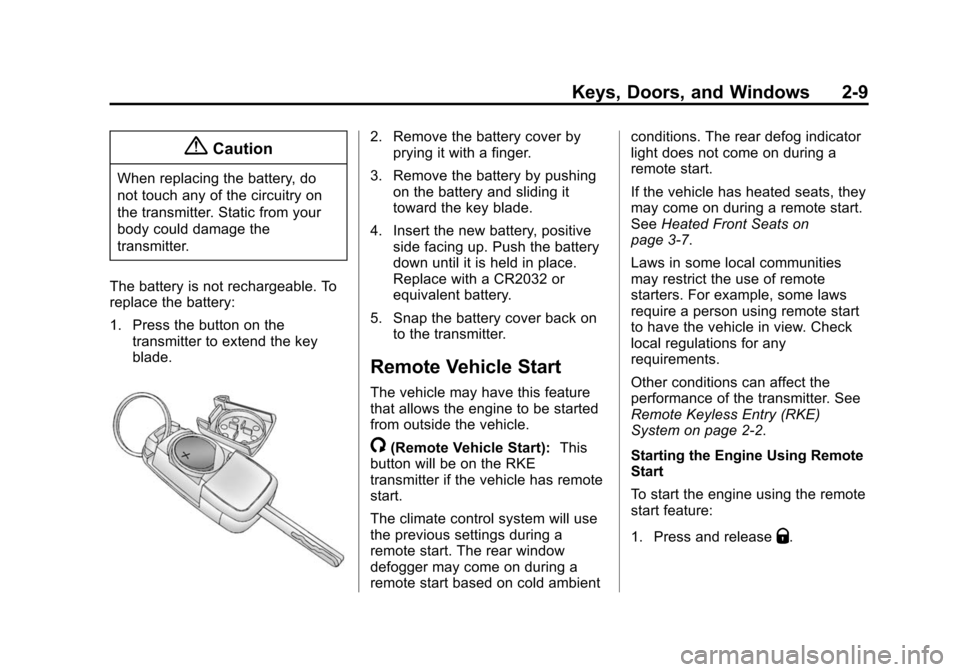
replace the battery:
1. Press the button on the transmitter to extend the key
blade.
2. Remove the battery cover byprying it with a finger.
3. Remove the battery by pushing on the battery and sliding it
toward the key blade.
4. Insert the new battery, positive side facing up. Push the battery
down until it is held in place.
Replace with a CR2032 or
equivalent battery.
5. Snap the battery cover back on to the transmitter.
Remote Vehicle Start
The vehicle may have this feature
that allows the engine to be started
from outside the vehicle.
/(Remote Vehicle Start): This
button will be on the RKE
transmitter if the vehicle has remote
start.
The climate control system will use
the previous settings during a
remote start. The rear window
defogger may come on during a
remote start based on cold ambient conditions. The rear defog indicator
light does not come on during a
remote start.
If the vehicle has heated seats, they
may come on during a remote start.
See
Heated Front Seats on
page 3-7.
Laws in some local communities
may restrict the use of remote
starters. For example, some laws
require a person using remote start
to have the vehicle in view. Check
local regulations for any
requirements.
Other conditions can affect the
performance of the transmitter. See
Remote Keyless Entry (RKE)
System on page 2-2.
Starting the Engine Using Remote
Start
To start the engine using the remote
start feature:
1. Press and release
Q.
Page 39 of 399
Black plate (10,1)Chevrolet Malibu Owner Manual (GMNA-Localizing-U.S./Canada/Mexico-
7575972) - 2015 - crc - 4/1/14
2-10 Keys, Doors, and Windows
2. Immediately after completingStep 1, press and hold
/for at
least four seconds or until the
turn signal lamps flash. The turn
signal lamps flashing confirms
the request to remote start the
vehicle has been received.
When the engine starts, the parking
lamps will turn on and remain on as
long as the engine is running. The
doors will be locked and the climate
control system may come on.
The engine will continue to run for
10 minutes. Repeat the steps for a
10-minute time extension. Remote
start can be extended only once.
Start the vehicle before driving.
Extending Engine Run Time
The engine run time can be
extended by another 10 minutes,
if during the first 10 minutes
Steps 1–2 are repeated while the
engine is still running. When the
remote start is extended, the second 10 minute period is added
on to the first 10 minutes for a total
of 20 minutes.
The remote start can only be
extended once.
A maximum of two remote starts,
or a single start with an extension,
is allowed between ignition cycles.
The vehicle's ignition must be
turned on and then back off before
the remote start procedure can be
used again.
Canceling a Remote Start
To cancel a remote start, do one of
the following:
.Aim the RKE transmitter at the
vehicle and press and hold
/
until the parking lamps turn off.
.Turn on the hazard warning
flashers.
.Turn the vehicle on and then off.
Conditions in Which Remote Start
Will Not Work
The remote vehicle start feature will
not operate if:
.The key is in the ignition (Key
Access) or if the key is in the
vehicle (Keyless Access).
.The hood is not closed.
.The hazard warning flashers
are on.
.The malfunction indicator lamp
is on.
.The engine coolant temperature
is too high.
.The oil pressure is low.
.Two remote vehicle starts, or a
single remote start with an
extension, have already
been used.
.The vehicle is not in P (Park).
Page 42 of 399
Black plate (13,1)Chevrolet Malibu Owner Manual (GMNA-Localizing-U.S./Canada/Mexico-
7575972) - 2015 - crc - 4/1/14
Keys, Doors, and Windows 2-13
Lockout Protection
If equipped with pushbutton start
and the vehicle is in ACC/
ACCESSORY or ON/RUN/START,
and locking is requested with the
driver door open, all doors will lock
and only the driver door will unlock.
If equipped with a keyed ignition,
and the key is in the ignition when
locking is requested with the driver
door open, all doors will lock and
then the driver door will unlock.
Lockout Protection with the key in
the ignition can be manually
overridden with the driver door open
by pressing and holding
Qon the
power door lock switch.
If Open or Unlocked Door Anti
Lockout is turned on and the vehicle
is off, and locking is requested with
the driver door open, all doors will
lock and only the driver door will
unlock. The Unlocked Door Anti
Lockout feature can be turned on or off using the vehicle personalization
menus. See
Vehicle Personalization
on page 5-31.
Safety Locks
The rear door safety locks prevent
passengers from opening the rear
doors from inside the vehicle.
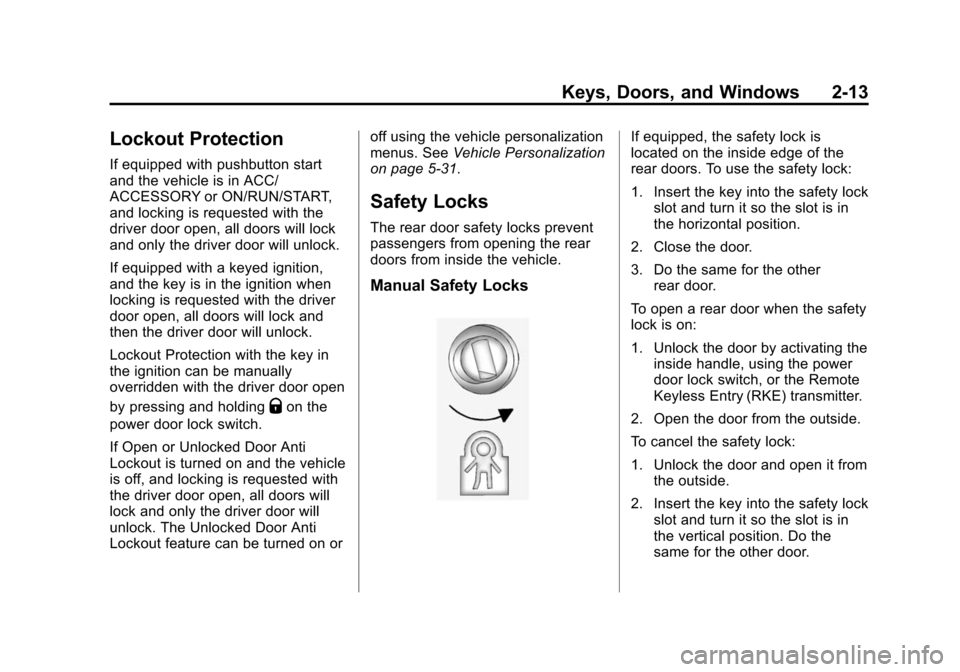
Manual Safety Locks
If equipped, the safety lock is
located on the inside edge of the
rear doors. To use the safety lock:
1. Insert the key into the safety lock slot and turn it so the slot is in
the horizontal position.
2. Close the door.
3. Do the same for the other rear door.
To open a rear door when the safety
lock is on:
1. Unlock the door by activating the inside handle, using the power
door lock switch, or the Remote
Keyless Entry (RKE) transmitter.
2. Open the door from the outside.
To cancel the safety lock:
1. Unlock the door and open it from the outside.
2. Insert the key into the safety lock slot and turn it so the slot is in
the vertical position. Do the
same for the other door.
Page 47 of 399
Black plate (18,1)Chevrolet Malibu Owner Manual (GMNA-Localizing-U.S./Canada/Mexico-
7575972) - 2015 - crc - 4/1/14
2-18 Keys, Doors, and Windows
The immobilization system is
disarmed when the ignition button is
pushed in and a valid transmitter is
found in the vehicle.
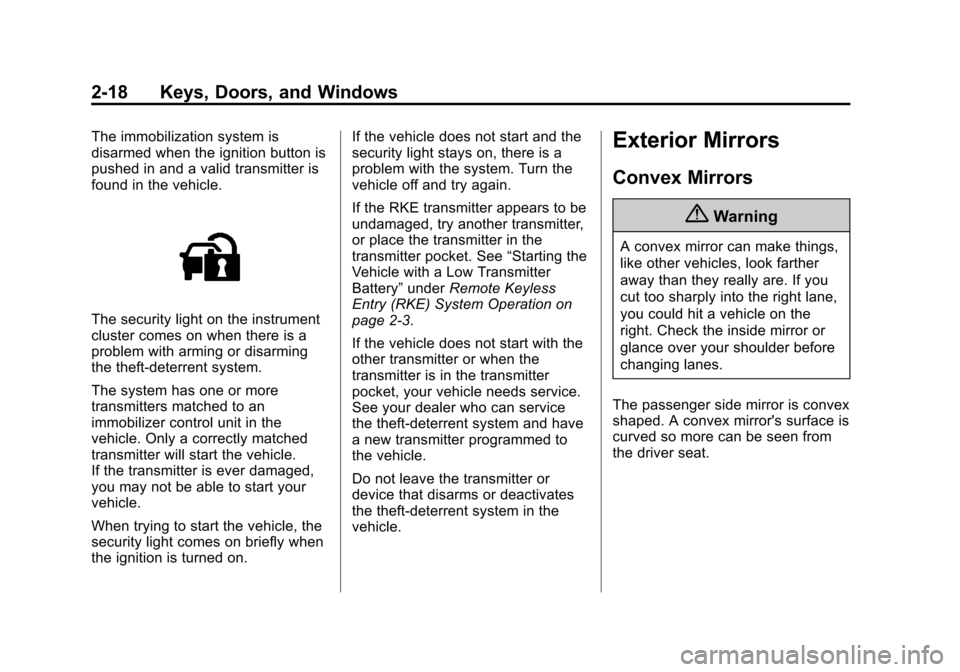
The security light on the instrument
cluster comes on when there is a
problem with arming or disarming
the theft-deterrent system.
The system has one or more
transmitters matched to an
immobilizer control unit in the
vehicle. Only a correctly matched
transmitter will start the vehicle.
If the transmitter is ever damaged,
you may not be able to start your
vehicle.
When trying to start the vehicle, the
security light comes on briefly when
the ignition is turned on.If the vehicle does not start and the
security light stays on, there is a
problem with the system. Turn the
vehicle off and try again.
If the RKE transmitter appears to be
undamaged, try another transmitter,
or place the transmitter in the
transmitter pocket. See
“Starting the
Vehicle with a Low Transmitter
Battery” underRemote Keyless
Entry (RKE) System Operation on
page 2-3.
If the vehicle does not start with the
other transmitter or when the
transmitter is in the transmitter
pocket, your vehicle needs service.
See your dealer who can service
the theft-deterrent system and have
a new transmitter programmed to
the vehicle.
Do not leave the transmitter or
device that disarms or deactivates
the theft-deterrent system in the
vehicle.
Exterior Mirrors
Convex Mirrors
{Warning
A convex mirror can make things,
like other vehicles, look farther
away than they really are. If you
cut too sharply into the right lane,
you could hit a vehicle on the
right. Check the inside mirror or
glance over your shoulder before
changing lanes.
The passenger side mirror is convex
shaped. A convex mirror's surface is
curved so more can be seen from
the driver seat.
Page 59 of 399
Black plate (6,1)Chevrolet Malibu Owner Manual (GMNA-Localizing-U.S./Canada/Mexico-
7575972) - 2015 - crc - 4/1/14
3-6 Seats and Restraints
Memory Seats
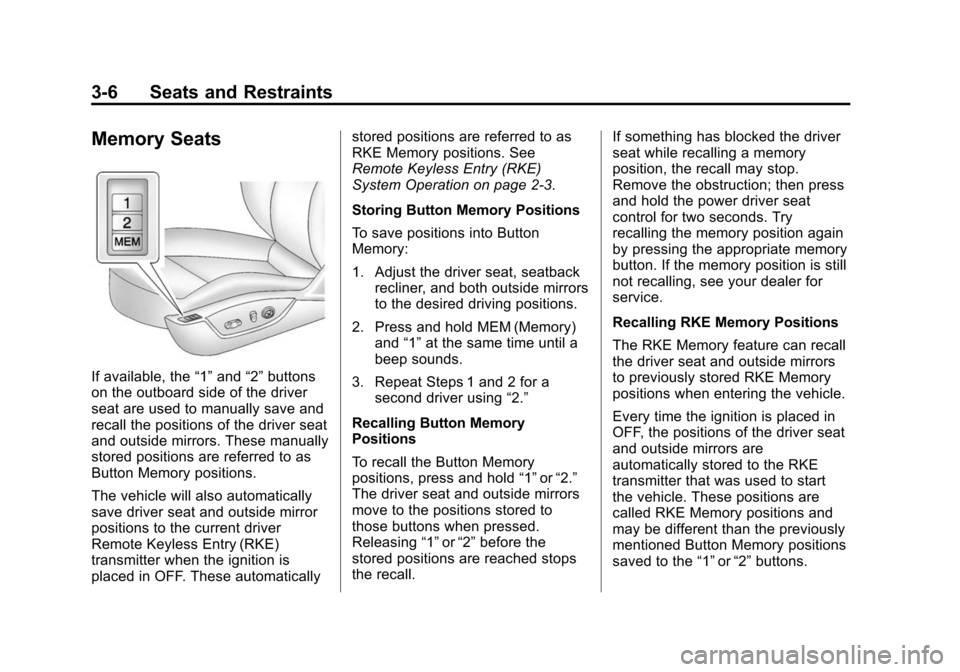
If available, the“1”and “2”buttons
on the outboard side of the driver
seat are used to manually save and
recall the positions of the driver seat
and outside mirrors. These manually
stored positions are referred to as
Button Memory positions.
The vehicle will also automatically
save driver seat and outside mirror
positions to the current driver
Remote Keyless Entry (RKE)
transmitter when the ignition is
placed in OFF. These automatically stored positions are referred to as
RKE Memory positions. See
Remote Keyless Entry (RKE)
System Operation on page 2-3.
Storing Button Memory Positions
To save positions into Button
Memory:
1. Adjust the driver seat, seatback
recliner, and both outside mirrors
to the desired driving positions.
2. Press and hold MEM (Memory) and “1”at the same time until a
beep sounds.
3. Repeat Steps 1 and 2 for a second driver using “2.”
Recalling Button Memory
Positions
To recall the Button Memory
positions, press and hold “1”or“2.”
The driver seat and outside mirrors
move to the positions stored to
those buttons when pressed.
Releasing “1”or“2” before the
stored positions are reached stops
the recall. If something has blocked the driver
seat while recalling a memory
position, the recall may stop.
Remove the obstruction; then press
and hold the power driver seat
control for two seconds. Try
recalling the memory position again
by pressing the appropriate memory
button. If the memory position is still
not recalling, see your dealer for
service.
Recalling RKE Memory Positions
The RKE Memory feature can recall
the driver seat and outside mirrors
to previously stored RKE Memory
positions when entering the vehicle.
Every time the ignition is placed in
OFF, the positions of the driver seat
and outside mirrors are
automatically stored to the RKE
transmitter that was used to start
the vehicle. These positions are
called RKE Memory positions and
may be different than the previously
mentioned Button Memory positions
saved to the
“1”or“2” buttons.
Page 61 of 399
Black plate (8,1)Chevrolet Malibu Owner Manual (GMNA-Localizing-U.S./Canada/Mexico-
7575972) - 2015 - crc - 4/1/14
3-8 Seats and Restraints
Warning (Continued)
heat, such as a blanket, cushion,
cover, or similar item. This may
cause the seat heater to
overheat. An overheated seat
heater may cause a burn or may
damage the seat.
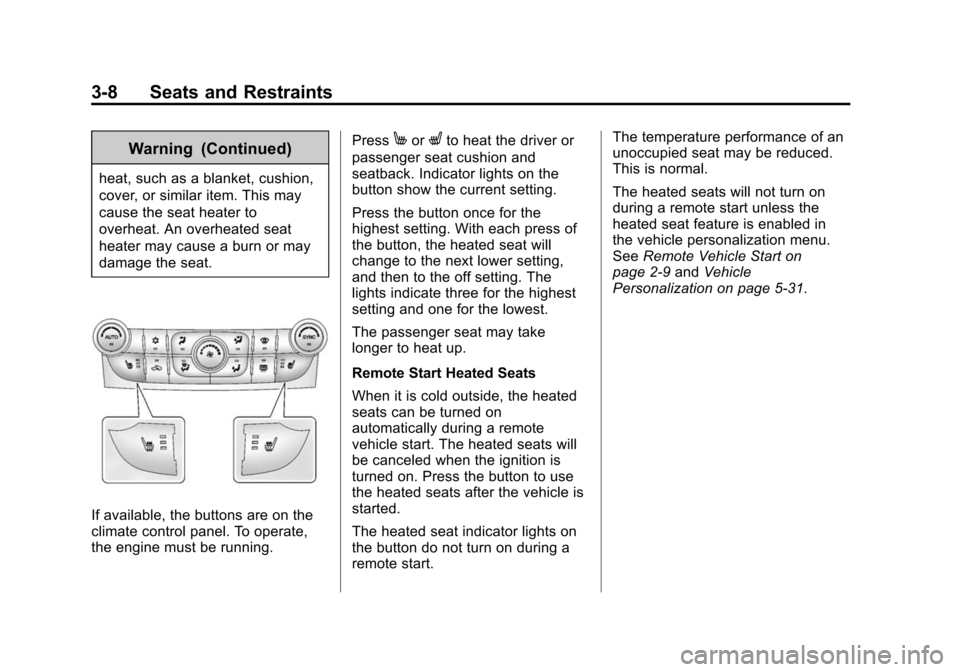
If available, the buttons are on the
climate control panel. To operate,
the engine must be running.Press
MorLto heat the driver or
passenger seat cushion and
seatback. Indicator lights on the
button show the current setting.
Press the button once for the
highest setting. With each press of
the button, the heated seat will
change to the next lower setting,
and then to the off setting. The
lights indicate three for the highest
setting and one for the lowest.
The passenger seat may take
longer to heat up.
Remote Start Heated Seats
When it is cold outside, the heated
seats can be turned on
automatically during a remote
vehicle start. The heated seats will
be canceled when the ignition is
turned on. Press the button to use
the heated seats after the vehicle is
started.
The heated seat indicator lights on
the button do not turn on during a
remote start. The temperature performance of an
unoccupied seat may be reduced.
This is normal.
The heated seats will not turn on
during a remote start unless the
heated seat feature is enabled in
the vehicle personalization menu.
See
Remote Vehicle Start on
page 2-9 andVehicle
Personalization on page 5-31.